
Related Manuals for Pioneer VSX-531


Summary of Contents for Pioneer VSX-531
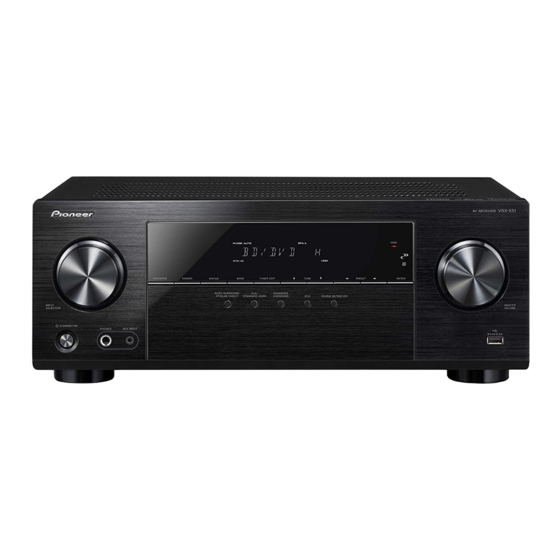
- Page 1 VSX-531 AV Receiver Register your product on http://www.pioneerelectronics.com (US) http://www.pioneerelectronics.ca (Canada) Operating Instructions...
-
Page 2: Table Of Contents
3 Basic playback 5 Home Menu Thank you for buying this Pioneer product. Please read through these operating instructions so you will know how to ......16 . -
Page 3: Before You Start
Before you start Flow of settings on the receiver The unit is a full-fledged AV receiver equipped with an The Input Assign menu (page Checking what’s in the box abundance of functions and terminals. It can be used easily (When using connections other than the after following the procedure below to make the connections Please check that you’ve received the following supplied recommended connections.) -
Page 4: Controls And Displays
Controls and displays Front panel VSX-531 INPUT SELECTOR PRESET / dial – Use to select preset radio stations Listening mode buttons Selects an input source (page 16). (page 21). AUTO SURROUND/STREAM DIRECT – Switches between Auto surround mode (page 22) and Stream... -
Page 5: Display
Controls and displays Display PHASE DTS indicators HDMI – Lights when an HDMI signal is selected. Blinks Lights when the Phase Control is switched on (page 24). when an HDMI signal is selected and selected HDMI DTS – Lights when a source with DTS encoded audio input is not provided. -
Page 6: Remote Control
Use to select the input source to this receiver (page 16). This STREAM BOX STREAM BOX Press to select the audio input signal of the component to will enable you to control other Pioneer components with the play back (page 16). S.BOX S.BOX remote control. -
Page 7: Loading The Batteries
Controls and displays Loading the batteries Operating range of remote control The remote control may not work properly if: • There are obstacles between the remote control and the receiver’s remote sensor. • Direct sunlight or fluorescent light is shining onto the remote sensor. -
Page 8: Connecting Your Equipment
Connecting your equipment Hints on the speaker placement Placing the speakers Where you put your speakers in the room has a big effect on the quality of the sound. The By connecting the left and right front speakers (L/R), the center speaker (C), the left and right following guidelines should help you to get the best sound from your system. -
Page 9: Connecting The Speakers
Connecting your equipment Subwoofer Front left Front right Connecting the speakers Center The receiver will work with just two stereo speakers (the front speakers in the diagram) but using at least three speakers is recommended, and a complete setup is best for surround LINE LEVEL sound. -
Page 10: Making Cable Connections
Connecting your equipment • If the video signal does not appear on your TV, try Note Making cable connections adjusting the resolution settings on your component or ®/ • Use a High Speed HDMI ™ Cable. If HDMI cable other display. -
Page 11: Analog Audio Cables
Connecting your equipment Analog audio cables Standard RCA video cables About video outputs connection Use stereo RCA phono cables to connect analog audio These cables are the most common type of video connection This receiver is not loaded with a video converter. When you components. -
Page 12: Connecting A Tv And Playback Components
Connecting your equipment HDMI/DVI-compatible components Connecting a TV and playback components Streaming media player Game console Blu-ray Disc /DVD Set-top box player Connecting using HDMI If you have an HDMI or DVI (with HDCP) equipped component (Blu-ray Disc player, etc.), you can connect it to this receiver using a commercially available HDMI cable. -
Page 13: Connecting Your Component With No Hdmi Terminal
Connecting your equipment Connecting your component with no HDMI terminal Blu-ray Disc/DVD player Set-top box This diagram shows connections of a TV and Blu-ray Disc/DVD player (or other playback component) with no HDMI terminal to Select one Select one VIDEO OUT VIDEO OUT the receiver. -
Page 14: Connecting Antennas
Connecting your equipment To improve AM reception Place the AM antenna on a flat surface and in a direction Connecting antennas giving the best reception. Connect a 5 m to 6 m (16 ft. to 20 ft.) length of vinyl-coated wire to the AM antenna terminal without disconnecting the Connect the AM loop antenna and the FM wire antenna as Connect the FM wire antenna into the FM antenna... -
Page 15: Connecting A Usb Device
A damaged power cord can cause a fire or give you an electrical shock. Check the power cord once in a while. When you find it damaged, ask your nearest PIONEER authorized service center or your dealer for a replacement. -
Page 16: Basic Playback
Basic playback It is possible to check on the front panel display whether Selecting the audio input signal Playing a source or not surround sound playback is being performed The audio input signal can be selected for each input source. properly. - Page 17 Basic playback When digital input (optical or coaxial) is selected, this • receiver can only play back Dolby Digital, PCM (32 kHz to 96 kHz) and DTS (including DTS 96 kHz/24 bit) digital • In order to enjoy the picture and/or sound from devices connected to each terminal, select the input by doing the following. signal formats.
-
Page 18: Playing A Usb Device
• MP3 (MPEG-1/2/2.5 Audio Layer 3) – Sampling rates: • Pioneer cannot guarantee compatibility (operation and/or GAME GAME 32 kHz/44.1 kHz/48 kHz; Bit rates: 32 kbps to 320 kbps HOME HOME... -
Page 19: Music Playback Using Bluetooth ® Wireless Technology
BLUETOOTH capable device. The coverage area is • This unit will be displayed as “Pioneer AV Receiver” switched off during use. about 33 feet (10 meters). on all BLUETOOTH capable devices that you have. -
Page 20: Listening To The Radio
Basic playback In the following locations, poor condition or inability to receive When changing connections of audio or other cables for Improving FM sound radio waves may cause the audio to be interrupted or products supported by this unit, confirm that you have If the TUNE or ST indicators don’t light when tuning to an FM stopped: sufficient working space in the surrounding area. -
Page 21: Listening To Station Presets
Basic playback Stations are stored in stereo. When the station is stored in • the FM MONO mode, it shows as ST when recalled. Listening to station presets You will need to have some presets stored to do this. See Saving station presets on page 20 if you haven’t done this already. -
Page 22: Listening To Your System
Listening to your system Auto playback Choosing the listening mode Listening in surround sound AUTO SURROUND/ ALC/ AUTO/ ALC/ STREAM DIRECT STANDARD SURR DIRECT STANDARD This receiver offers a variety of listening modes to The simplest, most direct listening option is the AUTO Using this receiver, you can listen to any source in surround accommodate playback of various audio formats. -
Page 23: Using The Advanced Surround
Listening to your system Note Multichannel sources Using the Advanced surround ADVANCED SURROUND ADV SURR • During ECO mode, the brightness switches between 2 STEREO ALC See above. levels. If the dimmest level is selected, DIMMER will be The Advanced surround feature creates a variety of surround Straight Decode No additional effects shown on the display. -
Page 24: Using The Sound Retriever
Listening to your system Note Setting the Audio options Using the Sound Retriever • Phase matching is a very important factor in achieving proper There are a number of additional sound settings you can sound reproduction. If two waveforms are ‘in phase’, they make using the AV ADJUST menu. - Page 25 Listening to your system This is not displayed by default. You need to change some Setting/What it does Option(s) Setting/What it does Option(s) settings on this unit to display the menu. (see Displaying the Fixed PCM Setting menu on page 26).
-
Page 26: Displaying The Fixed Pcm Setting Menu
Listening to your system • The functions that can be set differ depending on the input signal or speaker settings. Displaying the Fixed PCM Setting menu AUTO DIRECT PURE DIRECT STEREO ALC/ ADV SURR Using the The Fixed PCM Audio options are not displayed by default. SURROUND STANDARD headphones... -
Page 27: Home Menu
Home Menu Using the Home Menu Select the setting you want to adjust. Manual speaker setup The following section shows you how to make detailed This receiver allows you to make detailed settings to optimize Home Menu settings to specify how you’re using the receiver, and also the surround sound performance. -
Page 28: X.over
Home Menu • Subwoofer – LFE signals and bass frequencies of Select ‘Manual SP Setup’ from the Home Menu. Select a setup option. channels set to SMALL are output from the subwoofer • Manual – Move the test tone manually from speaker when YES is selected (see notes below). -
Page 29: Speaker Distance
Home Menu Speaker Distance Select ‘Input Assign’ from the Home Menu. The Auto Power Down menu For good sound depth from your system, you need to specify Set to automatically turn off the receiver after a specified time Home Menu the distance of your speakers from the listening position. -
Page 30: The Hdmi Setup Menu
Home Menu • The CEC (Consumer Electronic Control) function may The HDMI Setup menu Choose the ‘4k60p Setting’ setting you want. activate when the ARC function is turned ON, causing If the TV to be connected using HDMI supports 4K/60p, power to turn ON and OFF and the input to switch from If your TV supports an audio return channel (ARC) function, you can switch the 4k60p setting in accordance with TV... -
Page 31: Additional Information
Make sure the player’s settings are correct and/or the DTS Switch the subwoofer setting in Speaker Setting on page 27 and call a Pioneer authorized independent service company. signal out is on. Refer to the instruction manual supplied with to YES or PLUS. -
Page 32: Hdmi
Additional information Avoid exposing the remote sensor on the front panel to direct component or monitor manual or contact the manufacturer for Important information regarding the HDMI light. support. connection The display is dark. No picture. DIMMER Press on the remote control repeatedly to return to Video signals that are input from the analog video terminal will There are cases where you may not be able to route HDMI the default. -
Page 33: Resetting The Main Unit
Additional information Miscellaneous Resetting the main unit Specifications Power Requirements ....AC 120 V, 60 Hz Power Consumption ......210 W Use this procedure to reset all the receiver’s settings to the Amplifier section In standby . - Page 34 Bluetooth SIG, Inc. and any use of such marks by Onkyo & Pioneer Corporation is under license. “Pioneer”, “PHASE CONTROL” and “AUTO LEVEL CONTROL” are trademarks of Pioneer Corporation, and are used under license.
-
Page 35: Software License Notice
Additional information Finally, any free program is threatened constantly by software patents. the Program is not required to print an announcement.) Software license notice We wish to avoid the danger that redistributors of a free program will These requirements apply to the modified work as a whole. If identifiable individually obtain patent licenses, in effect making the program sections of that work are not derived from the Program, and can be The licenses for the open source software used on this... - Page 36 Additional information However, parties who have received copies, or rights, from you in detail to address new problems or concerns. This program is free software; you can redistribute it and/or modify it under this License will not have their licenses terminated so long as Each version is given a distinguishing version number.
- Page 37 <France> 6, Avenue de Marais F - 95816 Argenteuil Cedex FRANCE Tel :+33(0)969 368 050 Корпорация О энд Пи 2-3-12, Яэсу, Чуо-ку, г. Токио, 104-0028, ЯПОНИЯ “Pioneer” is a trademark of Pioneer Corporation, and is used under license. <SN 29402364>...
Need help?
Do you have a question about the VSX-531 and is the answer not in the manual?
Questions and answers