Advertisement
Quick Links
사용 설명서
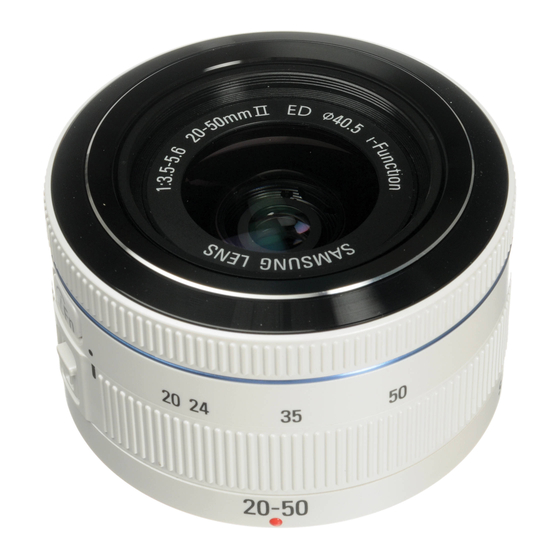
SAMSUNG 20-50mm F3.5-5.6 ED II
이 설명서는 제품의 상세 사용 방법을 담고 있습니다. 올바른 사용과 유지를 위해
반드시 사용 설명서를 읽고 바르게 사용해 주세요.
A
7
1
2
3
4
B
C
D
E
한국어
사용하기 전에
SAMSUNG 렌즈를 구입해 주셔서 감사합니다. 설명서에 사용된
이미지는 실제와 다를 수 있습니다. 카메라 모델에 따라서 지원되는
기능이 다를 수 있습니다. 카메라 본체와 렌즈의 펌웨어를 업데이트
하세요. www.samsung.com/sec 에서 펌웨어를 내려받으세요.
구성품
렌즈, 렌즈 덮개, 렌즈 마운트 덮개, 사용 설명서
• 별매품: 필터, 휴대용 파우치
각 부분의 명칭
(그림 A 참조)
1 렌즈 마운트 결합점 2 렌즈 수납 잠금 스위치 3 초점 링
4 렌즈 5 i-Function 버튼 6 줌 링 7 렌즈 정보 접점
렌즈 끼우기/빼기
► 렌즈를 끼우려면
1
렌즈 덮개, 렌즈 마운트 덮개와 본체 마운트 덮개를 제거하세요.
2
카메라 본체의 렌즈 마운트 인덱스(빨간색)와 렌즈 마운트
결합점(빨간색)을 일치시킨 후, 찰칵 소리가 날 때까지
그림과 같이 렌즈를 돌려서 끼우세요.(그림 B 참조)
AD68-08110A (1.2)
► 렌즈를 빼려면 렌즈 분리 버튼을 누른 채로 그림과 같이 렌즈를
돌리세요.(그림 C 참조)
렌즈 풀기
렌즈를 사용하기 전에 잠금을 풀어야 합니다. 딸깍 소리가 날 때까지
줌 링을 시계 반대 방향으로 돌리세요.
초점 링 사용하기
수동 초점(MF)를 설정한 경우 초점 링을 돌려 초점을 맞추세요.
수동 초점(MF) 기능은 카메라 본체의 메뉴에서 설정할 수 있습니다.
자동 초점(AF) 기능이 작동 중일 때는 렌즈 앞부분에 무리한 힘을
가하지 마세요. 고장의 원인이 될 수 있습니다.
카메라 본체의 MF Assist 기능을 사용하면 좀 더 편리하게 초점을
맞출 수 있습니다. MF Assist 기능에 대한 자세한 설명은 카메라
설명서를 참조하세요.
i-Function 사용하기
6
렌즈의 i-Function 버튼을 누르면 E 모드, Z을
사용하거나 일부 촬영 옵션을 설정할 수 있습니다. E 모드를
사용하면 카메라가 지원하는 장면 모드 또는 필터 효과를 선택해 촬영할
5
수 있습니다. Z을 사용하면 디지털 줌보다 이미지 손상을 줄이며
원하는 장면을 확대해 촬영할 수 있습니다. 단, 카메라에서 i-Function
기능을 지원하는 경우에만 사용할 수 있습니다. i-Scene은 일부
카메라 모델에서만 사용할 수 있습니다.
1
모드 다이얼을 P, A, S, M 또는 i에 맞춤
2
렌즈의 [i-Function] 눌러 원하는 설정 선택
• 촬영 모드에 따라 선택할 수 있는 설정이 다릅니다.
설정
촬영 모드
E
i
Z
P, A, S, M, i
S, M
셔터 속도
F
3
렌즈의 초점 링을 돌려 원하는 옵션 선택
(Z에서는 줌 배율 변경)
4
초점 확인 후 촬영
• 카메라 본체의 iFn 선택 기능을 사용하여 i-Function 버튼을
눌렀을 때 나타나는 설정 항목을 선택할 수 있습니다.
• E 모드에서 선택할 수 있는 장면 모드 및 필터 효과는
카메라 모델에 따라 다를 수 있습니다.
• Z을 사용하면 줌 배율에 따라 사진의 해상도가 달라집니다.
줌 링 사용하기
줌 링을 돌려 원하는 구도(렌즈 초점 거리)를 설정하세요.(그림 D 참조)
줌 링을 돌리면 초점이 미세하게 변할 수 있으므로 촬영 전에 초점을
다시 맞추세요.
렌즈 잠그기
(그림 E 참조)
렌즈를 사용하고 난 후에는 렌즈 수납 잠금 스위치를 당긴 상태에서
줌 링을 시계 방향으로 돌려 렌즈를 잠그세요.
필터 사용하기(별매품)
(그림 F 참조)
필터의 크기가 렌즈와 호환되는지 확인한 후('제품 규격' 참조)
렌즈의 앞면에 장착하세요.
• 렌즈에 장착된 필터는 정밀 광학 제품이므로 먼지나 오물, 긁힘에
주의해 주세요. 또한 필터를 2개 이상 겹쳐 사용하면 렌즈에 따라
화질 저하와 비네팅(액세서리에 렌즈의 화각이 가려져 이미지의
모서리가 어두워지는 현상)이 발생할 수 있으니 2개 이상의 필터를
동시에 장착하지 마세요.
• 프레임이 두꺼운 필터의 경우 광각 렌즈에 비네팅이 발생할 수 있습니다.
제품 규격
모델명
SAMSUNG 20-50mm F3.5-5.6 ED II
초점 거리
20~50 mm
35 mm 환산 초점 거리 30.8~77 mm
렌즈 구성-매
9
렌즈 구성-군
8
비구면 렌즈
1
ED 렌즈
1
렌즈 화각
70.2°~31.4°
최대 개방 조리개
F3.5~5.6
최소 개방 조리개
F22
조리개 날의 수
7
최단 촬영 거리(Wide)
0.28 m
최단 촬영 거리(Tele)
0.28 m
최대 촬영 배율
0.22X
렌즈 후드
미포함
손 떨림 보정 기능
없음
마운트 형식
삼성 NX 마운트
필터 크기
40.5 mm
최대 지름
63.2 mm
최대 길이
39.8 mm
설정
촬영 모드
무게(렌즈 본체만)
약 119 g
조리개 값
A, M
작동 온도
0~40 °C
P, A, S
노출 보정
작동 습도
5~85 %
P, A, S, M
화이트 밸런스, ISO
제품의 사양은 성능 향상을 위해 사전 예고 없이 변경될 수 있습니다.
English
Before Using This Device
4
Focus and capture the photo.
• To select the items that will appear when you press the
Thank you for purchasing the Samsung Lens. The illustrations
used in this manual may differ from the actual items. Some
i-Function button on the lens, you can use the iFn Customizing
functions described in this manual may not be available depending
menu on your camera.
on the camera model. Update the firmware of the camera body
• Available scenes or filter effects in the E mode may vary
and lens. Visit www.samsung.com to download the firmware.
depending on the camera model.
• If you select Z, the photo resolution will vary according
Unpacking
to the zoom rate.
Lens, Lens cap, Lens mount cover, User manual
Using the Zoom Ring
• Optional Item: Filter, Case
Layouts
Set the composition of the photo (the focal distance of the lens) by
(See illustration A)
rotating the zoom ring on the lens. (See illustration D)
1 Lens mount index 2 Zoom lock switch 3 Focus ring 4 Lens
When you use the zoom function, focus can be slightly changed.
5 i-Function button 6 Zoom ring 7 Lens information contacts
Adjust the focus again before you capture a photo.
Attaching and Removing the Lens
Locking the lens
► To attach the lens,
After using the lens, pull and hold the zoom lock switch away from
1
Remove the lens cap, lens mount cover, and body cap.
the camera body, and then rotate the zoom ring clockwise.
2
Align the red mark on the lens with the red mark on the
camera body. Then, rotate the lens as shown in the illustration
Using a Filter (optional)
until it locks into place. (See illustration B)
Before putting a filter on the lens, make sure it is compatible.
► To remove the lens, press and hold the lens release button, and
Refer to "Specifications" for compatible filter size.
then rotate the lens as shown in the illustration.
(See illustration C)
• A filter is a precise optical product. Keep away from dust, dirt,
or scratches. Also, do not try to mount two or more filters at the
Unlocking the lens
same time. Doing so may deteriorate the image quality and cause
vignetting (a reduction of an image's brightness or saturation at the
Before using the lens, you must unlock it. Rotate the zoom ring
periphery as the viewing angle of the lens is hidden).
counter-clockwise until you hear a click.
• In case of a thick framed filter, the vignetting can occur with a
Using the focus ring
wide-angle lens.
In the MF mode, adjust the focus manually by rotating the focus
Specifications
ring on the lens. You can select the MF mode on the camera.
Lens Name
Do not apply excessive force to the front of the lens while the
Focal Length
camera is using auto focus (AF). Doing so may cause the lens
to malfunction.
Focal Length in 35 mm
Equivalent
Use the MF Assist function on the camera to aid with manual
Lens Construction-Elements
focusing. Refer to your camera manual for more details.
Lens Construction-Groups
Aspherical Elements
Using i-Function
ED Elements
Angle of View
When you press the i-Function button on the lens, you can use
Maximum Aperture
the E mode or Z or adjust some shooting options.
Minimum Aperture
In the E mode, you can select scenes or filter effects that
your camera supports. Z allows you to zoom in on a subject
Number of Diaphragm Blades
with less degradation of photo quality than the Digital zoom. This
Minimum Focus Distance
feature is available only when your camera supports it. i-Scene
(Wide)
mode is available only on some camera models.
Minimum Focus Distance
1
Rotate the mode dial to P, A, S, M, or i.
(Tele)
2
Press [i-Function] on the lens to select a setting.
Maximum Magnification
• Available settings may differ depending on the shooting mode.
Lens Hood
Shooting mode
Setting
Optical Image Stabilizer
Setting
Shooting mode
Mount Type
E
i
Aperture value
A, M
Filter Size
Z
P, A, S, M, i
Exposure value
P, A, S
Max. Diameter
Shutter speed
S, M
White Balance, ISO
P, A, S, M
Length
3
Rotate the focus ring on the lens to adjust the setting (or to
Weight (Lens Only, Approx.)
change the zoom rate in Z mode).
Operating Temperature
Operating Humidity
Specifications may change without notice for better performance.
(See illustration E)
(See illustration F)
SAMSUNG 20-50mm F3.5-5.6 ED II
20–50 mm
30.8–77 mm
9
8
1
1
70.2°–31.4°
F3.5–5.6
F22
7
0.28 m
0.28 m
0.22X
Optional
No
Samsung NX Mount
40.5 mm
63.2 mm
39.8 mm
119 g
0–40 °C
5–85 %
Advertisement

Subscribe to Our Youtube Channel
Related Manuals for Samsung 20-50mm F3.5-5.6 ED II


Summary of Contents for Samsung 20-50mm F3.5-5.6 ED II
- Page 1 렌즈의 초점 링을 돌려 원하는 옵션 선택 (Z에서는 줌 배율 변경) • To select the items that will appear when you press the Thank you for purchasing the Samsung Lens. The illustrations SAMSUNG 렌즈를 구입해 주셔서 감사합니다. 설명서에 사용된 초점 확인 후 촬영...
- Page 2 • 不要通过镜头或相机看太阳。否则可能会严重损伤您的眼睛。 • Do not stare at the sun through the lens or camera. • 在安装镜头时,确保仅在清洁的环境更换镜头并且不要将手指伸到镜 • Samsung is not responsible for any damage incurred by using other 이물질을 방지하고 렌즈를 보호하세요. This may cause severe damage to your eyes.
Need help?
Do you have a question about the 20-50mm F3.5-5.6 ED II and is the answer not in the manual?
Questions and answers