
Related Manuals for VBrick 8000-0188

Summary of Contents for VBrick 8000-0188
- Page 1 VBrick Multi-Format Set Top Box Multi-Format Set Top Box v2.2.5 Quick Start Guide January 2016...
- Page 2 This document may also have links to third-party web pages that are beyond the control of VBrick. The presence of such links does not imply that VBrick endorses or recommends the content of any third-party web pages.
-
Page 3: Table Of Contents
Contents Multi-Format STB v2.2.5 Quick Start Preface ..............v Organization . - Page 4 4. Managing the Set Top Box Overview ..............29 Telnet.
-
Page 5: Multi-Format Stb V2.2.5 Quick Start
When you want to distribute high-definition IP video in cost-sensitive applications, the VBrick Multi-Format Set Top Box (STB) is the solution. This unit is ideal for large-scale deployment to plasmas, LCDs, projectors and other large format displays. It supports the leading compression protocols, so it fits into most applications. -
Page 6: Getting Help
When used in file names or other strings, a percent20 "%20" indicates a space. Environmental Considerations At VBrick, we believe that running our company with a "green" conscience is good for the environment and good for business and that environmental awareness is an important part of the value we deliver to our customers. -
Page 7: Getting Started
The Multi-Format STB decodes and plays the streams shown in Table 1. These streams can be sourced from VBrick encoding appliances or from VBrick VOD-W (MPEG), VOD-WM (Windows Media), VOD-D (Darwin), and DME (Distributed Media Engine) VOD servers. -
Page 8: Hardware Specifications
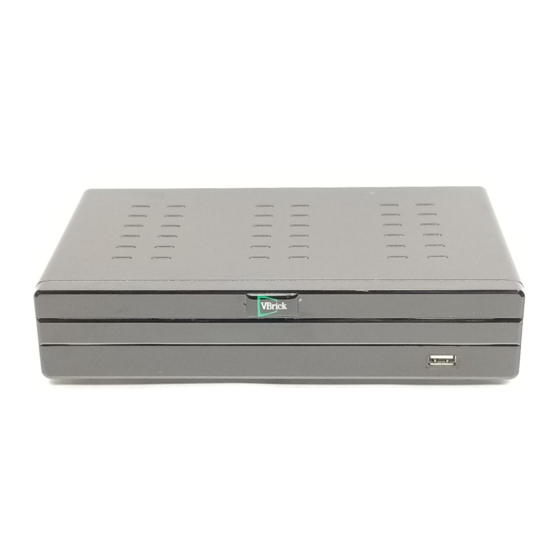
TV as explained below. Check the components for damage as you unpack the device and contact VBrick if anything is missing or damaged. Use common sense when installing the set top box. Do not expose the unit to direct sunlight, high humidity or wet conditions. - Page 9 Getting Started Figure 2. Multi-Format Set Top Box (rear) To setup and connect the Multi-Format STB: 1. Place the device in a suitable location. 2. Connect the device to your network using the provided Ethernet cable with an RJ-45 connector.
-
Page 10: Start Mode
In Local Fullscreen Mode the set top box plays one channel that fills the entire screen. A set top box configured for Full Screen Mode is shown in Figure 4. Local Fullscreen Mode is configured in the channels.xml file. © 2016 VBrick Systems, Inc. -
Page 11: Portal Server Mode (Vems 5.X)
Getting Started Figure 4. Local Fullscreen Mode Portal Server Mode (VEMS 5.x) Note As noted in the Preface, there are important differences in behavior depending on whether you are using the set top box with a VEMS 5.x system or with a VEMS 6.x system. -
Page 12: Portal Server Mode (Vems 6.X)
Table 6. You may be prompted for a PIN number when the set top box is powered on or rebooted. PIN numbers are assigned to each user in VEMS. To change or disable the PIN, see Access Control > Users in the Portal Server Admin Guide. © 2016 VBrick Systems, Inc. - Page 13 Getting Started Figure 6. Portal Server Mode (VEMS 6.x) In VEMS 6.x you perform a search using the button on the remote control. You can Search filter by category, type, or keyword (Figure 7) and any stream currently in progress will continue to play when the search results are displayed.
- Page 14 Figure 7. Search Live or Stored Content (VEMS 6.x) © 2016 VBrick Systems, Inc.
-
Page 15: Configuration
If you have the VBDirectory management program installed you easily find any networked VBrick devices. See VBDirectory on page 30 for more information. To find the IP address launch the Setup program as explained below or in Local Mode use the remote control (use the unlabeled third button down on the right). -
Page 16: Stb Configuration
2. When the animated "Starting" circle is displayed, start pressing the Help (?) button on the remote and continue until the Password page is displayed. (For more details see Displaying the Setup Page on page 9.) © 2016 VBrick Systems, Inc. - Page 17 Configuration Note: Click the Info icon in the lower left area of the page to display the MAC address and other information (see Figure 8) without entering a password. 3. Enter the default password , move the cursor to the button, and press the 1234 button on the remote.
- Page 18 5 attempts to connect and then bypass the upgrade step. 6. Set UTC to your local time zone. (U.S. Eastern Time = -5) 7. Click to continue. Next 8. Click to continue. Next 9. Click to continue. Next © 2016 VBrick Systems, Inc.
- Page 19 Configuration 10. Click to continue. (Note: the Display Region is used for Channel Guide graphics— Next not the video resolution. The 640x480 setting may not work properly on some screens.) 11. Click to continue. Next 12. On the page, set to match the Video &...
-
Page 20: Adjusting The Display Area Of Output Devices (Vems 5.X)
VEMS page display. Portal Server Mode You can adjust the display area of output devices by modifying the file in VEMS. adjust.xml This file is located in the following folder on the VEMS Portal Server: C:\Program Files\VBrick\MCS\VEMSPisces\adjust.xml © 2016 VBrick Systems, Inc. -
Page 21: Adjusting The Display Area Of Output Devices (Vems 6.X)
Configuration To fine tune the display area for connected devices: 1. Open in a text editor such as Notepad. adjust.xml 2. Add one line for each Multi-Format Set Top Box you wish to fine tune. This line must contain an XML tag containing the MAC address of the box and an adjustment value in the range of 1–20 per cent. -
Page 22: Upgrade, Reset, Change Password
Note After changing the password, be sure to save the new password in a safe and accessible location. If you lose the password your warranty may not cover the cost of shipping the unit to VBrick for repair and unlocking. © 2016 VBrick Systems, Inc. -
Page 23: Creating A Channel Guide
Chapter 3 Creating a Channel Guide Topics in this chapter Overview ..............17 Configuring channels.xml. -
Page 24: Sample Channels File
<!-- this is general information --> <Title>VBrick Systems, Inc.</Title> <GlobalMsg></GlobalMsg> <FullScreen>0</FullScreen> <!-- RTSP MPEG4 Interleave --> <Stream> <ProgramName>RSTP MPEG4 Interleave (server session based)</ProgramName> <Message>rtsp://172.22.123.116/unit116s2?tcp=1</Message> <URL>rtsp://172.22.123.116/unit116s2?tcp=1</URL> </Stream> <!-- RTPS MPEG4 Live --> <Stream> <ProgramName>RSTP MPEG4 Live (server session based)</ProgramName> © 2016 VBrick Systems, Inc. - Page 25 Creating a Channel Guide <Message>rtsp://172.22.123.116/unit116s2</Message> <URL>rtsp://172.22.123.116/unit116s2</URL> </Stream> <!-- MPEG4 Multicast SDP --> <Stream> <ProgramName>MPEG4 Multicast SDP</ProgramName> <Message>http://172.22.123.116/vbs2d1.sdp</Message> <URL>http://172.22.123.116/vbs2d1.sdp</URL> </Stream> <!-- MPEG2 Multicast Live --> <Stream> <ProgramName>MPEG2 Multicast Live</ProgramName> <Message>tv://239.16.2.180:4444</Message> <URL>tv://239.16.2.180:4444</URL> </Stream> <!-- H.264 RTP RTSP --> <Stream> <ProgramName>H.264 RTP RTSP</ProgramName> <Message>rtsp://172.22.128.1/vbStream1S1</Message>...
- Page 26 <ProgramName>MPEG4 VODW RTSP</ProgramName> <Message>rtsp://172.22.2.119/CD-MPEG4.mp4</Message> <URL>rtsp://172.22.2.119/CD-MPEG4.mp4</URL> </Stream> <!-- MPEG2 VODW RTSP --> <Stream> <ProgramName>MPEG2 VODW RTSP</ProgramName> <Message>rtsp://172.22.2.119/AndyM-MP2.mpg</Message> <URL>rtsp://172.22.2.119/AndyM-MP2.mpg</URL> </Stream> <!-- Windows Media VODWM RTSPT --> <Stream> <ProgramName>WM VODWM RTSP</ProgramName> <Message>rtspt://172.17.2.44/PublishingPoint34</Message> <URL>rtspt://172.17.2.44/PublishingPoint34</URL> </Stream> <!-- Windows Media VODWM RTSPU --> © 2016 VBrick Systems, Inc.
-
Page 27: Sample Urls
Creating a Channel Guide <Stream> <ProgramName>WM VODWM RTSPU</ProgramName> <Message>rtspu://172.17.2.44/PublishingPoint34</Message> <URL>rtspu://172.17.2.44/PublishingPoint34</URL> </Stream> <!-- Windows Media VODWM HTTP --> <Stream> <ProgramName>WM VODWM HTTP</ProgramName> <Message>http://172.17.2.44/VBP/bobWM-LAN-1M.wmv</Message> <URL>http://172.17.2.44/VBP/bobWM-LAN-1M.wmv</URL> </Stream> <!-- MPEG4 Darwin RTSP --> <Stream> <ProgramName>MPEG4 Darwin RTSP</ProgramName> <Message>rtsp://172.22.2.117/Acacia/ACM%20H264_12_29_10_11_24_29.mp4</Message> <URL>rtsp://172.22.2.117/Acacia/ACM%20H264_12_29_10_11_24_29.mp4</URL> </Stream> <!-- MPEG2 or H.264 Transport Stream file playback --> <Stream>... -
Page 28: Updating Channels.xml
Unix editor). For a list of vi commands go to http://www.cs.colostate.edu/ helpdocs/vi.html. To edit the file in place with vi: 1. Telnet or SSH into the STB. When logging in, the user name is ; the password is iptv settopbox © 2016 VBrick Systems, Inc. -
Page 29: Hosting Channels.xml On A Pc
Creating a Channel Guide # cd /root/data (to rename file to today's date as a backup) # cp channels.xml YYYYMMDDchannels.xml # vi channels.xml 2. Navigate and edit the file using vi. 3. After editing the file, save and quit the vi session: Press b. -
Page 30: Putting The Files On A Pc
Config Setting 2. Go to and enter the IP address of a Windows PC. Portal Page > Other 3. When done, enter a password and click Save Changes 4. Then repeat for each set top box. © 2016 VBrick Systems, Inc. -
Page 31: Using Multiple Channel.xml Files
This channel file starts up in channel listing mode and sets up a power-on default channel to play: <?xml version="1.0" encoding="utf-8"?> <STBLocalUI> <!-- this is general information --> <Title>VBrick Systems, Inc.</Title> <GlobalMsg>Test enviroment.</GlobalMsg> <FullScreen>0</FullScreen> <!-- Multicast stream --> <Stream> <ProgramName>OPS H.264 SDP</ProgramName>... - Page 32 </Stream> </STBLocalUI> Channel 1 The first channel file will play a live video telecast from a VBrick encoder. It will start up in full screen mode. The file is rather simple since there is only one channel. <?xml version="1.0" encoding="utf-8"?>...
-
Page 33: Testing The Configuration
To test the system: 1. Log into the STB using Telnet. 2. At the # prompt, type the following: # gotourl file:///root/titanium/demo_page/kumat/vbrick/ home.htm?CXML=channel3.xml This will load the new channel file. So in the above example, will go to the channel3.xml third channel file (training recorded video) as shown above. -
Page 34: Managing The Set Top Box
Chapter 4 Managing the Set Top Box Topics in this chapter Overview ..............29 Overview Table 10 shows the tools you can use to manage the set top box. -
Page 35: Vbdirectory
VBDirectory VBDirectory shows all networked VBrick devices at your site. Multi-Format STBs are identified in the column as . You can install VBDirectory from the VBrick Model STB-HWM Support Downloads site. Setup The Setup program is the recommended method for configuring the set top box. See STB Configuration on page 10 for complete details. -
Page 36: Web Interface
Managing the Set Top Box Web Interface You typically use the Web Interface to change the Telnet password. To display this interface, open a browser and enter the IP address of the set top box. After logging in, click on the tab to change the Telnet password;... - Page 37 4. Once you logoff Telnet you will subsequently need to enter the new password. Be sure to save the new password in an accessible location. Lost passwords cannot be recovered and will require factory intervention. © 2016 VBrick Systems, Inc.
-
Page 38: Software Upgrade
Mass Upgrade Using a VEMS Server ......... . 36 Overview From time to time VBrick may make new STB software available. This topic explains how to upgrade the STB software when a new image is available. As explained below, there are multiple ways to upgrade the set top box. -
Page 39: Using Telnet
# upgrade ftp://<ipaddress>/filename.img 1 This will replace the file with the new version. Note that any configuration config.txt changes will be lost with this option. # upgrade ftp://<ipadd8ress>/Filename.img 3 This will keep the old file. config.txt © 2016 VBrick Systems, Inc. -
Page 40: Using An Iis Server
UPG.zip download) that are used during the STB's initial boot process. The actual upgrade code image is available separately from VBrick Support Services. The STB has a configuration parameter (see Upgrade, Reset, Change Password on page 16) which specifies the upgrade . -
Page 41: Mass Upgrade Using A Vems Server
If you will be using the VEMS server to upgrade multiple STBs, you can find the password-protected upgrade image on the VEMS server after the VEMS (6.2.1 or higher) software is installed. Before unzipping the file you will need to contact VBrick Support Services for the password. -
Page 42: Configure The Global Setting
STB image file installed on the VEMS server. On <upgPath> a 64-bit server, the file path is: C:\Program Files (x86)\VBrick\Maduro\STB\MFSTB_Upgrade\UPG\upgrade\upgrade_path.xml Right-click on , select Notepad, and note the following Open with upgrade_path.xml code: <!-- The HTTP transfer option is used here, the ftp is commented out -->... -
Page 43: Configure The Stb With The Vems Upgrade Server Url
To configure the VEMS Upgrade URL: 1. Launch the VEMS admin interface and go to Devices > STB 2. For each set top box, set the parameter to STB Mode after Schedule VEMS Mystro Channel Guide © 2016 VBrick Systems, Inc. -
Page 44: Cancelling The Upgrade
Software Upgrade 3. Open the VEMS Mystro client interface and create a schedule, for example a Rebroadcast Content 4. Set the schedule for with a of 1 minute. When selecting destination output Duration devices, be sure to select all of the STBs you will be upgrading. 5. - Page 45 Upgrade Server Page URL 3. Reboot the STB. This can only be done by power cycling the unit or using Telnet. 4. When the STB reboots, it will no longer attempt to contact the upgrade server. © 2016 VBrick Systems, Inc.
-
Page 46: Using The Remote Control
Chapter 6 Using the Remote Control Topics in this chapter Overview ..............41 Using the Remote Control (VEMS 5.x) . -
Page 47: Using The Remote Control (Vems 5.X)
Display the search window. Press Search again to exit window. Live Go to Live Video page. Go to Stored Video page. Sched Display scheduled streams available for viewing. Mark VOD content only: Create a bookmark. © 2016 VBrick Systems, Inc. -
Page 48: Local Mode
Using the Remote Control Local Mode Button Function Info Portal Server mode only. Use to power the device on/off. Same as reset. Mute Mute/unmute volume. Use the volume controls on the display device to set volume. 0–9 Portal Server mode. Enter a PIN, or enter a search string using the number keypad for text entry. -
Page 49: Using The Remote Control (Vems 6.X)
. During recording, a red indicator is shown in lower right area of window. Stop If playing an RTSP stream, this button will stop the stream. Search Display the search window. Press Search again to exit window. Live Go to Live Video page. © 2016 VBrick Systems, Inc. - Page 50 Using the Remote Control Button Function Go to Stored Video page. Sched Not active. Mark Not active. Multi-Format STB Quick Start...
-
Page 51: Local Mode
Sched Portal Server mode only. Mark Portal Server mode only. Using the Remote Control to Change the Channel With VEMS 6.x, you may also use the remote control to change the channel for live content © 2016 VBrick Systems, Inc. - Page 52 Using the Remote Control that is associated to a channel. The following is specifically supported: • Live content • Server mode (only) • Guide mode and full screen mode Live content channels will be listed in the guide by channel number and then in alphabetical order;...
- Page 53 (or the center of the screen if in full screen mode) and the STB does nothing further. Note When in Search mode, the channel number entered must match the search criteria or a “Channel Not Found” message will display. © 2016 VBrick Systems, Inc.
-
Page 54: Editing Config.txt
The following table shows the settings in you will likely need to modify. To avoid config.txt problems, enter your changes carefully and do not change anything else except as directed by VBrick Support Services. Notable Configurable Settings in config.txt Table 11. Setting... -
Page 55: Config.txt File
#------------------------------------------------------------------------------ # Portal page URL browser.document.default: file:///root/titanium/demo_page/kumat/vbrick/home.htm # Set VBrick server portal page url # Note: It is the reference value of portal type in booting setup page. If setup this value manually, please modify browser.document.default to the same URL. - Page 56 Editing Config.txt stb.vbrick.server.url: http://MyVBrickServerHostname_OR_IPaddress # Upgrade page URL # Upgrade page with UI for display upgrade progress,information,etc... # It can use at bootup and schedule upgrade stb.url.fwupg: http://172.17.1.5/upg/upgrade/upgrade.html #stb.url.fwupg=file:///root/titanium/demo_page/kumat/upgrade/upgrade.html # Help page URL stb.url.help: #------------------------------------------------------------------------------ Language Setting #------------------------------------------------------------------------------ # Set language tag to use if neither the HTTP(S) server, document, or element # attributes specify one.
- Page 57 - disable health check of decoder, both video and audio. stb.stm.check_av: auto # Set to 1 to enable HD and SD deinterlace stb.stm.deinterlace: 0 # Enable/Disable chromakey color stb.chromakey.enable: 1 # Set chromakey color stb.chromakey: #010101 #------------------------------------------------------------------------------ Display Setting © 2016 VBrick Systems, Inc.
- Page 58 Editing Config.txt #------------------------------------------------------------------------------ # Adjust display region 1920,1280,720,640 - width 1080,720,480,576 - height stb.ui.width: 1280 stb.ui.height: 720 # The set of pages always displayed in a single redraw ("one-shot rendering") # rather than progressively as data is retrieved. 0 - disable one-shot rendering 1 - enable one-shot rendering for URIs where no network access is required.
- Page 59 2 - Enable IR blaster without forwarding IR input stb.irblaster.mode: 0 # Set IR blaster forward protocol RC5 - forward Philips RC-5/RC-5 Extension protocol stb.irblaster.forward.protocol: #------------------------------------------------------------------------------ Network Setting #------------------------------------------------------------------------------ # Set to 1 to enable IPv6 DNS query net.ipv6.enable: 0 #------------------------------------------------------------------------------ © 2016 VBrick Systems, Inc.
- Page 60 Editing Config.txt UDP meaasge Setting #------------------------------------------------------------------------------ #Set the port number that listening to UDP message stb.udpmessage.port: 7121 #Set the group IP address that multicasting UDP message stb.udpmessage.multicast.ip: 225.1.1.1 #------------------------------------------------------------------------------ Decode Setting #------------------------------------------------------------------------------ # For transport stream STB need to get stream information from PAT and PMT first, # thus stream can be decoded correctly.
- Page 61 # Set the unit number of STB SAP from 0~2147483647 stb.sap.unitnumber: 1 # Set the timeout of SAP from 1~3153600 # Unit: sec stb.sap.packet.timeout: 90 # Set the retransmit time of SAP from 1~3153600 # Unit: sec stb.sap.packet.retransmittime: 10 © 2016 VBrick Systems, Inc.
- Page 62 Editing Config.txt # Set the TTL of SAP stb.sap.packet.ttl: 32 # Set the ToS of SAP stb.sap.packet.tos: 0 # Set the address of SAP stb.sap.packet.addr: 224.2.133.134 # Set the port of SAP stb.sap.packet.port: 9876 # Set the host name of SAP stb.sap.hostname: # Set the group name of SAP stb.sap.groupname:...
- Page 63 # Set different mode of error page 1 - The location information is hidden. 2 - The location information is visible and un-controlable 3 - The location information is visible and controlable (Retry must disable) transports.err.location.mode: 3 #------------------------------------------------------------------------------ © 2016 VBrick Systems, Inc.
- Page 64 Editing Config.txt Control Setting #------------------------------------------------------------------------------ # Set to 1 to disable watch dog stb.wdt.disable: 0 # Set the timeout of watch dog, min: 60, max: 159 stb.wdt.timeout: 60 # Set to 1 to enable remote management function stb.remotemgmt.gotourl.enable: 1 # Set to 1 to enable IR key simulation stb.remotemgmt.irsim.enable: 1 # Set to 1 to enable debug message browser.ecmascript.errors.alert: 0...
- Page 65 1 transports.files.cookie: /root/data/cookies.txt webimage.animation.buffer.size: 1500000 window.overflow.ignore.negative: 1 window.caret.block: 0 window.caret.colour: 00000000 object.cache.ram.size: 4196 © 2016 VBrick Systems, Inc.
- Page 67 VBrick Systems, Inc. 2121 Cooperative Way, Suite 100 Herndon, VA 20171...
Need help?
Do you have a question about the 8000-0188 and is the answer not in the manual?
Questions and answers