
Related Manuals for Jack LaLanne's MT-1020


Summary of Contents for Jack LaLanne's MT-1020
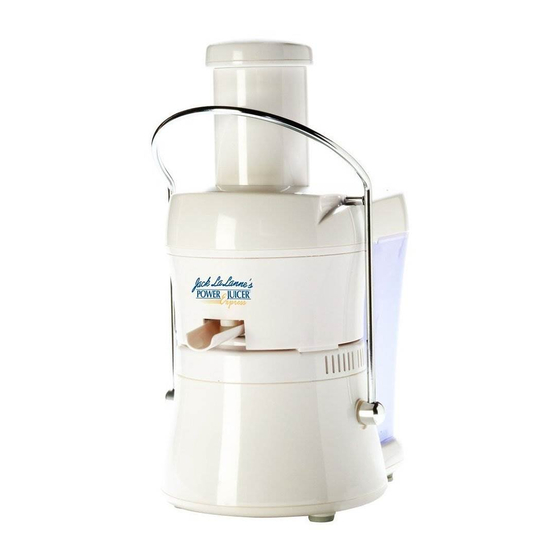
- Page 1 Operating Manual Model #MT-1020 FOR HOUSEHOLD USE. Please read and save this manual. Warranty Information Inside Also for red and black models.
-
Page 2: Table Of Contents
TABLE OF CONTENTS Important Safeguards Safety Features Parts List Disassembly Assembly Step-by-Step Guide to Juicing 10-16 Cleaning Your Juicer 16-17 Troubleshooting Warranty Common Questions & Answers 20-21 Notes Accessories/Replacement Parts Order Form... -
Page 3: Important Safeguards
IMPORTANT SAFEGUARDS READ THESE SAFEGUARDS CAREFULLY BEFORE USING THIS PRODUCT! When using electrical appliances, basic safety precautions should always be followed including the following: • Read all instructions. • NOT FOR USE BY CHILDREN! Keep out of the reach of children to avoid injury. This appliance is not a toy. -
Page 4: Safety Features
• If juicer jams, turn power switch off immediately and remove AC cord from electrical outlet, disassemble, and clean. • Do not use outdoors. • Be sure to turn switch to OFF position after each use of your juicer. Make sure the motor stops completely before disassembling. •... -
Page 5: Parts List
PARTS LIST Chute Pulp Guard Pusher Pulp Collector Lid with Built-in Pulp Guard Removable Non-Drip Spout Receptacle Safety Micro Switch (Located on reverse side) Filter/Blade Locking Bar Base... -
Page 6: Disassembly
DISASSEMBLY IMPORTANT: Before disassembling the unit make sure you turn the power OFF and unplug the AC cord from the electrical outlet. STEP 1: Pusher Remove pusher from the chute. Chute STEP 2: Lower the locking bar (silver) Locking Bar into the disengaged position as shown. - Page 7 DISASSEMBLY (Cont.) STEP 4: Remove pulp collector by sliding the bottom away from the base in the direction of the arrows while unhooking from under lip on receptacle. Pulp Collector Base STEP 5: Receptacle Remove filter/blade/receptacle unit from base by grasping the Lift and Twist..
-
Page 8: Assembly
ASSEMBLY Assemble As Shown STEP 1: Place base on a dry flat surface with Locking locking bar in down position as shown. In front of the machine (spout side). IMPORTANT: There is a Safety MicroSwitch located in the back center of the base. This mechanism is an added safety feature. - Page 9 ASSEMBLY (Cont.) Lid with Built-In Pulp Guard Filter/Blade Top Rim Pulp Receptacle Collector Receptacle Juice Spout STEP 4: STEP 5: Place filter/blade inside receptacle. Rotate Place lid with built-in pulp guard on top the filter/blade allowing it to settle into of receptacle, making certain it is securely alignment.
-
Page 10: Step-By-Step Guide To Juicing
STEP-BY-STEP GUIDE TO JUICING Congratulations on your purchase of the Jack LaLanne Power Juicer. In order to assure that your first and every juicing experience will be a pleasant one, we have included this “Step-by-Step Guide to Juicing”. Juicing is a quick and satisfying way to get the vitamins, nutrients, and minerals from fresh fruits and vegetables…... -
Page 11: Helpful Tips
Helpful Tips For easy to follow additional information, you can visit our website at www.powerjuicer.com and select: “Juicing Tips” for, instructional videos to “help you get started”, “how to make juice”, or “how to clean your Power Juicer” and more. Balancing The Blade, 5-10 Seconds is All it Takes It is necessary to run the machine for approximately 5-10 seconds before inserting any produce to be juiced. - Page 12 Helpful Tips Noise and Vibration Sometimes when you juice you’ll hear a bit more noise than the normal whisper quiet juicing you’ve come to expect from your Power Juicer. This noise may also be accompanied by a little extra vibrating. This is alright; it is just the juicer processing the food.
- Page 13 Helpful Tips Carrots Carrots can be a bit challenging to juice due to their dense nature and irregular shape. Do not over stuff the chute. Leave some room on the sides to be able to maneuver the carrots while juicing. They tend to bounce around inside the chute. Use the pusher to guide them to the blade.
- Page 14 Helpful Tips Berries and Small Fruits Juicing berries may seem a bit challenging at first but once you get the hang of it you will love the great flavors they add to your juice. Not to mention the health benefits they have to offer. When juicing berries (except cranberries) you will need to add something that contains a larger volume of juice such as an apple or orange.
-
Page 15: Fruits And Vegetables
Fruits and Vegetables: Ideal for Juicing Apples Grapes Peaches (harder) Asparagus Guava Pears (harder) Brussels sprouts Honeydew Melon Peppers Cabbages Horseradish Pineapple Cantaloupe Jicama Pomegranate seeds Celery Kiwi Potatoes Cherries (pitted) Kohlrabi Pumpkin Clementines Lemon Radicchio Cranberries Lettuces Radishes Cucumber Lime Squashes Fennel... -
Page 16: Cleaning Your Juicer
Fruits and Vegetables: Containing a Large Juice Content Apples Grapefruits Peppers Cantaloupe Grapes Pineapple Celery Honeydew Melon Tangerines Clementines Lemon Tomatoes Cranberries Lime Watermelon Cucumber Oranges DO NOT JUICE Some fruits and vegetables cannot be juiced due to their inability to produce juice. - Page 17 • Wipe base with a soft damp cloth or sponge. Do not submerge base in water. Do not spray the base with water or any other liquid. Base is not dishwasher safe. IMPORTANT: Do not use abrasive sponges, cloths, or cleansers as these can damage the finish.
-
Page 18: Troubleshooting
TROUBLESHOOTING Problem Possible Reasons and Solution • Check to see if unit is plugged in. The motor does not run after being • Locking bar is not locked in place properly. switched on. • Check if all parts are assembled properly. •... -
Page 19: Warranty
Jack LaLanne Power Juicer Limited Lifetime Warranty The manufacturer warrants that your Jack LaLanne Power Juicer is free of defects in materials and workmanship and will, at its option, repair or replace any defective juicer that is returned. The Jack LaLanne Power Juicer motor is warranted for the lifetime of the original purchaser, and all other parts and components are warranted for 60 days from the original date of purchase. -
Page 20: Common Questions & Answers
Common Questions about the Jack LaLanne Power Juicer This summary briefly answers common questions. Read operating manual before use. Why won’t the power turn on? First, check that the switch is in the on position. Then, check that all parts are assembled properly. The unit has a built-in safety device that will not let the motor turn on if not assembled properly. - Page 21 Can I add ice or liquid to the Power Juicer? No, ice turns to water and any other liquid that is poured in will cause an abundance of liquid in the receptacle. It will overflow and run out the sides of the receptacle. Add these items separately in a glass, pitcher or blender.
-
Page 22: Notes
NOTES... - Page 24 www.powerjuicer.com We are very proud of the design and quality of our Power Juicer. This product has been manufactured to the highest standards. Should you have any problem our friendly customer service staff is here to help you. 973-287-5150 © 2011 Tristar Products, Inc. All rights reserved.
Need help?
Do you have a question about the MT-1020 and is the answer not in the manual?
Questions and answers
I **** looking for replacement spout for Mt 1020-1
You can find a replacement spout for Jack LaLanne's MT-1020 on Poshmark.
This answer is automatically generated
How can I separate the filter from the machine to clean it? I need help?
To separate the filter from the Jack LaLanne's MT-1020 machine for cleaning, follow these steps:
1. Unplug the AC cord from the electrical outlet.
2. Disassemble the machine by grasping the receptacle with two hands.
3. Lift and twist the receptacle either clockwise or counterclockwise while pulling upward to separate the filter/blade/receptacle unit from the base.
4. Do not remove screws from the blade; the filter and blade are one piece and are not meant to be separated.
After removal, clean the filter and blade by holding them under warm running water and using a bristled dishwashing brush to gently clean pulp from the filter. Rinse from the outside under running water.
This answer is automatically generated
I would also like to replace the spout. I took it apart to clean it and can’t put it back together!
To replace the spout on Jack LaLanne's MT-1020:
1. Remove the Spout:
- Locate the removable juice spout locking mechanism on the bottom side of the receptacle.
- Turn the locking mechanism counterclockwise to unlock it, aligning the notch with the juicer spout hinge pivot arm.
- Carefully lift the juice spout from the receptacle and remove it for cleaning or replacement.
2. Reattach the Spout:
- Insert the juice spout back into its original position.
- Turn the locking mechanism clockwise to lock it securely in place.
- Ensure the juice spout is in the locked position and tightly secured before using the juicer.
This answer is automatically generated
I would like to replace the pulp collector due to the safety pin is broken
To replace the pulp collector on the Jack LaLanne's MT-1020, follow these steps:
1. Turn the power OFF and unplug the AC cord from the electrical outlet.
2. Remove the pusher from the chute.
3. Lower the locking bar into the disengaged position.
4. Remove the lid with built-in pulp guard by pulling it off the receptacle.
5. Remove the pulp collector by sliding the bottom away from the base in the direction of the arrows while unhooking it from under the lip on the receptacle.
If the safety pin is broken, ensure you replace the pulp collector with a compatible part and verify that all safety mechanisms are functioning before use.
This answer is automatically generated
I used my juicer but couldn’t separate the filter from the juicer to clean it? Please help?