Table of Contents
Advertisement
Quick Links
Download this manual
See also:
Instruction Manual
Advertisement
Table of Contents

Related Manuals for Baumatic PCC1220SS


Summary of Contents for Baumatic PCC1220SS
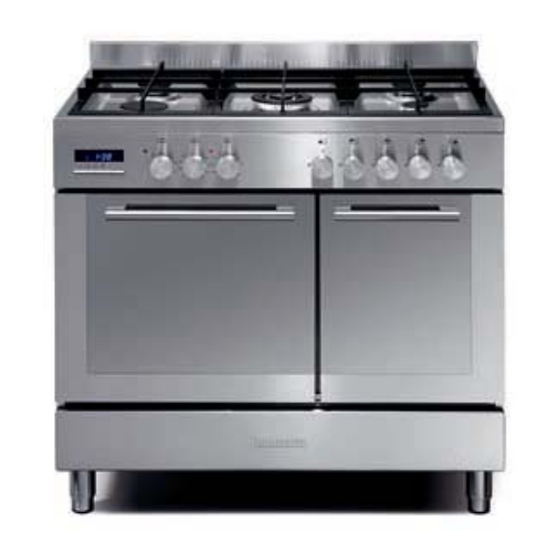
- Page 1 PCC1220SS 100 cm Multi-function twin cavity cooking theatre...
- Page 2 User Manual for your Baumatic PCC1220SS 100 cm Multi-function twin cavity cooking theatre NOTE : This User Instruction Manual contains important information, including safety & installation points, which will enable you to get the most out of your appliance. Please keep it in a safe place so that it is easily available for future reference;...
-
Page 3: Table Of Contents
Contents Environmental note Important safety information 5 – 9 Specifications 9 – 10 Thermostat control knob (main oven) Oven function selector knob (main oven) Oven function and thermostat control knob (secondary oven) Oven programmer/timer Oven programmer/timer display Setting and using the oven programmer/timer 12 - 16 Selecting manual operation mode Setting the time of day... -
Page 4: Environmental Note
Environmental note o The packaging materials that Baumatic uses are environmentally friendly and can be recycled. o Please discard all packaging material with due regard for the environment. -
Page 5: Important Safety Information
Your new appliance is guaranteed against electrical or mechanical defects, subject to certain exclusions that are noted in Baumatic’s Conditions Of Guarantee. The foregoing does not affect your statutory rights. o Repairs may only be carried out by Baumatic Service Engineers or their authorised service agent. - Page 6 Warning and safety instructions o This appliance complies with all current European safety legislation. Baumatic do wish to emphasise that this compliance does not remove the fact that the appliance surfaces will become hot during use and retain heat after operation.
- Page 7 o Do not place heavy objects on the oven door or lean on the oven door when it is open, as this can cause damage to the oven door hinges. Nobody should be allowed to sit or stand on any part of the cooker.
- Page 8 Please see the specific section of this booklet that refers to installation. o Baumatic Ltd. declines any responsibility for injury or damage, to person or property, as a result of improper use or installation of this appliance.
-
Page 9: Specifications
o The above directives comply with 93/68/EEC regarding CE marking. o The manufacturer declares that the oven is built using certified materials and requires the appliance to be installed in accordance with the standards currently in force. This appliance must be used by a trained person for domestic purposes only. Specifications Product dimensions: Height: 880 - 900 mm... - Page 10 Standard accessories: o Wok stand o Removable side racks o 2 x Safety shelves o Enamelled drip tray o Trivet o LPG conversion jets Optional extras: o BPS1 Pizza stone o BTGRID Double-sided griddle plate Electrical details Rated Voltage: 230 Vac 50 Hz Supply Connection: 16 A (double pole switched fused outlet with 3mm contact gap)
-
Page 11: Thermostat Control Knob (Main Oven)
Control Panel Thermostat control knob (main oven) o Use this control knob to control the temperature in the oven. Oven function selector knob (main oven) o Use this control knob to select the oven function and turn on the oven light in the main oven. -
Page 12: Oven Programmer/Timer Display
Oven programmer/timer display “Auto” function symbol “Minute minder” symbol “Manual operation” symbol. Setting and using the oven programmer/timer Selecting manual operation mode After your appliance is connected to your mains supply for the first time, the numbers on the timer display will flash. Before you can select a cooking function or set a temperature, you must set the appliance into “manual operation”... -
Page 13: Setting The Minute Minder Function
Setting the minute minder function (main and secondary oven) You are able to set the minute minder at any time, regardless of whether an oven function has been selected. You can set a period of time using the minute minder function and an alarm will sound when this period of time has elapsed. -
Page 14: Setting The Duration Function
Setting the duration function (main oven only) This function will allow you to set a countdown time similar to the minute minder function. However the oven will no longer continue to heat, once the countdown period has elapsed. o Use the thermostat control knob to set the temperature that you require. -
Page 15: Setting The End Cook Function
Setting the end cook function (main oven only) This function is similar to the duration function, however instead of selecting a period of time that you wish the oven to switch off after. You select the time of day that you wish the oven to switch off at. -
Page 16: Setting The Start And End Time Function
Setting the start and end time function (main oven only) This function will allow you to set a time in the future that the oven switches on at and a time that the oven will switch off at. o Use the thermostat control knob to set the temperature that you require. -
Page 17: Selecting A Cooking Function And Temperature
Selecting a cooking function and temperature Selecting manual operation mode After your appliance is connected to your mains supply for the first time, the numbers on the timer display will flash. Before you can select a cooking function or set a temperature, you must set the appliance into “manual operation”... - Page 18 There are eight cooking functions available on your appliance: OVEN LIGHT: Separate light control which allows the light to be switched on, even when the oven is not heating. DEFROST MODE: The fan runs without heat to reduce the defrosting time of frozen foods. The time required to defrost the food will depend on the room temperature, the quantity and type of food.
-
Page 19: Thermostat Control Knob (Main Oven)
hermostat control knob (main oven) he oven thermostat control knob should be turned clockwise and it sets the required temperature of the oven. It is possible to regulate the temperatur within a range of 50 - 250°C. Selecting an ove n function and temperature (secondary oven) you turn the control knob clockwise, it will automatically select the oven light function fir... -
Page 20: Using And Assembling The Rotisserie
sing and assembling the rotisserie o Place the food on the spit (L), making sure that it is placed centrally between the two forks (F). Otherwise excess strain will be placed on the motor (R). o Place one end of the spit (L) onto support (G) and put the opposite end into the hole of the motor (P). -
Page 21: Cooking Guidelines
oking guidelines Please refer to the information given on food pa ckaging for guidance on coo king temperatures and times. Once familiar with the performance of your appliance, temperatures and times can be varied to suit personal preference. If you are using the fan oven function, then you should follow the information given on the food pack aging for this particular mode of cooking. -
Page 22: Using The Hob Top
o The grill heating element becomes extremely hot during operation, avoid touching it inadvertently when handling food which you are grilling. o Important: Be careful when opening the door, to avoid contact with hot parts and steam. o IMPORTANT: In case of fire, close the main valve of the gas supply and switch off the electricity supply to the appliance. -
Page 23: Energy Saving Tips
nergy saving tips The diametre of the bottom of the pan should corre spond to that of the burner. The burner flame must never exte nd beyond the diametre of the pan. o Use flat bottomed pans only o When possible, keep a lid on the pan whilst cooking. o Cook vegetables with as little water as possible, to reduce cooking times. -
Page 24: Cleaning The Hob Burners
Any damage that is caused to the appliance by a cleaning product will not be fixed by Baumatic free of charge, even if the appliance is within the guarantee period. leaning the hob burners he hob burners should be cleaned once a week or more frequently if they get soiled. -
Page 25: Replacing The Oven Bulb
eplacing the oven bulb MPORTANT: The oven must be disconnected from your mains supply before you attempt to either remove or replace the oven bulb. o Remove all oven shelves and the drip tray. o Unscrew the lamp cover. o Unscrew the bulb and remove it from its holde o Replace the bulb with a 15 W/300°C, screw type pigmy. -
Page 26: Removing The Inner Door Glass For Cleaning
o IMPORTANT: You should make sure that the door is supported at all times and that you place the door on some padded material whilst cleaning it. o The oven door and door glass should only be cleaned using a damp cloth and a small amount of detergent. -
Page 27: Installation
o Remember that if the surface of the glass panel becomes scratched, this could lead to a dangerous failure. o When refitting, make sure that the glass is correctly seated in the door recess and the correct way round. You should slide the door glass back into its original position. -
Page 28: Positioning
Positioning The adjacent furniture and all materials used in the installation must be able to withstand a minimum temperature of 85°C above the ambient temperature of the room it is located in, whilst in use. o Your appliance is heavy, so you should be careful when moving or positioning it. - Page 29 (including the burners). o Baumatic do not recommend that the cooker is positioned below wall cupboards, as the heat and steam from the appliance and what is being cooked, may damage the cupboard and its contents.
-
Page 30: Gas Connection
Conversion for use on LPG and other gases must only be undertaken by a qualified person. For information on the use of other gases, please contact the Baumatic Technical Department. o The cooker must be installed by a qualified person, in... -
Page 31: Gas Safety (Installation And Use) Regulations
o Ensure that the room containing the cooker is well ventilated, keep natural ventilation holes or install a mechanical ventilation device (mechanical cooker hood). o Prolonged intensive use of the appliance may call for additional ventilation, either by the opening of a window, or by increasing the level of the mechanical ventilation device (where present). -
Page 32: Gas Connection
Gas connection ALL INSTALLATION AND SERVICE WORK MUST BE CARRIED OUT BY A CORGI REGISTERED ENGINEER. o Prior to installation, ensure that the gas supply conditions (nature of the gas and gas pressure) and the adjustment conditions are compatible. The adjustment conditions for this appliance are stated on the rating plate which can be found on the back cover. -
Page 33: Gas Adjustment (Conversion To Lpg)
Gas adjustment (Conversion to LPG) All work must be carried out by a CORGI registered engineer. IMPORTANT: Always isolate the cooker from the electricity supply before changing the injectors and/or adjusting the minimum flow of the burners. o Remove the pan-stands, burners and flame spreaders (A). -
Page 34: Minimum Flow Adjustment For Hob Gas Taps
o Reassemble all the burners carefully; in particular you should make sure that the flame spreader is correctly placed on the burner. IMPORTANT: After changing the injectors YOU MUST follow the minimum flow adjustment section below. Minimum flow adjustment for hob gas taps. All work must be carried out by a CORGI registered engineer. -
Page 35: Fitting A Stability Chain
Fitting a stability chain IMPORTANT: It is a legal requirement for your CORGI registered installer to fit a stability chain. The stability hook should be securely fixed to the fabric of the building, in an adjacent position to the safety chain at the rear of the appliance. The chain should be kept as short as is practical. -
Page 36: Electrical Connection
Electrical connection This appliance must be installed by a qualified person in accordance with the latest edition of the I.E.E. Regulations and in compliance with Baumatic’s instructions. Before connecting the appliance, make sure that the supply voltage marked on the rating plate corresponds with your mains supply voltage. -
Page 37: Replacing The Mains Supply Cable
o The cable can be looped if necessary, but make sure that is not kinked or trapped when the cooker is in position. Replacing the mains supply cable If the mains supply cable is damaged, then it must be replaced by an appropriate replacement. -
Page 38: My Appliance Isn't Working Correctly
My appliance isn’t working correctly o The oven isn’t coming on. * Check that the oven is in manual operation mode. * Check that you have selected a cooking function and a cooking temperature. o There appears to be no power to the oven and grill. * Check that the appliance has been connected to the electrical mains supply correctly. - Page 39 Or any installation other than the one specified by Baumatic Ltd. has been completed. Please refer to the conditions of guarantee that appear on the...
-
Page 40: Contact Details
Czech Republic Baumatic CR spol s.r.o. Amperova 495 46215, Librec Czech Republic +420 800 185 263 United Kingdom www.baumatic.cz Baumatic Ltd., Baumatic Buildings, Slovak Republic 6 Bennet Road, Baumatic Slovakia, s.r.o. Reading, Berkshire Skultetyho 1 RG2 0QX 831 04 Bratislava 3...
Need help?
Do you have a question about the PCC1220SS and is the answer not in the manual?
Questions and answers