Table of Contents
Advertisement
Advertisement
Table of Contents

Subscribe to Our Youtube Channel
Related Manuals for Laser STB-6000


Summary of Contents for Laser STB-6000
- Page 1 STB-6000 USER MANUAL Please read carefully before use...
-
Page 2: Table Of Contents
STB-6000 USER MANUAL Table of Contents IMPORTANT SAFETY INSTRUCTIONS AND PRECAUTIONS WHATS IN THE BOX INSTALLING THE BATTERIES SET TOP BOX Front Panel Rear Panel REMOTE CONTROL Key Function CONNECTING TO A TELEVISION Power Video and Audio Connection Connection Method A: Composite... - Page 3 STB-6000 USER MANUAL Sleep Option OSD Language Subtitle Language Audio Language Digital Audio System Setting Parental Guidance Set Password Restore Factory Defaults Information Multimedia Photo Configure Movie Configuration PVR Configuration MULTIMEDIA PLAYBACK Music Photo Movie GENERAL INFORMATION Simple Program Recording...
-
Page 4: Important Safety Instructions And Precautions
Do not mix old and new batteries in the remote. We reserve the right to change the products and/or documentation without notice. WHATS IN THE BOX 1 x STB-6000 HD Set Top Box 1 x Remote control 1 x AV Cable (Composite RCA) -
Page 5: Set Top Box
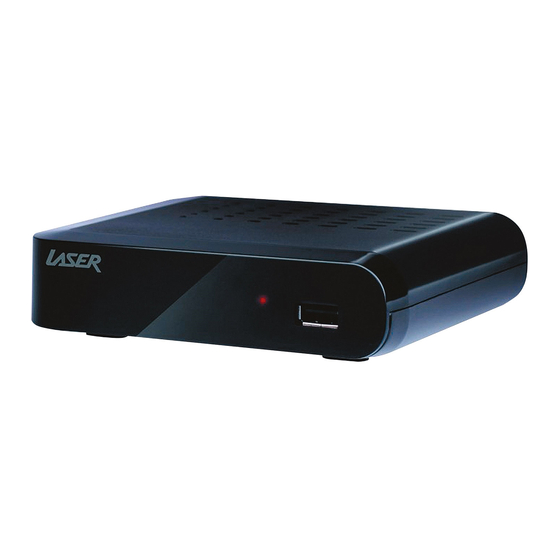
STB-6000 USER MANUAL SET TOP BOX Front Panel Item Description USB Socket Rear Panel Item Description Item Description Antenna In Video Output Antenna Loop Through Audio Left/Right output HDMI Output Audio Left/Right output... -
Page 6: Remote Control
STB-6000 USER MANUAL REMOTE CONTROL MUTE FAVOURITES SUBTITLES NUMERIC KEYS MENU OK (BUTTON) PAGE UP/DOWN VOLUME UP/DOWN REWIND / FAST FOREWARD PREVIOUS/NEXT PLAY PAUSE RECORD TIMESHIFT ZOOM ASPECT POWER ON/OFF TELETEXT (WHERE AVAILABLE) INFORMATION RECALL LIST EXIT DIRECTION (FOR CURSER) -
Page 7: Key Function
STB-6000 USER MANUAL Key Function Button Action MUTE Mute or restore Audio FAVOURITES Displays Favourite Channel list. SUBTITLES Displays Subtitle language information NUMERIC KEYS Enter music track or chapters in movies (where supported) MENU Displays all the maim menus. OK (BUTTON) -
Page 8: Connecting To A Television
Power 1. Turn the TV off at the main power outlet. 2. Check the Main Power switch on the rear of the STB-6000 and the mains outlet that it is to be connected too is in the off position. 3. Connect the Antenna cable to the ANT In socket. -
Page 9: Video And Audio Connection
FIRST TIME INSTALLATION Once the STB-6000 has been connected to the power and to the TV and after all audio connections have been made properly, switch on Press Power button to switch the Set Top Box (STB) unit on. -
Page 10: Country
STB-6000 USER MANUAL Country To change the Country Settings press the LEFT/RIGHT buttons on the remote until the desired Country is displayed and then press the DOWN button. Channel Search Press OK to start the Channel Auto Search. The System will now scan for the available channel in your area. -
Page 11: Main Menu
STB-6000 USER MANUAL MAIN MENU Press the MENU button to access the main system menu. Use the LEFT and RIGHT buttons to scroll across to select the Menu Section that you require and then press the OK or DOWN button to access the required Menu Section. -
Page 12: Epg & Scheduling
STB-6000 USER MANUAL EPG & Scheduling The EPG is an on-screen TV guide that shows scheduled programs up to seven days in advance for every tuned channel. Press the EPG button on the Remote Control to access the guide. Use the LEFT and RIGHT buttons to change the channel. -
Page 13: Sort
STB-6000 USER MANUAL The Status icons: Green = Booked for Viewing Orange/RED = Booked for recording Programs are also marked as booked in the EPG. MAIN MENU Action Button Description Press the RED button to Add a booking manually. Press the GREEN button to edit the selected booking. -
Page 14: Channel Search
STB-6000 USER MANUAL Channel Search This Menu provides options to adjust the Search Channel settings Auto Search. Use the RIGHT button or the OK button to start the full Auto search of all TV and Radio channels. This option will delete all previously scanned channels. -
Page 15: Time
Note: Only available if chosen Audio language is being transmitted. Digital Audio Set the Digital audio output of the STB-6000. Options are: PCM, RAW or OFF. Please refer to your Audio equipment documentation for the best setting for your equipment. -
Page 16: System Setting
STB-6000 USER MANUAL System Setting The menu provides options to adjust the system settings. Parental Guidance Select the parental level you desire for disc with lock-out function or multiple rating levels. There are listed in AGE from the level 1 to the highest level 18. -
Page 17: Photo Configure
STB-6000 USER MANUAL Photo Configure Use the Right button to enter the Photo configuration menu and set the available options as required. SELECTION OPTIONS DESCRIPTION Set the number of seconds to SLIDE TIME 1 to 8 seconds display each picture. -
Page 18: Multimedia Playback
In the PVR Menu use the LEFT and RIGHT buttons to navigate to the folder on the USB device that contains the Recorded files to view. By default, the STB-6000 will create a folder called PVRRECORD on the USB device when the first recording starts. All subsequent recordings will be saved to this folder... -
Page 19: General Information
Please allow approximately 4GB per hour if recording HD programs. Less space will be required for lower resolution programs. Connecting a 2.5” (Notebook) Hard Drive It is recommended that 2.5” drives are connected to the STB-6000 using a powered USB hub. Only single partition drive should be used. -
Page 20: Trouble Shooting
STB-6000 USER MANUAL Due to the power requirements of some USB drives, the USB port on this device may not be able to power the drive. Please ensure that the drive is formatted in FAT32 or NTFS before recording. TROUBLE SHOOTING... -
Page 21: Available Accessories
Product and a copy of your receipt. Laser will cover the cost of the return delivery. Step 4: Wait for us to contact you. Once we have received your defective Laser Product for inspection, we will inform you of our assessment of your claim within 7 days. When we contact you, we will firstly let you know whether you have a valid claim under this Warranty, and if so, we will inform you whether your defective Laser Product will be replaced or repaired, together with the number of days you can expect to wait to receive your replaced or repaired Laser Product.
Need help?
Do you have a question about the STB-6000 and is the answer not in the manual?
Questions and answers