Table of Contents
Advertisement
Quick Links
Advertisement
Table of Contents

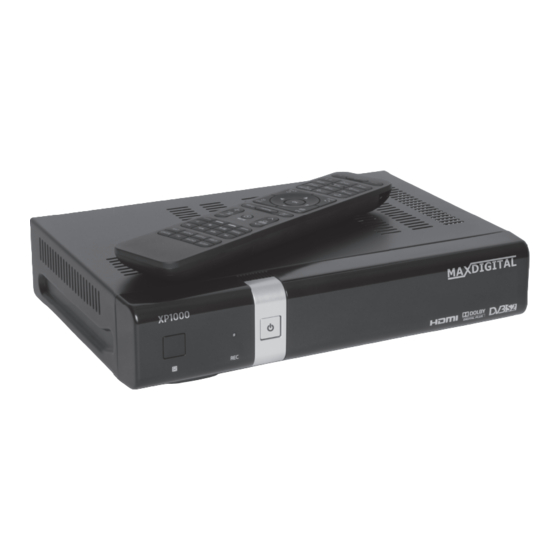
Summary of Contents for MAX DIGITAL XP1000
- Page 1 User’s Guide HD Satellite PVR Ready STB...
-
Page 3: Table Of Contents
1.7.2 Basic Functions..8 5.3 Information..26 5.3.1 Service Information..26 5.3.2 Checking H/W & S/W Information..26 2. INSTALLATION OF XP1000..9 2.1 Connecting the TV..9 2.1.1 Connecting TV via HDMI cable..10 6. REMOTE CONTROL UNIT (RCU) SETUP..26 2.1.2 Connecting TV via SCART cable..10 6.1 Setting up as a TV Remote Control..26... -
Page 4: Introduction
1. Introduction 1.1 Safety Instructions XP1000 has been designed and manufactured in compliance with EU consumer safety requirements (CE). Please read the following safety precautions carefully 1. Connecting Power • This product operates only in the range of AC 100V~250V and 50Hz/60Hz. Please check first your power supply to see if it fits in this range. -
Page 5: Packaging Contents
This will help prevent harm to the environment or human health from uncontrolled waste disposal. 1.2 Packaging Contents Please check all package contents before using your product. XP1000 Remote Control & Battery(AAA 1.5V Battery x 2) HDMI Cable User’s Guide User’s Guide... -
Page 6: Product Descriptions
1.3 Product Descriptions Front Panel 1. IR Receiver: Receive the IR signal from remote controller. 2. Recording Indicator: Display the current recording status of STB. 3. On/Off button and Indicator: Display the current power status of STB. Using this button, you can power on and off your STB. 4. -
Page 7: Conditional Access
Insertion of CAM (Conditional Access Module) There are several Conditional Access Systems (CAS) that XP1000 supports. To be able to watch channels encrypted in such CAS as Nagravision, NDS, Irdeto, Viaccess, etc, users need to purchase a CAM corresponding to each CAS, as well as Smartcard to decrypt those encrypted channels. -
Page 8: Remote Control
1.5 Remote Control Power Press to turn the product on or standby. Press to switch the remote control to control this product. Next Press to switch the remote control to Press to go to Next Page. control TV set. Numeric Keys Info Press to enter a channel number or numbers Press to view the Program... -
Page 9: Main Features
1.6 Main Features • MIPS Processor 3300 class • 1 x USB 2.0 • Linux Operating System • HDMI • Media Player • 1 x SCART • Downloadable Plug-ins supported • SPDIF for digital bit stream out (optical) • 2 x Smartcard Readers •... -
Page 10: Basic Functions
Packaging Paper box, coloured design Gift box Accessories HDMI Cable AC Adaptor (+12V/2.5A) Battery (AAAx2) User Manual Guide 1.7.2 Basic Functions Solution MIPS 3300 class 512MB SPI-NOR 4MB NAND 128MB Linux version > 3.5.0 Audio Decoder Dolby Digital (AC3) MPEG-1 L1/L2/L3 MPEG-2 AAC MPEG-4 HE-AAC Digital multi-lingual... -
Page 11: Installation Of Xp1000
Volume & Mute Control Photo viewer 2. INSTALLATION OF XP1000 This chapter will guide you through the whole installation process of XP1000. Please read each section carefully to make sure that the system runs properly. 2.1 Connecting the TV XP1000 provides a variety of audio/video connection methods. -
Page 12: Connecting Tv Via Hdmi Cable
Connect your TV to XP1000 using an HDMI cable as follows. HDMI Cable HDMI 2.1.2 Connecting TV via SCART Cable In case your TV is analogue TV, SCART cable is the most common method. Connect your TV to XP1000 using SCART cable as follows. SCART Cable SCART 2.2 Connecting Power A power adaptor is provided as one of the basic accessories of XP1000. -
Page 13: Power On/Off
* Standby Mode POWER key is normally used to turn the power of XP1000 on or off. If you press POWER, it instantly switches your XP1000 off or on. In this mode, the system is not completely shut down and thus it takes a shorter time to turn it on and off. -
Page 14: Basic Operations
4.1 Switching Channels : Press ▲/▼ , CHANNEL +/- key / Press ◀/▶ to move to the next channels] XP1000 offers various channel zapping methods. You can switch the current channel by pressing • UP/DOWN key If you press UP or DOWN key, Channel Selection menu appears. -
Page 15: Selecting Audio Track
4.3 Selecting Audio Track : Press AUDIO key] You can check what audio tracks are available to choose by pressing AUDIO key. By using UP/DOWN key and Colour key, you can select a different audio language or Stereo sound. NOTE: Available options on this menu will differ depending on the service. -
Page 16: Program Information
4.6 Program Information : Press INFO key] Whenever you change the channel, infobar is always displayed for 5 seconds (default setting). Infobar is designed to provide you comprehensive information of the channel that you are currently watching. 4.7 Info Bar •... - Page 17 - Name Displays the name of the selected program. - Description Displays a short description of the selected program. - Timer Type • Select Zap for channel tuning reservation. • Select Record for recording reservation. - Repeat Type • Select Once for one time of zapping or recording reservation. •...
-
Page 18: Time Shift
What is different from normal recording is that Timeshifted recording is not meant to be stored on HDD. If you stop Timeshift, you cannot replay the Timeshifted recording. 4.10 Recording XP1000 is a Personal Video Recorder with an integrated DVB-S2 tuner. There are two ways to operate and manage recording. 1 Instant Recording : Press REC key] Press REC key to start the recording of the current program. -
Page 19: Recording Play
This option is used to remove those finished timers from the Timer List. NOTE: Make sure that the HDD on your XP1000 has enough free space available for recording. If the free space on the HDD is not sufficient, recording might stop before the defined end time. -
Page 20: Managing Recording Files
XP1000 is integrated with standard 10/100Mbps Ethernet with RJ 45 connector. You are recommended to use this network capability of XP1000 to fully enjoy the system. If your XP1000’s network connection is established, you can directly download plug-ins from a designated website of XP1000 . -
Page 21: Plugins
XP1000 is a very sophisticated device designed to allow users a variety of System Settings options as detailed as possible. You can fine-tune your XP1000 to be your OWN system to fit your taste. This chapter will guide you through the entire menu of system configuration. -
Page 22: Setup
Amongst the parameters given in this menu, the following ones are generally what you need to decide for the audio and video. 1 Video output Here you need to decide which video output you want to use between your TV and XP1000 . The available options are as below. • HDMI •... -
Page 23: Network Setup
When you are not sure whether the network configuration has been done correctly or not, you can run this test. 4 Restart Network This option is used when you want to reboot the Ethernet of your XP1000 . 5.2.1.4 Language Selection 5.2.1.5 Time zone... -
Page 24: Service Searching
5.2.1.6 Hard Disk Set Up : MENU > Setup > System Settings > Hard drive > Hard drive Setup] You can set the duration of time after which HDD is to be put into standby mode. Here, you can choose from No standby to various duration. Once you set this option, press GREEN key to confirm the change. -
Page 25: Manual Scan
7 Network Scan Here you have two options for YES and NO. NO is used to scan the transponder (TP) based on the data that your XP1000 currently has. YES is used to scan the TP not just based on the existing TP data but also using new TP data, if there is TP data newly transported from the TP. -
Page 26: Checking Cam
: MENU > Setup > CI > Common Interface] To be able to watch CAS channels, you need to have a proper CAM and a Smartcard. XP1000 is integrated with a Common Interface slot and two Smartcard slots. If you have inserted CAM, you can check the information of the inserted CAM, through this menu as below: 5.2.4 Parental Control... -
Page 27: Factory Reset
Step4: Place USB stick in the USB slot at the rear side of the XP1000. Step5: Power up the XP1000 by the power switch. Then, the record LED and standby LED will become red. Step6: After about 3 seconds, open the front panel cover and press CH+ button. -
Page 28: Information
5.3.2 Checking H/W & S/W Information : MENU > Information > About] This menu is for you to check the current system of your XP1000. You can see the following information: 1 S/W version 2 Detected NIMs for Tuner A 3 Detected HDD 6. -
Page 29: Smart Scan Method
6.1.2 Smart Scan Method 1. Power on TV using TV power button or TV remote control. From this step all further remote controls should be done using the universal remote control and the remote control should be directed towards the TV. 2. -
Page 30: Supported Tv Brand List
6.1.3.3 Master Power Master Power Reset: - In TV mode, power button is only working for TV power. - In STB mode, they are only working for STB power. Master Power Set: - Power button is working both for TV and STB power. How to reset Master Power 1. - Page 31 Also, for each author’s protection and ours, we want to make certain that everyone understands that there is no warranty for this free software. If the software is modified by someone else and passed on, we want its recipients to know that what they have is not the original, so that any problems introduced by others will not reflect on the original authors’...
- Page 32 c) Accompany it with the information you received as to the offer to distribute corresponding source code. (This alternative is allowed only for noncommercial distribution and only if you received the program in object code or executable form with such an offer, in accord with Subsection b above.) The source code for a work means the preferred form of the work for making modifications to it.
-
Page 33: Troubleshooting
• Check if there is a conflict between recording timers. 7. Noise • XP1000 has an integrated FAN. This may create a noise but is inevitable to make sure the safety of the product. • Also, when HDD is running, you may hear a noise. -
Page 34: Appendix
APPENDIX Brand Codes 4523 4648 A.R. Systems 8644 7213 6896 5090 7014 Apollo 4659 Accent Arcam 7647 8644 6896 3637 4469 Acer Arc en Ciel 3857 7430 Action Ardem 4523 5510 3637 4648 2590 8060 8644 5613 6896 Adcom Aristona 4884 6896 8644 4648 ART Tech... - Page 35 Bigston Cihan 3637 4648 Black Cimline 7647 4016 3637 5319 8033 3840 6896 7837 3036 Diamond Cinex 3451 5952 Black Star 5531 Circuit City 4523 3802 5874 Black Strip 6482 3802 5510 Citizen 4523 5510 4648 Black Way 5896 4016 City 7647 3637 Blaupunkt...
- Page 36 Daytek Electro Tech 2924 4979 8435 4698 3637 Dayton Electrobrand 5874 4979 Daytron Electrohome 7647 5090 8644 6896 4523 3637 4523 3802 5874 Electronika 4167 7314 5397 4648 Elekta Decca 7647 8644 6896 3488 5896 3637 8568 8644 6896 6286 7733 4648 de Graaf Elfunk 7910 5605 4783 2438...
- Page 37 Fisher Gradiente 6812 7910 7287 3350 5605 3802 4638 4849 8644 6896 Gradin Flint 3637 4648 8644 6896 2696 4016 7014 3488 4648 Force Graetz 7660 8060 3350 4530 5605 8644 6559 6896 Forgestone 6127 5319 Formenti 5605 8644 6896 2590 4469 4648 Granada 8644 6896 3001 5620 4659 3270 3847 Formenti-...
- Page 38 Hisawa International 5896 4016 7014 2696 7733 8060 4469 5896 7014 8644 4530 2796 7350 2590 Intervision Hisense 6685 7910 7287 3488 5531 7647 6896 3158 6230 3952 6069 4889 6812 6896 7430 2438 Hitachi 4016 5605 4783 5620 4659 5605 6982 6619 5295 Irradio 7647 8644 6896 4016 5531 4530 3637 7040 5393 8568 6972 4874 8644 6286...
- Page 39 Kobic Luma 3637 8644 2438 5605 2620 6896 5090 7647 Kobra 2519 8377 3637 4648 Kolster 8644 6896 5531 4016 4648 Lumatron 2438 8644 6896 8377 5605 3350 3488 Konichi 7647 3637 5301 Konka 8644 6896 4530 8060 5553 4016 8485 Lux May 4648 8644 7647 6896 8299 3491 4706...
- Page 40 Merritt Netsat 4783 3350 5605 8644 6896 Metz Neufunk 8644 7647 6896 2696 4016 5896 8060 2769 6975 5313 2410 8644 6896 8299 5355 5319 5265 6640 3518 3840 7324 8644 7647 6896 6982 3637 4648 New World 4016 5393 8644 6896 4016 Nicamagic Micromaxx 4469...
- Page 41 Merritt Netsat 4783 3350 5605 8644 6896 Metz Neufunk 8644 7647 6896 2696 4016 5896 8060 2769 6975 5313 2410 8644 6896 8299 8644 7647 6896 6982 3637 4648 5355 5319 5265 6640 3518 3840 7324 New World 4016 5393 8644 6896 4016 Nicamagic Micromaxx 4469...
- Page 42 President 3637 7314 Otto Versand Prima 7647 3488 6764 7789 4523 3802 5510 3802 3637 5874 7350 3518 3350 7430 3637 4648 3001 6736 6812 3193 3835 5531 7647 5896 6982 8644 6896 6640 5265 8568 Princess 2924 3637 Prinston 3840 4648 Prinz...
- Page 43 Revox/Studer 4648 Scotland 5605 Scott 2438 2620 5531 5605 3488 4485 5393 4523 3802 5874 Sears 7287 3488 8644 6896 2590 5393 Rhapsody 4469 Seaway 5295 Rice Club 5510 Seelver 6896 3840 8644 Ricoh 8644 6896 8644 6896 3840 4917 8377 4469 5319 Rinex 2335 5553 4016 5355 6230 7647 5605 2499 3634...
- Page 44 Sonawa Tashiko 4016 6812 4849 4469 5605 2438 3802 Soniko Tatung 8644 6896 5952 8644 6896 8568 7507 7733 8016 Soniq 2519 5905 4156 4648 Sonitron 7910 7287 6559 8060 3730 7361 Sonneclair 8644 6896 Teac 2924 3835 8644 4917 5393 7647 6764 Sonoko 8644 6896 7647 3488 3637 5896 4648 5896 3840 6896 5716 5355 5553 4849...
- Page 45 Tesla Orava United 4648 8060 8644 6381 6896 7733 3840 8299 Tevion 7066 7350 4706 5905 3191 3451 5355 6286 Universal 8644 6896 8060 8644 5952 6896 7361 3840 4596 3730 Universum 6092 4819 5265 4659 2620 4752 7839 5186 6640 3350 5531 6753 6736 5355 Texet 5090 7647 4469 4016 7430 8377 8020 7287 6538 5553 8394...
- Page 46 United 8060 8644 6381 6896 7733 3840 8299 7066 Universal 8644 6896 Universum 6092 4819 5265 4659 2620 4752 7839 5186 6640 3350 5531 6753 6736 5355 7430 8377 8020 7287 6538 5553 8394 7647 6634 3634 7507 8644 3835 6812 3840 4917 4849 5319 4265 5605 3488 6896 7660 2517 3637 4648 Univox...
- Page 48 Specifications and features are subject to change without notice. Product may not be exactly the same as shown.
Need help?
Do you have a question about the XP1000 and is the answer not in the manual?
Questions and answers
My Max Digital remote OK button has stopped working. Where can I but a replacement remote?