Table of Contents
Advertisement
Advertisement
Table of Contents

Subscribe to Our Youtube Channel
Related Manuals for Revolectrix GT500


Summary of Contents for Revolectrix GT500
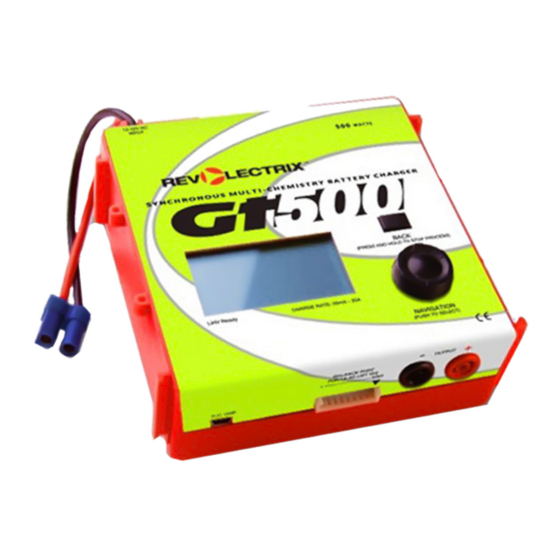
- Page 1 GT500 Multi Chemistry Charger MANUAL © Copyright 2015 Rev2.2...
-
Page 2: Table Of Contents
Contents About GT500 ......................... 3 Specifications ........................5 Precautions .......................... 6 Smart Power Management ....................7 Regenerative Discharge ...................... 8 Power supplies ........................9 Firmware Update ........................ 10 Connecting Packs ......................11 General info ..............................11 Single Pack Balanced LiPo Charge/Discharge ..................12 Single Pack Unbalanced Charge/Discharge .................... -
Page 3: About Gt500
About GT500 Description: Model GT500 for use with LiPo, LiIon, LiPoHV, LiFePO4 (or A123), NiCd, NiMH, and Pb (Lead Acid) battery packs Features Selectable charge rates range from 25mA to 20A Continuous maximum output power rating, 500W @ +24VDC input voltage, 250W @ ... - Page 4 Massive sendust core toroid capable of 25A continuous input current requirement for maximum output specifications Other Features 2.6", 128 x 64 pixels graphic LCD with white LED backlight Embedded PC USB support and free PC Software Intuitive Navigation Wheel with inclusive push button SELECT/ENTER, plus a BACK button ...
-
Page 5: Specifications
Specifications For Battery types: Lithium Polymer HV (1s to 8s balanced, 1s to 2s unbalanced), Lithium Polymer (1s to 8s balanced, 1s to 2s unbalanced) Lithium Ion (1s to 8s balanced, 1s to 2s unbalanced), Lithium Manganese (1s to 8s balanced, 1s to 2s unbalanced), A123 (LiFePO4) (1s to 8s balanced, 1s to 8s unbalanced), NiCd (1s to 21s), NiMH (1s to 21s), Lead Acid batteries (1s-12s Flooded, Gel, AGM, SLA) Pack capacity: 50 mAh to 360Ah... -
Page 6: Precautions
Precautions Follow all instructions in this manual to ensure safe operation. IMPORTANT: Do not disconnect or connect packs while the charger is charging. Always watch LiPo packs while they are charging. Never leave LiPo packs unsupervised during charging See additional warning sheets provided with your battery packs. -
Page 7: Smart Power Management
PSU2, PSU3) and three for Lead Acid batteries (Batt1, Batt2, Batt3). When you first apply power to the GT500, the first thing you do is select the profile that matches the power source you are using. This makes it easy to change the Smart Power Management profile from a DC power supply at home to a Lead Acid battery at the field. -
Page 8: Regenerative Discharge
Regenerative discharge routes most of the energy from the pack being discharged back into the Lead Acid battery powering the GT500. This feature is only available when the GT500 is powered from a Lead Acid battery. Regenerative discharge supports up to 20A, 500W maximum. -
Page 9: Power Supplies
500W to batteries during charge. To achieve this, even on an 8 cell Lithium battery, it must boost the input voltage. This means the GT500 may draw up to 600W from the input power supply. -
Page 10: Firmware Update
Firmware Update The free GT500 PC software gives you the ability to update to the latest firmware via a USB cable. You can download the GT500 PC software at http://www.revolectrix.com/downloads.htm Refer to the GT500 PC software for firmware update instructions. -
Page 11: Connecting Packs
The GT500 balance port accepts direct connection of a universal JST-XH balance connector up to 9-pins, supporting packs up to 8s. To connect a pack lower than 8s, align the connector to the right as shown. -
Page 12: Single Pack Balanced Lipo Charge/Discharge
Single Pack Balanced LiPo Charge/Discharge Note: Best practice is to connect balance connector first, then connect discharge wires. Single Pack Unbalanced Charge/Discharge... -
Page 13: Parallel Charge
Parallel Charge... -
Page 14: Example 1: Configuring Smart Power Management
1. This example will show you how to configure a 12V DC power supply and a 12V Lead Acid battery for GT500 for the first time. Although we use a 12V DC power supply in this example, any input source may also be used. - Page 15 After you have configured all the power source settings, you only need to change the Power Source option to select the right input source each time you power up with a different input source. The GT500 will then load the correct settings for Smart Power management.
-
Page 16: Example 2: Charging A Lipo Pack
DC power supply, and before charging for the first time from a battery. The GT500 allows you to store up to 6 different power supply profiles (3x DC power supply profiles and 3x Lead Acid battery profiles). - Page 17 PO/FEPO4-CHARGE menu with Start highlighted. Press ENTER to start the charge operation. 13. GT500 checks the battery and cell voltages and displays the number of cell count and battery chemistry. If the display matches the pack’s chemistry and cell count, press ENTER to start charging. If the display does not match the pack’s chemistry and cell count, press BACK or do nothing –...
- Page 18 STOP is displayed at the top right of the screen. Press any button to return to the LI-PO/FEPO4-CHARGE screen. 17. If you allow the operation to complete, GT500 will beep several times and the display will show DONE at the top right of the screen. Use the navigation wheel to scroll through and review the status information.
-
Page 19: Example 3: Saving And Loading A User Preset
These shortcuts will help you to edit names faster. Note: In GT500, Supply names and User Preset names supports up to 16 characters maximum. 5. If you wish to discard the name you have just typed, press and hold BACK. - Page 20 Store, Cycle or Monitor). This is a characteristic of Revolectrix chargers where the powerful and intuitive features of a User Preset based menu interface may be experienced. In GT500, after loading or saving a preset, the LOAD USER PRESET menu becomes the main menu instead of the CHEMISTRY/SETTINGS menu.
-
Page 21: Charging Tips
You can top off packs, or remove them when they are partially charged. There is virtually no way to damage a pack when using GT500. (The only exception to this is if you are using Parallel Adapters and you accidentally connect two packs having different number of cells together in parallel. -
Page 22: Internal Resistance
from the different voltages and currents applied to the pack during charging. Use the GT500 as a tool, measuring and recording the internal resistance of your packs over time. Look for trends that would indicate the IR of a cell or a pack is increasing over time. -
Page 23: Menu Options
Menu Options Basic Settings – Charge Cell Type – specifies the type of cell for that battery chemistry. In Lead Acid packs, the charge end voltage for SLA/Gel cell is fixed at 2.40V/cell and the charge end voltage for AGM cell is fixed at 2.45V/cell. -
Page 24: Advanced Settings - Cycle Settings
Advanced Settings – Cycle Settings Cycles – sets the number of charge and discharge cycles. Cool Down – sets the amount of time for the pack to cool down between charges and discharges. End Cycle – end cycling with a charge or discharge. Advanced Settings –... -
Page 25: Advanced Settings - Charge Timeout
Disch Cap Limit – limits the capacity going out of the pack during a discharge. Advanced Settings – Trickle Settings Mode – sets whether to trickle charge after a charge. Also allows GT500 to skip directly to trickle charge. This is only needed for NiCd/NiMH batteries when a fast charge isn’t desired. Trickle Charge only can be helpful to increase the life of those batteries. -
Page 26: Settings - Audio Settings
Settings - Audio Settings Speaker Volume – sets the loudness (Off, 1 = quietest, Max = loudest). Finish Beeps – controls how many times the GT500 repeats “beep beep beep” when charging is complete. Button Beep – enables or disables the speaker “beep” when the ENTER or BACK button is pressed. -
Page 27: Settings - Reset Settings
Settings - Reset Settings Factory Restore – restores all settings to their factory defaults. This option does not reset or change any of the stored User Presets. A prompt will appear to confirm if you wish to proceed with this option. Delete All Presets –... -
Page 28: Troubleshooting
Troubleshooting Safety Code/Message Problem Cannot Load an Attempting to load a blank/empty User Preset. Empty Preset Bad Cell Count Check the balance connector or adapter. Check Wiring Check Check the main discharge connectors. Connections Mains Lead Check the battery pack to charger connections. Battery positive connects to Reversed charger red terminal and battery negative connects to charger black terminal. - Page 29 Safety Code/Message Problem Code Checksum Bad Code is corrupted. Return Charger To Factory Calibration Checksum Bad Calibration data is corrupted. Return Charger To Factory...
-
Page 30: Support Options
Support options For Support on REVOLECTRIX Products: REVO USA Email: support@revolectrix.com or phone: (301) 798 2770 REVO SINGAPORE Email: support@revolectrix.com or phone: (65) 6272 1818... -
Page 31: Revolectrix Limited Warranty
Return Merchandise Authorization (RMA) form to the service station designated by REVOLECTRIX. To obtain an RMA, contact REVOLECTRIX. If you purchased the unit directly from REVOLECTRIX, you may also file a case on line at REVO...
Need help?
Do you have a question about the GT500 and is the answer not in the manual?
Questions and answers