Table of Contents
Advertisement
Quick Links
Advertisement
Chapters
Table of Contents

Related Manuals for Fiat 2003 Palio


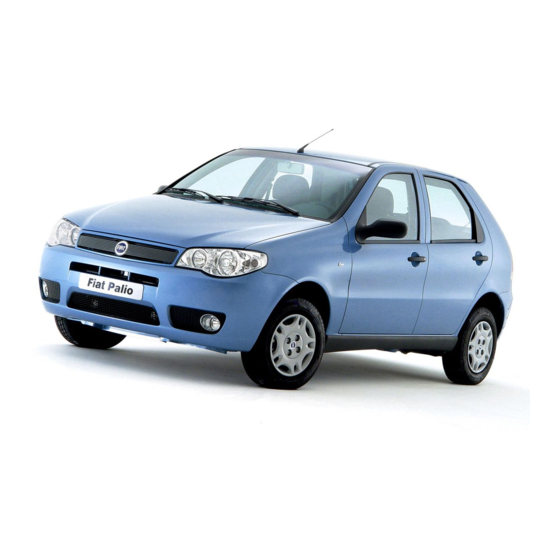
Summary of Contents for Fiat 2003 Palio
- Page 2 Thank you for selecting Fiat and congratulations on your choice of a Fiat Palio. We have produced this owner handbook to help you get to know all your Fiat Palio’s new features and use it in the best possible way.
- Page 3 Fiat Palio. nd you will realise it later when you discover that its driving style and performance goes hand in hand with new manufacturing processes that help cut running costs.
- Page 4 THE SIGNS TO HELP YOU DRIVE CORRECTLY he signs you see on this page are very important. They highlight those parts of the owner handbook where, more than anywhere else, you should stop for a minute and read carefully. As you can see, each sign has a different image to make it clear and easy to identify the subjects in the differ- ent areas: Personal safety.
- Page 5 A list of symbols to be found on your Fiat Palio is given below with Battery Belts and pulleys the name of the component to which Explosion.
- Page 6 Refer to the “Safeguard of the device reduc- When there is water in the diesel fu- ing the emissions” chapter. el filter. have the condense drained out by a Fiat Dealership. Hydraulic power GLOW PLUGS Battery steering (amber) Keep children away.
- Page 7 OBLIGATION SYMBOLS Brake circuit Unleaded fuel car Battery Do not exceed the max- Use only unleaded fuel Protect eyes. imum level of the fluid as 87 R.O.N. indicated on the tank. Use only the fluid prescribed in the “Refueling” chapter. Windscreen wiper Battery Expansion tank...
-
Page 8: Table Of Contents
SUMMARY READY TO GO GETTING TO KNOW YOUR CAR DRIVING YOUR CAR IN AN EMERGENCY CAR MAINTENANCE TECHNICAL SPECIFICATIONS INDEX... -
Page 9: Ready To Go
READY TO GO DASHBOARD INSTRUMENT HOLDER ..PAGE it comfortably in your car and get ready to... INSTRUMENT PANEL .......... PAGE 10 read. KEYS ................PAGE 11 The following pages tell you everything you need to SEATS ................ PAGE 11 know to start off in the best way: that is to say, in HEAD RESTS ............ -
Page 10: Dashboard Instrument Holder
DASHBOARD INSTRUMENT HOLDER The presence and the position of the instruments and indicators may vary according to the version of your car. P4E02269 fig. 1 1. Adjustable side air vents - 2. Vents for air dispatch to side windows - 3. Adjustable central air vents - 4. Commands and pilot lights - 5. -
Page 11: Instrument Panel
INSTRUMENT PANEL VERSIONS 1.2 EL - ELX A - Fuel level gauge with reserve warning light. Speedometer, kilometre counter and trip meter. C - Engine coolant temp. gauge. P4E02270 fig. 2 VERSIONS 1.6 - GTX A - Fuel level gauge with reserve warning light. -
Page 12: Keys
KEYS SEATS HEAD RESTS A set of 2 keys are provided with Adjust the headrest fig. 7 such that the car for fig. 5: the nape, and not the neck, rests on All adjustments must them, making sure that they are be made when the car is –... -
Page 13: Safety Belts
SAFETY BELTS Fig. 9 Adjusting the central rear seat belt fig. 10 To lift: lift the loop C. To tighten: pull the end A (this To lower: keeping the knob operation can be carried out also pressed D move the loop C. with the seat belt already fastened). -
Page 14: Steering Column Stalks
STEERING COL- Fig. 11 LEFT-HAND STALK fig. 13 Position A = Windscreen wipers UMN STALKS To fasten: insert tongue A in B OFF. on the buckle. Position B = Intermittent wipe. To loosen: press button C. RIGHT-HAND STALK fig. 12 Position C = Slow continuous wipe. -
Page 15: Rearview Mirrors
REARVIEW MIR- MANUAL CLI- HAZARD LIGHTS RORS MATE CONTROL To switch them on, press the switch A-fig. 16. IMPORTANT The reflecting sur- CONTROLS fig. 15 To switch them off, press the face of the left-hand mirror is para- switch again. bolic to increase viewing range. -
Page 16: Command Switches
COMMAND ELECTRIC WIN- ELECTRIC REAR WINDOWS fig. 19 SWITCHES DOW WINDER A - Switch on door handle. Switches fig. 17. B - Rear left-hand window switch. FRONT ELECTRICAL WIN- A - Rear windscreen heater switch. DOW WINDERS C - Rear right-hand window switch. B - Front fog light switch with LED. -
Page 17: Boot
BOOT ENGINE BONNET Improper use of the electrical windows can be dangerous. From outside the car: use ignition To open: pull lever A-fig. 22. Before and during their opera- key to open. Press lever B and lift the bonnet. tion ensure that passengers are Insert the end of rod A-fig. -
Page 18: Doors
DOORS The bonnet should be CENTRAL DOOR LOCKING opened only when the SYSTEM car is stationary. Turn the key fig. 24: To lock/unlock all the doors at the same time: 1 - door locked. – from outside the car, turn the key 2 - door unlocked in the lock;... -
Page 19: At The Filling Station
AT THE FILLING CHILD SAFETY LOCK When refueling, position the plug in the adequate seat on the door, as (rear doors) STATION shown in fig. 28. This ensures that the rear doors cannot be opened from inside the Refuel the car with unleaded fuel car. - Page 20 NEVER go close to the Ideally, refuel the car tank filler with naked before the reserve warn- flames or lit cigarettes: light illuminates. Also avoid going too close to Driving in fuel shortage condi- the fuel tank filler area, to avoid tions can cause irregular supply inhaling harmful vapours.
-
Page 21: Getting To Know Your Car
GETTING TO KNOW YOUR CAR INSTRUMENTS ............PAGE 33 ou should read this chapter sitting comfortably in your new Fiat Palio. This way you can see the parts WARNING LIGHTS ..........PAGE 35 described in the handbook at a glance and immediate- HEATING/ ly check out what you have just read for yourself. -
Page 22: Keys
(e.g. attempted theft), SWITCH have the car checked at a Two keys are provided with the car Fiat Dealership prior to driving & (fig. 1) they are used for: The key can turn to 4 different po- again. – the ignition;... -
Page 23: Individual Settings
INDIVIDUAL SET- STEERING COLUMN LOCK Once you have released the lever, check that the seat is firmly locked in TINGS Engagement: After turning the key the runners by trying to move it back to position STOP or PARK remove it and forth. - Page 24 HEAD RESTS DRIVING MIRROR fig. 6 This mirror can be adjusted. Move Front seats fig. 4 lever A to shift the mirror to the fol- lowing positions: To improve passenger safety, the height of the head restraints can be ad- 1) anti glare position;...
-
Page 25: Seat Belts
SEAT BELTS DOOR MIRRORS If the mirror makes it difficult to get through To adjust, operate the knob inside narrow gaps, fold it from the car A-fig. 7. USING THE SEAT BELTS 1-fig. 7 to position 2. (for the front seats) fig. 8 Make sure that the car is stationary and the handbrake is on before you To fasten the seat belts, take the... - Page 26 ADJUSTING THE HEIGHT OF Adjust the seat belt height only when To unfasten the seat belts, press but- the car is stationary. THE SEAT BELTS ton C. Guide the seat belt with your hand while it is rewinding, to prevent Fig.
- Page 27 Releasing knob D, press a little further to trigger the anchor device. This ensures the belt is locked into a stable position if not already done.
- Page 28 GENERAL INSTRUCTIONS If the seat belt is sub- jected to high stress, for FOR THE USE OF THE SEAT example after a collision, BELTS it must be replaced completely The driver is obliged to respect (and together with the anchors, an- check that the car occupants respect) chor fixing screws and the pre- all local traffic laws regarding the use...
- Page 29 Do not travel with a Seat belts are also to be worn by ex- HOW TO KEEP THE SEAT child sitting on the lap of pectant mothers: the risk of injury in BELTS IN PROPER WORKING a passenger using one the case of accident is greatly reduced ORDER AT ALL TIMES seat belt to protect both (fig.
-
Page 30: Transporting Children In Safety
TRANSPORTING Child’s restraint systems are classi- fied into the following four weight CHILDREN groups, fig. 16: IN SAFETY Group 0 weight 0-10 kg Group 0 weight 9-18 kg For optimal protection in the event of a crash, all passengers must be seat- Group 0 weight 15-25 kg ed and wearing adequate restraint sys-... - Page 31 We recommend seating GROUP 1 children on the rear seat. Children from 18 kg up only require Children from 9 kg are to be seated This is the most protect- cushion lift them facing forward in child seats with front ed position in the event of a fig.
- Page 32 GROUP 2 A summary of safety precau- 5) Always check the seat belts do not fit around the child’s throat. tions to follow when transport- Children from 15 kg can be secured ing children. directly with the car seat belts. The 6) While travelling, do not let the child seat has the purpose of posi- child sit incorrectly or release the...
-
Page 33: Pretensioner
The pretensioner does not require the front seat belts even more effec- any maintenance or lubrication. Any tive, some versions of Fiat Palio are fit- modification of its original state inval- ted with pretensioners. These devices idates its efficiency. If, as the result of “feel”... -
Page 34: Instruments
21 vice. Vibrations from rough road surfaces or accidental jolting caused by mounting pavements etc. do not have any effect on the pretensioner. If, however, you need any assistance, go to a Fiat Dealership. fig. 22 fig. 23... - Page 35 The clock displays time in a 24 hour could damage the catalyser. gine immediately and go format. to a Fiat Dealership. ENGINE COOLANT TEMPER- To set hour: press the button A. ATURE GAUGE fig. 23-24 To set minute: press the button B.
-
Page 36: Warning Lights
The warning lights come on in the erating system. shipas soon as possible. following circumstances: Go to a Fiat Dealership and pre- Using the car for long periods when vent deploying the battery. the warning light is on may cause dam-... - Page 37 LIGHTS (blue) short period of time at low ratios. out the ABS assistance. Hence, have When main beam head- the car seen to at a Fiat Dealership Occassional and brief lighting of the lights are switched on as soon as possible.
-
Page 38: Heating /Climate Control System
WATER IN DIESEL FUEL FILTER versions (amber) (diesel version) When there is water in the diesel fu- el filter. have the condense drained out by a Fiat Dealership. GLOW PLUGS (amber) (diesel version) When the ignition key is turned to the MAR position. -
Page 39: Manual Climate Control System
MANUAL CLIMATE DIRECTIONAL AND AD- B - Control for adjusting direction of air flow. JUSTABLE AIR VENTS fig. 28 CONTROL SYSTEM C - Side window fixed vent fig. 29. The vents can be rotated upwards or downwards. The system is filled with A - Control for allowing adjusting air R134a refrigerant which flow:... - Page 40 CONTROLS (fig. 30) COOLING HEATING A - Air temperature knob (mixing 1) Air temperature knob: pointer in 1) Air temperature knob: pointer in hot and cold air). the blue sector. the red sector. B - Air recirculation slider to cut off 2) Fan knob: pointer set at the speed 2) Fan knob: pointer set at the speed outside air.
- Page 41 RAPID DEMISTING/DEFROST- Rear window RECIRCULATION Press the button ( . When the pointer is at T , only in- ternal air recirculation is activated. The climate system is very useful for As soon as the rear window is accelerating the demisting, because it demisted, we suggest switching off the IMPORTANT In conditions of very dehumidifies the air.
-
Page 42: Steering Column Stalks
STEERING COL- Side/taillights fig. 31 Main beam headlights fig. 33 UMN STALKS They come on when the ring is They come on when the ring is at 2 moved from O to 3 . On the in- position, and the stalk is pushed for- strument panel the relevant indicator ward towards the dashboard. - Page 43 To flash head lights fig. 34 Direction indicators fig. 35 LEFT-HAND STALK Pull the stalk towards the steering Move the stalk as follows: This stalk groups together all the wheel (temporary position). washer/wiper controls. downwards - to switch the right- hand indicators on;...
-
Page 44: Controls
CONTROLS Pull the stalk towards the steering Rear window wiper/washer wheel fig. 37 to operate the wind- fig. 38 screen washer. This function can only be used when HAZARD LIGHTS fig. 39 the ignition key is at MAR. Press switch A, regardless of the po- Controls: sition of the ignition key. - Page 45 CONTROLS Rear fog light FUEL CUT-OFF SWITCH fig. 40 fig. 41 Button B: These lights can only be switched on when the dipped beam The buttons located above the cen- This is a safety cut-off switch which headlights or the front foglights are tral air vents.
-
Page 46: Interior Equipment
INTERIOR EQUIP- journey, press button A-fig. 41 to re- You will find indents A-fig. 43 on the activate the fuel supply system. flap for arranging a cup or can, when MENT the car is stationary. After the crash, remember to turn the ignition key to STOP to prevent the battery running down. - Page 47 FRONT CEILING LIGHT CIGAR LIGHTER fig. 45 IMPORTANT Always make sure the cigar lighter does in fact pop out fig. 44 It works only with the ignition key at after it has been pushed in. MAR. The ceiling light can achieve the fol- lowing positions: Press the button A of the cigar lighter;...
- Page 48 ASHTRAY For the rear seats fig. 47 SUNVISORS For the front seats fig. 46 For the rear seats, there is a foldaway These are positioned to the sides of ashtray on the side panel. the rearview mirror. They can be Open flap A pulling it backwards.
-
Page 49: Doors
DOORS Manual locking/opening from Opening/locking the rear doors front door inside from the inside To open: pull lever A-fig. 50. To open: pull lever A-fig. 51. The Before opening a door, door will open if the child safety lock Locking: close the door and press make sure this can be A-fig. - Page 50 Child safety lock CENTRAL DOOR LOCKING ELECTRIC WINDOW SYSTEM WINDERS This ensures that the rear doors can- not be opened from inside the vehicle. Front electric windows fig. 53 From outside Engage by inserting the tip of the ig- The electric windows are controlled When the doors are closed, insert nition key in A-fig.
- Page 51 Rear electric windows D - rear door enable button (the Do not keep the switch lights in the rear window buttons will pressed when the window Inside the handle of each door there go out when the window winders are is completely wound up is a button A-fig.
-
Page 52: Boot
BOOT Do not operate the tail- When using the boot, gate opening lever when make sure the load you the car is mobile. are carrying does not ex- OPENING/CLOSING ceed the permitted weight (see THE BOOT the chapter “Technical Specifi- To close, lower the tailgate to about 20 cm, then let it drop. - Page 53 INCREASING THE LUGGAGE 3) Then tip forward the complete To return the seat to normal rear seat back fig. 60, in order to ob- SPACE AREA position tain an only loading surface with the 1) Release the seat back by means of 1) Tip the entire seat backwards.
- Page 54 To remove the IMPORTANT If the load in the If you want to carry a boot is fairly heavy and you are trav- can of petrol as a reserve, parcel shelf elling at night, check and adjust the adhere to the laws in 1) Free the upper extremities A-fig.
-
Page 55: Bonnet
BONNET Before lifting the bonnet When the engine is run- check that the wind- ning, do not put hands screen wiper arms are near moving elements. To open the bonnet: not raised from the windscreen. Be very careful that scarves, ties 1) Pull lever A-fig. - Page 56 ROOF RACK When the engine is hot, After travelling a few be very careful not to burn kilometers, check that yourself when operating the securing screws are Move the door weather strips aside inside the engine compartment. tight. in the points shown in fig. 66 to reach Keep your hands away from the the fasteners.
-
Page 57: Headlights
ABS. FRONT FOG LIGHTS BEAM If a failure occurs and consequently ADJUSTMENT the anti-lock system is not working, Have the lights checked at a Fiat the car normal braking performance is Dealership. not in anyway jeopardised. fig. 67... - Page 58 Fiat Dealership to have your car road could infact increase the braking checked and put it right imme- distance.
-
Page 59: Air Bag
AIR BAG The bag inflates instantly and acts as In the event of a less severe collision a soft protective barrier between the (for which seat belts are sufficient pro- driver’s body and the structures that tection) the airbag is not activated. DESCRIPTION could cause injury. - Page 60 Fiat immediately to a Fiat Dealership. kerbs or raised road bumps, or if Dealership.
-
Page 61: Sound System
Fiat ed by the seat belts only and Dealership. therefore they should always be... - Page 62 STANDARD EQUIPMENT The radio must be mounted in the For the front speakers, use the seats proper housing occupied by the cov- on the object-holder pocket of the door The system consists of: er A-fig. 69, which can be removed panel.
-
Page 63: At The Filling Station
1) Remove the courtesy light unit The pollution prevention devices of Never put even the tini- (see “If an interior light burns out” in Fiat Palio mean only unleaded petrol est amount of leaded fu- the “In an emergency” chapter). can be used. -
Page 64: Protecting The Environment
Fiat Palio right from the start. The re- the tank. A hissing sound when the sult is the use of materials and creation... -
Page 65: Driving Your Car
DRIVING YOUR CAR STARTING THE ENGINE ........PAGE 65 o help you handle your Fiat Palio in the best and safest possible way, and above all use it to its fullest PARKING ..............PAGE 67 potential, we have given you some hints in this chap- USING THE GEARBOX ......... -
Page 66: Starting The Engine
100 version of your Fiat Palio to contribute to the maintenance intervention re- duction. - Page 67 HOW TO WARM UP THE BUMP STARTING STOPPING THE ENGINE ENGINE AFTER IT HAS JUST Turn the ignition key to STOP while STARTED the engine is idling. – Begin to move forward slowly let- Never bump start the ting the engine turn over at medium engine (by pushing, tow- revs.
-
Page 68: Parking
IMPORTANT If this is not the 3) To prevent accidental movement Do not leave the ignition key at case, take the car to a Fiat Dealer- of the car, this procedure should be MAR because it drains the battery. ship to have the handbrake adjusted. -
Page 69: Using The Gearbox
GEARBOX moving completely. With the engine In designing the Fiat Palio, Fiat made running, before engaging the reverse every effort to offer a car able to pro- To engage the gears, press the clutch... - Page 70 BEFORE GETTING BEHIND – Do not place clear objects or Water, ice or salt sprin- sheets of paper on the dashboard that kled on the road can de- THE WHEEL reflect on the windscreen. posit on the brake discs – Make sure all lights including the and reduce efficiency of the first –...
- Page 71 WHEN TRAVELLING Always fasten both front You should be physically fit and men- and back seat belts, in- tally alert before setting out on long – The first rule of safe driving is pru- cluding the child restraint journeys. dence. systems.
- Page 72 DRIVING AT NIGHT – Dip your headlights as soon as you – Do not drive through puddles at see cars coming in the other direction speed and hold on tightly to the wheel If you are driving at night these are and pass them with the headlights if you do: a puddle taken at high speed the main rules to follow:...
- Page 73 – Remember that fog also means the MOUNTAIN DRIVING – Keep your speed down. tarmac is wet and therefore manoeu- – When driving downhill, use the en- – Use chains if the roads are covered vres of all kinds are more difficult and gine braking by engaging a low gear, so in snow: see paragraph “Snow chains”...
-
Page 74: Economical Running That Respects The Environment
Fiat Dealership, driving in a man- On this subject, a few useful tips have ner to avoiding sharp braking and been given below to supplement those get the system checked. - Page 75 The correct use of pollution control you are making on the engine and go pipe. devices not only ensures respect for to a Fiat Dealership as soon as you Do not allow anything to be sprayed the environment but also has an effect can.
-
Page 76: Containing Running Cost And Pollution
CONTAINING RUNNING COSTS AND POLLUTION Some suggestions which may help Tyres Roof rack/ski rack you to keep the running costs of the Tyre pressure should be checked at Remove roof racks and ski racks car down and lower the amount of least once every four weeks: if the from the roof of the car as soon as toxic emissions released into the at-... - Page 77 Climate control system Unnecessary actions Your speed should be kept as even as possible and superfluous braking The climate control system is an ad- Avoid revving the engine when and acceleration avoided as this in- ditional load which greatly effects the stopped at traffic lights or before creases both consumption and emis- engine leading to higher(up to +20%...
-
Page 78: Snow Chains
SNOW CHAINS Traffic and road conditions Check the tautness of the chains af- ter driving some ten metres. Heavy traffic and higher consumption The use of snow chains is regulated are synonymous: for example, when by the legislation in force in the coun- driving slowly with frequent use of try the car is driven in. -
Page 79: Storing The Car
STORING THE RECURRENT – Clean and protect the shiny metal parts using special compounds readi- CHECKS AND ly available. BEFORE LONG – Sprinkle talcum powder on the The following precautions should be rubber windscreen and rear window DISTANCE TRIPS taken if the car will not be used for wiper blades and lift them off the glass. -
Page 80: Accessories Purchased By The Owner
PURCHASED BY ACCESSORIES may be reduced by the screening ef- fect of the car bodywork. THE OWNER There are useful accessories provid- ed by FIAT. For more details contact RADIO FIAT dealer. TRANSMITTERS AND CELLULAR TELEPHONES Cellular telephones and other radio transceiver equipment (e.g. -
Page 81: In An Emergency
Owners Handbook you have also been provided with the Warranty Booklet where you will find details of all the services Fiat can provide should you find yourself in difficulty. We nevertheless recommend you read these pages. -
Page 82: Jump Starting
Specifications”). but have the car seen to at a Fiat rosive. Avoid contact with skin Proceed as follows fig. 1: and eyes. You are also advised Dealership. -
Page 83: Bump Starting
BUMP STARTING IF A TYRE IS Never start the engine, when the car is raised on PUNCTURED a jack. Never tamper with the inflation valve. Never place Follow the instructions on this and tools between the rim and tyre. the following pages to use the jack and spare wheel correctly. - Page 84 1. STOP THE CAR 2. TAKE OUT THE TOOLS, – Lift the carpet covered flap. JACK AND SPARE WHEEL – Stop the car in a position that is not – Loosen the fastener A-fig. 4 and dangerous for oncoming traffic where take the spare wheel.
- Page 85 Please note: 5) Warn anyone nearby that the car 7) Unscrew the 4 wheel bolts and is about to be lifted. They must stay remove the wheel. – the jack weighs 2.900 kg; clear and not touch the car until it is 8) Ensure that the housing for the back on the ground.
- Page 86 10) Fit the wheel cup in order that 15) Lower the carpet. IMPORTANT As soon as possible: the biggest hole A-fig. 8 is aligned with have the punctured tyre repaired and 16) Put back the jack, the operating the bolt fixing the wheel. When fitting mount it on the car thus limiting the handle and the wheel bolt wrench in- the wheel cup make sure that the sym-...
-
Page 87: If A Bulb Burns Out
When a light is not working, check C. Cylindrical bulbs You should have the that it has not fused before changing the Remove by pulling away from termi- bulbs replaced at a Fiat bulb. nals. Dealership. The correct For the location of the fuses, refer to operation and direction of the D-E. - Page 88 Bulbs Reference Type Power a fig. 12 Dipped beam Main beam Front parking/tail lights PY21W Front direction indicators P21W Rear direction indicators Front foglights P21/5W 21/5W Rear parking/tail lights P21/5W 21/5W Stop P21W Reversing light Number plate light C10W Front ceiling light fig.
-
Page 89: If An Exterior Light Burns Out
IF AN EXTERIOR 3) Pull side tabs of the fixing clips C- MAIN BEAM HEADLIGHTS fig. 14; remove the bulb holder and LIGHT BURNS To replace a halogen bulb (type H1, the relevant bulb. 12V-55W): 4) Insert the new bulb, making sure 1) Remove the plastic cover, by that the tabs on the metal part coin- pulling the stop spring. - Page 90 FRONT SIDE LIGHTS FRONT DIRECTION FRONT FOGLIGHTS INDICATORS To replace the 12V-5W bulb: To replace the halogen bulb (type H3, 12V-55W). To replace the 12V-21W bulb: 1)Release the spring A-fig . 16 and remove the plastic protective cover. 1) Loosen the fog light fastening 1) Release the spring A-fig .
- Page 91 FRONT FOGLIGHTS 4) release the clip C-fig. 20 and re- REAR LIGHT CLUSTER move the bulb holder. To replace the halogen bulb (type To replace a bulb: H3, 12V-55W). 5) Remove the bulb and replace it 1) From inside the boot, lift the with an other one of same type and 1) Turn the wheels to the left to re- opening on the covering panel and un-...
- Page 92 The bulbs fig. 24 are: D - 12V-21/5W for parking/tail 3) Unscrew the screws B-fig. 26 lights. and replace the bulb group C or only A - 12V-21/5W for brake lights; the burnt-out bulb. B - 12V-21W for direction indicators; THIRD BRAKE LIGHT C - 12V-21W for the reversing lights;...
-
Page 93: If An Interior Light Burns Out
IF AN INTERIOR NUMBER PLATE LIGHT fig. 27 – remove the reflector A-fig. 29 act- ing in the direction shown by the ar- LIGHT BURNS To replace the 12V-5W bulb: rows and replace the cylindrical bulb 1) Remove the bulb holder by lev- ering with a screwdriver in the point –... -
Page 94: If A Fuse Blows
A - Undamaged fuse. B - Fuse with broken filament. Replace broken filament fuse with Never change a fuse undamaged fuse. with another amperage: fire risk. If the problem occurs again, have the car in- spected at a Fiat Dealer- ship. fig. 31... - Page 95 If the fuse blows again, the cover. have the car inspected at a Fiat Dealership. Do not attempt to re- pair a blown maxi fuse. Go to a Fiat Dealership. fig. 32 fig. 33...
- Page 96 FUSES IN THE ENGINE COMPARTMENT fig. 34(a, b, c) The devices protected by the fuses in the engine compartment are listed in the following tables. fig. 34 (a) 1.2 version fig. 34 (b) 1.6 16V version fig. 34 (c) 1.9D version fig.
- Page 97 Component fuse N. Ampere Location Left front side light Fig. 33 Right front side light Fig. 33 Left tail light Fig. 33 Right tail light Fig. 33 Left dipped beam headlight Fig. 33 Right dipped beam headlight Fig. 33 Left main beam headlight Fig.
- Page 98 Component fuse N. Ampere Location ABS (1,6 16V version) Fig. 34 (b) ABS (1,9 D version) Fig. 34 (c) Clock (power supply under key) Fig. 33 Clock (power supply not under key) Fig. 33 Clock (illumination) Fig. 33 Instrument panel power supply Fig.
-
Page 99: If The Battery Is Flat
IF THE BATTERY RECHARGING THE BATTERY The liquid in the battery is poisonous and corro- IS FLAT You are advised to recharge the bat- sive. Do not let it touch tery slowly for a period of approxi- the skin or eyes. Recharging the mately 24 hours at a low amperage. -
Page 100: If The Car Needs To Be Raised
IF THE CAR Do not use the jack to WITH A SHOP JACK lift loads exceeding that NEEDS TO BE indicated on the label at- Front end tached to the jack itself. RAISED The car may only be raised by plac- ing the jack arm under the gearbox/dif- ferential, inserting a wooden or rub- WITH THE JACK... - Page 101 At the sides Rib A of the car side member must WITH AN ARM-TYPE HOIST fit into groove B of the strip. The car may only be raised by plac- Place the ends of the arms in the ares ing the jack arm with the special brack- shown in fig.
-
Page 102: If The Car Needs To Be Towed
IF THE CAR Fasten the ring on the threaded Do not tow the car by pin, rear fig. 40 or front fig. 41. using flexible elements NEEDS TO BE (metallic cables, ropes or strings); only the use of a rigid TOWED bar, with the ends supplied with adequate joints, is allowed. -
Page 103: If An Accident Occurs
IF AN ACCIDENT – Call for rescue making the infor- IF ANYONE IS INJURED mation you give as accurate as you OCCURS – Never leave the injured person can. On the motorway use the special alone. The obligation to provide as- column-mounted emergency phones. - Page 104 42: The first-aid kits are also available in – sterile gauze for covering and the Lineaccessori Fiat. cleansing wounds; – bandages of different widths; elas- tic in nature – antiseptic plasters of different sizes;...
-
Page 105: Car Maintenance
CAR MAINTENANCE SCHEDULED SERVICING ........PAGE 105 he Fiat Palio is new throughout, even in its ser- vicing schedule. SCHEDULED SERVICING PLAN ................PAGE 106 For instance: the first scheduled servicing coupon ADDITIONAL INTERVENTIONS ....... PAGE 108 is prescribed at 1,000-1,500 kms or 3 months LEVEL CHECK ............ -
Page 106: Scheduled Servicing
The service of Scheduled Servicing is condition for a long time to come. performed by all Fiat Dealership, For this reason, Fiat prepared a se- with prefixed times. ries of maintenance controls and in- If performing each intervention, in terventions, from 1000-1500, 7500 &... -
Page 107: Service Schedule
SERVICE SCHEDULE Thousands of kilometers 90 105 120 135 150 165 180 Check of conditions and weariness of tyres Check front disc brake pad Check of conditions and weariness of rear drum brake gasket Visually inspect: underbody protection, pipes (exhaust - fuel supply - brakes), rubber elements (guards - sleeves - bushes - etc.), supply and brake system tubing Voltage check and possible adjustment of trapezoidal belts and/or poly-V... - Page 108 Thousands of Kilometers 90 105 120 135 150 165 180 Top up fluids (engine coolant, brakes, power steering, windscreen washer etc.) Timing command toothed belt check Timing command toothed belt replacement Spark plugs replacement, wire control (*) Engine control system functionality check (through autodiagnostic socket) Change gear/differential gear oil level check Changing engine oil (every 7,500 km or 6 months)
-
Page 109: Additional Interventions
– with engine frequently idling or for product expressly recommended, long distances at low speed (e.g. taxi, INTERVENTIONS studied and realized for Fiat cars (see door-to-door deliveries or for long the “Refuelling” table in the “Techni- storage). Every 1000 km or prior to long cal Specifications”... -
Page 110: Plan
HYDERABAD MUMBAI PUNE - LUCKNOW For further information about Fiat Service Network please refer 24 Hours Service * If you are not in, but near any of the above cities; Dial city code followed by the single Assistance Booklet provided. -
Page 111: Level Check
Therefore, we recommend you to perform the operation at Fiat Dealership. CHECKING FLUID LEVELS 1. Engine oil - 2. Battery - 3. Brake- clutch fluid - 4. Windscreen/rear mir- ror washer fluid - 5. - Page 112 1. Engine oil- 2. Battery - 3. Brake- clutch fluid - 4. Windscreen/rear mir- ror washer fluid - 5. Engine coolant - 6. Power steering fluid. fig. 2 - Versions 1.6 1. Engine oil- 2. Battery - 3. Brake- clutch fluid - 4. Windscreen/rear mir- ror washer fluid - 5.
- Page 113 Fig. 4: versions 1.2 frequency indicated in the “Scheduled over the MAX mark, go to a Fiat Servicing Plan” and “Additional Inter- Dealership to have it put right. Fig. 5: versions 1.6 vention”.
- Page 114 We rec- ommend you have the car seen to at a Fiat Dealership for the oil and filter change. It is suitably equipped for disposing of used oil and filters in an environmentally -friendly way that complies with the law.
- Page 115 WINDSCREEN/ A dipstick fig. 10 indicates the POWER STEERING FLUID amount of fluid in the washer reser- REAR WINDOW WASHER Fig. 11: 1.2 version voir. FLUID fig. 9 Fig. 12: 1.6 16v - 1.9 D version To add fluid, remove the cap and Check that the level is between the pour a mixture of water and 10% of MIN and MAX marks on the reser-...
- Page 116 (with igni- tem checked for leaks at a Fiat ter. tion key at MAR) warning light x Dealership. should come on.
-
Page 117: Air Cleaner
The symbol π , present quently severely damage the en- You are however advised to have this on the container, indi- gine. operation performed at a Fiat deal- cates synthetic brake flu- ership. ids distinguishing it from mineral Replace cleaner fluid. -
Page 118: Battery
We rec- The Fiat Palio battery is of the “lim- the skin or eyes. Do not bring comend you have the car seen to ited maintenance” type: under normal... - Page 119 OF YOUR BATTERY with satellite antitheft system etc.) vis- When you park the car, ensure the it a Fiat Dealership. They can sug- doors, boot and bonnet are closed gest the most suitable accessories to Battery Maximum permissible properly.
- Page 120 If the indicator shows a light bright lation to coloration that the indicator coloration, or dark but without a can have. Refer to the following table OPTICAL HYDROMETER green central area, contact the Fiat plate fig. 18 Dealership. located on the battery, in position Description B-fig.
-
Page 121: Electronic Control Units
ELECTRONIC – Be particularly careful when con- IMPORTANT If the sound system necting the battery to the electrical or car alarm systems are not installed CONTROL UNITS system. Make sure that the polarity is correctly, they can interfere with the correct and the connection is efficient. -
Page 122: Spark Plugs
It is normal for the pressure to rise plugs checked at a Fiat Dealership. specified in the Service when you are driving. If you have to Schedule. Only use the type of check or to restore the pressure plugs indicated. - Page 123 Fiat Dealership. direction of rotation. Avoid overloading your car: this can seriously damage wheels and/or tyres.
-
Page 124: Rubber Pipes
RUBBER TUBING WINDSCREEN/ – Remove any snow that has settled on the glass: besides saving the blades REAR WINDOW you will avoid straining the electric Follow the Service Schedule to the windscreen wiper motor and causing WIPER letter as concerns supply line, power it to overheat. - Page 125 Changing the rear window SPRAY NOZZLES The windscreen washer jets can be directed by adjusting the inclination of wiper blade fig. 22 If there is no jet of liquid, first make the nozzles. Insert a screwdriver in A- sure that there is liquid in the reser- 1) To remove the blade, operate on fig.
-
Page 126: Manual Climate System
BODY AND UNDERBODY GUARANTEE Fiat has used leading-edge techno- logical solutions to effectively protect Fiat Palio is covered by warranty The system is filled with the body from rust. against any original structural or body R134a refrigerant which part being perforated by rust. Refer to... - Page 127 TIPS FOR KEEPING THE Detergents pollute wa- Outside plastic parts must be cleaned ter. For this reason, the following the usual car washing pro- BODY IN GOOD CONDITION car must be washed in an cedure. area equipped for the collection Paintwork Avoid parking the car under trees;...
-
Page 128: Interiors
INTERIORS IMPORTANT To prevent damage PLASTIC PARTS INSIDE THE to the electric heater element, wipe the inside of the heated rear window gen- Periodically check that water has not Use special products designed not to tly in the same direction as the ele- collected under the mats (from dip- alter the appearance of the compo- ments. -
Page 129: Technical Specifications
ENGINE ............... PAGE 131 TRANSMISSION ............PAGE 133 In a sense, it is Fiat Palio’s identity card. A docu- BRAKES ............... PAGE 134 ment that introduces the car and explains in techni- SUSPENSIONS ............PAGE. 134... -
Page 130: Car Identification Data
CAR IDENTIFICATION DATA E - Maximum vehicle weight fully loaded F - Maximum vehicle weight fully CHASSIS MARKING fig. 1 MODEL PLATE fig. 4 loaded plus trailer This is stamped on the floor pan of This label is secured to the bonnet G - Maximum vehicle weight on the passenger compartment under the and bears the following identification... -
Page 131: Engine Codes
This adhesive label is applied to the inner side of the front right-hand door. It bears the following data: A - Paint manufacturer B - Colour name C - Fiat colour code D - Respray and touch up code. fig. 5... -
Page 132: Engine
ENGINE GENERAL Type code 178C4066 182B6000 223A6000 Cycle Otto Otto Diesel Number and layout of cylinders 4 in line 4 in line 4 in line Number of valves per cylinder Diameter x stroke 70,80 x 78,86 80,50 x 78,40 82x90.4 Total capacity 1242 1596... - Page 133 FUEL SUPPLY/ IGNITION Mixture metered by electronic pro- LUBRICATION cessing of the data picked up by the Integrated multipoint electronic in- Forced-feed with gear pump with engine speed sensor and absolute jection and ignition system: only one pressure relief valve incorporated. pressure sensor in the intake manifold.
-
Page 134: Transmission
TRANSMISSION Cyclical gear reduction and differen- tial assembly incorporated in the gear- box. The ratios are: CLUTCH Self-adjusting with travel-free pedal. Torque Teeth Hydraulic clutch control. reduction Number in the differential 3.867 58/15 GEARBOX 3.867 58/15 AND DIFFERENTIAL 1.9 D 3.867 58/15 Five forward gears and reverse with... -
Page 135: Brakes
BRAKES SUSPENSIONS SERVICE AND EMERGENCY FRONT BRAKES Independent wheel, MacPherson- type with lower wishbones anchored Front: disc-type with floating calliper. to an auxiliary cross bar. Rear: drum and self-centering shoes. Coil springs and double action shock Cross-over hydraulic circuit control. absorbers. -
Page 136: Steering
STEERING Do not push the power steering to its limit while the engine is running for Energy absorbing steering wheel (air more than 15 seconds: this will bag, if provided). make a noise and could damage Rake adjustable, jointed energy ab- the system. -
Page 137: Wheels And Tyres
WHEELS AND Max speed index CORRECT READING IMPORTANT The light alloy 96 = 710 kg Load index (capacity) wheels are fixed with specific bolt in- OF THE TYRE fig. 6 97 = 730 kg Q = up to 160 km/h. TYRES compatible with any printed steel 98 = 750 kg... -
Page 138: Electric System
ELECTRIC SYSTEM Modifications or repairs ALTERNATOR to the electrical system Rectifier bridge and built-in elec- Supply voltage: 12 Volt. carried out incorrectly tronic voltage regulator. Battery be- and without bearing the features gins recharging as soon as the engine of the system in mind can cause starts. -
Page 139: Weights
WEIGHTS Weights (kg) (*) If special equipment is fitted, the unloaded car weight increases thus reducing the spec- Kerb weight ified payload , respecting the max allowable (including fuel, spare wheel, loads. 1140 tools and accessories): 1015 1085 (**) Loads not to be exceeded. The driver is Payload (*) including driver : responsible for arranging the loads so that they comply with these limits. -
Page 140: Dimensions
DIMENSIONS Dimensions in mm. 1.6/1.9 D 2373 2373 3763 3763 1440 1440 1415 1415 1378 1378 1620 1620 fig. 7 P4E02266 Boot volume (standard VDA): – normal conditions: 260 dm – extended with load up to side win- dows: 650 dm –... -
Page 141: Capacities
CAPACITIES Prescribed fuels litres litre Recommended products litre Fuel tank: – Super unleaded petrol 87 R.O.N. – – including a reserve of: 5.5-7.5 – 5.5-7.5 – 5.5-7.5 – Engine cooling system: Mixture composed by 70% distilled water – with manual climate control system and 30% fluid PARAFLU ngine sump: VS MAX PETROL (*) -
Page 142: Fluids And Lubricants
FLUIDS AND LUBRICANTS PRODUCTS WHICH MAY BE USED AND THEIR SPECIFICATIONS Specifications of fluids and lubricants to use Recommended lu- Applications for best car operation bricants and fluids Use temperatures SAE 15W40 grade mineral multigrade oils that exceed the API Lubricants for VS MAX from –15°C to 40°C... - Page 143 Specifications of fluids and lubricants to use Recommended lu- Applications for best car operation bricants and fluids Hydraulic Synthetic fluid, NHTSA n° 116, DOT 4, TOP 4 Hydraulic brakes and brake/clutch fluids ISO 4925, SAE J 1703 hydraulic clutch com- mands Radiator antifreeze Protective inhibited monoethylene glycol based antifreeze com-...
-
Page 144: Tyre Pressure
TYRE PRESSURE COLD TYRE PRESSURES (bar) 0.3 bar should be added to the values given if the pressure is measured while the tyre is hot. Tyre Medium load Full load Wheel Front Rear Front Rear Spare 1.2 EL-ELX SPORT 165/80 R13 1.6 GTX 175/65 R14 1.9 D EL-ELX... -
Page 145: Index
INDEX Boot - climate ........- extending......... - controls........14-39 - tailgate opening/closing ..16-51 - fast demisting ......Brake lights bord instrument ....- maintenance ......125 (bulb replacement) ....ABS ..........- air re-circulation ....Brake-clutch fluid level ....115 Accessories Purchased - heating........ - Page 146 Dipped beam headlights - marking ........129 Getting to know the car ... - control ........13-41 - cooling........132 Glove compartment....- bulb replacement ....illing ..........140 andbrake ....... 67-134 Doors..........17-48 First-aid kit ........103 Hazard lights ......... 13-43 Flashing ...........
- Page 147 Protecting the environment ..- driving in fog ......ain beam headlights - driving on snow and ice ..- control ........13-41 - before driving ......- flashing........13-42 aising the car ......Seat belts........12-24 - bulb replacement....Ready to start .......
- Page 148 Spark plugs ........121 Towing the car ......101 - engaged handbrake ....Speedometer......... - direction indicators ..... Transmission ......... 133 - low brake-clutch fluid level Starter (specifications) ....137 Transporting children in - low engine oil pressure..safety .......... Starting the engine ......
- Page 149 - fluid level........114 Windscreen washer - control ........13-42 - blades........124 - sprayer ........124 Windscreen/rear window washer fluid level ........114 Windscreen/rear window wiper blades ......... 123 Windscreen/rear window wiper sprayers ........124...
- Page 150 NOTES...
- Page 152 The vehicle you have just bought was built with A FL Group products inside it. You will find VS at all Fiat Dealerships and garages the next time you need to change the oil in your engine. 35,000 motor experts all over Europe...
- Page 153 YOUR CAR GENERAL PERFORMANCE DETERIORATION HAS CHOSEN VS GENERAL is the result of combining tradition PERFORMANCE DETERIORATION with the experience of the A FL Group lab- oratories, which has been built up over the STANDARD OIL years by experimental research on the VS line products.
- Page 154 * If you are not in, but near any of the above cities; Dial city code followed by the single response number For further information about Fiat Service Network please refer 24 Hours Service Assistance Booklet provided. Print no.AS/STA 50167-03/2003 - 4...
Need help?
Do you have a question about the 2003 Palio and is the answer not in the manual?
Questions and answers