Table of Contents
Advertisement
Quick Links
Advertisement
Table of Contents

Related Manuals for Edision Piccollino


Summary of Contents for Edision Piccollino
- Page 1 LED Full HD Sat Receiver User’s Guide piccollino p i c c o l l i n o...
-
Page 2: Table Of Contents
Contents ►Safety .......................4-5 ►Remote control ....................6 ►Description ......................7 ►Technical Data ....................8 ►Information bar ....................9 ►EDIVISION - Program eGuide ..............10-11 ►Service .......................12 Organizing Services ......................12 Organizing Favourites ......................14 ►Installation ......................16 Satellite installation .......................16 FastScan Satellite .........................18 Auto Installation ........................18 Satellite Guide ........................19 ►Settings ......................20 Software update ........................20... - Page 3 ►Media ........................27 Recording ..........................27 Movie ............................27 Music .............................27 Images ..........................27 File List / Software ........................ 27 PVR Setting ..........................30 Disk management ......................... 30 Remove USB Device Safely! ....................30 ►Applications .....................31 YouTube ..........................31 RSS Reader ..........................31 Weather forecast ........................31 Google Maps .........................31 Ftp ............................31 Web TV ..........................31 DLNA .............................31...
-
Page 4: Safety
► Important safety instructions Read these instructions. Keep these instructions in a safe place. Follow all warnings. Follow all instructions. Do not use the device near water. Only clean with a dry cloth. Do not use near heat sources, such as radiators, heat accumulators, ovens or other devices (including amplifiers) generating heat. - Page 5 CAUTION RISK OF ELECTRIC SHOCK DO NOT OPEN ATTENTION RISQUE DE CHOC ELECTRIQUE NE PAS OUVRIR This symbol indicates that there is risk of electric shock. This symbol indicates that the operating instructions contain important operating and maintenance instructions. This symbol indicates that there is a double insulation between voltage and user accessible parts between the product.
-
Page 6: Remote Control
►Remote Control On/Off button. Mute On/Off. Starts recording manually. Start playing the TimeShift function and / or a Recording. Back to normal recording speed. Finishes TimeShift, a recording or a playback. Pauses playback. Scrolls listings per page backward. Fast Possibility backwards. Scrolls listings per page forward. -
Page 7: Description
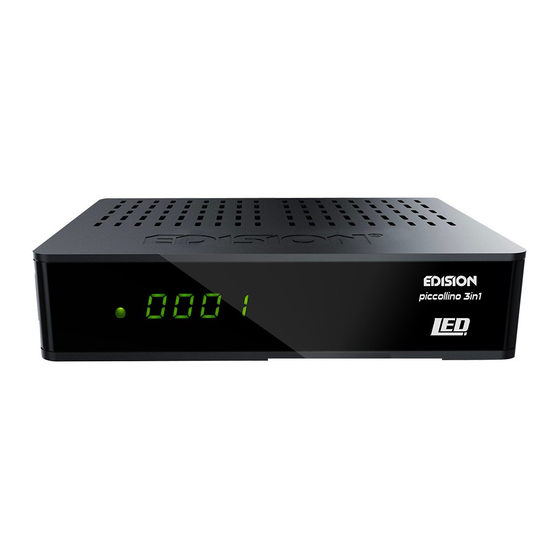
►Description Front Panel Infrared sensor for the reception of remote control commands piccollino Display LED, displays current information Card reader Back Panel LNB IN: Connection for the coaxial cable to the signal from the satellite system S/PDIF: Audio interface for amplifier/audio console... -
Page 8: Technical Data
• Auto save on last channel • Software / channel list Upgrade & Backup using USB • FAT 16/32, NTFS formats support • Parental Lock • Eco Standby 0.8 Watt •100 ~ 240V Voltage, piccollino 50Hz/60Hz • Media player MP3/ JPEG/BMP/AVI/DivX/ VOB/MKV • Dimensions:... -
Page 9: Information Bar
► Information bar (InfoBar) When in the TV/Radio mode, the 'INFO' button displays an information bar (InfoBar) at the lower edge of the screen. This bar is faded-in up to 10 seconds. How to change the duration of fading of the information bar: 1. - Page 10 ► EDIVISION - Your electronic program guide Standard: EDIVISION is an electronic program guide with its own OSD menu. EDIVISION presents the information provided by the service provider in detailed views. In addition, up to 8 time-controlled recordings (Timer) can be programmed from here. Note that not all channels/program providers provide program-related information.
- Page 11 The following functions and buttons can be used in all modes: The red button displays an overview of the existing channel lists (groups). Use the arrow buttons to navigate through this overview and the OK button to set the channel list to be used by EDIVISION.
-
Page 12: Service
►Menu: Program ► Service ► Installation ► Settings ► Conditional Access ► Media ► Application ► Game ► Edivision ► Service ► Organizing Services ► Organizing Favourites Organizing Services In this menu you can configure your channel lists for TV or radio channels. Notes: Check the operation mode of the receiver. - Page 13 The green button displays more options. The following options are available: Select all: All channels are selected. Deselect all: All channels are deselected. Select other: All channels, that were not selected previously, are now selected. Select TP: Here, you can select all channels of a transponder. The ‘FIND’...
-
Page 14: Organizing Favourites
How to delete a channel: 1. Place the cursor (yellow bar) in the channel list on the channel you wish to delete. 2. Navigate to the right side of the menu using the right arrow button and move the cursor on the ‘Delete’ symbol. - Page 15 The green button displays more options. The following options are available: Select all: All channels are selected. Deselect all: All channels are deselected. Select other: All channels, that were not selected previously, are now selected. Select TP: Here, you can select all channels of a transponder. While on the left column, you can quickly search for channel names using the‘FIND’...
-
Page 16: Installation
How to rename a favourite list: 1. Press the‘FAV’ button and select the favourite list you wish to rename. 2. Move to the middle column of the menu and navigate the cursor to the ‘Rename’ symbol. The symbol is highlighted in color. 3. - Page 17 0/12V: If you use a 12V switch, set the value to ‘On’. Polarity: Here you can set the polarity. Tone Burst: Tone Burst is another mode option availed by the receivers. This signal does not include digital commands, but can be recognised and used by most switches for position toggling.
-
Page 18: Fastscan Satellite
FastScan Satellite Define the scan of TV and radio channels using the preset frequencies of the service providers. Select the type, DiseqC, LCN & press Start Scan. Auto Installation Here you can automatically set the value for DiSEqC. Select DiSEqC 1.0 4port, DiSEqC 1.1 8port or DiSEqC 1.1 16port and press OK. -
Page 19: Satellite Guide
Menu functions and settings: DVB-C Setup: Use the OK button to switch to the DVB-C settings menu (see below). Region: Select your region here. Tuner Power: Here you can set extra voltage for reception via DVB-C. Functions and settings in the search and setup menus for DVB-C: Scan mode: Define the channel scan by inserting a specific frequency or an entire frequency band. -
Page 20: Settings
‘www.edision.gr’ through a computer with internet connection: http://www.edision.gr Save the downloaded file to the USB memory unit and plug this unit into the USB port of ‘piccollino’. Note: The update speed via USB might depend on the data format in the USB memory. It is recommended to previously format the USB memory through item ‘HDD Formatting’... -
Page 21: Language
Menu functions and settings: File opening: If the receiver detects files to be updated in the USB memory device, it displays them. Select the file to be updated using the arrow buttons and the OK button. If no file is detected, the message ‘No File’ is displayed on the screen. -
Page 22: Ethernet Setting
Contrast: Here you can set the Contrast Saturation: Here you can set the Saturation Exit the ‘A/V Setting’ menu pressing the EXIT button. Ethernet Setting Menu functions and settings: Tip: The items IP Address, Subnet Mask, Gateway, DNS Preferred and DNS Alternate are available only if item ‘DHCP’... -
Page 23: Time Settings
- Restarting... Auto update If you select this menu item, the receiver will try to connect with the factory-configured server of EDISION. Provided that the cables are properly setup and the values that correspond to your network in the ‘Network Settings’... -
Page 24: Timer
Timer In this menu you can schedule up to 8 time-controlled recordings (Timer). A lot more information is provided in EDIVISION paragraph. Menu functions and settings: Timer number: Upon opening the ‘Timer’ menu, you are automatically directed to the next (available) configurable timer. -
Page 25: Miscellaneous Settings
Note: You may occasionally receive an error message. This usually happens when you have selected the wrong start time or date. Check your settings! Note: Please note that the recording is performed successfully only when a suitable USB memory device is also connected with the receiver at the scheduled time. -
Page 26: Information
Information Here you are provided with information about the device. This information can be useful when you need to contact the Technical Department of EDIVISION or the point of sale. You are also informed of the receiver’s software version. You can exit the ‘Information’ menu, pressing the EXIT button. -
Page 27: Version Of 26 April
►Media ► Recording ► Movie ► Music ► Image ► File List / Software ► PVR Setting ► Disk Management ► Remove USB Device Safely! Recording Tip: This menu is only available if you have connected a suitable USB memory unit, which is recognised by the receiver. - Page 28 Menu functions and settings: Use the up/down arrow buttons and the OK button to navigate through the folder structure. If images or MP3 files have been detected, you can view them or listen to them by pressing the OK button. If the folder contains more image files, pressing the OK button will initiate their presentation in slide show mode.
- Page 29 Use the red button to rename the recording. In the displayed input field, select characters and letters using the arrow buttons and the OK button. You can delete the last character (of your entry), by moving the cursor inside the letter field, to the ‘<-’ symbol. You can add a space using the arrow buttons to move to the ‘--’ symbol.
-
Page 30: Pvr Setting
PVR Setting Note: This menu item is available provided that you have connected a USB memory device with a recording speed exceeding 25M Bit/minute, which is recognised by the receiver. In addition, this menu item is locked if one or more recordings are taking place. Menu functions and settings: Time Shift: Here you can enable/disable the Time Shift function. -
Page 31: Applications
►Applications ► YouTube ► RSS Reader ► Weather forecast ► Google Maps ► Ftp ► Web TV ► DLNA ► Big2Small ► Web Server ►Games ► Tetris ► Snake ► Othello ►Edivision ► Edivision Electronic program schedule (see pages 10-11) ►... - Page 32 w w w. e d i s i o n . g r DC 12V/1,5 A LNB IN 13/18V S/PDIF HDMI ETHERNET SCART 400mA MAX 4 0 0 m A M A X S / P D I F H D M I E T H E R N E T S C A R T L N B I N 1 3 / 1 8 V...
Need help?
Do you have a question about the Piccollino and is the answer not in the manual?
Questions and answers