
Related Manuals for Garrett Atx


Summary of Contents for Garrett Atx
- Page 1 Highly Refined Pulse Induction Technology 1881 W. State Street Texas 75042 Garland 1.972.494.6151 sales@garrett.com Email 1.972.494.1881 Owner’s Manual © 2013 Garrett Electronics, Inc. PN 1534000.A1.1013...
-
Page 2: Table Of Contents
SEARCHCOIL BASICS ....................21 PINPOINTING TECHNIQUES..................22 BENCH TESTING......................24 In order to take full advantage of the special features and functions of the ATX, TIPS AND TECHNIQUES....................26 you are urged to carefully read this instruction manual in its entirety. WATER USE........................28 SEARCHCOIL REMOVAL/INSTALLATION..............30... -
Page 3: Controls/Quick Start Guide
Factory Reset Sensitivity ( +, - ) حساسیت Garrett recommends that all new ATX owners completely read and understand the entire یا تنظیمات ثانویه دکمه های قرمز manual before using this detector� This section is only intended as a reminder�... -
Page 4: Atx Components
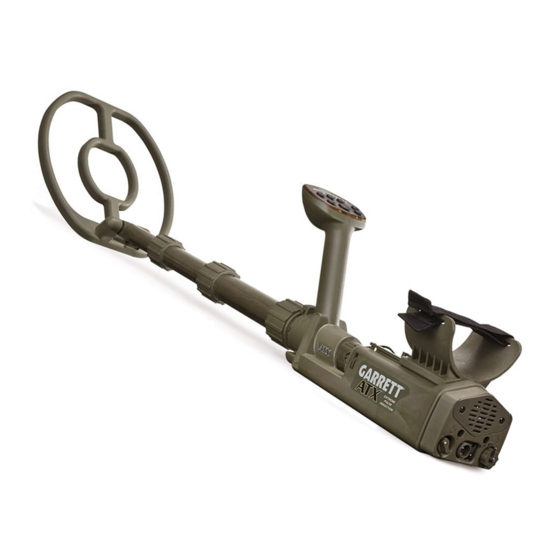
ATX COMPONENTS LIST OF PARTS No tools are required to assemble the ATX� Eight (8) AA batteries are includ- ed with the detector� The box for your detector contains the following parts: Detector with alkaline batteries Battery charger kit with eight... -
Page 5: Equipment Setup
The ATX can be operated with the stems fully collapsed (preferred for shallow diving), fully extended, or anywhere in between� To extend the tele- scopic stem to the desired operating length, begin by loosening the bottom stem nut closest to the search coil�... - Page 6 روشن کردن / بررسی باطری چراغهای هشداردهنده شنیداری این دستگاه نسبت به هدفهای کوچک و بزرگ واکنشهای صدایی قوی و ضعیف از و شکل و عمق هدف را بهتر شناسایی خود نشان میدهد.که با آن میتوانید اندازه .کنید .در حالت حرکتی : لوپ شما باید در حال حرکت باشد تا واکنش نشان دهد فلزات...
- Page 7 تفکیک به شما در حذف در زمینهایی که مواد معدنی بسیار زیاد دارد حالت حرکتی میتوانید این دست قادر است انواع و اندازه های هدفهای خاصی را که هنوز در حال ردیابی هدفهای . لهای اضافی زمین کمک کند سیگنا سطوح...
-
Page 8: Volume
حساسیت THERSHOLD حد آستانه شنیداری در این حالت شما میتوانید هم عمق بیشتر و هم هدفهای کوچکتری را ردیابی نمایید.اما مراقب باشید که با افزایش دادن حساسیت وسیله خود را در معرض شوکهای الکتریکی قرار سطح تنظیم حد آستانه داریم. که سطح شماره صدای... -
Page 9: Ground Track
As Volume levels are adjusted, the new level will Change Volume by دکمه شیفت را فشار دهید و be temporarily pressing the SHIFT indicated on .را نگه دارید دکمه then the (+) and button these LEDs. ( - ) VOL buttons. Ground Track ردیابی... -
Page 10: Retune
Retune تنظیم دوباره .با فشار دادن یکبار این دکمه شما تنظیمات خود را به حالت اولیه بازگردانید برای بازگشت به حالت اولیه یک بار Press and release the FREQ این دکمه را فشار دهید SCAN while holding searchcoil stationary away from any metal. برای... -
Page 11: Searchcoil Basics
سانتی متر دستگاه را بسمت راست و چپ حرکت دهید شما میتوانید در یک ثانیه سانتی .به سمت جلو حرکت کنید به اندازه نصف طول لوپ شما که برابر است .متر ATX FACTORY/DEFAULT SETTINGS ft (60 cm)/second Motion Mode Zero discrimination... -
Page 12: Pinpointing Techniques
PINPOINTING TECHNIQUES Three red LEDs to the far right indicates maximum target signal strength. Accurate pinpointing of a target enables you to recover it quickly while also digging the smallest hole possible� Several pinpointing techniques will be offered below; use what works best for you� Press and hold the To utilize the Pinpoint button: PINPOINT button to... -
Page 13: Bench Testing
Motion Mode, and more frequent Retunes however may be required� For bench testing, take the ATX outdoors, away from electrical interference and large metallic � Extend the first stem and lay the coil back as shown above�... -
Page 14: Tips And Techniques
• Mind your metal: The ATX is very sensitive, so be mindful not to let the other metals you carry come too close to the coil (e�g� a pick or shovel, steel- toed boots, etc�)�... -
Page 15: Water Use
ATX Therefore has an alternative method to address saltwater� Specifically, the ATX can برای کردن به شما توصیه نمیشود چون امکان دارد به دستگاه آسیب برسد و این شامل automatically ground balance out the saltwater response without the need گارانتی... -
Page 16: Searchcoil Removal/Installation
Figure 8). Figure 1 Figure 2 Figure 3 It is also possible to replace the ATX searchcoil without fully remov- Note ing the armrest or one of the battery covers� At Step 2 from above, simply � Disengage the stem rotation lock (see Figure 4) and, while continuing to disengage the armrest lock and slide the armrest forward without removing hold the lock open, rotate the stem 180°... -
Page 17: Battery Replacement And Charging
(see Figure 3)� Replace the battery cover and rotate a quarter-turn clockwise to lock into place� Repeat this process for the bat- teries on the opposite side of the detector� If the ATX will be submerged, be... -
Page 18: Storing Atx In Soft Case
Flashing Green LED indicates the battery is under- going a discharge cycle� Figure 3: ATX with DD coil attached + Deepseeker coil + headphones + 8" mono coil. close velcro flap to secure Deepseeker coil. Note... -
Page 19: Care And Maintenance
• When storing for longer than one month, remove detector's batteries. Figure 6: ATX with Deepseeker coil attached + DD coil + 8" mono coil + headphones. • Install protective cover on the connector when not using headphones. -
Page 20: Troubleshooting Guide
METAL DETECTING CODE OF ETHICS TROUBLESHOOTING GUIDE The following is a Code of Ethics that many treasure hunt clubs endorse SYMPTOM SOLUTION and hobbyists follow to preserve our exciting hobby of metal detecting� We Ensure batteries are installed in the correct polarity. encourage you to do the same: No power Replace all old batteries with all new batteries. -
Page 21: Cautions
Your ATX detector is warranted for 24 months, limited parts and labor, but does not cover damage caused by alteration, modification, neglect, precautions accident or misuse� Use of the ATX at submerged depths exceeding 10 feet • Never trespass or hunt on private property without permission�... -
Page 22: Accessories
LED light for low light uses� Includes woven belt holster and a 9-volt battery� To see Garrett's complete collection of metal detector accessories and gold please visit www.garrett.com and view products in the Hobby Division. pans...
Need help?
Do you have a question about the Atx and is the answer not in the manual?
Questions and answers