Table of Contents
Advertisement
Quick Links
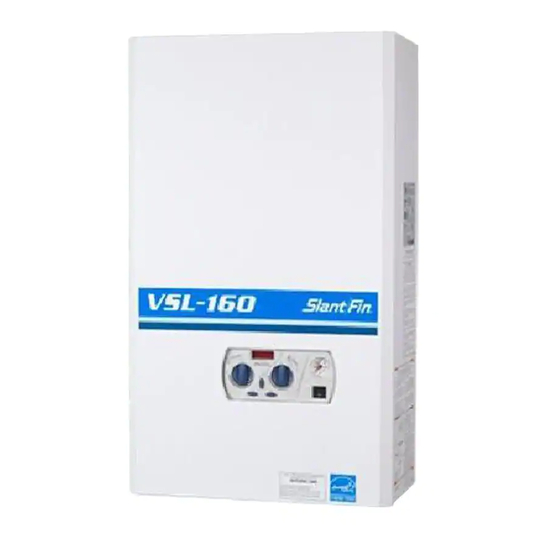
VSL Boiler
DIRECT-VENT SEALED COMBUSTION CONDENSING BOILER
HOT WATER MODEL VSL-160B & VSL-160C (COMBI BOILER)
GAS-FIRED BOILER FOR NATURAL AND L.P. PROPANE GASES
Heating Contractor
Address
Phone Number
Part # 819506000-R00 Printed in U.S.A. 513
INSTALLATION INSTRUCTIONS
This manual must be left with owner and should be
hung on or adjacent to the boiler for reference.
Boiler Model Number
Boiler Serial Number
Installation Date
®
LLC
®
C
US
PUBLICATION VSL-40 rev.B
Advertisement
Table of Contents

Related Manuals for Slant/Fin VSL-160B


Summary of Contents for Slant/Fin VSL-160B
-
Page 1: Installation Instructions
This manual must be left with owner and should be hung on or adjacent to the boiler for reference. VSL Boiler DIRECT-VENT SEALED COMBUSTION CONDENSING BOILER HOT WATER MODEL VSL-160B & VSL-160C (COMBI BOILER) GAS-FIRED BOILER FOR NATURAL AND L.P. PROPANE GASES INSTALLATION INSTRUCTIONS ®... -
Page 2: Safety Instructions
SAFETY INSTRUCTIONS WARNING: If the information in these AVERTISSMENT: Assurez vous de bien instructions is not followed exactly, a fi re suivre les instructions données dans or explosion may result causing property cette notice pour réduire au minimum damage, personal injury or death. le risque d’incendie ou d’explosion ou pour éviter tout dommage matériel, toute blessure ou la mort... - Page 3 SAFETY INSTRUCTIONS...
- Page 4 SAFETY INSTRUCTIONS Local approval: The local building WARNING!!! regulations stipulating the installation These rules at the time of installation. instructions must be read prior to installation. If the information in these instructions Installation location: The boiler is not followed exactly, a fi re or must be located in an area where explosion may result, causing leakage of the tank or connections...
- Page 5 SAFETY INSTRUCTIONS When servicing boiler, to avoid Ensure the boiler and its controls severe burns, allow boiler to cool are protected from dripping or before performing maintenance. spraying water during normal operation or service. Electrical: Label all wires prior ...
-
Page 6: Table Of Contents
TABLE OF CONTENTS SAFETY INSTRUCTIONS .........................2 TABLE OF CONTENTS ........................6 1 - INSTALLATION - CODE REQUIREMENTS .................8 1.1 - Regulations and guidelines ..........................8 1.2- Commonwealth of Massachusetts Installation Requirements ................8 2 - GENERAL INFORMATION ......................9 2.1 - Key to symbols used ............................9 2.2 - Description of model: ............................ - Page 7 TABLE OF CONTENTS 12 - START-UP ..........................62 12.1 - Operating ................................. 62 12.2 - General warnings concerning gas supply ......................64 12.3 - Confi rming the boiler’s gas type ........................64 12.4 - Gas type conversion ............................64 12.5 - Start-up of the boiler ............................64 12.6 - Ignition control testing ............................
-
Page 8: Installation - Code Requirements
1 - INSTALLATION - CODE REQUIREMENTS 1.1 - Regulations and installing plumber or gasfi tter shall (b) Exemptions observe that a hard wired carbon The following equipment is exempt from guidelines monoxide detector with an alarm and 248 CMR 5.08(2)(a) 1 through 4: battery back-up is installed on the fl... -
Page 9: General Information
2 - GENERAL INFORMATION 2.1 - Key to symbols used WARNING!!! Failure to follow these indications can causing an explosion, extensive property damage, severe personal injury or death! CAUTION!!! Failure to observe this indication may compromise the smooth running of the appliance or cause serious damage to individuals, animals or property. -
Page 10: Main Components
3 - MAIN COMPONENTS 1 - Automatic air vent 15 - Openterm interface board (optional) 2 - Air intake and fl ue gas discharge fi tting (venting system) 16 - Connection board 3 - U7 fl ue gas temp. sensor and fl ue safety switch 17 - Primary heat exchanger 4 - Expansion tank (not present on 160-B model) 18 - Spark cable... - Page 11 3 - MAIN COMPONENTS 37 - Cable clamp 22 - Combustion analysis tap 38 - ASME Safety relief valve 23 - U1 supply temperature sensor 39 - U8 return temperature sensor 24 - Burner window 40 - By-pass pipe (not present on 160-B model) 25 - Air/gas manifold 41 - Condensation discharge pipe 26 - U6 high temperature limit sensor...
-
Page 12: Function Overview
4 - FUNCTION OVERVIEW Key to fi gures 4-1 and 4-2: 1 = boiler 2 = automatic air vent 3 = air intake 4 = fl ue gases discharge 5 = sealed combustion chamber 6 = expansion tank 7 = burner 8 = fan 9 = gas valve 10 = condensate discharge trap... -
Page 13: Intended Use And Functions Of The Boiler
4 - FUNCTION OVERVIEW 4.1 - Intended use a heating system with heating elements 160-C and 160-B models can be functioning at temperatures ranging connected to a room thermostat, and functions of the between 68°F (20°C) and 176°F (80°C). Section 8.1.3. The boiler can also function directly with boiler a radiant fl... -
Page 14: Installation - Location
5 - INSTALLATION - Location 5.1 - Choosing the WARNING!!! WARNING!!! Do not install LIQUEFIED installation location the boiler in an attic. Failure PETROLEUM (L.P.) PROPANE to comply with this provision GAS-FIRED BOILER LOCATION could result in severe personal REQUIRES SPECIAL WARNING!!! injury, death, or substantial ATTENTION: 1994 UNIFORM... -
Page 15: Transporting The Boiler
5 - INSTALLATION - Location When locating the boiler the following - Ceiling: 2 inches (51 mm) 5.2 - Transporting factors must be considered: - Front: 2 inches (51 mm) the boiler - Rear: 0 inches (0 mm) the location of vent/air intake - Sides: 2 inches (51 mm) terminals;... -
Page 16: Installation - Mounting The Boiler
6 - INSTALLATION - Mounting the boiler 6.1 - Mounting the boiler Refer to Figure 6-1: 1. place the cardboard template, provided with the boiler, against the wall; 2. ensure that the template is plumb and the screw holes line up with the wall studs;... -
Page 17: Installation - Water Connection
7 - INSTALLATION - Water connection 7.1 - Water connections The boiler comes with the fi ttings shown in Figure 7-1. 7.2 - Supply and return piping CAUTION!!! All heating system piping must be installed in accordance with the ANSI/ASME Boiler and Pressure Vessel Code, Section IV. - Page 18 7 - INSTALLATION - Water connections tested at least once a year and as CAUTION!!! CAUTION!!! Risk of system If the boiler is recommended by the producer of the damage due to unsuitable installed in a low temperature glycol solution. Allowance should be heating system water.
-
Page 19: Relief Valve
7 - INSTALLATION - Water connections 4. Boiler isolation valves: Field 10. Indirect water heaters: fi eld WARNING!!! supplied. Full port ball valves are supplied. This boiler may be piped The National required. Failure to use full port ball to an indirect water heater to heat Standard Plumbing Code, valves could result in a restricted domestic hot water with the space... -
Page 20: Converting A Combi Boiler Into A Heating Only Boiler
7 - INSTALLATION - Water connections 7.2.3 - Expansion Tank To connect a system pump on the 7.3 - Converting a secondary looping see Figure 7-6 and and Makeup Water combi boiler into a electrically connect the pump follow Boiler model 160-C is factory Figure 8-2 heating only boiler equipped with its expansion tank with... -
Page 21: Domestic Hot And Cold Water (Only For 160-C Model)
7 - INSTALLATION - Water connections 7.4 - Domestic hot and cold water (only for 160-C model) 160-C boiler, offers resistance to the passage of domestic water (see graph fl ow/pressure of Figure 7-5). The installer or the engineer must take account of this in order to ensure the correct domestic water fl... - Page 22 7 - INSTALLATION - Water connections 1 = Boiler 12 = Gas shut-off valve (Install manual shut-off valve 5 ft 2 = Air separator (1.5m) above fl oor). 3 = Ball valve 13 = Ground joint union 4 = Drain cocks 14 = Condensate drain (see also Figure 7-8) 5 = Filling valve 16 = System pump...
- Page 23 7 - INSTALLATION - Water connections 1 = Boiler 9 = Heating pump 2 = Air separator 11 = Relief valve drain 3 = Ball valve 12 = Gas shut-off valve (Install manual shut-off valve 5 ft 4 = Drain cocks (1.5m) above fl...
-
Page 24: Condensate Disposal
7 - INSTALLATION - Water connections 7.5 - Condensate A condensate removal pump is be installed in such a way so as to required if the boiler is below the avoid the freezing of the liquid; disposal drain. When installing a condensate ... -
Page 25: Installation - Electrical Connections
8 - INSTALLATION - Electrical connections 8.1 - Electrical connections: overview WARNING!!! ELECTRICAL SHOCK HAZARD – For your safety, turn off electrical power supply before making any electrical connections to avoid possible electric shock hazard. Failure to do so can cause severe personal injury or death. WARNING!!! Label all wires prior to disconnection when servicing controls. -
Page 26: Connecting The Power Supply Cable
8 - INSTALLATION - Electrical connections Outdoor sensor (optional) Room thermostat Neutral 120Vac hot central heating System pump (see piping diagram of 120Vac LINE (HOT) Figure7-6) NEUTRAL GROUND Figure 8-2 Electrical connections for 160-C model (Refere to Figure 7-6) 8.1.2 - Wiring the heating 1. -
Page 27: Thermostat Wiring
8 - INSTALLATION - Electrical connections NOTICE! the maximum room thermostat 2. use a two conductor cable with a CAUTION!!! If the pump is larger cable length permitted is 32 ft (10 m). minimum cross section of # 18 AWG than 1 hp or 1 amps, you must For longer lengths, up to 300ft (100 m) a between the boiler and the outdoor... -
Page 28: Installation - Connecting To An Indirect Water Heater
9 - INSTALLATION - Connecting to an indirect water heater 9.1 - Connecting 5. move switch #1, item “D” to its “ON” WARNING!!! position as marked on the control Since the the boiler to an board; indirect water heater temperature 6. -
Page 29: Opening The Instrument Panel
9 - INSTALLATION - Connecting to an indirect water heater 9.1.1 Indirect water Priority selection is a functionality 9.2 - Opening the that toggles between CH and DHW heater priority selection instrument panel demand when they are both active at The boiler is factory set for DHW the same time. -
Page 30: Installation - Vent And Combustion Air
10 - INSTALLATION - Vent and combustion air 10.1 - Removing (d) Place in operation the appliance (c) Dans la mesure du possible, being inspected. Follow the lighting fermer toutes les portes et les of a boiler from a instructions. Adjust thermostat so fenêtres du bâtiment et toutes appliance will operate continuously. -
Page 31: Prevent Combustion Air Contamination
10 - INSTALLATION - Vent and combustion air 10.2 - Prevent 10.3 - Venting and venting. You must install air piping from combustion air air piping systems outside to the boiler air intake. The resultant installation is Direct Vent contamination (sealed combustion). - Page 32 10 - INSTALLATION - Vent and combustion air Figure 10-1 Side wall two Figure 10-2 Vertical two pipes Figure 10-3 Side wall air pipes (Direct venting). (Direct Venting). intake, vertical vent (Direct venting). Figure 10-6 Side wall one pipe venting, combustion air from room (not Direct Figure 10-5 Side wall Figure 10-4 Vertical...
-
Page 33: Minimum / Maximum Allowable Combustion Air And Vent Piping Lengths
10 - INSTALLATION - Vent and combustion air 10.4 - Minimum / 10.5 - Install vent WARNING!!! Never use Maximum allowable and combustion air cellular (foam) core pipe in vent pipe line and fi ttings. combustion air and piping Failure to comply could result vent piping lengths in severe personal injury, death, or substantial property... - Page 34 10 - INSTALLATION - Vent and combustion air Vent pipe materials and fi ttings must comply with the following standards Standard for installation Standard for installation in USA in CANADA PVC schedule 40, 80 ANSI/ASTM D1785 CPVC schedule 40/80 ANSI/ASTM F441 Vent pipe and fi...
-
Page 35: Air Inlet Pipe Materials
10 - INSTALLATION - Vent and combustion air 10.6 - Air inlet pipe 10.6.1 - Sealing of Type 10.6.2 - Sealing of PVC, “B” double-wall vent CPVC or ABS air inlet materials: material or galvanized pipe The PVC, CPVC, or ABS air inlet pipe vent pipe WARNING!!! should be cleaned and sealed with the... -
Page 36: Pvc/Cpvc Vent Piping Materials
10 - INSTALLATION - Vent and combustion air 10.7 - PVC/CPVC fl ue collar connection, supplied by the to the fi tting socket. vent manufacturer to adapt to its vent c. Apply a liberal even coat of primer vent piping system. - Page 37 10 - INSTALLATION - Vent and combustion air 2. insert the clamp “D” into convertor Tight the clamps with a tork of 1.5 - 2 the adapter “E”. To do this tighten “A” in the “C” side. lbf ft (2-3 Nm). the half clamp on the pipe and half 3.
-
Page 38: Stainless Steel Vent Piping Materials
10 - INSTALLATION - Vent and combustion air 10.8 - Stainless WARNING!!! This steel vent piping appliance requires a special venting system. The fi eld materials provided vent fi ttings must be connected to the boiler WARNING!!! following Section 10.8.1. Use only the Failure to follow this warning materials, vent systems, and... - Page 39 10 - INSTALLATION - Vent and combustion air 10.8.1 - Stainless steel air Vent connection (Figure 10-9 item “A”) is used to provide intake/vent connections a passageway for conveying combustion gases to the outside. Vent Combustion Air Intake piping must be supported per the connection (see Figure 10-9 National Building Code, Section 305, Item “C”).
-
Page 40: Polypropylene Vent Piping Materials
10 - INSTALLATION - Vent and combustion air 10.9 - Polypropylene WARNING!!! Use only vent piping materials water-based lubricants on joints. Never use hydrocarbons-based WARNING!!! lubricants because they would destroy gaskets. Failure to Use only follow this warning could result the materials listed in Tables in excessive levels of carbon 10-1 and 10-2 for vent pipe,... - Page 41 10 - INSTALLATION - Vent and combustion air 10.9.1 - Polypropylene systems. Figure 10-10 shows fi tting into hole “M” of boiler adapter “A” “A” that can freely turn 360 degrees 3. Insert vent pipe “N” into boiler two pipes air intake/vent for optimum installation versatility (see adapter “A”...
- Page 42 10 - INSTALLATION - Vent and combustion air 10.9.2 - Polypropylene two pipes system components Some of the most commonly used components for installing the two pipes polypropylene vent and combustion air systems are listed below: P/N 81 9001 000 - Two pipes adaptor 80/80 PP P/N 81 9171 000 - 3ft PP M/F extension P/N 81 9772 000 - 60 ft PP fl...
- Page 43 10 - INSTALLATION - Vent and combustion air 10.9.3 - Polypropylene concentric system The boiler is not supplied with the fi ttings needed for connecting a coaxial vent/combustion air system. A special kit must be ordered to connect the boiler with the Coaxial polypropylene vent.
- Page 44 10 - INSTALLATION - Vent and combustion air 10.9.4 - Polypropylene concentric system components The following coaxial polypropylene vent and combustion air system components are available, on request, for installing the Coaxial system P/N 81 9183 000 - In line 90° PP coaxial M/F elbow P/N 81 9176 000 - In line 45°...
-
Page 45: Single Pipe Vent (Not Sealed Combustion)
10 - INSTALLATION - Vent and combustion air 10.10 - Single pipe 10.10.1 - Combustion Air WARNING!!! and Ventilation openings Fire danger vent (not sealed due to fl ammable materials or liquids. Do not store fl ammable combustion) WARNING!!! materials and liquids in the Make sure that immediate vicinity of the boiler. -
Page 46: Determine Location
10 - INSTALLATION - Vent and combustion air 10.10.2 - Determine e. Do not locate the terminations 5. Maintain clearances as shown in where wind eddies could affect Figure 10-11 (get references to location performance or cause recirculation, “Mechanical draft vent terminal” Locate the vent termination using the such as inside building corners, only). -
Page 47: Sidewall Termination - Two Pipes
10 - INSTALLATION - Vent and combustion air 10.11 - Sidewall 10.11.2 - Determine location termination - Two Locate the vent/air terminations using pipes the following guidelines: 1. The total length of piping for vent or air must not exceed the limits given 10.11.1 - Vent/air in the Section 10.4. - Page 48 10 - INSTALLATION - Vent and combustion air 3. The air piping must terminate in a down-turned elbow as shown in Figures 10-17 and 10-18. This arrangement avoids recirculation of fl ue products into the combustion air stream. 4. The vent piping must terminate in an elbow pointed outward or away from the air inlet, as shown in Figures 10-17 and 10-18.
-
Page 49: Prepare Wall Penetrations
10 - INSTALLATION - Vent and combustion air 10.11.3 - Prepare wall penetrations 1. Air pipe penetration: a. Cut a hole for the air pipe. Size the air pipe hole as close as desired to the air pipe outside diameter. 2. -
Page 50: Sidewall Termination - Concentric Vent
10 - INSTALLATION - Vent and combustion air 10.12 - Sidewall termination – Concentric vent 10.12.1 - Description and usage The termination kit must terminate outside the structure and must be installed as shown in Figure 10-21. The required concentric termination kit as well as combustion air and vent pipe materials are listed in Tables 10-1 and 10-2. -
Page 51: Multiventing Sidewall Terminations
10 - INSTALLATION - Vent and combustion air 10.12.3 - Multiventing CAUTION!!! sidewall terminations DO NOT use fi eld- supplied couplings to extend When two or more direct vent pipes. Airfl ow restriction appliances are vented near each will occur and may cause other, each appliance must be intermittent operation. -
Page 52: Vertical Termination - Two Pipes
10 - INSTALLATION - Vent and combustion air 10.13 - Vertical 10.13.1 - Determine 10.13.2 - Prepare roof location penetrations termination - Two Locate the vent/air terminations using 1. Air pipe penetration: cut a hole for pipes the following guidelines: the air pipe. - Page 53 10 - INSTALLATION - Vent and combustion air 10.13.4 - Multiple vent/air terminations 1. When terminating multiple boilers, Air intake Air intake Vent terminate each vent/air connection Vent as shown in Figures 10-24 and 10- vertically from vent outlet to WARNING!!! any air inlet Terminate all...
-
Page 54: Vertical Termination - Concentric Vent
10 - INSTALLATION - Vent and combustion air 10.14 - Vertical 10.14.3 - Vertical 4. Cut one (1) hole 6 inch diameter into the structure to install the termination installation termination – termination kit. 5. Install the Concentric vent kit Concentric vent 1. -
Page 55: Multiventing Vertical Terminations
10 - INSTALLATION - Vent and combustion air 10.14.4 - Multiventing vertical terminations When two (2) or more direct vent appliances are vented near each other, each appliance must be individually vented (see Figure 10-27). WARNING!!! NEVER common vent or breach vent this appliance to avoid possibility of severe personal injury, death, or substantial... -
Page 56: Alternate Vertical Concentric Venting
10 - INSTALLATION - Vent and combustion air Flue exhaust 10.14.5 - Alternate vertical Seal concentric venting Combustion This appliance may be installed with a concentric air intake vent arrangement where the vent pipe is routed through an existing unused venting system; or by using the existing unused venting system as a Combustion chase for vent and combustion air routing. -
Page 57: Existing Vent As A Chase
10 - INSTALLATION - Vent and combustion air 10.15 - Existing vent as a chase Follow all existing termination and clearance requirements of section 10- The maximum allowable equivalent vent and air intake lengths for this venting arrangement are to be determined from Section 10-4. -
Page 58: Installation - Gas Supply
11 - INSTALLATION - Gas supply 11.1 - Gas supply supply piping system during any pressure testing of that system at piping a test pressure in excess of 1/2 PSIG (3.5 kPa). b. The appliance must be isolated WARNING!!! from the gas supply piping Check that system by closing a manual the type and the pressure of the... -
Page 59: Pipe Sizing For Natural Gas
11 - INSTALLATION - Gas supply 11.2 - Pipe sizing for 11.4 - Check inlet 11.5 - Operating at natural gas gas supply high altitudes Refer to Tables 11-1 and 11-2 for pipe length and diameter. Based on rated For installations in the United States, WARNING!!! boiler input (divide by 1,000 to obtain the boiler is rated for operation at... -
Page 60: Convert The Boiler From Natural Gas To Propane Gas Or Viceversa
11 - INSTALLATION - Gas supply 11.6 - Convert the - an instruction sheet; stamping on the orifi ce matches the - an orifi ce; gas type (See Table 11-3). boiler from Natural Installing: 11 - turn on power to the boiler; Gas to Propane gas in order to make the gas change or viceversa... - Page 61 11 - INSTALLATION - Gas supply WARNING!!! If the combustion levels are not within the range given in Table 11-3 for the fi ring rate, shut the boiler down and contact your distributor or the boiler manufacturer (see reference in the last cover page).
-
Page 62: Start-Up
12 - START-UP 12.1 - Operating 3. With a rubber tube and a funnel, Make sure that the user slowly pour approximately 4 oz. understands never to tamper Before starting the boiler, the following (100 ml), of water into the “B” with gas control settings and the must be done. - Page 63 12 - START-UP 12.1.5 – Auto-purging the CAUTION!!! The addition of any heating system chemical substances, such as Each time the on/off power switch, anti-freeze, must be carried item “12” in Figure 13-1, is switched out according to the product on, an auto-purging cycle lasting 3 instructions.
-
Page 64: General Warnings Concerning Gas Supply
12 - START-UP 12.2 - General LP Gas 7. If the pump indicator is illuminated but the heating system does not Maximum supply pressure = 13 warnings heat up, repeat the air purging in.W.C. (33.0 mbar). operations on both the boiler and Minimum supply pressure = 3 in.W.C. -
Page 65: Gas Supply Pressure Checking
12 - START-UP 12.7 - Gas supply upstream gas pressure regulator to bring the gas supply pressure within pressure checking the above values. WARNING!!! WARNING!!! DO NOT DO NOT adjust the screws “E” and/or adjust or attempt to measure “F” (Figure 12-3). These screws gas valve outlet pressure. -
Page 66: Check The Combustion Air Pressure
12 - START-UP 12.8 - Check the combustion air pressure The boiler has a factory-set air/gas ratio. The pressure of the gas at the burner is indirectly controlled by the blower. The combustion air pressure must be checked as follows while refering to Figures 12-4 and 12-5: 1. -
Page 67: Checking And Adjusting Co2 Levels
12 - START-UP 12.9 - Checking and making sure to use the range for the gas type in use. If the CO2 reading adjusting CO2 levels is outside the specifi ed range, it must be adjusted operating on the Table 11-3 lists the correct CO2 ranges “E”... -
Page 68: Adjusting The Heating Capacity
12 - START-UP 12.10 - Adjusting 12.11 - Domestic the heating hot water fl ow rate capacity adjustment (160-C This boiler has been engineered model only) with an “intelligent” micro-processor The volume of domestic hot water control that will adjust the heating that the boiler can produce, depends output to match the system demand. -
Page 69: Use
13 - USE 1 - Display of the parameters 2 - Display of the paramenters value. 3 - Light indicates the burner state: Light-on = Burner ON; Blinking = Burner OFF. 4 - Light indicating DHW service: Light-on = DHW service ON; Light-off = DHW service OFF. 5 - Light indicates the decimal. -
Page 70: Start-Up Procedure
13 - USE 13.4 - Start-up 13.5 - Summer procedure mode 1. Open the manual shutoff gas valve; To disable the heating functions for 2. switch on electric power to the a prolonged period, leaving only boiler; the domestic hot water function, 3. -
Page 71: Adjusting The Domestic Hot Water Temperature
13 - USE 13.7 - Adjusting the 13.9 - Heating on and off. B - Iarge systems, with radiators, where domestic hot water system type each zone is controlled by its own room thermostat. Where zone valves temperature selection are used the boiler pump is shutdown only when all the room thermostats The domestic hot water temperature The boiler is factory set for wall stat... -
Page 72: Outdoor Reset Activation
13 - USE 13.10.3 - Outdoor reset: 13.10.4 - Outdoor reset: setting parameters zone adjustments Refer to Section 13.16 and set: The default values previously suggested are for boilers using an outdoor temperature sensor installed = “The angle of the curve”, in dwellings with average heat loss in which can be adjusted between areas where the design outside winter... - Page 73 13 - USE 13.10.6 – Outdoor reset with room compensation While in the “Installers’ Menu” (section 13.17) set the parameter to 02. The system will function exactly as described in the previous “Outdoor reset adjustment” sections except that now the boiler pump will stay on permanently.
-
Page 74: Boiler Switch Settings
13 - USE 13.11 - Boiler CAUTION!!! Improper setting switch settings of these switches could cause the boiler to malfunction resulting in The control board shown in Figure improper system performance. 3-1, item “14”, contains a series of Only a qualifi ed technician, with an switches that allow the boiler to be in-depth knowledge of the boilers’... -
Page 75: Display In Energy Saving Mode
13 - USE 13.15 - Display 13.16 - “Users’ 4. press to save the parameter in energy saving menu” change before going to the next parameter. When entering the “Users’ menu”, the mode display, item “1” in Figure 13-1, will When the last parameter has been If desired, the display, item “1”... -
Page 76: Installer's Menu
13 - USE 13.17 - “Installer’s NOTE: If no key is pressed for 1. press and hold the button more than 60 seconds, the control menu” down for 12 seconds until the automatically exits the “Installers’ menu”. Any parameter change not parameter is displayed;... - Page 77 13 - USE Continued PARAMETER DESCRIPTION INFORMATION ON DISPLAY ITEM “2” OF FIGURE 13-1 Can be changed (see Section 13.9): 00 = thermostatic adjustment; Heating service functioning mode 01 = outdoor reset; 02 = outdoor reset with room compensation; Reaction to external temperature Keep always at value of 1 Can be changed from 16°F (-9°C) to 149°F (65°C) (active only with Angle fulcrum of climatic adjustment...
-
Page 78: Diagnostics
13 - USE 13.18 - Diagnostics During the normal operation of the boiler, the display, of Figure 13-1, continually shows the operating status of the boiler as shown below (see also section 17): PARAMETER PARAMETER REFERENCE DISPLAY READ OUT (ITEM “2”, FIGURE 13-1) Boiler in stand-by mode or pause (no request for heating or Boiler temperature (°F) domestic hot water) - Page 79 13 - USE 13.18.1 - Diagnostics: “L” lock-outs Lock-out “L” Checks to make Solutions description Code Check: a-If the gas supply pressure is incorrect, it must be adjusted to No fl ame detected after a-correct gas supply pressure (see the correct pressure; three ignition attempts.
- Page 80 13 - USE 13.18.1 - Diagnostics: “L” lock-outs (continued) Lock-out “L” Solutions Controls description Code Program error Replace the power control board Flame sensed for 10 Call technical service seconds, after the closure of the gas valve Flame sensed before Call technical service opening of the gas valve.
- Page 81 13 - USE 13.18.2 - Diagnostics: “E” blocking errors Blocking “E” Checks to make Solutions description Code If the sensor resistance does not correspond, it must be U1 boiler temperature Check that the electrical resistance of replaced; sensor circuit interrupted. the sensor corresponds with the graph in if the electrical circuit is damaged, it must be repaired;...
- Page 82 13 - USE 13.18.2 - Diagnostics: “E” blocking errors (continued) Blocking “E” Checks to make Solutions description Code If the sensor resistance does not correspond, it must be U8 return temperature Check that the electrical resistance of replaced; sensor short-circuited the sensor corresponds with the graph in if the electrical circuit is damaged, it must be repaired;...
-
Page 83: Maintenance
14 - MAINTENANCE 14.1 - Care and A trained and qualifi ed service technician WARNING!!! should perform the inspection listed in these Never store maintenance instructions before each heating season and combustible materials, gasoline or at regular intervals. This section must be brought to the attention any product containing fl... -
Page 84: Check Wiring And Connections
14 - MAINTENANCE 3. Check for gas leaks: using soap 14.1.6 - Check ignition and WARNING!!! solution, check for gas leaks from fl ame sense electrodes Never meter to boiler including all pipes and obstruct the fl ow of combustion 1. -
Page 85: Check Condensate Drain System
14 - MAINTENANCE plumbing contractor or authorized 2. Air contaminants -- Products 14.1.16 - Check inspection agency, to ensure that containing chlorine or fl uorine, condensate drain system the product has not been affected if allowed to contaminate the by corrosive water conditions and to 1. -
Page 86: Removing The Casing
14 - MAINTENANCE 14.2 - Removing the casing In order to remove the casing, follow the steps below while refering to Figure 14-1: 1. remove screws “A”; 2. raise latch “C”; 3. remove the front cover; 4. press the two plastic springs, item “L”, down;... -
Page 87: Cleaning The Burner And Primary Heat Exchanger, Fl Ue Gas Side
14 - MAINTENANCE 14.3 - Cleaning the 6. prepare a suitable cover for the 11. using only water, wash the inside gas valve outlet under nut “D” so of the combustion chamber, detail burner and primary that no dirt, water, or other foreign “H”... -
Page 88: Correct Positioning Of The Ignition And Fl Ame Detection Electrodes
14 - MAINTENANCE 14.4 - Correct positioning of the ignition and fl ame detection electrodes For the boiler to work properly the electrodes must be positioned as shown in Figure 14-3: the distance between the ignition electrodes “A” and “B”, must be between 0.08 in (2 mm), and 0.10 in (2.5 mm);... -
Page 89: Condensate Trap Cleaning
14 - MAINTENANCE 14.6 - Condensate WARNING!!! 2. press the keys Before trap cleaning together for more than 10 seconds, proceeding to the next step, The condensate trap must be checked verify that the electrical supply until a blinking is displayed; every year and cleaned if required. -
Page 90: Circulator Pump Motor Replacement (Only For 160-C Model)
14 - MAINTENANCE 14.7 - Circulator pump motor replacement (only for 160-C model) To replace the circulator pump follow the steps below while, refering to Figure 14-5: 1. follow the steps in Section 14.10 to isolate and drain the water from the boiler;... -
Page 91: 3-Way Valve Removal (Only For 160-C Model)
14 - MAINTENANCE 14.9 - 3-way valve removal (only for 160-C model) The 3-way valve, details “M” and “Q” in Figures 14-6 and 14-7, directs hot water produced by the primary heat exchanger to the heating circuit or to the secondary heat exchanger for the production of D.H.W. -
Page 92: Draining The Heating Side Of The Boiler
14 - MAINTENANCE 14.10 - Draining the 14.11 - Draining the - for domestic hot water turn knob “11” in Figure 13-1 to its heating side of the domestic hot water maximum and fully open a hot water faucet; boiler side of the boiler 2. -
Page 93: Water And Fl Ue Temperature Sensor
14 - MAINTENANCE 14.13 - Water and fl ue temperature sensor The boiler has a number of sensors that measure temperature. The electrical resistance between the sensor wires must correspond with the values shown in Figure 14-8. The temperature sensors are: U1; U2, U3, U5, U6, U7 and U8. -
Page 94: Functional Wiring Diagram
14 - MAINTENANCE 14.15 - Functional wiring diagram WARNING!!! Label all wires prior to disconnection when servicing controls. Wiring errors can cause improper and dangerous operation! Verify proper operation after servicing Failure to comply with this warning can cause extensive property damage, severe personal WARNING!!! injury or death! - Page 95 14 - MAINTENANCE...
-
Page 96: Multiwire Wiring Diagram
14 - MAINTENANCE 14.16 - Multiwire LEGEND: wiring diagram ALA - Alarm output CM - Power control board CR - Remote command (only for outdoor models) WARNING!!! EA - Ignition electrode ER - Flame detection electrode Label all EPO - External pump (REQUIRED FOR 160-B model) wires prior to disconnection EV3V - External three way valve (optional) when servicing controls. - Page 97 14 - MAINTENANCE...
-
Page 98: Technical Data
15 - TECHNICAL DATA MODEL VSL-160-B; VSL-160-C; Country of destination USA and Canada Type of boiler Direct Vent and room combustion air Category of discharge chimney CSA certifi cate N° 2045300 (114696) Maximum Heat input Btu/hr 160,000 Minimum heat input Btu/hr 30,000 Effi... -
Page 99: Spare Parts
16 - SPARE PARTS... - Page 100 16 - SPARE PARTS...
- Page 101 16 - SPARE PARTS...
-
Page 102: Spare Parts List
16 - SPARE PARTS Bottom side of the 160-B model 18 - 81 9027 000 - O-RING 134 EPDM 3,53 X 25,8 Spare parts list 19 - 81 9028 000 - SCREW SELFTAPPING 3.9 X 9.5 CROSS HEAD 20 - 81 9029 000 - SIPHON 1 - 81 9010 000 - CABLE UL IGNITOR CONN 90°... - Page 103 16 - SPARE PARTS 38 - 81 9047 000 - 3/8G MALE to 1/8NPT FEMALE BUSHING 114 - 81 9123 000 - UPPER PISTON 39 - 81 9048 000 - GASKET EPDM D38 F20 SP6 115 - 81 9124 000 - HYDRONIC SUPPLY GROUP. 40 - 81 9049 000 - 45xx WALL MOUNTING BRACKET 116 - 81 9125 000 - HEATING PRESSURE SWITCH 41 - 81 9050 000 - SCREW SELFTAPPING 5X50 WOOD...
-
Page 104: Read Out Flow Chart
17 - READ OUT FLOW CHART... - Page 105 17 - READ OUT FLOW CHART...
- Page 106 17 - READ OUT FLOW CHART The boiler’s micro-processor makes Now “ty” is displayed. Use plus and CAUTION!!! Changing these this menu of parameters available to minus keys to change the value; use parameters could cause the the qualifi ed technician for the setting RESET key to save the value and boiler and therefore the system to of the appliance .
- Page 107 NOTE...
- Page 108 ©Slant/Fin Corp. 2013 SLANT/FIN CORPORATION, Greenvale, N.Y. 11548 • Phone: (516) 484-2600 FAX: (516) 484-5921 • Canada: Slant/Fin , Mississauga, Ontario LTD/LTEE www.slantfin.com...
Need help?
Do you have a question about the VSL-160B and is the answer not in the manual?
Questions and answers