Table of Contents
Advertisement
Quick Links
Advertisement
Table of Contents

Subscribe to Our Youtube Channel
Related Manuals for Edison Proton


Summary of Contents for Edison Proton
- Page 1 Full HD Sat Receiver FTA User’s Guide proton p r o t o n...
-
Page 2: Table Of Contents
Contents ►Important safety instructions .........................4 ►Remote control ..............................6 ►Description ..............................7 During the initial start, please select your language..................8 ►Features ................................8 ►Information bar/InfoBar ..........................9 How to change the time for fading in the information bar: ................9 Functions and settings: ..........................9 ►EDIVISION - Your electronic program guide ....................10 Functions and settings: ..........................10 ►Program list ..............................13... - Page 3 ►Menu/media/disk manager ..........................30 ►Menu/conditional/software update ......................31 Http upgrade ...............................31 Update of USB/HDD ...........................31 Backup on USB/HDD ..........................32 Version of 14 June 2016...
-
Page 4: Important Safety Instructions
► Important safety instructions Read these instructions. Keep these instructions in a safe place. Follow all warnings. Follow all instructions. Do not use the device near water. Only clean with a dry cloth only. Do not use near heat sources, such as radiators, heat accumulators, ovens or other devices (including amplifiers) generating heat. - Page 5 CAUTION RISK OF ELECTRIC SHOCK DO NOT OPEN ATTENTION RISQUE DE CHOC ELECTRIQUE NE PAS OUVRIR This symbol indicates that there is risk of electric shock. This symbol indicates that the operating instructions contain important operating and maintenance instructions. This symbol indicates that there is a double insulation between voltage and user accessible parts between the product.
-
Page 6: Remote Control
► Remote control On/off button. Mute On/Off. Changes the screen TV standard. Safe removal of USB Displays the satellite lists. Displays the favourite lists. To search for programs in lists. Displays a file list. Scrolls through the lists Channel list forward (+) or backward (-). -
Page 7: Description
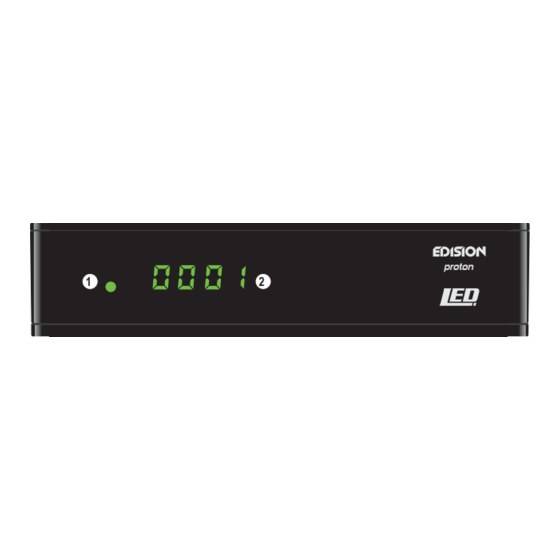
► Description Front Panel Infrared sensor for the reception proton of remote control commands Display LED, displays current information Back Panel LNB IN: Connection for the coaxial cable to the signal from the satellite system S/PDIF: Audio interface for amplifier/audio console... -
Page 8: During The Initial Start, Please Select Your Language
• Teletext • Last channel auto-save • Software Upgrade & Backup channel list, via USB • Supports FAT 16/32, NTFS proton • Parental Lock • Eco-mode standby 0,8 Watt • 100 ~ 240V Voltage, 50Hz/60Hz • Media player MP3/JPEG/BMP/AVI/DivX/ VOB/MKV •... -
Page 9: Information Bar/Infobar
►Information bar/InfoBar When in the TV/Radio mode, the ‘INFO’ button displays an information bar (InfoBar) at the lower edge of the screen. This bar is faded-in up to 10 seconds. How to change the time for fading in the information bar: Press the ‘MENU’... -
Page 10: Edivision - Your Electronic Program Guide
►EDIVISION - Your electronic program guide Standard: EDIVISION is an electronic program guide with its own OSD menu. EDIVISION hereby represents the information provided by the program provider in different views extensively and clearly. Note that not all channels/program providers provide program-related information. Use the EDIVISION button on the remote control to start your program guide. - Page 11 The 'More' mode displays program information in tabular form in chronological order. Use the left/right arrow buttons to navigate between a channel's temporal program information and use the up/down arrow buttons to move the cursor (yellow marking) in the channel list. The OK button may possibly have to be pressed if another channel was selected and you want program-related information to be displayed.
- Page 12 to navigate between channel list and weekday overview; use the PREV/NEXT buttons to navigate between the weekdays and the up/down arrow buttons to navigate in the respective list EDIVISION window in 'Timetable' mode in the corresponding direction. If the cursor is located on the right-hand column side of a program title, even more detailed information about this channel can be displayed by pressing the OK button (if available).
-
Page 13: Program List
►Program list Call up the program list in the TV or Radio mode via the OK button on the remote control or receiver. The window of the program list can be displayed in 3 forms. TV list 3 How to change the view of the program list: 1. - Page 14 The following possibilities exist if the cursor is located in the left column: Red button: Displays overview of all channel lists/channel groups Yellow button: Displays program-related information in the form of EDIVISION on the selected channel, if available. Green button: Opens the 'Options' window.
-
Page 15: Menu Program
►Menu program Edit channel Your channel list(s) for TV or Radio channels can be designed in this menu. Notes: Make sure the receiver is in the correct mode. If wanting to edit radio channel lists, the receiver must be in radio mode. The TV/Radio button enables switching between TV and Radio mode. Standard: The left column of the menu window shows the list of the channels of the currently selected channel list, the right column shows the symbols for 'Move', 'Lock', 'Delete', 'Rename' and 'Skip'. -
Page 16: How To Move A Channel
How to move a channel: Move the cursor (yellow bar) in the channel list to the channel to be moved. Change now with the right arrow button in the right part of the menu and navigate the cursor with the up/down arrow buttons to the 'Move' symbol. -
Page 17: How To Rename A Channel
How to rename a channel: Move the cursor (yellow bar) in the channel list to the channel to be renamed. Now change to the right part of the menu with the right arrow button and navigate the cursor to the 'Rename' symbol. -
Page 18: Edit Favourites
Edit favourites Your favourite lists for TV or Radio programs can be designed in this menu. Your favourite channels or stations can be organised in favourite lists and thus represent a useful extension. Standard: This menu is divided into 3 columns. The list of the available channels can be found on the left side, depending on the overview selected. -
Page 19: How To Add A Channel To A Favourite List
The 'FAV' button enables switching of the favourite list in order to view or edit it. Press the 'FAV' button to display the overview of the favourite lists. Use the up/down arrow buttons and OK button to select the favourite list to be edited. The list will then appear on the right side of the menu. The channels are marked on the left side with a symbol already available in the selected favourite list. -
Page 20: How To Rename A Favourite List
How to rename a favourite list: Press the 'FAV' button and select the favourite list to be renamed. Now change to the central part of the menu and navigate the cursor to the ‘Rename' symbol. The symbol is highlighted in colour. Press the OK button. -
Page 21: Menu System
►Menu system Other settings Functions and settings in the menu: Go into standby: Here, time can be set in minutes in which the receiver should switch into standby mode (30 minutes to 3 hours). 0.5 Watt Standby: Specify here whether the receiver is switched into 0.5 watt standby mode. Select TV lists: Set here the way the program list should be displayed. -
Page 22: Menu Installation
►Menu installation Satellite installation Please observe the following notes before configuration in the menu: HDTV Sat TV requires a minimum size satellite dish of 80 cm. A specialist should calibrate the system with a digital TV level measuring set. Depending on the setting selection, the intensity level and quality of the signal is shown in the lower area. - Page 23 Use the green button to call up the menu for the search of channels according to the set values at the item TP Index (Transponder Index). The following settings can be specified: Search mode: Select here between the value All (channels) or Available (channels). With the value All, encrypted and free-to-air channels are sought.
-
Page 24: Auto Installation
Auto installation Select this item to install satellites and channels automatically with preset parameters. The receiver thereby searches first in the first step for possible satellites and in the second step (provided satellites were found with sufficient signal strength) for channels in order to include them in the program list. Exit the 'Auto Installation' menu with the EXIT button. -
Page 25: Menu System Installation
►Menu system settings Languages Functions and settings in the menu: Menu language: Specify the language here displaying the menu texts. Audio language: Set the audio language here for the first channel. EDIVISION: Specify the language here in which the electronic program guide EDIVISION (EDV) should be displayed. -
Page 26: Youth Protection
Youth protection This menu is only accessible by entering a PIN code. The default setting of the PIN code is: 0000. Functions and settings in the menu: Menu lock: Set here whether to allow or deny access to the menu. If the 'On' value was selected in this item, access to menu is only possible via PIN code. -
Page 27: Audio + Video
Audio + Video Functions and settings in the menu: Display Mode: Select here between the options Auto, By Native TV, 720p_50, 720p_60, 1080i_50 or 1080i_60. Aspect ratio: Determine here the aspect ratio with which the image should be displayed. (16:9, 4:3PS, 4:3LB, AUTO) Digital Audio Out: Specify here the mode in which the digital audio output should work. -
Page 28: Menu Conditional
►Menu conditional Information Information about the device is displayed here. This information may be relevant when contacting your dealer. Furthermore, the version of the receiver software can be found here. Exit the 'Information' menu by pressing the EXIT button. Factory setting Use the up/down arrow buttons to select one of the following menu items and press the OK button. -
Page 29: Menu/Media
►Menu/Media Use the arrow buttons to select between the “Movie”, “Music”, “Image”, “Disk Manager”, “E-book”and "Remove USB/HDD" modes Your videos can be viewed from the USB medium in the movie mode. Your images can be viewed from the USB medium in the image mode. Information can be retrieved from the USB medium in the disk manager mode. -
Page 30: Menu/Media/Disk Manager
►Menu/Media/Disk Manager Information can be found in this menu about the connected USB memory device. Volume: Displays the name. Total memory: Displays the total memory capacity. Available memory: Displays the available memory capacity. File system: Displays the file system used. It is possible to format the USB memory by pressing the green button (HDD formatting). -
Page 31: Menu/Conditional/Software Update
►Menu/Conditional/Software Update Http upgrade Update of USB/HDD Standard: This menu is only accessible if a suitable USB data storage is connected and recognised by the receiver. Otherwise, this menu is not accessible. Another prerequisite for an 'Update of USB/HDD' is that the appropriate software file is located on the USB data storage. -
Page 32: Backup On Usb/Hdd
Backup on USB/HDD Standard: This menu is only accessible if a suitable USB data storage is connected and recognised by the receiver. Otherwise, this menu is not accessible. Functions and settings in the menu: Backup of the file: Determine the file name for the backup file here. Press the OK button to display a letter and number field, and use the arrow buttons and OK button to specify the name of the backup file. - Page 33 Version of 14 June 2016...
- Page 34 w w w. e d i s i o n . g r LNB IN 13/18V DC 12V/1,0 A S/PDIF HDMI SCART 400mA MAX 4 0 0 m A M A X S / P D I F H D M I S C A R T L N B I N 1 3 / 1 8 V D C 1 2 V / 1 , 0 A...
Need help?
Do you have a question about the Proton and is the answer not in the manual?
Questions and answers