Table of Contents
Advertisement
Available languages
Available languages
Bedienungsanleitung/Garantie
Placa de hornillo por inducción • Chapa de cozimento por indução • Induction Cooker
Placa de hornillo por inducción • Chapa de cozimento por indução • Induction Cooker
Placa de hornillo por inducción • Chapa de cozimento por indução • Induction Cooker
05-EKI 3438.indd 1
Inductiekookplaat • Plaque chauffante à induction • Piano di cottura ad induzione
Inductiekookplaat • Plaque chauffante à induction • Piano di cottura ad induzione
Inductiekookplaat • Plaque chauffante à induction • Piano di cottura ad induzione
Indukcyjna płyta kuchenna • Indukciós főzőlap • Індукційна кухонна плита
Indukcyjna płyta kuchenna • Indukciós főzőlap • Індукційна кухонна плита
Indukcyjna płyta kuchenna • Indukciós főzőlap • Індукційна кухонна плита
Gebruiksaanwijzing • Mode d'emploi • Instrucciones de servicio
Manual de instruções • Istruzioni per l'uso • Instruction Manual
Instrukcja obsługi/Gwarancja • Használati utasítás
Інструкція з експлуатації
I
I
NDUKTIONSKOCHPLATTE
NDUKTIONSKOCHPLATTE
EKI 3
438
02.11.11 10:49_TH
Advertisement
Table of Contents

Subscribe to Our Youtube Channel
Related Manuals for Clatronic EKI3438


Summary of Contents for Clatronic EKI3438
- Page 1 Bedienungsanleitung/Garantie Gebruiksaanwijzing • Mode d’emploi • Instrucciones de servicio Manual de instruções • Istruzioni per l’uso • Instruction Manual Instrukcja obsługi/Gwarancja • Használati utasítás Інструкція з експлуатації NDUKTIONSKOCHPLATTE NDUKTIONSKOCHPLATTE Inductiekookplaat • Plaque chauffante à induction • Piano di cottura ad induzione Inductiekookplaat •...
-
Page 2: Table Of Contents
DEUTSCH ITALIANO Inhalt Indice Übersicht der Bedienelemente ........Seite Elementi di comando ..........Pagina Bedienungsanleitung ..........Seite Istruzioni per l’uso ............ Pagina 25 Technische Daten ............Seite Dati tecnici ..............Pagina 28 Garantiebedingungen ..........Seite NEDERLANDS ENGLISH Inhoud Contents Overzicht van de bedieningselementen ....Pagina Overview of the Components ........ -
Page 3: Übersicht Der Bedienelemente
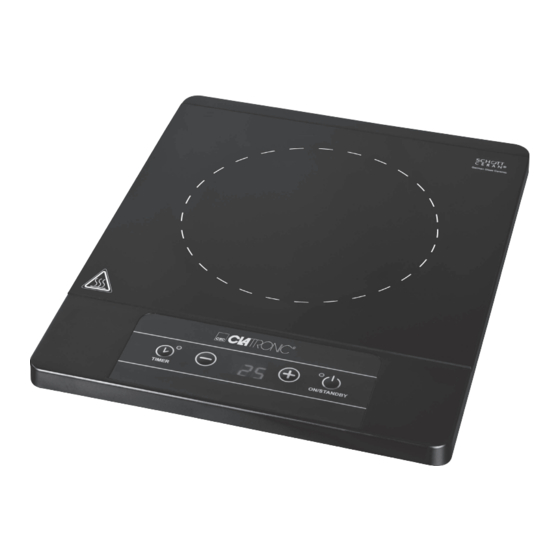
Übersicht der Bedienelemente Overzicht van de bedieningselementen • Liste des différents éléments de commande Indicación de los elementos de manejo • Descrição dos elementos • Elementi di comando Overview of the Components • Przegląd elementów obsługi A kezelőelemek áttekintése • Огляд елементів управління... -
Page 4: Bedienungsanleitung
Allgemeine Sicherheitshinweise WARNUNG: Lesen Sie vor Inbetriebnahme dieses Gerätes die Bedienungs- Warnt vor Gefahren für Ihre Gesundheit und zeigt mögliche anleitung sehr sorgfältig durch und bewahren Sie diese inkl. Verletzungsrisiken auf. Garantieschein, Kassenbon und nach Möglichkeit den Karton mit Innenverpackung gut auf. Falls Sie das Gerät an Dritte ACHTUNG: weitergeben, geben Sie auch die Bedienungsanleitung mit. -
Page 5: Elektrischer Anschluss
Übersicht der Bedienelemente Elektrischer Anschluss 1 TIMER Taste (Zeiten einstellen) mit Kontrollampe Anschlusswert 2 „–“ Taste (Leistung niedriger) Insgesamt kann die Kochplatte eine Leistung von 2000 W 3 Display aufnehmen. Bei diesem Anschlusswert empfiehlt sich eine 4 „+“ Taste (Leistung höher) getrennte Zuleitung mit einer Absicherung über einen 16A 5 ON/STANDBY (Ein-/Bereitschaftstaste) Haushaltsschutzschalter. - Page 6 Reinigung HINWEIS: • Drücken Sie die Tasten - oder + kurz, um die Zeit um eine WARNUNG: Minute zu verstellen. • Ziehen Sie immer den Netzstecker vor der Reinigung! • Halten Sie die Tasten - oder + gedrückt und die Zeit •...
-
Page 7: Technische Daten
Über einen persönlichen Zugangscode, der Ihnen direkt nach Konformitätserklärung Ihrer Anmeldung per E-Mail übermittelt wird, können Sie den Bearbeitungsablauf Ihrer Reklamation auf unserem Servicepor- Hiermit erklärt die Firma Clatronic International GmbH, dass sich tal online verfolgen. das Gerät EKI 3 in Übereinstimmung mit den grundlegenden Anforderungen, der europäischen Richtlinie für elektromagneti-... - Page 8 Gerätes vor. Bei unfreien Lieferungen entfällt Ihr Anspruch auf Garantieleistungen. Nutzen Sie die für die Entsorgung von Elektrogeräten vorgese- henen Sammelstellen und geben dort Ihre Elektrogeräte ab, die Clatronic International GmbH Sie nicht mehr benutzen werden. Industriering Ost 40 D-47906 Kempen/Germany...
- Page 9 Algemene veiligheidsinstructies WAARSCHUWING: Lees vóór de ingebruikname van dit apparaat de handleiding waarschuwt voor gevaren voor uw gezondheid en toont uiterst zorgvuldig door en bewaar deze goed, samen met het mogelijk letselrisico’s. garantiebewijs, de kassabon en zo mogelijk de doos met de binnenverpakking.
-
Page 10: Overzicht Van De Bedieningselementen
Overzicht van de bedieningselementen Elektrische aansluiting 1 TIMER-toets (tijd instellen) met controlelampje Aansluitingswaarde 2 „–“ -toets (vermogen lager) De kookplaat kan in totaal een vermogen van 2000 W opnemen. 3 Display Bij deze aansluitingswaarde is een gescheiden toevoerleiding 4 „+“ -toets (vermogen hoger) met een beveiliging via een 16A veiligheidsschakelaar voor 5 ON/STANDBY (Aan-/standby-toets) huishoudelijk gebruik aanbevolen. - Page 11 Reiniging OPMERKING: • Druk kort op de toetsen - of + om de tijd met stappen van WAARSCHUWING: een minuut te verzetten. • Trek vóór de reiniging van het apparaat altijd de steker uit • Houd de toetsen - of + ingedrukt en de tijd verspringt met de contactdoos.
-
Page 12: Technische Gegevens
Oplossing: Ontdoe de verluchtingsgleuven van vreemde voorwerpen. Andere oorzaak: De kookplaat werd na 120 minuten automatisch uitgescha- Betekenis van het symbool ‘vuilnisemmer’ keld. Bescherm ons milieu, elektrische apparaten horen niet in het huisafval. Storingsmeldingen Maak voor het afvoeren van elektrische apparaten gebruik van Tijdens de werking verschijnen de volgende meldingen op het de voorgeschreven verzamelpunten en geef daar de elektrische display:... -
Page 13: Mode D'emploi
Conseils généraux de sécurité DANGER: Lisez attentivement ce mode d’emploi avant de mettre l’appareil Prévient des risques pour votre santé et des risques éventuels en marche pour la première fois. Conservez le mode d’emploi de blessure. ainsi que le bon de garantie, votre ticket de caisse et si possible, le carton avec l’emballage se trouvant à... -
Page 14: Liste Des Différents Éléments De Commande
Liste des différents éléments de commande Branchement électrique 1 Touche TIMER (réglage du temps) avec son Puissance du branchement voyant de contrôle Au total, la plaque de cuisson peut accepter une puissance 2 Touche „–“ (baisser la puissance)) de 2000 W. Face à une telle puissance du branchement, nous 3 Écran recommandons un fil d’amenée séparé... - Page 15 Nettoyage REMARQUE: • Appuyez brièvement sur la touche + ou - pour changer le DANGER: temps d’une minute. • Débranchez toujours l’appareil avant le nettoyage! • Maintenez enfoncée les touches + ou - et le temps avance • Attendez que l’appareil ait complètement refroidi! ou recule de 10 minutes.
-
Page 16: Données Techniques
Remède: Débranchez l’appareil du secteur et laissez-le refroidir pen- dant env. 20 min. Ensuite, remettez-le en marche. Autre cause: Signification du symbole „Elimination“ Les fentes d’aération sont obstruées. Protégez votre environnement, ne jetez pas vos appareils Remède: électriques avec les ordures ménagères. Dégagez les fentes d’aération de tout corps étranger. -
Page 17: Instrucciones De Servicio
Indicaciones generales de seguridad AVISO: Antes de la puesta en servicio de este aparato lea detenida- Advierte ante los peligros para su salud y demuestra posibles mente el manual de instrucciones y guarde éste bien incluido la riesgos de herida. garantía, el recibo de pago y si es posible también el cartón de embalaje con el embalaje interior. -
Page 18: Indicación De Los Elementos De Manejo
Indicación de los elementos de manejo Conexión eléctrica 1 Tecla TIMER (ajustar tiempos) con lámpara Potencia conectada de control La placa de cocción puede absorber una potencia total de 2 Tecla „–“ (potencia más baja) 2000 W. Para esta potencia conectada se recomienda una 3 Display línea de alimentación separada con una protección por fusible 4 Tecla „+“... - Page 19 Limpieza INDICACIÓN: • Pulse brevemente las teclas - o +, para cambiar la hora AVISO: por un minuto. • ¡Antes de la limpieza retire siempre la clavija de red de la • Si mantiene las teclas - o + pulsadas, la hora saltará en caja de enchufe! un intervalo de 10 minutos.
-
Page 20: Datos Técnicos
Acción correctora: Elimine los cuerpos extraños de las ranuras de ventilación. Otra causa: La placa de cocina se desconectó automáticamente Significado del símbolo „Cubo de basura“ después de 120 minutos. Proteja nuestro medio ambiente, aparatos eléctricos no forman Mensajes de fallo parte de la basura doméstica. Haga uso de los centros de recogida previstos para la elimi- Durante el servicio aparecen en la pantalla los siguientes nación de aparatos eléctricos y entregue allí... -
Page 21: Manual De Instruções
Instruções gerais de segurança AVISO: Antes de pôr este aparelho a funcionar, leia muito atentamente Chama a atenção para perigos existentes para a sua saúde e as instruções de emprego e guarde-as muito bem, juntamente para possíveis riscos de ferimento. com o talão de garantia, o talão de compra e, tanto quanto possível, a embalagem com os elementos interiores. -
Page 22: Descrição Dos Elementos
Descrição dos elementos de serviço Conexão eléctrica 1 Tecla TIMER (configurar períodos de tempo) Valor de conexão com lâmpada de controlo No total o fogão tem uma capacidade de rendimento de 2 Tecla „–“ (baixar potência) 2000 W. Com este valor de conexão, recomenda-se uma rede 3 Display em separado com dispositivo de segurança por intermédio de 4 Tecla „+“... - Page 23 Limpeza INDICAÇÃO: • Prima brevemente as teclas - ou + para alterar o tempo de AVISO: cozedura de um minuto. • Retire sempre a ficha da tomada, antes de proceder à • Mantenha as teclas - ou + premidas e o tempo de cozedu- limpeza do ferro de engomar! ra salta 10 minutos.
-
Page 24: Características Técnicas
Solução: Tire a ficha da tomada e deixe que arrefeça por aprox. 20 minutos. Em seguida retome o funcionamento. Outro motivo: Significado do símbolo „contentor do lixo“ As aberturas de ventilação estão obstruídas. Poupe o nosso meio ambiente, não deite aparelhos eléctricos Solução: para o lixo doméstico. -
Page 25: Istruzioni Per L'uso
Norme di sicurezza generali AVVISO: Prima di mettere in funzione questo apparecchio, leggere molto Previene i rischi della propria salute ed indica possibili rischi attentamente le istruzioni per l’uso e conservarle con cura uni- di ferite. tamente al certificato di garanzia, allo scontrino e, se possibile, alla scatola di cartone con la confezione interna. -
Page 26: Elementi Di Comando
Elementi di comando Allacciamento elettrico 1 Tasto TIMER (regolazione dei tempi) con Potenza allacciata indicatore luminoso di controllo Complessivamente il piano di cottura può assorbire una potenza 2 Tasto „–“ (potenza più bassa) di 2000 W. Con questa potenza allacciata si consiglia una linea 3 Display di alimentazione separata con una protezione mediante un 4 Tasto „+“... - Page 27 Pulizia NOTA: • Premere per un breve lasso di tempo i tasti - o + , per AVVISO: spostare di un minuto. • Staccare sempre la spina prima della pulizia! • Tenere premuti i tasti - o + , per spostare di 10 minuti. •...
-
Page 28: Dati Tecnici
Rimedio: Separate l’apparecchio dalla rete di alimentazione di energia elettrica e fatelo raffreddare per ca. 20 min. Rimettetelo poi in funzione. Significato del simbolo „Eliminazione“ Ulteriore causa: Le feritoie di ventilazione sono coperte. Salvaguardare l’ ambiente, gli elettrodomestici non vanno elimi- nati come rifiuti domestici. -
Page 29: Overview Of The Components
General Safety Instructions CAUTION: Read the operating instructions carefully before putting the This refers to possible hazards to the machine or other appliance into operation and keep the instructions including the objects. warranty, the receipt and, if possible, the box with the internal ... -
Page 30: General Information
General information Connection • Before inserting the mains plug into the socket check Cooking with induction technology whether the voltage which you intend to use corresponds to When cooking with induction technology, heat is only generated that of the machine. Please see the label on the machine for by means of magnetic power, if a pot or pan with a magnetisable details. -
Page 31: Troubleshooting
Delete the time Housing • If you would like to delete the preset times, press the TIMER • Clean the housing after use using a slightly moist cloth. (1) button, so that the control lamp goes off. • Make sure that no fluid matter gets into any of the openings of the housing. -
Page 32: Technical Data
Technical Data Model: ................EKI 3 Power supply: ..........220–240 V, 50/60 Hz Power consumption: ............2000 W Protection class: ................II Net weight: ................2,33 kg This device has been tested according to all relevant current CE guidelines, such as electromagnetic compatibility and low voltage directives, and has been constructed in accordance with the latest safety regulations. - Page 33 Ogólne wskazówki bezpieczeństwa OSTRZEŻENIE: Przed uruchomieniem urządzenia proszę bardzo dokładnie Ostrzega przed zagrożeniami dla zdrowia i wskazuje na przeczytać instrukcję obsługi. Proszę zachować ją wraz z kartą potencjalne ryzyka obrażeń. gwarancyjną, paragonem i w miarę możliwości również karto- nem z opakowaniem wewnętrznym. Przekazując urządzenie UWAGA: innej osobie, oddaj jej także instrukcję...
-
Page 34: Przegląd Elementów Obłsugi
Przegląd elementów obłsugi Podłączenie do prądu 1 TPrzycisk TIMER (ustawianie czasu) z lampką Wartość przyłączowa kontrolną W sumie płyta grzejna może pobrać prąd o mocy 2000 W. 2 Przycisk „–“ (zmniejszyć moc) W przypadku takiej wartości zaleca się oddzielny przewód z 3 Wyświetlacz bezpiecznikiem w sieci domowej 16 A. - Page 35 Czyszczenie WSKAZÓWKA: • Proszę krótko wcisnąć przyciski - lub +, by przestawić OSTRZEŻENIE: czas o jedną minutę. • Przed rozpoczęciem czyszczenia proszę zawsze • Proszę przytrzymać wciśnięte przyciski - lub +, a wtedy wyciągać wtyczkę z gniazdka! czas zmienia się skokowo o 10 minut. •...
-
Page 36: Instrukcja Obsługi
OGÓLNE WARUNKI GWARANCJI Usuwanie: Usunąć ciała obce ze szczelin wentylacyjnych. Producent / Dystrybutor udziela 24 miesięcy gwarancji na zaku- Inna przyczyna: pione urządzenie. Okres gwarancji liczony jest od daty zakupu Płyta grzejna wyłączona została automatycznie po 120 urządzenia. minutach. W tym okresie uszkodzone urządzenie będzie bezpłatnie wy- mienione na wolne od wad. -
Page 37: A Kezelőelemek Áttekintése
Általános biztonsági rendszabályok FIGYELMEZTETÉS: A készülék használatba vétele előtt gondosan olvassa végig a Egészségét károsító veszélyforrásokra figyelmeztet és rámu- használati utasítást, és őrizze meg a garancialevéllel, a pénztári tat a lehetséges sérülési lehetőségekre. nyugtával és lehetőleg a csomagolókartonnal, ill. az abban lévő... - Page 38 Általános tudnivalók Csatlakoztatás • Mielőtt Ön bedugná a csatlakozót a konnektorba, kérjük Az indukciós főzésről ellenőrizze, hogy a hálózati feszültség, amelyet Ön hasz- Az indukciós főzésnél mágneses erők hozzák létre a főzéshez nálni szeretne megegyezik a berendezés feszültségével. A szükséges hőt, de csak akkor, ha egy mágnesezhető fenéklap- megfelelő...
- Page 39 Idő törlése Ház • Ha törölni szeretné a beállított időt, nyomja mega TIMER (1) • A készülék házának tisztításához enyhén benedvesített gombot, ekkor az ellenőrzőlámpa kialszik. rongyot használjon. • Ügyeljen arra, hogy a készülékház nyílásain keresztül ne Automatikus kikapcsolás hatolhasson be folyadék. Ez ugyanis károsíthatja a kés- •...
-
Page 40: Műszaki Adatok
Műszaki adatok Modell: ................EKI 3 Feszültségellátás: ........220–240 V, 50/60 Hz A „kuka“ piktogram jelentése Teljesítményfelvétel: ............2000 W Kímélje környezetünket, az elektromos készülékek nem a Védelmi osztály: ................II háztartási szemétbe valók! Nettó súly: ................2,33 kg Használja az elektromos készülékek ártalmatlanítására kijelölt gyűjtőhelyeket, ott adja le azokat az elektromos készülékeit, Ezt a készüléket az Európa Tanács minden vonatkozó... -
Page 41: Інструкція З Експлуатації
Загальні вказівки щодо безпеки ЗАСТЕРЕЖЕННЯ: Перед прийняттям в експлуатацію цього приладу дуже Попереджує про загрози для Вашого здоров’я та вказує уважно читайте інструкцію з експлуатації та зберігайте її на можливі ризики травм. разом з гарантійним талоном, касовим чеком та, по мірі можливості, з... - Page 42 Огляд елементів для управління приладом Електричне підключення 1 Клавіш TIMER (регулювання часу) з Характеристики для електричного підключення контрольною лампочкою У цілому плита може витримати потужність до 2000 Вт. При 2 Клавіш „–“ (зниження потужності) такому значенні рекомендується роздільна проводка із 3 Дисплей...
- Page 43 Введення команди обмеження часу праці плити ЗАСТЕРЕЖЕННЯ! Ви можете обмежити час праці плити клавішем TIMER. • Після того як Ви закінчили працювати з плитою, слід • Включіть прилад і оберіть ступінь потужності, що Вам вимкнути її за допомогою клавіш для управління (ON/ потрібний.
-
Page 44: Технічні Параметри
ВКАЗІВКА: Для безпеки користування прилад через декілька секунд переключиться в режим готовності. Допомога: Поставте на плиту каструлю, що придатна для індукційного нагрівання. • Плита раптово виключається під час праці. Можливі підстави: Включився захист від перегрівання. Допомога: Відключіть прилад від електричної мережі і дайте йому охолонути... - Page 46 D-47906 Kempen/Germany · Industriering Ost 40 Internet: http://www.clatronic.de · email: info@clatronic.de...
Need help?
Do you have a question about the EKI3438 and is the answer not in the manual?
Questions and answers