Hide thumbs Also See for Lumia 620:

Advertisement

Quick Links

Service Manual for L1 and L2
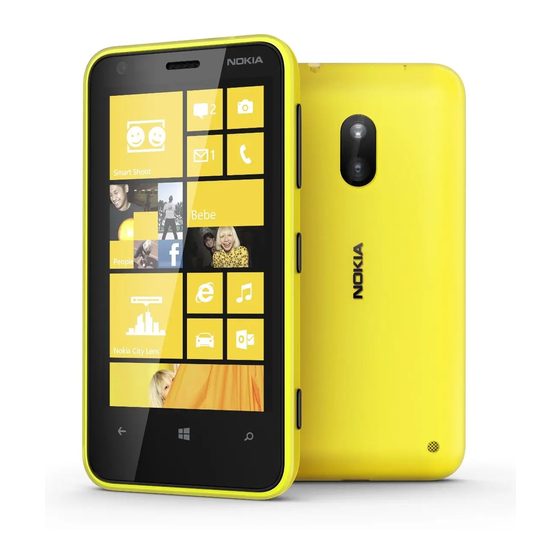
Nokia Lumia 620
RM-846
Key features
Complete WP8 experience
Edge-to-edge 3.8" ClearBlack display
1 GHz dual core processor
8 GB internal mass memory / 512 MB RAM
Cup-shaped body with changeable covers
720p HD video recording
Version 1.0
Exploded view
Solder components
Service concept
Disassembly steps
More
Service devices
More
Phone reset
More
©2012 Nokia | Nokia Internal Use only | All Rights Reserved.
Check the repair
policy before
performing any
mechanical repair
on Service Level
1&2!
Assembly hints
More
Product controls and interfaces
More
More
More
More

Advertisement

Table of Contents
loading

Summary of Contents for Nokia Lumia 620

  • Page 1 720p HD video recording Version 1.0 Exploded view Disassembly steps Assembly hints More More More Solder components Service devices Product controls and interfaces More More More Service concept Phone reset More More ©2012 Nokia | Nokia Internal Use only | All Rights Reserved.
  • Page 2: Exploded View

    SIZE 4 M1.4 X 3.4 I0016 SCREW TORX+ SIZE 4 RF1.6 x 4.5 I0015 BACK COVER I0018 Only available Not reuseable Repair/swap v1.0 as assembly after removal only in level 3 ©2012 Nokia | Nokia Internal Use only | All Rights Reserved.
  • Page 3: Disassembly Steps

    Service Manual Level 1 and 2 Disassembly steps Nokia Lumia 620 RM-846 Version 1.0 For disassembling you need the Nokia Standard toolkit version 2. You will also need the camera removal tool SS-296. Protect the TOUCH MODULE with the protective film.
  • Page 4 Release the BACK COVER by pushing the device down from the camera deco. Lift up and remove the BACK COVER.
  • Page 5 Pull out and remove the SIM TRAY. Unscrew the six Torx+ size 4 screws. Note that the two screws in the middle are different type of screws than the other four screws! If the screws are scratched, do not use them again.
  • Page 6 Lift up and remove the MAIN ANTENNA ASSEMBLY. Insert the SS-93 to the shown place and release the side of the CWS CARRIER ASSEMBLY. Be careful not to damage the spring clips beneath the CWS CARRIER ASSEMBLY.
  • Page 7 Insert the SS-93 to the shown place and release also the other side of the CWS CARRIER ASSEMBLY. Be careful not to damage the spring clips beneath the CWS CARRIER ASSEMBLY. Lift up and remove the CWS CARRIER ASSEMBLY.
  • Page 8 Check that the shown spring clips are not damaged. Use the SS-93 to open the TOUCH MODULE connector from the shown side. Be careful not to damage the connector or any nearby components.
  • Page 9 Open the DISPLAY connector with the SS-93 from the shown side. Be careful not to damage the connector or any nearby components. Open the three shown clips holding the ENGINE BOARD. Be careful not to damage the clips.
  • Page 10 The ENGINE BOARD can now be separated. Place the camera removal tool SS-296 on top of the CAMERA as shown. Push it in gently until the camera retaining clips are released.
  • Page 11 Hold from the sides of the SS-296 and lift up and remove the CAMERA. Grab the ENGINE BOARD as shown and remove the USB BOOT. Be caeful not to twist the ENGINE BOARD or damage the contact springs on the other side.
  • Page 12 Remove the EARPIECE HOLDER with tweezers. Be careful not to damage the EARPIECE or the DUSTNET. Remove the EARPIECE from the EARPICE HOLDER with tweezers. Be careful not to damage the EARPIECE or the DUSTNET. Discard the EARPIECE and the DUSTNET if they are damaged.
  • Page 13 Remove the EARPIECE HOLDER ADHESIVE. Do not use it again. Discard it. The Nokia Lumia 620 disassembly procedure is complete. -END OF DISASSEMBLY- ©2012 Nokia | Nokia Internal Use only | All Rights Reserved.
  • Page 14: Assembly Hints

    Service Manual Level 1 and 2 Assembly hints Nokia Lumia 620 RM-846 Version 1.0 Place the EARPIECE HOLDER with tweezers. Then place the EARPIECE to the EARPIECE HOLDER with tweezers. Press the EARPIECE gently with the SS- 93 with the maximum pressing power of 15 N. Make sure that the EARPIECE DUSTNET is not misplaced...
  • Page 15 Place the device to the BACK COVER bttom end first. Then lower down the top end and press it until it snaps to place. ©2012 Nokia | Nokia Internal Use only | All Rights Reserved.
  • Page 16: Solder Components

    Ant spring spring Spring X6301 Speaker X7751 X7760 + Spring X2101 Speaker - Spring X2102 X7720 X6500 X7761 GPS Ant NFC Ant NFC Ant Main Ant v1.0 spring spring spring GND spring ©2012 Nokia | Confidential | All Rights Reserved.
  • Page 17: Service Devices

    For more information, refer to the Service Bulletin (SB-011) on Nokia Online. Supplier or manufacturer contacts for tool re-order can be found in “Recommended service equipment” document on Nokia Online. ©2012 Nokia | Nokia Internal Use only | All Rights Reserved.
  • Page 18 10 — Microphone 11 — Camera flash 12 — Camera 13 — Volume keys 14 — Power/Lock key 15 — Camera key 16 — Loudspeaker 17 — Antenna area v1.0 ©2012 Nokia | Nokia Internal Use only | All Rights Reserved.
  • Page 19 Service Manual Level 1 and 2 Service concept Nokia Lumia 620 RM-846 Version 1.0 Flashing concept Service CA-101 software Care Dummy Battery with power supply via Nokia charger or product specific battery Transceiver ©2012 Nokia | Nokia Internal Use only | All Rights Reserved.
  • Page 20: Phone Reset

    Service Manual Level 1 and 2 Phone reset Nokia Lumia 620 RM-846 Version 1.0 Hardware reset If the phone hardware is jammed, you should first recommend that the consumer performs a hardware reset. The hardware reset does not reset the Windows Live ID or remove any consumer data.
  • Page 21 1. Volume up 2. Volume down 3. Power 4. Volume down Step 3 The phone will reset and boot up automatically. Please note that this may take several minutes. ©2012 Nokia | Nokia Internal Use only | All Rights Reserved.
  • Page 22: Version History

    Service Manual Level 1 and 2 Version history Nokia Lumia 620 RM-846 Version 1.0 Version Date Description 05.12.2012 First published version ©2012 Nokia | Nokia Internal Use only | All Rights Reserved.
  • Page 23 www.s-manuals.com...

This manual is also suitable for:

Rm-846

Table of Contents