
Related Manuals for Hoover 2240 classic


Summary of Contents for Hoover 2240 classic
- Page 1 Robot Robot Vacuum Cleaner Edge Cleaning Side Brushes Cliff Sensor Includes Additional Accessories Classic MILLILITRES Water Capacity Lightweight...
- Page 2 batteries not included. Remote control - 2 x AAA size battery required. Virtual Wall - 2 x D size battery required.
-
Page 3: Specifications
2240 Robot Congratulations on the purchase of your new HooVER vacuum cleaner. there are many useful features built into your vacuum cleaner and we recommend that you carefully read this instruction manual so that you may take best advantage of them. -
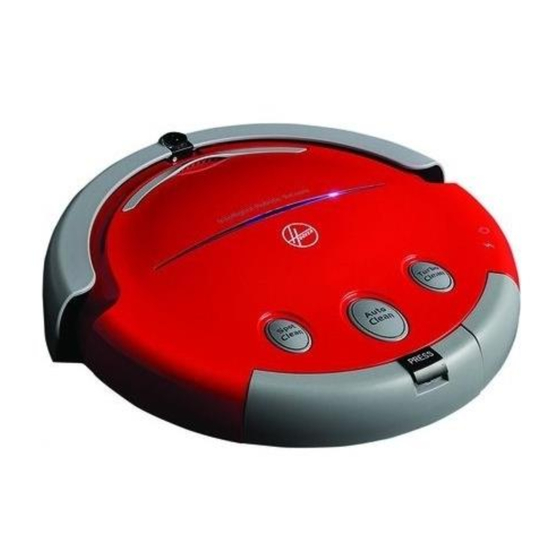
Page 4: Robot Vacuum
Robot Vacuum Infrared Operating sensor buttons Easy to grab handle Battery life indicator Removable dust bin Sensors Rechargeable battery (not shown) Sensors Main brush Filter Side brush Vacuum inlet lid Battery Power charger socket switch... -
Page 5: Charging Station
Virtual Wall unit 0-5m Power indicator Range selector switch 0-3m Power switch Infrared wave emitter 0-1.5m The Virtual Wall Unit has three setting options to choose from depending on the size of the room. CAUTION! Do not use the infrared wave emitter to point at the eyes! Charging Station Signal sensor LCD Display... -
Page 6: Before You Begin
before you begin this cleaner must be operated in accordance with these instructions and used only for domestic household cleaning to remove DRY dirt and dust from household carpets, flooring, walls and fabrics. this cleaner is not fit to be used as an industrial cleaner hence will void the manufacturer’ s warranty if used inappropriately. Please read these instructions thoroughly this will ensure you obtain full benefit from your new cleaner. -
Page 7: After Use
Safety Precautions and Warnings WARNING: to avoid a safety hazard, only an authorised Godfrey’s Service technician must replace the Electricity can be extremely dangerous. this Power Cord. appliance is powered by rechargeable Ni-MH batteries and is provided with a charging base •... -
Page 8: Safety Precautions And Warnings
Safety Precautions and Warnings No one else can disassemble, maintain or transform Don’t use other chargers only the one supplied with the product except the maintenance technicians the unit or it may cause product damage, electric designated by our company, or it may cause fire, shock or fire due to high voltage. - Page 9 Assembly WARNING! The cleaner should be switched off and disconnected from the mains power supply before assembling. Battery charger socket Outlet Wall xing plate Outlet Battery charger socket Setting the Auto Charging Base Plate 1. the cleaner may be charged directly by the charger as well as by the auto charging base plate.
- Page 10 Assembly (continued) 2. For charging with auto charging base plate, the plug of charger should be inserted into the DC socket at the back of the base plate, meanwhile, the screen on the base plate will display the time, etc. 3.
-
Page 11: Clock Function
Clock Function a. Press the clock key to adjust the time of clock as shown. b. Press the clock key three times and respectively adjust hour, minute and week. Press +/- key to adjust the specific parameters. After setting the Clock Timing time, press the clock key and the clock setting... - Page 12 Assembly (continued) Auto Cleaning Function a. the cleaner will automatically work after being fully charged. b. Press the full go key there will be a broom icon displayed at lower right corner of the screen, which means the function is on. Press the key again; the broom icon will Clock Timing disappear, which means the function is off.
-
Page 13: Instructions For Use
Instructions for Use 1. Please ensure the battery is fully charged before starting the cleaner. 2. Please ensure any unfixed articles are removed from the floor space before using the cleaner, and ensure that there are no spikes on the edges of the carpet or power cables lying on the floor. - Page 14 Instructions for Use (continued) If you don’t want your cleaner to clean those areas beyond your desired cleaning area, please place the Virtual Wall Unit at the proper place. When the wrong start button is pressed, the other start switch needs to be pressed twice before cleaning.
-
Page 15: Helpful Hints
Helpful Hints For the purpose of ensuring the cleaner is automatically charged, regularly wipe the charging contact at the front of the unit and the charging dome on the base plate with a dry cloth, so as to keep it free of dust, otherwise it may result in poor contact. the charging base plate should be installed in as open place as possible, and do not place any obstacle within the range of 1.5m of the charging base plate, this will affect auto charging. -
Page 16: Maintenance
Maintenance IMPORTANT! Ensure the vacuum cleaner is not connected to the power supply when performing any maintenance procedures. Use a damp cloth and mild detergent when cleaning the appliance. Emptying the Dust Bin turn off the power switch. Press down the bin clip and pull out the dustbin. - Page 17 Cleaning the Main Brushes of the Cleaner turn off the power switch and put the cleaner on a flat surface upside down. Using right thumb, push forward the locking rod and lift up the cover; using left hand, hold the middle hairbrush and lift up. Clean the chamber where the brush is located and the contaminants on the brushes.
-
Page 18: Replacing The Side Brush
Maintenance (continued) Cleaning the Vacuum Inlet Lid turn off the power switch; turn the cleaner upside down on flat surface. Remove the vacuum inlet lid out as per following drawing. Clean the vacuum inlet lid and the fan-shaped mechanism to ensure good ventilation. Guide the hinge tabs on the vacuum inlet lid back into their holes carefully. -
Page 19: Troubleshooting
Problems and Solutions If you come across a problem, please use the checklist of troubleshooting tips before ringing Hoover Customer Care. Problem Solution Cleaner is falling down stairs Cleaner is falling down stairs (ie: not changing direction (ie: not changing direction when when stairs are sensed). -
Page 20: Conditions Of Warranty
Your Hoover cleaner, in the case of domestic use, has Monday-Friday 9am-5pm EST. The decision to repair or replace the cleaner is at the sole discretion of Hoover Floorcare. If a one year parts and labour warranty against product Hoover Floorcare decide to repair or replace the cleaner, it will defects and failures when the product is used in do so at its own cost.
Need help?
Do you have a question about the 2240 classic and is the answer not in the manual?
Questions and answers