Table of Contents
Advertisement
ENGLISH • ESPAÑOL • FRANÇAIS
IMPORTANT! KEEP FOR FUTURE REFERENCE.
Please read all instructions before assembly and use of the swing.
¡IMPORTANTE! CONSÉRVELO PARA REFERENCIA FUTURA.
Por favor lea todas las instrucciones antes de armar y usar el columpio.
IMPORTANT ! À CONSERVER POUR CONSULTATION.
Lire les instructions dans leur intégralité avant de monter et utiliser la balançoire.
6931-ES
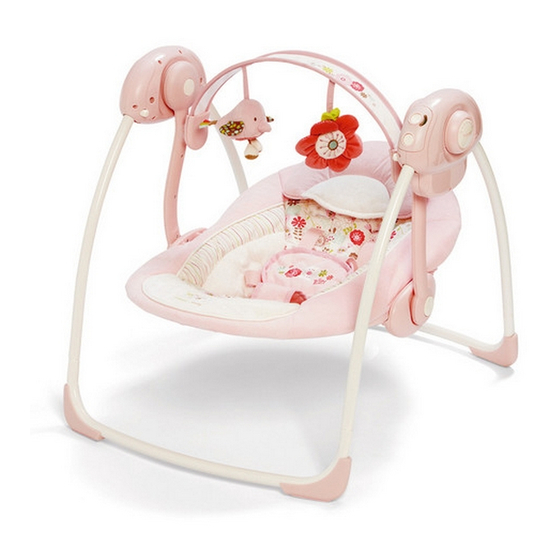
Portable Swing • Mecedora Portátil
Balançoire Portable
Advertisement
Table of Contents

Related Manuals for Bright Starts 6931-ES


Summary of Contents for Bright Starts 6931-ES
- Page 1 Por favor lea todas las instrucciones antes de armar y usar el columpio. IMPORTANT ! À CONSERVER POUR CONSULTATION. Lire les instructions dans leur intégralité avant de monter et utiliser la balançoire. 6931-ES Portable Swing • Mecedora Portátil Balançoire Portable...
- Page 2 WARNING To Prevent Serious Injury or Death: • NOT INTENDED FOR CARRYING BABY. • NEVER leave child unattended in the swing. • ALWAYS use restraint system. • NEVER use with an active child who may be able to climb out of the seat.
- Page 3 • NUNCA levante la mecedora usando la barra de juguetes como manija. • ¡NUNCA mueva la unidad mientras el niño esté en la mecedora! • NUNCA use el producto como portabebés para viajar en automóviles ni en aviones. • NUNCA ate cuerdas ni correas adicionales al producto ni a la barra de juguetes.
- Page 4 DANGER DE CHUTE : • NE JAMAIS utiliser la balançoire sur un plan de travail, une table, à proximité d’un escalier ou sur d’autres surfaces élevées. • TOUJOURS poser sur le sol. DANGER DE SUFFOCATION : • Ne JAMAIS utiliser sur une surface molle (un lit, un canapé ou un coussin par exemple), car le siège risquerait de se renverser, d’où...
- Page 5 Swing Frame Assembly Armado del armazón de la mecedora Assemblage du cadre de la balançoire Left frame/pivot assembly Right frame/pivot assembly Conjunto armazón/pivote izquierdo Conjunto armazón/pivote derecho Module cadre/pivot gauche Module cadre/pivot droit Speed Selector Ring Anillo de selección de velocidad Sélecteur de vitesse Battery compartment...
- Page 6 Place a base frame tube on the fl oor as shown. Insert each end of the tube into the front tube of the left and right frame/pivot assemblies. Coloque un tubo del armazón de la base en el suelo, como se muestra. Inserte cada extremo del tubo en el tubo delantero de los conjuntos armazón/pivote izquierdo y derecho.
- Page 7 Seat Frame Assembly • Ensamblaje del Armazón del Asiento • Ensemble du Cadre du Siège Footrest tube Symbols Tubo del apoyapiés Símbolos Tube du repose-pied Symboles Backrest tube Tubo del respaldo Tube de l’appui-tête Position the end of the footrest tube with the triangle symbol at the left bracket as shown. Then slide the ends of the tube into place at the front of the seat frame brackets.
- Page 8 Turn the backrest tube so that the dot symbol is near the left bracket. Then slide the ends of the tube into place at the rear of the seat frame brackets. Gire el tubo del respaldo para que el símbolo circular quede cerca del soporte izquierdo. Luego, deslice los extremos del tubo hasta que queden en su lugar, en la parte trasera de los soportes del armazón del asiento.
- Page 9 Seat Pad Installation • Instalación de la Almohadilla del Asiento • Installation de Coussinet du Siège Locate the seat pad. Turn it over and unfasten the buckles on each side of the shoulder straps. Localice la almohadilla del asiento. Voltéela y desprenda las hebillas de cada lado de las correas para hombros.
- Page 10 Pivot the footrest tube upward until it locks into place. Lift the bottom of the seat pad upward and slide the fabric pocket over the footrest tube. Gire el tubo del apoyapiés hacia arriba hasta que se trabe en su lugar. Levante la parte inferior de la almohadilla del asiento hacia arriba y deslice el bolsillo de tela sobre el tubo del apoyapiés.
- Page 11 Route each shoulder strap through the corresponding buckle as shown below. Pase cada correa para hombros a través de la hebilla correspondiente, como se muestra a continuación. Faire passer chacune des sangles épaule dans la boucle correspondante comme indiqué ci-après. Battery Installation •...
- Page 12 El módulo de control de la mecedora requiere cuatro (4) baterías tamaño C/LR14 (1.5 V) (no incluidas). Use baterías alcalinas para un mejor funcionamiento. PRECAUCIÓN: Siga los lineamientos para las baterías en esta sección. De lo contrario, la vida de la batería podría reducirse o la batería podría tener una fuga o romperse.
- Page 13 Swing control module Módulo de control de la mecedora Module de contrôle de la balançoire Battery compartment Compartimiento de baterías Compartiment des pile Use a #1 Phillips screwdriver to loosen the screw that secures the battery cover. Use un destornillador Phillips Nro. 1 para afl ojar el tornillo que sujeta la tapa del compartimiento de baterías.
- Page 14 Replace the battery cover on the swing control module and tighten the screw. Do not overtighten. Vuelva a colocar la tapa de las baterías en la módulo de control de la mecedora y ajuste el tornillo. No apriete demasiado. Remettre le cache du compartiment à piles en place sur la module de contrôle de la balançoire et serrez la vis.
- Page 15 The toy bar is adjustable so you can easily access the baby without removing the toy bar. Click • Clic • Clic La barra de juguetes es ajustable; por lo tanto, puede colocar al bebé sin necesidad de retirar la barra de juguetes.
- Page 16 Using the Seat Restraint Utilización del sujetador del asiento Utilisation des sangles de sécurité du siège ™ • The Comfort & Harmony Portable Swing has a 5-point seat restraint for child safety. • La mecedora portátil Comfort & Harmony ™ cuenta con un sujetador de asiento de 5 puntos para la seguridad del niño.
- Page 17 (Optional) You may also detach the shoulder buckle from the waist buckle on each side. Slide the buckles apart, if needed. (Opcional) También puede desprender la hebilla del hombro de la hebilla de la cintura en cada lado. De ser necesario, deslice las hebillas para separarlas.
- Page 18 Place the infant in the seat. The seat restraint should be visible between the baby’s legs. Lift the seat restraint up and toward the baby’s waist. Guide the baby’s arms under the shoulder straps. Insert the left and right sets of buckles into the restraint latch. Coloque al bebé...
- Page 19 To adjust the shoulder strap length, slide the straps through the two buckles behind the backrest as needed. Para ajustar la longitud de las correas para hombros, deslice las correas a través de las hebillas detrás del respaldo, según sea necesario. Pour régler la longueur de la bandoulière, faire glisser les sangles dans les deux boucles derrière le dossier jusqu’à...
- Page 20 Using the Swing Control Module Utilización del módulo de control de la mecedora Utilisation du module de commande de la balançoire Swing Timer Select Button and Indicator Speed Selector Ring Botón e indicador de selección de temporizador Anillo de selección de velocidad de la mecedora Sélecteur de vitesse Sélecteur et indicateur de minuterie de...
- Page 21 Use la función de Selección de temporizador de la mecedora para APAGAR la mecedora automáticamente. Presione el botón para determinar la confi guración deseada del temporizador de 15, 30 ó 45 minutos. Las tres LED al lado del botón indican el período seleccionado. Si no selecciona una confi guración del temporizador (todas las LED están APAGADAS), la unidad utiliza un período predeterminado de 60 minutos para apagarse automáticamente.
- Page 22 Storage and Travel • Almacenamiento y transporte Rangement et déplacements The frame of the Comfort & Harmony ™ Portable Swing can be folded for storage or travel. To close the swing frame... • Pivot the two halves of the seat together until they meet at the top. •...
- Page 23 To open the swing frame for use... Pivot both sides of the frame outward until the frame lock buttons click into place. Pivot the footrest and headrest downward until each stops at the normal position. Para abrir el armazón de la mecedora a fi n de utilizarlo... Gire ambos lados del armazón hacia afuera hasta que los botones de traba del armazón se traben en su lugar.
- Page 24 FCC Statement • Declaración de la FCC • Déclaration FCC This device complies with Part 15 of the FCC rules. Operation is subject to the following two conditions: this device may not cause harmful interference, and this device must accept any interference received, including interference that may cause undesired operation.
- Page 25 Cet appareil est conforme à la Partie 15 des règles de la FCC. L’utilisation est sujette aux deux conditions suivantes : ce dispositif ne peut causer d’interférences nuisibles, et ce dispositif doit accepter toute interférence reçue, y compris les interférences pouvant causer un fonctionnement indésirable.
- Page 26 6931 Parts List and Drawing • Lista de partes y dibujo Liste de pièces et dessin Qty. Cant. Description Descripción Description N° Qté M5 x 25 mm (1”) Tornillos Phillips de tournevis cruciforme Phillips screw M5 x 25 mm (1”) M5 x 25 mm Left frame/pivot Conjunto armazón/pivote...
- Page 27 – 27 –...
- Page 28 Kids II Limited Warranty • Garantía Limitada de Kids II ® ® Garantie limitée Kids II ® Kids II is committed to making innovative, high quality products for babies and children. We warrant this product to be free from defects in material and workmanship existing at the time of manufacture for a period of one year from the date of initial purchase (sales receipt is required for proof of purchase).
Need help?
Do you have a question about the 6931-ES and is the answer not in the manual?
Questions and answers