Advertisement
Advertisement

Related Manuals for SingTel Pace-5520


Summary of Contents for SingTel Pace-5520
- Page 1 SingNet BroadBand • mio Voice...
-
Page 2: Table Of Contents
Contents STEP 1: Equipment Check STEP 2: Setting Up Your BroadBand Connection STEP 3: BroadBand Connection Settings for Fibre (Optional) STEP 4: Logging in to Your SingNet BroadBand STEP 5: Connecting Wirelessly to SingNet BroadBand (Optional) STEP 6: Setting Up Your mio Voice Technical Support Contact Numbers... -
Page 3: Step 1: Equipment Check
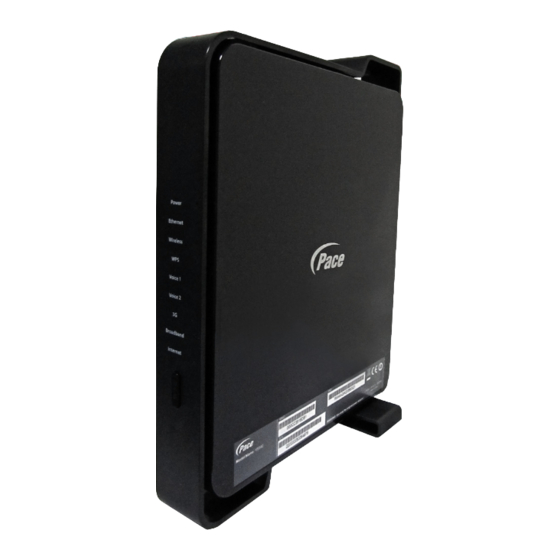
Dear Customer, this guide has been prepared to help you to install SingNet BroadBand (ADSL) service. STEP 1: Equipment Check The following items are pre-packaged in your Residential Gateway. Note: Existing SingNet BroadBand, mio Plan or mio Home subscribers should already have these items connected to their Residential Gateway. -
Page 4: Step 2: Setting Up Your Broadband Connection
STEP 2: Setting Up Your BroadBand Connection 2.1. Connecting Residential Gateway to Telephone wall socket Using the Telephone Cable (RJ11), connect the Residential Gateway “DSL” port to the DSL Microfilter‘s “DSL” port. Phone line Phone socket Insert the head of the DSL Microfilter Phone into your telephone wall socket. -
Page 5: Step 3: Broadband Connection Settings For Fibre (Optional)
STEP 3: BroadBand Connection Settings for Fibre (Optional) Connect the Residential Gateway Broadband Port to the ONT LAN 1 Port highlighted in Yellow using the Ethernet Cable (RJ45). Switch off the ONT Power before you do the set up. For mio TV Set Top Box, personal computer or laptop, please connect it to the Lan Port highlighted in Yellow. -
Page 6: Step 4
STEP 4: Logging in to SingNet BroadBand Please confirm that you have the following item on hand before attempting this section: SingNet BroadBand Service Letter – this contains your Username and Password which will be used for setting up the SingNet BroadBand. Open your web-browser (e.g. -
Page 7: Step 5: Connecting Wirelessly To Singnet Broadband (Optional)
You may fill in these details on the box below for future references. Note: The default wireless encryption option is WPA/WPA2. Network Name (SSID): Network Key: SINGTEL-_______________ _______________________ Insert last 4 numbers of your Serial Write the 10 digit of Wireless Key here. - Page 8 Section E. Double click on the correct Network Name of your wireless network (e.g. SINGTEL-0110) and wait for the network to be detected. Note: Please refer to Section A if you are unsure of your Network Name or try refreshing your Network list if you do not see it.
- Page 9 STEP 5: Connecting Wirelessly to SingNet BroadBand (Continued) You will see the following screen if you were successful. Section C: If you are using Windows Vista In Windows Vista, click on the Start button. Click on Connect To You will see the following screen.
- Page 10 STEP 5: Connecting Wirelessly to SingNet BroadBand (Continued) Under Show, select “Wireless” Find the correct Network Name of your wireless network (e.g. SINGTEL-0110). Note: Please refer to Section A if you are unsure of your Network Name or try refreshing your Network list if you do not see it.
- Page 11 STEP 5: Connecting Wirelessly to SingNet BroadBand (Continued) You will now be prompted to enter your Network Key. Note: You will see this when: (i) You are connecting to the Residential Gateway for the first time (ii) You have unselected the option to save the Network Type in your Network Key in the “Security key or passphrase”...
- Page 12 You will see a window of the available networks, locate and select your own wireless network. e.g. SINGTEL-0110. Note: Please refer to Section A if you are unsure of your Network Name or try refreshing your Network list if you do not see it.
- Page 13 STEP 5: Connecting Wirelessly to SingNet BroadBand (Continued) Click on the “Close” button to complete the setup and close the window. You will see the wireless icon on the taskbar, like the one on the left, once the wireless is successfully connected. Section E: If you are using another wireless manager Configuration of most Wireless Managers requires your Network Name and Key.
- Page 14 Section F: Welcome to your FREE exPress Portal! Stay close to the people and memories that matter most to you. Visit www.express.singtel.com and log in with your SingNet email and password. First time users will see a guided tour.
- Page 15 Your home screen - Play and discover new possibilities Once logged in, non-Fibre customers will see the below screen. If you are a Fibre customer, you’ll see a slightly different interface (refer to the “Quick Quide to exStream” leaflet). To start a service, double-click on the service’s icon to open up the widget. Let’s check out Store & Share.
- Page 16 Using Widgets You can start using the widget once it’s opened. Store & Share allows you to store, share and retrieve files online, anywhere you are. You can also back up your phone contacts and computer files. If you’ve signed up for this service, you can start using it immediately.
- Page 17 More fun services Check out these other interesting widgets to help keep your friends close! Universal Inbox Pull together your social networks and emails all in one page. Check out your friend’s latest updates and pictures. Update your status or upload photos to multiple social networks at once. Save pictures you like directly into Store &...
-
Page 18: Step 6: Setting Up Your Mio Voice
STEP 6: Setting Up Your mio Voice New subscribers for mio Voice will automatically be configured with the service. The “VOICE” LED on the Residential Gateway will turn on after 10 minutes upon successful configuration of your BroadBand service. Thereafter, customers may proceed to connect their supported telephones following the steps below. - Page 19 IMPORTANT TIPS: 1. Ensure that all active telephone extensions are fixed with DSL microfilters for stable and reliable Internet experience. The DSL microfilter can be seen in Step 1 – Equipment Check. 2. Remember the Network Name (SSID) and the Network key of the wireless setup. For more information, please refer to Step 4 –...
- Page 20 Copyright © 2012 Singapore Telecommunications (CRN: 199201624D) and SingNet Pte Ltd (CRN: 199802130W). All rights reserved.
Need help?
Do you have a question about the Pace-5520 and is the answer not in the manual?
Questions and answers