D-Link DWR-720 User Manual
Hspa+
Hide thumbs
Also See for DWR-720:
- Quick installation manual (77 pages) ,
- User's setup manual (2 pages) ,
- Basic user setup manual (2 pages)
Table of Contents
Advertisement
Advertisement
Table of Contents

Related Manuals for D-Link DWR-720


Summary of Contents for D-Link DWR-720
-
Page 1: User Manual
Version 1.00 | 10/02/2015 User Manual HSPA+ Mobile Router DWR-720... -
Page 2: Manual Revisions
Preface D-Link reserves the right to revise this publication and to make changes in the content hereof without obligation to notify any person or organization of such revisions or changes. Manual Revisions Revision Date Description 10/02/2015 • Initial release Trademarks D-Link and the D-Link logo are trademarks or registered trademarks of D-Link Corporation or its subsidiaries in the United States or other countries. -
Page 3: Table Of Contents
Web-based Configuration ............14 Security ..................39 Configuration Utility ............14 Firewall ...................39 Home ....................15 IP Filter ................39 Navigation ................15 IPv6 Filter ................40 Device Status ................16 MAC Filter .................41 Home ..................17 DDOS ..................42 Wizard .....................18 URL Filter ................43 Internet ...................20 D-Link DWR-720 User Manual... - Page 4 Using Windows Vista™ ..............62 Configuring Wireless Security ........63 Using Windows XP ..............65 ® Configure WEP ..............66 Configure WPA-PSK ............68 Troubleshooting ..............70 Networking Basics ............72 Check your IP address ...............72 Statically Assign an IP address ..........73 Technical Specifications ..........74 D-Link DWR-720 User Manual...
-
Page 5: Product Overview
Section 1 - Product Overview Product Overview Package Contents D-Link DWR-720 HSPA+ Mobile Router Battery USB Cable If any of the above items are missing from your package, please contact your reseller. D-Link DWR-720 User Manual... -
Page 6: System Requirements
• Safari 4.0 or higher • Chrome 20.0 or higher Windows Users: Make sure you have the latest version of Java ® installed. Visit www.java.com to download the latest version. Subject to services and service terms available from your carrier. D-Link DWR-720 User Manual... -
Page 7: Introduction
Built-in Software for Instant Access Anywhere The DWR-720 is truly plug and play, with drivers built right into the router so you can connect without the need to install anything. Open a browser, connect the router, and you can set up your network right from a web interface. This means that notebooks and netbooks without a CD-ROM drive can connect and get up and running in no time. -
Page 8: Hardware Overview
If you wish to use the onboard storage functionality, insert a microSD card here. Use the included cable to connect to a powered USB port to charge the device, or connect to a Micro USB port computer to access the configuration utility. D-Link DWR-720 User Manual... -
Page 9: Battery Cover Removed
Insert a SIM card to access the Internet and your SIM card contacts list. Wi-Fi Network (SSID) The factory default network name (SSID) of the DWR-720 will be displayed here. Network (SSID) The network (SSID) password of the DWR-720 will be displayed here. -
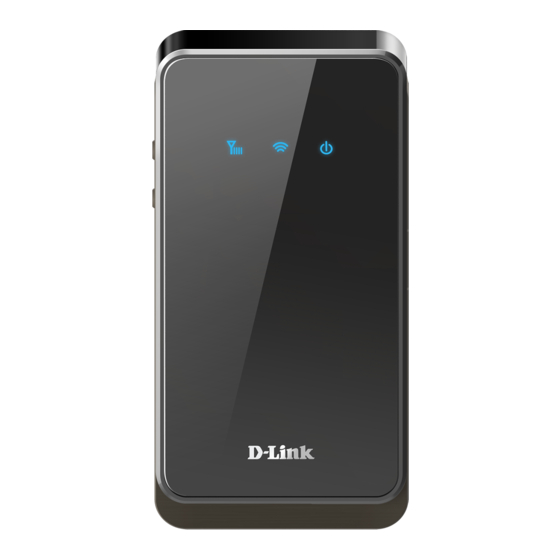
Page 10: Led Icons
No signal or SIM error Blue Solid: Wi-Fi Active Wi-Fi LED Blinking: Transmitting data / WPS active Blue Battery level greater than 50% Amber Charging Green Battery level 10% - 50% Battery LED Battery Low SMS message received Purple D-Link DWR-720 User Manual... -
Page 11: Installation
This section will guide you through the installation process. Connect to Your Network 1. Ensure that your DWR-720 Mobile Wi-Fi Hotspot 21 Mbps is powered off. 2. Remove the back cover and take out the battery. Slide your (U)SIM card into the slot provided, ensuring that the alignment is the same as indicated by the logo next to the slot. -
Page 12: Insert A Microsd Card
Section 2 - Installation Insert a microSD Card 1. Ensure that your DWR-720 HSPA+ Mobile Router is powered off. 2. Open the cover of the microSD slot on the side of the router. 3. Insert the microSD card into the slot and push it in until it locks into place. -
Page 13: Driver Installation
Section 2 - Installation Driver Installation When you plug the DWR-720 into your computer, any necessary drivers will immediately install. . Your version of Windows may prompt you to confirm the driver installation. Note: These drivers are Windows-only. Mac and Linux users will still be able to configure the DWR-720 using the web configuration utility described in Configuration Utility on page 14. -
Page 14: Wireless Installation Considerations
Wireless Installation Considerations The DWR-720 can be accessed using a wireless connection from anywhere within the operating range of its wireless network. Keep in mind that the quantity, thickness, and location of walls, ceilings, or other objects that the wireless signals must pass through may adversely affect wireless signals. -
Page 15: Configuration
Initial Connection to the Router By default, the DWR-720 comes configured to work with most 3G SIM cards. Simply connect to it via Wi-Fi or use the included USB to access the SIM’s 3G Internet connection. When configuring the router for the first time, you will need to establish a direct connection with the router in order to access the web-based configuration utility. -
Page 16: Connect Via Wi-Fi
To connect to the router using Wi-Fi, open your operating system’s wireless networking utility and scan for available networks to connect to. By default, the network name (SSID) of the DWR-720 will be in the format dlink_DWR-720_xxxx, where “xxxx” represents the last four character’s of the router’s MAC address. - Page 17 Enter the security key in the box provided and click OK. Your wireless connection utility should confirm that the connection is successful, and you can move to the next step to continue to configuration process. D-Link DWR-720 User Manual...
-
Page 18: Web-Based Configuration
Once you have reached the configuration utility through your web browser, you will need to log in. Enter admin as the username, and then enter the password. By default, the password is blank. You can also select your language from the drop-down menu. Click Login to continue. D-Link DWR-720 User Manual... -
Page 19: Home
The Security tab allows you to configure firewall and security settings to protect your network from WAN-side Security: intrusions. Application: From this tab, you can manage the administrative configuration of your router, such as time and date, firmware, language, and remote management. D-Link DWR-720 User Manual... -
Page 20: Device Status
Indicates that the router’s Wi-Fi network is currently active. The number to the right of this icon indicates the number of wireless clients currently connected to the router’s Wi-Fi network. Logout: Click this button to log out of the configuration interface. D-Link DWR-720 User Manual... -
Page 21: Home
Traffic This area shows the amount of data which has been sent (TX) Statistics: and received (RX) over the mobile network. This information may not reflect the amount recorded by your mobile service provider. D-Link DWR-720 User Manual... -
Page 22: Wizard
If you wish to change the 2G or 3G service provider or connection type, click on a profile in the list to highlight it, and click Set to set that profile as the default. Click Next to continue, or Back to return to the previous step. D-Link DWR-720 User Manual... - Page 23 SSID before you can access your network or the configuration utility. Click Done to complete the wizard, or click Back to return to the previous page. After you have clicked Done, a confirmation window will appear. Click OK to save the configuration. D-Link DWR-720 User Manual...
-
Page 24: Internet
Click Change to effect the change. Select whether you would like to Enable or Disable mobile Roaming Mode: network roaming from the drop-down menu. Caution: Using networks other than the ones provided by your service provider may result in roaming charges. D-Link DWR-720 User Manual... - Page 25 Enter the password to be used for this connection. Click the delete icon to delete this profile from the list. Click OK to save the profile. Click Apply to apply the profile settings and return to the Internet menu. D-Link DWR-720 User Manual...
-
Page 26: 2G/3G Modem
2G Only - The modem will only connect to 2G networks. If you wish to change the modem type, select your new modem type and click Change to effect the change. Re-enter the new PIN code. Click Apply to apply the changes. D-Link DWR-720 User Manual... -
Page 27: Sim
This section allows you to turn SIM lock on or off for the SIM card which is currently inserted into the router. PIN Code: Enter the PIN code for the SIM card. Click Enable to turn on SIM lock, or click Disable to turn off SIM lock. D-Link DWR-720 User Manual... -
Page 28: Plmn
Note: You will need to manually disconnect the current mobile data service before selecting a network using PLMN. Please refer to Connection on page 20 for further information on how to do this. D-Link DWR-720 User Manual... -
Page 29: Network
Enter the prefix to be used to delegate IPv6 addresses to the LAN. RA Autonomous: Check the box to set the router announcement mode to autonomous. RA On-Link: Check the box to enable router announcement on-link Click Apply to save the current configuration. D-Link DWR-720 User Manual... - Page 30 Section 3 - Configuration DNS NAME DNS Device Enter your router’s DNS device name in the field provided. Name: Click Apply to save the current configuration. D-Link DWR-720 User Manual...
-
Page 31: Dhcp
Section 3 - Configuration DHCP The DWR-720 has a built-in DHCP server which can assign IP addresses to connected clients. This section allows you to configure the DHCP settings. DHCP SERVER DHCP Mode: Select None from the drop-down menu if you do not wish to enable the DHCP Server. - Page 32 DHCP address from the DHCP server. Click Refresh to update the table. The MAC address of the device or machine assigned an DHCP MAC Address: address. The IP address of the device or machine assigned an DHCP IP Address: address. D-Link DWR-720 User Manual...
-
Page 33: Nat
Enter the starting and ending ports to be opened when the trigger occurs. Delete: Click the Delete icon to delete the rule. Click OK to save the rule. Click Apply to apply the current rules and return to the Network page. D-Link DWR-720 User Manual... - Page 34 Note: Only recommend for advanced users, enabling this option will potentially expose your computer to cyber attacks over the Internet. DMZ Host: Enter the DMZ host IP address here. D-Link DWR-720 User Manual...
-
Page 35: Sms
Section 3 - Configuration The DWR-720 can send and receive SMS text messages through the mobile network’s SMS function. New Message Send To: Enter the phone number that you wish to send the message Messages: Enter the body of the message to be sent. -
Page 36: Wi-Fi
Select the desired transmission power from the drop- down menu. Beacon Interval: The beacon interval determines how often information about the wireless network is broadcast. It is recommended that you do not adjust this setting unless instructed to do so. D-Link DWR-720 User Manual... - Page 37 For more information regarding wireless encryption and how to configure it, please refer to Wireless Security on page 34. If you do not wish to enable wireless security, select None from the drop-down menu. Click Apply to save the current settings. D-Link DWR-720 User Manual...
-
Page 38: Wireless Security
Select whether you wish to use HEX or ASCII characters in your key using the drop-down menu. Enter the desired key in the field provided. Click Apply to save the current settings. D-Link DWR-720 User Manual... -
Page 39: Wi-Fi Protected Access (Wpa)
Pre-Shared Key The pre-shared key is the password which clients will require in order to connect to your network. Enter a password of between 8 and 63 characters in length. Click Apply to save the current settings D-Link DWR-720 User Manual... -
Page 40: Wi-Fi Protected Setup (Wps)
Enrollee PIN: If the device you are trying to add to the network was provided with a PIN number, select this option and enter the device’s PIN in the field. Click Apply to commence the connection process. D-Link DWR-720 User Manual... -
Page 41: Mac Filter
Click the Delete icon to delete the rule from the table. Click OK to save the current rule and add it to the table. Click Apply to save all changes and return to the Wi-Fi page. D-Link DWR-720 User Manual... -
Page 42: Station Lists
Section 3 - Configuration Station Lists The Station List tab shows a list of all wireless clients currently connected to your wireless network. D-Link DWR-720 User Manual... -
Page 43: Security
Enter the ending port of the destination IP. Port: Protocol: Select the protocol for the IP filter rule. Delete: Click the icon to delete the IP filtering rule. Click OK to save the filtering rule. Click Apply to save the current configuration. D-Link DWR-720 User Manual... -
Page 44: Ipv6 Filter
Enter the port on the destination IP. Protocol: Select the protocol for the IP filter rule. Delete: Click the icon to delete the IP filtering rule. Click OK to save the current filtering rule. Click Apply to save the current configuration. D-Link DWR-720 User Manual... -
Page 45: Mac Filter
Enter the ending time at which you wish to deactivate the MAC filtering rule each day. Delete: Click the icon to delete this MAC filtering rule. Click OK to add the current rule to the rules list. Click Apply to save the current configuration. D-Link DWR-720 User Manual... -
Page 46: Ddos
This section allows you to enable various security features to protect against Denial of Service (DoS) attacks. DoS Prevention Check the box next to the rule to enable prevention against Filters: that specific kind of DoS attack. Click Apply to save the current configuration. D-Link DWR-720 User Manual... -
Page 47: Url Filter
URLs under this domain will be allowed or denied access. Delete: Click the icon to delete the rule. Click Add to save the rule and add it to the rule table. Click Apply to save the current configuration. D-Link DWR-720 User Manual... -
Page 48: Application
Section 3 - Configuration Application This tab allows you to configure the router’s administrative functions, such as time & date, remote access, and firmware. You can also access the system log. About This tab shows the router’s basic information. D-Link DWR-720 User Manual... -
Page 49: Configuration
Restore to configure the router according to the selected configuration file. RESET TO DEFAULT Click Reset to restore the router’s settings to the factory defaults. Warning: All settings stored on the router will be lost following a factory reset. D-Link DWR-720 User Manual... -
Page 50: Firmware Upgrade
You can upgrade the firmware of the router here. Make sure the firmware file you want to use is on the local hard drive of the computer. Please check your local D-Link support site or http://support.dlink.com for firmware updates and language packs. -
Page 51: Standby Mode
Enter the number of minutes after which the router will enter Mode: hibernate mode if no activity is detected. Auto Power Off: Enter the number of minutes after which the router will shut down if no activity is detected. Click Apply to save the current configuration. D-Link DWR-720 User Manual... -
Page 52: Remote Control
Section 3 - Configuration Remote Control This section is for advanced users who wish to remotely configure the DWR-720. HTTP HTTP Server By default the HTTP Server is enabled. Check the box to Enable: disable this function. Please note, if you disable the HTTP Server function you will no longer be able to configure the router using this web configuration utility. - Page 53 Check this box to allow access to the web server from WAN. From WAN: Accept Request Check this box to allow access to the web server from LAN. From LAN: Click Apply to save the current configuration. D-Link DWR-720 User Manual...
-
Page 54: Password
Old Password: Enter the existing password for this account. New Password: Enter the new password for this account. Retype New Type the new password again to confirm. Password: Click Apply to save the current configuration. D-Link DWR-720 User Manual... -
Page 55: Date And Time
If you selected Get time From Server, select the desired time protocol from the drop-down menu. Time Server Enter up to four NTP server addresses which will be used to Address 1-4: synchronize the router’s system time and date. Click Apply to save the current settings. D-Link DWR-720 User Manual... - Page 56 Enter the details of the starting date and time for daylight saving time in your region. End Date: Enter the details of the ending date and time for daylight saving time in your region. Click Apply to save the current settings. D-Link DWR-720 User Manual...
-
Page 57: Language
Section 3 - Configuration Language Language: Select your preferred language from the drop-down menu. Click Apply to save the current configuration. D-Link DWR-720 User Manual... -
Page 58: System Log
Click Apply to save the current configuration. LOG DISPLAY Refresh: Click to update the log display. Clear Log: Click to clear all log entries. Display Log Select the level of log event which you wish to view from the Level: drop-down menu. D-Link DWR-720 User Manual... -
Page 59: Connecting To A Wireless Network
To join an existing network, locate the wireless network icon in the taskbar, next to the time display. ƒ Wireless Icon Clicking on this icon will display a list of wireless networks which are within connecting proximity of your computer. Select the desired network by clicking on the network name. D-Link DWR-720 User Manual... - Page 60 WPS function. When you have established a successful connection to a wireless network, the word Connected will appear next to the name of the network to which you are connected. D-Link DWR-720 User Manual...
-
Page 61: Using Windows 7
If you receive the Wireless Networks Detected bubble, click on the center of the bubble to access the utility. You can also click on the wireless icon in your system tray (lower-right corner). Wireless The utility will display any available wireless networks in your area. D-Link DWR-720 User Manual... - Page 62 Highlight the wireless network (SSID) you would like to connect to and click the Connect button. If you get a good signal but cannot access the Internet, check your TCP/IP settings for your wireless adapter. Refer to Networking Basics on page 72 for more information. D-Link DWR-720 User Manual...
-
Page 63: Configuring Wireless Security
If you are joining an existing network, you will need to know the security key or pass phrase being used. 1. Click on the wireless icon in your system tray (lower-right corner). Wireless 2. The utility will display any available wireless networks in your area. D-Link DWR-720 User Manual... - Page 64 Section 4 - Connecting to a Wireless Network 3. Highlight the wireless network (SSID) you would like to connect to and click the Connect button. 4. The following window appears while your computer tries to connect to the router. D-Link DWR-720 User Manual...
- Page 65 It may take 20-30 seconds to connect to the wireless network. If the connection fails, please verify that the security settings are correct. The key or passphrase must be exactly the same as on the wireless router. D-Link DWR-720 User Manual...
-
Page 66: Using Windows Vista
(displayed using the SSID) and click the Connect button. If you get a good signal but cannot access the Internet, check the TCP/IP settings for your wireless adapter. Refer to Networking Basics on page 72 for more information. D-Link DWR-720 User Manual... -
Page 67: Configuring Wireless Security
Wireless Utility by right-clicking on the wireless ® ™ computer icon in your system tray (lower right corner of screen). Select Connect to a network. 2. Highlight the wireless network (SSID) you would like to connect to and click Connect. D-Link DWR-720 User Manual... - Page 68 It may take 20-30 seconds to connect to the wireless network. If the connection fails, please verify that the security settings are correct. The key or passphrase must be exactly the same as on the wireless router. D-Link DWR-720 User Manual...
-
Page 69: Connect To A Wireless Network
(displayed using the SSID) and click the Connect button. If you get a good signal but cannot access the Internet, check the TCP/IP settings for your wireless adapter. Refer to Networking Basics on page 72 for more information. D-Link DWR-720 User Manual... -
Page 70: Configure Wep
XP Wireless Utility by right-clicking on ® the wireless computer icon in your system tray (lower-right corner of screen). Select View Available Wireless Networks. 2. Highlight the wireless network (SSID) you would like to connect to and click Connect. D-Link DWR-720 User Manual... - Page 71 It may take 20-30 seconds to connect to the wireless network. If the connection fails, please verify that the WEP settings are correct. The WEP key must be exactly the same as on the wireless router. D-Link DWR-720 User Manual...
-
Page 72: Configure Wpa-Psk
XP Wireless Utility by right-clicking on ® the wireless computer icon in your system tray (lower-right corner of screen). Select View Available Wireless Networks. 2. Highlight the wireless network (SSID) you would like to connect to and click Connect. D-Link DWR-720 User Manual... - Page 73 It may take 20-30 seconds to connect to the wireless network. If the connection fails, please verify that the WPA-PSK settings are correct. The WPA-PSK passphrase must be exactly the same as on the wireless router. D-Link DWR-720 User Manual...
-
Page 74: Troubleshooting
• Make sure that the computer you are using is not connected to any other devices (such as routers or switches) which might have the same IP address as the DWR-720, as this may cause an IP address conflict. If you have a conflict, temporarily unplug any other devices from your computer while you configure the DWR-720. - Page 75 Reset Button the hole to the upper-left of the SIM card slot (see diagram). The DWR-720 will restore the factory default settings. Wait about 30 seconds for the router to restart before you attempt to reconnect to it.
-
Page 76: Networking Basics
Check your IP address After you install your new D-Link adapter, by default, the TCP/IP settings should be set to obtain an IP address from a DHCP server (i.e. wireless router) automatically. To verify your IP address, please follow the steps below. -
Page 77: Statically Assign An Ip Address
Set Primary DNS the same as the LAN IP address of your router (192.168.0.1). The Secondary DNS is not needed or you may enter a DNS server from your ISP. Step 5 Click OK twice to save your settings. D-Link DWR-720 User Manual... -
Page 78: Technical Specifications
• Internal Wi-Fi antenna • -10 to 55 °C (14 to 131 °F) USB Interface Certifications • micro USB port • FCC/CE USIM Slot • Standard 6-pin SIM card interface Status Indicators • 3 LED icons D-Link DWR-720 User Manual... - Page 79 • This device is restricted from functioning in Ad-hoc mode while operating in 5 Ghz. Ad-hoc mode is direct peer-to-peer communication between two client devices without an Access Point. • Access points will support DFS (Dynamic Frequency Selection) and TPC (Transmit Power Control) functionality as required when operating in 5 Ghz within the EU. D-Link DWR-710 User Manual...
- Page 80 Spectrum Regulation MHz, Europa (ETSI) max. EIRP Innenbereich max. EIRP Außenbereich Europa 2400 - 2483.5 MHz 100 mW 100 mW 2400 - 2454 MHz 100 mW 100 mW Frankreich 2454 - 2483.5 MHz 100 mW 10 mW D-Link DWR-710 User Manual...
- Page 81 D-Link recommends that you always switch off or unplug your D-Link products when they are not in use. By doing so you will help to save energy and reduce CO2 emissions.
- Page 82 Chez D-Link, nous sommes conscients de l'impact de nos opérations et produits sur l'environnement et nous engageons à le réduire. Pour limiter cet impact, D-Link conçoit et fabrique ses produits de manière aussi écologique que possible, en utilisant des matériaux recyclables et faiblement toxiques, tant dans ses produits que ses emballages.
- Page 83 En D-Link, comprendemos y estamos comprometidos con la reducción del impacto que puedan tener nuestras actividades y nuestros productos en el medio ambiente. Para reducir este impacto, D-Link diseña y fabrica sus productos para que sean lo más ecológicos posible, utilizando materiales reciclables y de baja toxicidad tanto en los productos como en el embalaje.
- Page 84 D-Link raadt aan om steeds uw D-Link producten uit te schakelen of uit de stekker te halen wanneer u ze niet gebruikt. Door dit te doen bespaart u energie en beperkt u de CO2-emissies.
- Page 85 Firma D-Link zaleca, aby Państwo zawsze prawidłowo wyłączali z użytku swoje produkty D-Link, gdy nie są one wykorzystywane. Postępując w ten sposób pozwalają Państwo oszczędzać energię i zmniejszać emisje CO2.
- Page 86 D-Link a životní prostředí Ve společnosti D-Link jsme si vědomi vlivu našich provozů a výrobků na životní prostředí a snažíme se o minimalizaci těchto vlivů. Proto své výrobky navrhujeme a vyrábíme tak, aby byly co nejekologičtější, a ve výrobcích i obalech používáme recyklovatelné...
- Page 87 D-Link og miljøet Hos D-Link forstår vi oss på og er forpliktet til å minske innvirkningen som vår drift og våre produkter kan ha på miljøet. For å minimalisere denne innvirkningen designer og lager D-Link produkter som er så miljøvennlig som mulig, ved å...
- Page 88 Suosittelemme, että irrotat D-Link-tuotteesi virtalähteestä tai sammutat ne aina, kun ne eivät ole käytössä. Toimimalla näin autat säästämään energiaa ja vähentämään hiilidioksiidipäästöjä.
- Page 89 På D-Link förstår vi och är fast beslutna att minska den påverkan våra verksamheter och produkter kan ha på miljön. För att minska denna påverkan utformar och bygger D-Link sina produkter för att de ska vara så miljövänliga som möjligt, genom att använda återvinningsbara material med låg gifthalt i både produkter och förpackningar.
Need help?
Do you have a question about the DWR-720 and is the answer not in the manual?
Questions and answers