Table of Contents
Advertisement
Advertisement
Table of Contents

Related Manuals for Lenovo ThinkVision LT2323zwC


Summary of Contents for Lenovo ThinkVision LT2323zwC
- Page 1 LT2323zwC Flat Panel Monitor User's Guide...
-
Page 2: Product Numbers
© Copyright Lenovo 2012 All rights reserved LENOVO products, data, computer software, and services have been developed exclusively at private expense and are sold to governmental entities as commercial items as defined by 48 C.F.R. 2.101 with limited and restricted rights to use, reproduction and disclosure. -
Page 3: Table Of Contents
Chapter 3. Reference information..............3-1 Monitor specifications...........................3-1 Troubleshooting............................3-3 Manual image setup..........................3 -4 Manually installing the monitor driver....................3-5 Service information...........................3-9 Appendix A. Service and Support...............A-1 Online technical support ………………………………………………………………….......A-1 Telephone technical support ………………………………………………………………......A-1 Appendix B. Notices...................B-1 Recycling information ………………………………………………………………….......B-2 Trademarks ……………………………………………………………………………….......B-3 © Copyright Lenovo 2012. -
Page 4: Safety Information
Safety information General Safety guidelines For tips to help you use your computer safety, go to: http://www.lenovo.com/safety Before installing this product, read the Safety Information. í í í © Copyright Lenovo 2012. -
Page 5: Chapter 1 Getting Started
Chapter 1 Getting started This User’s Guide contains detailed information on the ThinkVision LT2323zwC Flat Panel Monitor For a quick over view, please see the Setup Poster that was shipped with your monitor Shipping contents The product package should include the following items: ·... -
Page 6: Product Overview
Product overview This section will provide information on adjusting monitor positions, setting user controls, and using the cable lock slot. Types of adjustments Tilt Please see the illustration below for an example of the tilt range. 0° Swivel With the built-in pedestal, you can tilt and swivel the monitor for the most comfortable viewing angle. -
Page 7: User Controls
Height Adjustment Hold the monitor pull up on both sides, adjust the reasonable height of the monitor. 110mm Monitor Pivot 90° - Adjust height to the top position before rotation the monitor. - Rotate clockwise until the monitor stops at 90°. User controls Your monitor has controls on the front which are used to adjust the display. -
Page 8: Cable Lock Slot
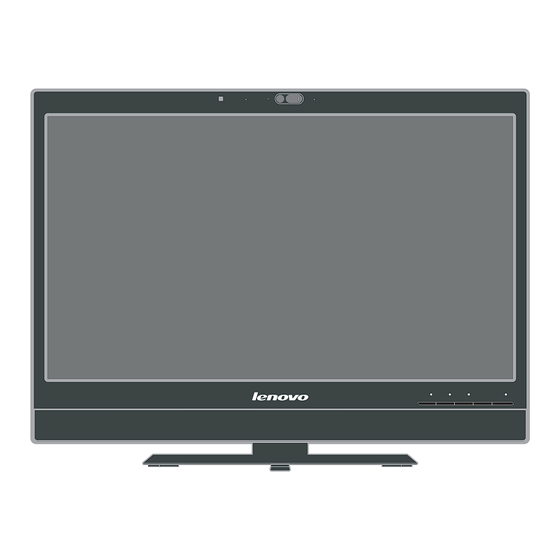
Cable lock slot Your monitor is equipped with a cable lock slot located on the rear of your monitor (in the lower left corner). Please follow the instructions that came with the cable lock to attach it. Web-Camera Your monitor has embedded FHD Web-Camera Module, you can use it on living meeting and other net communication. -
Page 9: Setting Up Your Monitor
you can push side volume control key to adjust sound of speaker. Setting up your monitor This section provides information to help you set up your monitor. Connecting and turning on your monitor N ote:Be sure to read the Safety Information located in the information flyer before carrying out this procedure. - Page 10 Connect one end of the DP cable to the DP connector on the back of the computer, and the other end to the DP connector on the monitor. Connect one end of the USB hub cable to the USB connector on the back of the computer, and the other end to the upstream USB connector on the monitor.
- Page 11 Plug the monitor power cord and the computer cord into grounded electrical outlets. Note: A certified power supply cord has to be used with this equipment. The relevant national installation and/or equipment regulations shall be considered. A certified power supply cord not lighter than ordinary polyvinyl chloride flexible cord according to IEC 60227 (designation H05VV-F 3G 0.75mm or H05VVH2-F2 3G ) shall be used.
- Page 12 Open the Main Clip and place the cables through the Main Clip. Power on the monitor and the computer. LT2323zwC F l a t Pan el Mo nitor Us ers Guide...
-
Page 13: Registering Your Option
Thank you for purchasing this Lenovo® product. Please take a few moments to register your product and provide us with information that will help Lenovo to better serve you in the future. Your feedback is valuable to us in developing products and services that are important to you, as well as in developing better ways to communicate with you. -
Page 14: Chapter 2. Adjusting And Using Your Monitor
However, be sure to optimize your monitor height so the line of site between your eyes and the center the monitor suits your preferences for visual distance and comfortable viewing when your eye muscles are in a relaxed stated. © Copyright Lenovo 2012. -
Page 15: Quick Tips For Healthy Work Habits
· Tilt: Adjust the tilt of your monitor to optimize the appearance of the screen content and to accommodate your preferred head and neck posture. · General location: Position your monitor to avoid glare or reflections on the screen from overhead lighting or nearby windows. The following are some other tips for comfortable viewing of your monitor: ·... -
Page 16: Accessibility Information
Accessibility information Lenovo is committed to providing greater access to information and technology to people with disabilities. With assistive technologies, users can access information in the way most appropriate to their disability. Some of these technologies are already provided in your operating system; others can be purchased through vendors or https://lenovo.ssbbartgroup.com/lenovo/request_vpat.php... - Page 17 To use the controls: 1. Press to open the main OSD menu. 2. Use to move among the icons. Select an icon and press to access that function. If there is a sub-menu, you can move between options using then press to select that function.
- Page 18 Table 2-2. OSD functions Controls and Controls and OSD Icon Submenu Description Adjustments Adjustments on Main (Digital) (Analog) Menu Adjusts overall brightness. Brightness Same as Analog Brightness- Contrast /Contrast Adjusts difference between light and dark areas. Monitor can detect environment luminance to adjust monitor's brightness for power saving .
- Page 19 Table 2-2. OSD functions (continued) Controls and Controls and Submenu Description OSD Icon on Adjustments Adjustments Main Menu (Analog) (Digital) Left optimum resolution is 1280x1080, Right optimum resolution is 640x1080 Same as Dual Analog Left optimum resolution is 960x1080, Right optimum resolution is 960x1080 Left optimum resolution is 640x1080, Right optimum resolution is 1280x1080 PIP im age m ode.
-
Page 20: Selecting A Supported Display Mode
Selecting a supported display mode The display mode the monitor uses is controlled by the computer. Therefore, refer to your computer documentation for details on how to change display modes. The image size, position and shape might change when the display mode changes. This is normal and the image can be readjusted using automatic image setup and the image controls. -
Page 21: Image Rotation
Image rotation Before rotating the monitor, you should set-up your computer to rotate the image. Rotating the image may require special rotation software or you may find that your computer is preloaded with video graphic drivers that allows image rotation. Check the Graphic Properties setting on your computer to see if this feature is available. -
Page 22: Understanding Power Management
Understanding power management Power management is invoked when the computer recognizes that you have not used your mouse or keyboard for a user-definable period. There are several states as described in the table below. For optimal performance, switch off your monitor at the end of each working day, or whenever you expect to leave it unused for long periods during the day. -
Page 23: Detaching The Monitor Base And Stand
Detaching the monitor base and stand step 1: Place the monitor on a soft and flat surface. step 2: Remove the base and stand from the monitor. Wall Mounting (Optional) Refer to the instructions that come with the VESA compatible base mounting kit. 1. -
Page 24: Chapter 3. Reference Information
Video input (Analog) Horizontal addressability 1920 pixels (max) Vertical addressability 1080 lines (max) Clock frequency 205 MHz Video input (DP) Interface Horizontal addressability 1920 pixels (max) Vertical addressability 1080 lines (max) Clo ck frequency 205 MHz © Copyright Lenovo 2012. - Page 25 3028-LB2 (continued) Table 3-1. Monitor specifications for type-model Communications VESA DDC Supported Display Modes Horizontal frequency 30 kHz - 81 kHz VESA Standard modes DP : 30 kHz - 75 kHz between noted ranges) Vertical frequency 50 Hz - 75 Hz Native Resolution 1920 x 1080 at 60 Hz 0º...
-
Page 26: Troubleshooting
Troubleshooting If you have a problem setting up or using your monitor, you might be able to solve it yourself. Before calling your dealer or Lenovo, try the suggested actions that are appropriate to your problem. Table 3-2. Troubleshootingg Problem... -
Page 27: Manual Image Setup
This is a characteristic Appendix A, "Service If there are more than five pixels of the pixels of the LCD technology and Support," on missing, contact the Lenovo appear and is not an LCD page A-1 Support Center. discolored defect. -
Page 28: Manually Installing The Monitor Driver
(Here, X stands for “the folder in which the downloaded driver locates” (such as desktop) 15. Select the "LT2323zwC.inf" file and click the Open button. Click the OK button. 16. Select “Lenovo LT2323zwC” in the new window and then click “Next”. Chapter 3. Reference information... - Page 29 Color Matching Profiles. . Note: On LCD monitors, unlike CRTs, a faster refresh rate does not improve display quality. Lenovo recommends using either 1920 x 1080 at a refresh rate of 60Hz, or 640 x 480 at a refresh rate of 60 Hz.
-
Page 30: Installing The Monitor Driver In Windows 7
Matching profiles. Note: On LCD monitors, unlike CRTs, a faster refresh rate does not improve display quality. Lenovo recommends using either 1920 x 1080 at a refresh rate of 60 Hz, or 640 x 480 at a refresh rate of 60 Hz... - Page 31 Note: On LCD monitors, unlike CRTs, a faster refresh rate does not improve display quality. Lenovo recommends using either 1920 x 1080 at a refresh rate of 60 Hz, or 640 x 480 at a refresh rate of 60 Hz.
-
Page 32: Service Information
Getting further help If you still can’t solve your problem, please contact the Lenovo Support Center. For more information on contacting the Customer Support Center, please see Appendix A, “Service and Support,” on page A-1. Service information Product numbers The product number for your monitor is located on the side of the display bezel as shown below. -
Page 33: Service Parts
Service parts The following parts are for use by Lenovo service, or Lenovo authorized dealers, to support the customer warranty. Parts are for service use only. The table below shows information for model 3028-LB2. Table 3-3. List of service parts... -
Page 34: Appendix A. Service And Support
Product replacement assistance or exchange of defective components also is available during the warranty period. In addition, if your option is installed in a Lenovo computer, you might be entitled to service at your location. A Lenovo technical support representative can help you determine the best alternative. - Page 35 Country or Region Telephone Number Argentina 0800-666-0011 (Spanish,English) Australia 1-800-041-267 (English) Austria 0810-100-654 (For local rate) (German) Belgium Warranty service and support: 02-339-36-11 (Dutch,French) Bolivia 0800-10-0189 (Spanish) Brazil Calls made from within the Sao Paulo region : 11-3889-8986, Calls made from outside the Sao Paulo region : 0800-701-4815 (Portuguese) Brunei Darussalam Dial 800-1111 (English)
- Page 36 Warranty service and support: +358-800-1-4260 (Finnish) France Warranty service and support: 0810-631-213 (hardware) (French) Germany Warranty service and support : 0800-500-4618 (toll-free) (German) Greece Lenovo Business Partner (Greek) Guatemala Dial 999-9190, wait for operator, and request to reach 877-404-9661 (Spanish) Honduras Dial 800-0123 (Spanish)
- Page 37 020-513-3939 (Dutch) New Zealand 0508-770-506 (English) Nicaragua 001-800-220-2282 (Spanish) Norway 8152-1550 (Norwegian) Panama Lenovo Customer Support Center : 001-866-434 (toll-free) (Spanish) Peru 0-800-50-866 OPCION 2 (Spanish) Philippines 1-800-8908-6454 (GLOBE subscribers), 1-800-1441-0719 (PLDT subscribers) (Tagalog, English) Poland Laptops and tablets with brand logosThink : 48-22-273-9777...
- Page 38 Country or Region Telephone Number Romania 4-021-224-4015 (Romanian) Russia +7-499-705-6204 +7-495-240-8558 (Standard Charges Apply) (Russian) Singapore 1-800-415-5529 6818-5315 (Standard Charges Apply) (English, Mandarin, Bahasa Malaysia) Slovakia ThinkStation and ThinkServer : 421-2-4954-5555 Slovenia 386-1-2005-60 (Slovenian) Spain 34-917-147-833 (Spanish) Sri Lanka 9477-7357-123 (Sumathi Information systems) (English) Sweden Warranty service and support: 077-117-1040 (Swedish) Switzerland...
-
Page 39: Appendix B. Notices
Any reference to a Lenovo product, program, or service is not intended to state or imply that only that Lenovo product, program, or service may be used. Any functionally equivalent product, program, or service that does not infringe any Lenovo intellectual property right may be used instead. -
Page 40: Recycling Information
Lenovo may use or distribute any of the information you supply in any way it believes appropriate without incurring any obligation to you. Any references in this publication to non-Lenovo Web sites are provided for convenience only and do not in any manner serve as an endorsement of those Web sites. -
Page 41: Trademarks
Collecting and recycling a disused Lenovo computer or monitor If you are a company employee and need to dispose of a Lenovo computer or monitor that is the property of the company, you must do so in accordance with the Law for Promotion of Effective Utilization of Resources. -
Page 42: Turkish Statement Of Compliance
Bu Lenovo ürünü, T.C. Çevre ve Orman Bakanlığı'nın “Elektrik ve Elektronik Eşyalarda Bazı Zarar lıMaddelerin Kullanımının Sınırlandırılmasına Dair Yönetmelik (EEE)” direktiflerine uygundur. EEEYönetmeliğineUygundur. Lenovo and the Lenovo logo are trademarks of Lenovo in the United States, other countries, or both. Ukraine RoHS Цим підтверджуємо, що продукція Леново відповідає вимогам...
Need help?
Do you have a question about the ThinkVision LT2323zwC and is the answer not in the manual?
Questions and answers