Beurer EM 41 Instructions For Use Manual
Digital electronic muscle stimulation unit (digital tens/ems unit )
Hide thumbs
Also See for EM 41:
- Instructions for use manual (112 pages) ,
- Instructions for use manual (112 pages) ,
- Installation manual (112 pages)
Table of Contents
Advertisement
Available languages
Available languages
Beurer GmbH Söflinger Str. 218 D-89077 Ulm, Germany
Tel.: +49 (0)731 / 39 89-144 Fax: +49 (0)731 / 39 89-255
www.beurer.de Mail: kd@beurer.de
EM 41
RUS
Gebrauchsanleitung
Digital TENS/EMS .............................(3-15)
Instruction for Use
Digital TENS/EMS unit .....................(16-29)
Mode d'emploi
Appareil TENS/EMS numérique .......(30-43)
Instrucciones para el uso
Aparato digital TENS/EMS ...............(44-57)
Instruzioni per l'uso
Apparecchio TENS/EMS digitale .....(58-71)
Kullanma Talimatı
Dijital TENS/EMS cihazı ..................(72-84)
Instrukcja obsługi
Cyfrowe urządzenie do elektrycznej
stymulacji mięśni i nerwów ............(98-110)
........(85-97)
0344
Advertisement
Chapters
Table of Contents

Related Manuals for Beurer EM 41


Summary of Contents for Beurer EM 41
- Page 1 Dijital TENS/EMS cihazı ....(72-84) ..(85-97) Instrukcja obsługi Cyfrowe urządzenie do elektrycznej stymulacji mięśni i nerwów ....(98-110) Beurer GmbH Söflinger Str. 218 D-89077 Ulm, Germany Tel.: +49 (0)731 / 39 89-144 Fax: +49 (0)731 / 39 89-255 0344 www.beurer.de Mail: kd@beurer.de...
- Page 2 1A-1B/2A-2B 1A-1B/2A-2B 1A-2A/1B-2B 1A-1B/2A-2B 1A-1B/2A-2B 1A-2A/1B-2B 1A-2A/1B-2B 1A-1B/2A-2B 1A-1B/2A-2B 1A-1B/2A-2B 1A-2A/1B-2B 1A-1B/2A-2B 1A-1B/2A-2B 1A-2A/1B-2B 1A-1B/2A-2B 1A-1B/2A-2B 1A-2A/1B-2B 1A-1B/2A-2B 1A-2B/2A-1B 1A-1B/2A-2B 1A-1B/2A-2B 1A-2B/2A-1B 1A-2A/1B-2B 1A-2A/1B-2B 1A-1B/2A-2B 1A-2A/1B-2B 1A-2A/1B-2B 1A-2A/1B-2B 1A-2A/1B-2B 1A-1B/2A-2B 1A-1B/2A-2B 1A-1B/2A-2B 1A-1B/2A-2B 1A-1B/2A-2B 1A-1B/2A-2B 1A-2B/2A-1B 1A-2B/2A-1B 1A-2B/2A-1B 1A-2A/1B-2B 1A-2A/1B-2B 1A-2A/1B-2B 1A-2A/1B-2B 1A-2A/1B-2B...
-
Page 3: Table Of Contents
Gebrauch auf, machen Sie sie anderen Benutzern zugänglich 2. Wichtige Hinweise ..................5 und beachten Sie die Hinweise. 3. Stromparameter ..................7 Mit freundlicher Empfehlung 3.1 Impulsform ..................7 Ihr Beurer-Team 3.2 Impulsfrequenz ...................7 3.3 Impulsbreite ..................7 1. Zum Kennenlernen 3.4 Impulsintensität ..................7 1.1 Was ist und kann Digital TENS/EMS? 3.5 Zyklusgesteuerte Impulsparameter-Variation ........7... -
Page 4: Lieferumfang
Die Wirkung der Elektrostimulation wird in der Regel erst nach regelmäßig gezielte Kräftigung der Muskulatur hervorgerufen werden (aktivierende wiederholter Anwendung erkennbar. Am Muskel ersetzt die Elektrostimula- Anwendung) und zum anderen kann auch eine entspannende, erholende tion regelmäßiges Training nicht, ergänzt die Wirkung desselben aber Wirkung (relaxierende Anwendung) erzielt werden. -
Page 5: Wichtige Hinweise
– diese Gebrauchsanweisung Auf akut oder chronisch erkrankter (verletzter oder entzündeter) Haut, – 1x Kurzanleitung (Vorschläge Elektrodenplatzierung und Anwendungsgebiete) (z.B. bei schmerzhaften und schmerzlosen Entzündungen, Rötungen, – 1x Aufbewahrungstasche Hautausschlägen (z.B. Allergien), Verbrennungen, Prellungen, Schwel- lungen und offenen sowie sich im Heilungsprozess befindliche Wunden, Nachkaufartikel an Operationsnarben die in der Heilung begriffen sind) 8x Klebeelektroden (45 x 45 mm), Art.-Nr. - Page 6 VORSICHTSMASSNAHMEN: Nicht anwenden in der Nähe leicht entzündlicher Stoffe, Gase oder Sprengstoffe. Entfernen Sie die Elektroden stets mit mäßigem Zug von der Haut, um im Verwenden Sie keine Akkus und nur die gleichen Batterietypen. seltenen Fall einer hochempfindlichen Haut Verletzungen zu vermeiden. Führen Sie die Anwendung in den ersten Minuten im Sitzen oder Liegen Halten Sie das Gerät von Wärmequellen fern und verwenden Sie es nicht durch, um in den seltenen Fällen vagaler Reaktion (Schwächegefühl) nicht...
-
Page 7: Stromparameter
3. Stromparameter tung, der Hautdicke sowie der Güte des Elektrodenkontakts. Die praktische Einstellung soll zwar wirksam sein, darf aber niemals unangenehme Empfin- Elektrostimulations-Geräte arbeiten mit den folgenden Stromeinstellungen, dungen, wie z.B. Schmerzen am Anwendungsort hervorrufen. Während ein die je nach Einstellung unterschiedliche Auswirkung auf die Stimulations- leichtes Kribbeln eine ausreichende Stimulations energie anzeigt muss jede wirkung haben: Einstellung die zu Schmerzen führt vermieden werden. -
Page 8: Tastenfunktionen
Zubehör: 5. Inbetriebnahme 2x Anschlusskabel 1. Nehmen Sie den Gürtelclip, falls aufgesteckt, vom Gerät 4x Klebeelektroden (45 x 45 mm) 2. Drücken Sie auf die Batteriefachabdeckung auf der Rück- 1x Gürtelclip seite des Gerätes und schieben Sie sie zur Seite. 3. -
Page 9: Tens-Programme
6.2 TENS-Programme Progr.- Sinnvolle Anwendungs- Mögliche Zyklus 1 Zyklus 2 Zyklus 3 Zyklus 4 bereiche, Elektroden- Zyklus 5 Zyklus 6 Zyklus 7 Zyklus 8 Indikationen platzierung Breite Fre- Breite Fre- Breite Fre- Breite Fre- (μs) quenz Time Time (μs) quenz Time Time (μs) -
Page 10: Ems-Programme
6.3 EMS-Programme Progr.- Sinnvolle Anwendungs- Mögliche Zyklus 1 Zyklus 2 Zyklus 3 Zyklus 4 bereiche, Elektroden- Zyklus 5 Zyklus 6 Zyklus 7 Zyklus 8 Indikationen platzierung Breite Fre- Breite Fre- Breite Fre- Breite Fre- (μs) quenz Time Time (μs) quenz Time Time (μs) -
Page 11: Massage-Programme
6.4 MASSAGE-Programme stimuliert wird. Um die Stimulation zu erhöhen muss dann die Impulsintensität erhöht werden. Progr.-Nr. Massageform Es gilt als Richtlinie für die Wahl der Elektrodenabstände: Klopf- und Greifmassage sinnvollster Abstand: ca. 5 –15 cm, unter 5 cm werden primär oberflächliche Strukturen stark stimuliert, Knet- und Greifmassage Klopfmassage liert. -
Page 12: Anwendung
i Sollte sich eine Elektrode während der Anwendung lösen, so geht die Wählen Sie die für Sie angenehmste Impulsintensität durch Drücken der Taste CH 1+/CH 2+. Im puls intensität beider Kanäle auf die niedrigste Stufe. Drücken Sie die EIN/AUS-Taste um in den Pausenmodus zu gelangen, platzieren Sie die Die Anzeige der Impulsintensität passt sich entsprechend Elektrode neu und fahren Sie mit der Anwendung durch erneutes Drücken Abb. -
Page 13: Änderungen Der Einstellungen
Wählen Sie dann die gewünschte Behandlungszeit mit den Die Einstellung dieses individuellen Programms kann dabei z.B. durch Rat- UP/DOWN-Tasten, und bestätigen Sie mit ENTER (Abb. 4, schlag Ihres Arztes erfolgen. Bsp. Behandlungsdauer 30 Minuten). Bei der Doctor’s Function kann während der Stimulationsbehandlung Das Gerät befindet sich im Wartestatus (Abb. -
Page 14: Entsorgung
Aufbewahrung: (2) Vor jeder Anwendung die Haut reinigen, auf Hautbalsam und Pflegeöle Entnehmen Sie die Batterien aus dem Gerät, wenn Sie es längere Zeit vor der Behandlung verzichten. Eine Rasur kann die Haltbarkeit der Elek- nicht benutzen. Auslaufende Batterien können das Gerät beschädigen. troden erhöhen. -
Page 15: Technische Angaben
Zeitraumes von 3 Jahren ab Kaufdatum gegenüber der Gewicht: 69 g (ohne Batterien), 108 g Beurer GmbH, Söflinger Straße 218, 89077 Ulm (Germany), geltend zu (inkl. Gürtelclip und Batterien) machen. Der Kunde hat im Garantiefall das Recht zur Reparatur der Ware bei Zeichenerklärung:... - Page 16 ENGLISH Table of Contents 1. Getting to know your machine ...............17 7. Application ....................26 1.1 What is Digital TENS/EMS and what can it do?........17 7.1 Advice on application ................26 1.2 Scope of supply ..................18 7.2 Procedure for TENS, EMS and MASSAGE programmes 01–10 ..26 7.3 Procedure for TENS/EMS programmes 11–...
-
Page 17: Getting To Know Your Machine
The method is Best regards, scientifically underpinned and medically approved. Your Beurer Team Any symptoms indicating TENS application must be clarified with the doctor 1. Getting to know your machine in charge of your treatment. The latter will also give you information on the respective benefits of TENS self-treatment. -
Page 18: Scope Of Supply
Improving muscular fatigue symptoms WARNING! Accelerating muscle regeneration after high muscular performance (e.g. In order to prevent any damage to health, we would urgently advise after a marathon). against using the Digital TENS/EMS in the following cases: With any implanted electrical devices (such as pacemakers) Through integrated massage technology, Digital TENS/EMS also offers the If there are any metal implants possibility of reducing muscular tension and combating fatigue symptoms... - Page 19 Chronic pain disorders which have not been clarified, regardless of the Do not use when asleep, when driving a vehicle or at the same time as region of the body operating machinery. Diabetes Never use with any activities where an unforeseen reaction (e.g. increased All sensitivity disorders with reduced pain awareness (such as metabolic muscle contraction despite low intensity) may be dangerous.
-
Page 20: Current Parameters
Information on ESD (Electrostatic Discharge) 3.3 Pulse width Please note that jacks marked with the ESD warning label must not Pulse width is used to indicate the duration of an indi- Pulse width be touched. vidual pulse in microseconds. Pulse width also determines the pene tration depth of the current whereby in general, ESD protective measures: the following applies: a greater muscle mass requires a... -
Page 21: Unit Description
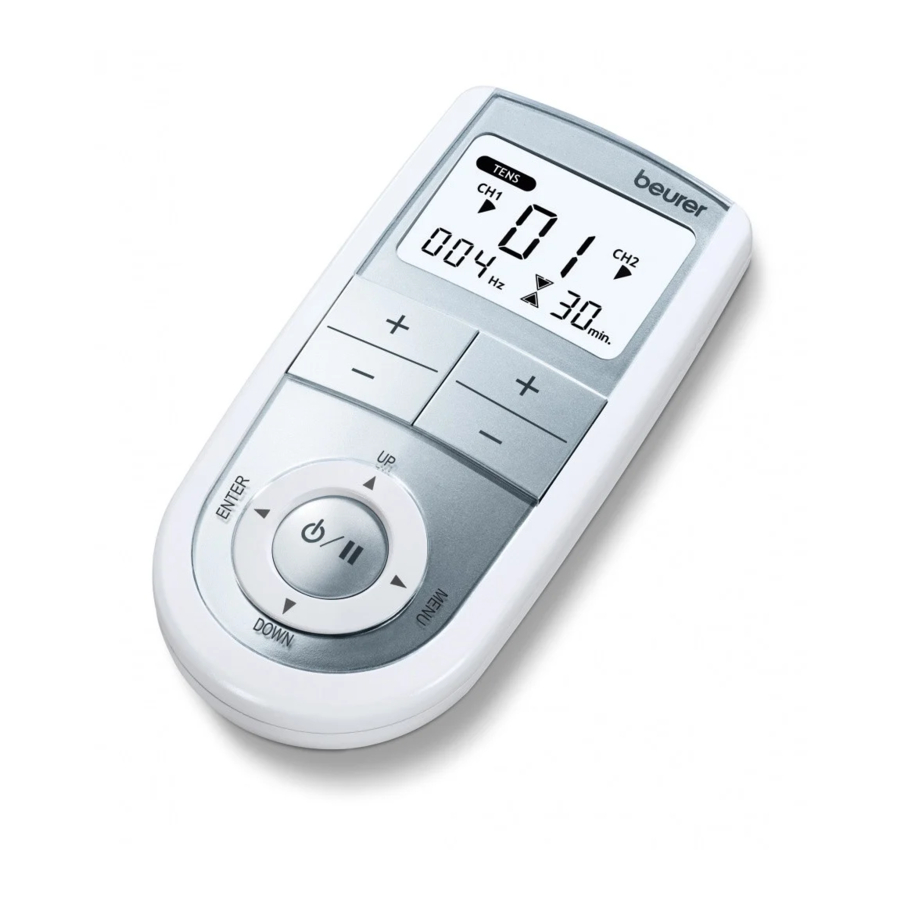
4. Unit description (2) The DOWN key is used to reduce pulse intensity for both channels dur- ing stimulation. 4.1 Description of components MENU Display (main menu): (1) Navigation between the submenus TENS, EMS and MASSAGE. A Pulse intensity (2) Return to (A) programme selection window or (B) main menu. B Programme/cycle numbers C Frequency (Hz) ENTER... -
Page 22: Programme Overview
6. Programme overview 6.1 Basic information The Digital TENS/EMS unit has a total 50 programmes: 20 TENS programmes 20 EMS programmes 10 MASSAGE programmes With all programmes, you can set the length of application and (for each of the two channels) pulse intensity separately. Besides this, with TENS and EMS programmes 11–... -
Page 23: Tens Programmes
6.2 TENS programmes Prog. Reasonable areas of Possible Cycle 1 Cycle 2 Cycle 3 Cycle 4 application electrode Cycle 5 Cycle 6 Cycle 7 Cycle 8 Indications position Width Fre- Width Fre- Width Fre- Width Fre- (μs) quen- Time Time (μs) quen- Time... -
Page 24: Ems Programmes
6.3 EMS programmes Prog. Reasonable areas of Possible Cycle 1 Cycle 2 Cycle 3 Cycle 4 application electrode Cycle 5 Cycle 6 Cycle 7 Cycle 8 Indications position Width Fre- Width Fre- Width Fre- Width Fre- (μs) quen- Time Time (μs) quen- Time... -
Page 25: Massage Programmes
6.4 MASSAGE programmes but stimulation is weaker. To increase stimulation, pulse intensity must then be increased. Prog. no. Massage form The following guideline holds when selecting electrode distances: most reasonable distance: approx. 5 –15 cm Tap and grasp massage below 5 cm, it is mainly surface structures which are strongly stimulated Knead and grasp massage over 15 cm, large-area and deep structures are stimulated very weakly Tap massage... -
Page 26: Application
i If an electrode becomes detached during the application, the pulse 7.3 Procedure for TENS/EMS programmes 11 to 20 intensity of both channels goes to the lowest setting. Press the ON/OFF key (individual programmes) to enter pause mode, reposition the electrode and continue application by Programmes 11 to 20 are preset programmes which you can also individualise. -
Page 27: Changes To Settings
i Note: Your individualised programme settings are stored and automati- Cancelling Doctor’s Function: To clear the device again and access other programmes, hold down the two cally retrieved when you select it next. keys ON/OFF and CH 2+ once again for approximately 5 seconds (not pos- 7.4 Changes to the settings sible during stimulation). -
Page 28: Problems And Solutions
(1) Look at the display. Is any channel flashing? Interrupt the programme by pressing the ON/OFF button. Make sure that the connecting leads Name and model: EM 41 are properly connected to the electrodes. Make sure that there is a firm Initial curve shape: biphase square-wave pulse contact between the electrodes and the treatment area. - Page 29 Weight: 69 g (without batteries) , 108 g (incl. belt clip and batteries) Explanation of symbols: Application part type BF Caution! Read the instructions for Use. Note: If the machine is not used according to these specifications, perfect functioning is not guaranteed. We reserve the right to make any technical alterations that are necessary in order to improve and develop the product further.
Need help?
Do you have a question about the EM 41 and is the answer not in the manual?
Questions and answers
Kljub navodilom je to težko nastaviti,navodila so vam popolnoma nejasna,delo s tem aparatom pa totalni problem,pa niti nimate v slovenščini
To set up the Beurer EM 41 device if instructions are unclear and not available in Slovenian, follow these general steps based on the manual:
1. Insert the batteries correctly and ensure they make contact.
2. If the device does not turn on, check battery placement or replace the batteries.
3. Attach the electrodes properly. Clean the adhesive surface with a lint-free damp cloth and let them air dry if they do not stick well.
4. Do not bend the connecting cables too much and always reattach electrodes to their support film after use.
5. Avoid using chemical or abrasive cleaners; wipe the device with a dry or slightly damp cloth.
6. If problems persist, contact customer service.
Make sure the device is dry if water has entered it, and never use it while wet.
This answer is automatically generated