Table of Contents
Advertisement
Advertisement
Table of Contents

Related Manuals for Brother P-Touch 18R


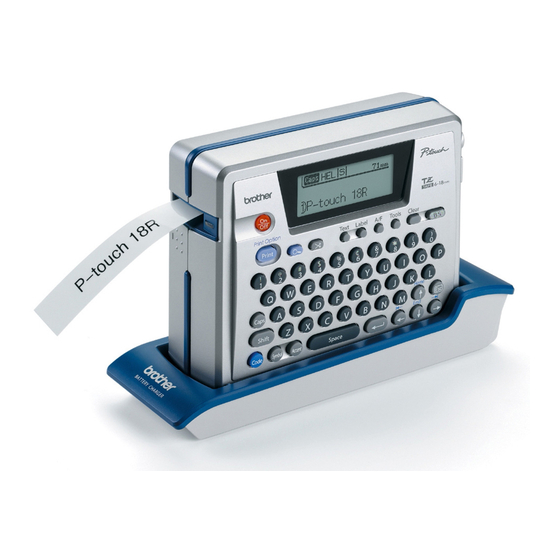
Summary of Contents for Brother P-Touch 18R
- Page 2 Directive 2006/95/EC. The Declaration of Conformity (DoC) is on our Web site. Please go to http://solutions.brother.com -> choose region (eg. Europe) -> choose country -> choose your model -> choose "Manuals"-> choose Declaration of Conformity (*Select Language when required).
-
Page 3: Introduction
INTRODUCTION Thank you for purchasing the P-touch PT-18R. Your new P-touch is an easy to operate, feature packed labelling system that makes creating professional, high quality labels a breeze. In addition to easy label creation via pre-formatted label layouts, the P-touch editing software features advanced label formatting, block formats, bar codes and auto-numbering functions. -
Page 4: Creating Your First Label
INTRODUCTION Creating Your First Label This section introduces you to the methods used to create simple labels with your P-touch. By creating a simple label, you will become familiar with the procedure for creating general label layouts. Creating a label with the P-touch Prepare the P-touch. - Page 5 Create a label with your personal computer Prepare the P-touch. (Refer to step 1 in the previous section.) Prepare the personal computer. Install the software. Connect the USB Turn the P-touch on. cable. Software Installation Guide Software Installation Guide P. 21 Enter the label text using P-touch Editor.
-
Page 6: Safety Precautions
INTRODUCTION Safety Precautions Please read the following directions for safe use and handling before using your P- touch. These safety precautions are provided for your benefit to prevent unnecessary injury to you and those around you, and to prevent damage to the product. Please read and follow them carefully. - Page 7 WARNING • If the battery begins to emit an odour, overheat, discolour, deform, or any other change occurs during use, charging, or storage, remove the battery immediately and discontinue use. Battery charger Failure to observe the following may result in fire, overheating, or failure. •...
- Page 8 INTRODUCTION CAUTION Rechargeable battery Failure to observe the following may result in fluid leaking, overheating, rupture, or deteriorated performance and life span. • Do not hit or throw the battery. • Do not use or leave battery exposed in direct sunlight, near heaters or other hot appliances, or in any location exposed to extremely high temperatures.
-
Page 9: General Precautions
General Precautions • Do not use the P-touch in any way or for any purpose not described in this guide. Doing so may result in accidents or damage the machine. • Use only genuine TZ tapes, with the mark, in the P-touch. •... -
Page 10: Quick Index
INTRODUCTION This section provides quick and easy access to Quick Index information on tasks often needed by users. Quick Quick Simply look for your task below and then go to Index Index the page indicated. If the task you are looking for is not shown here, try the Contents or Index pages. -
Page 11: Table Of Contents
Contents INTRODUCTION ..................1 Creating Your First Label ....................2 Safety Precautions ......................4 General Precautions...................... 7 Symbols Used in this Guide ..................7 Quick Index ........................8 Contents ........................9 GETTING STARTED ................11 Unpacking Your P-touch ..................... 11 General Description..................... - Page 12 INTRODUCTION Entering Bar Code Data..................33 Editing and Deleting a Bar Code ................35 Using Auto-Format Layouts ..................35 Using Templates - Example creating an Asset Tag..........35 Using Block Layouts ....................38 Automatic Currency Conversion ..................42 Currency Conversion Setup...................42 Converting Currency....................44 LABEL PRINTING ................. 45 Label Preview.......................45 Printing a Label ......................45 Printing a Single Copy ...................45...
-
Page 13: Getting Started
GETTING STARTED Unpacking Your P-touch Check that the package contains the following before using your P-touch. P-touch PT-18R TZ tape cassette CD-ROM USB cable AC adapter Rechargeable battery The plug may differ by countries. Battery charger User’s Guide Software Installation Guide Unpacking Your P-touch... -
Page 14: General Description
GETTING STARTED General Description LCD display AC adapter Keyboard connector When shipped from the factory, the LCD display is covered with a protective sheet to prevent damage. USB port Remove this sheet before using the P- touch. Charging terminals Rechargeable battery Tape viewer Release lever Tape exit... -
Page 15: Lcd Display & Keyboard
LCD Display & Keyboard LCD Display 1. Line number Displayed at the beginning of each line, this mark indicates the line number within the label layout. 2. Cursor Indicates the current position of the cursor. New characters are entered to the left of the cursor, and the character to the left of the cursor is deleted when the is pressed. -
Page 16: Key Names And Functions
GETTING STARTED Key Names and Functions LCD Display & Keyboard... - Page 17 (Power): • Turns the P-touch on and off. • Use these keys to type letters or numbers. • Uppercase letters, symbols or accent • Prints the current label design onto the characters can be entered using these tape. keys in combination with the •...
-
Page 18: Power Supply
GETTING STARTED Power Supply Your P-touch has a rechargeable battery that allows you to use it anywhere when charged, and an AC adapter that allows you to use it while connected to an electrical outlet when the battery’s charge becomes low. Rechargeable Battery The battery can be recharged by placing the P-touch on the battery charger stand. - Page 19 Insert the battery into the battery case and push the wires into the compartment so that they do not get damaged by the battery case cover. Attach the battery case cover and close the back cover. Release lever Make sure that the release lever is up when closing the back cover. The back cover cannot be closed if the release lever is pressed down.
- Page 20 GETTING STARTED • The AC power lamp lights when the P-touch is set in the battery charger and the AC adapter is connected to the battery charger, or when the AC adapter is connected directly to the P- touch, regardless of whether a battery is fitted or charging is complete. •...
-
Page 21: Ac Adapter
• Use only the AC adapter (AD-18ES) designed exclusively for your P-touch. Failure to observe this may result in an accident or damage. Brother shall not assume any responsibility for any accident or damage resulting from not using the specified AC adapter. - Page 22 GETTING STARTED Check that the end of the tape is not bent and End of tape that it passes through the tape guide. Tape guide After making sure that the power is off, press on the back cover opening grip and open the back cover. If there is already a tape cassette in the P-touch, remove it by pulling it straight up.
-
Page 23: Turning Power On/Off
Turning Power On/Off Press the key to turn the P-touch on. Press the key again to turn the P-touch off. • Your P-touch has a power saving function that automatically turns itself off if no key is pressed within a certain time under certain operating conditions. Refer to the Auto Power-Off Time table below for details. -
Page 24: Feeding Tape
GETTING STARTED Feeding Tape The Feed & Cut function feeds 22.5 mm of blank tape then cuts the tape. • Be sure to feed tape to remove any slack in the tape and ink ribbon after inserting the tape cassette. •... -
Page 25: Editing A Label
EDITING A LABEL Entering and Editing Text Using the keyboard of your P-touch is very similar to using a typewriter or word processor. Entering Text from the Keyboard • To enter a lowercase letter or a number, simply press the desired key. •... -
Page 26: Deleting Text
EDITING A LABEL Deleting Text Deleting one character at a time • To delete a character from an existing line of text, move the cursor to the character to the right of the position you want to start deleting text and then press the key. -
Page 27: Entering Symbols Using The Symbol Function
Entering Symbols Using the Symbol Function The Symbol function offers a total of 103 symbols. Press the key. A list of symbols is displayed. The last symbol entered is selected in the list displayed. Select a group using the keys, and then select a symbol using the keys. -
Page 28: Entering Accented Characters
EDITING A LABEL Entering Accented Characters The P-touch can display and print a set of accented characters such as composite characters that consist of a letter and a diacritical mark (eg. ) and other language specific characters. There are three methods of entering accented characters: •... -
Page 29: Entering Accented Characters Using The Accent Function
Entering Accented Characters Using the Accent Function The Accent function offers a total of 119 accented characters. Press the key. The accent group screen is displayed. Caps mode can be used with the Accent function. Type the letter for the desired composite character, or press the key and select it using the keys. -
Page 30: Setting Character Attributes
EDITING A LABEL Setting Character Attributes Using the key, you can select a font and apply size, width and style attributes. Press the key. The current settings are displayed. Select an attribute using the keys, and then set a value for that attribute using the keys. - Page 31 Attribute Value Result Size Width (Bold) Style1 (Outline) (Shadow) Style2 (Italic) (Vertical) By combining the “Style1” and “Style2” settings you can create Italic Bold, Italic Outline, Italic Shadow, Vertical Bold, Vertical Outline and Vertical Shadow styles. Setting Character Attributes...
-
Page 32: Setting Label Attributes
EDITING A LABEL Setting Label Attributes Using the key, you can create a label with a frame around the text and specify the label length. The text can be aligned within the label in one of three ways. Press the key. - Page 33 Attribute Value Result Frame (Left) Align (Centre) (Right) The length of the label is automatically Auto adjusted based on the amount of text entered. Length The length of the label can be set within Fixed the range 40 - 300 mm. Setting Label Attributes...
-
Page 34: Creating A Bar Code Label
EDITING A LABEL Creating a Bar Code Label Using the Bar Code function you can create labels with bar codes for use with cash registers, stock control systems or other bar code reader systems, or even asset control tags used in an asset management system. •... -
Page 35: Entering Bar Code Data
Attribute Value Under# (characters printed below bar code) C.Digit (check digit) (only available for the CODE39, I-2/5 and CODABAR protocols) Entering Bar Code Data Press the key to display the Tools menu, select “Bar Code Input” using the keys, and then press the key. -
Page 36: Special Character List
EDITING A LABEL Special Character List CODE39 CODABAR Code Special Character Code Special Character (SPACE) CODE128, EAN128 Code Special Character Code Special Character Code Special Character (SPACE) FNC3 FNC2 FNC4 FNC1 Creating a Bar Code Label... -
Page 37: Editing And Deleting A Bar Code
Editing and Deleting a Bar Code • To edit the bar code data in a bar code already placed in a label, position the cursor beneath either of the bar code marks on the data entry screen and then open the Bar Code Input screen. -
Page 38: To Print Multiple
EDITING A LABEL Press the key. The Bar Code Setup screen is displayed. Select an attribute using the keys, and then set a value for that attribute using the keys. The "C-Digit" attribute is only available for the CODE39, I-2/5 and CODABAR protocols. Press the key. - Page 39 Templates Attribute Value Details Binder Spine (18 mm x 254 mm) File Tab (12 mm x 89 mm) Hanging Folder (12 mm x 45 mm) Asset Tag (18 mm x 70 mm) Bin Box (18 mm x 76 mm) Template Name Equipment Label (18 mm x 58 mm) Faceplate (VRT)
-
Page 40: Using Block Layouts
EDITING A LABEL Using Block Layouts Press the key to display the Auto-Format screen, and then select “Block Layouts” using the keys. Press the key to display the Tape Width screen, and then select a tape width using the keys. Press the key. -
Page 41: To Print Multiple
Select Print using the keys and then press the key to print the label. • Select "Edit" to change the text data or style settings. • Select "Change Layout" to use a different layout. • Select "Quit" to exit the Auto-Format function. •... - Page 42 EDITING A LABEL Block Layouts Attribute Value Details 2 Line A 2 Line B 3 Line 1+2 Line A Block layout (18 mm tape) 1+2 Line B 1+3 Line 1+4 Line 1+5 Line 2 Line A 2 Line B Block layout (12 mm tape) 3 Line 1+2 Line...
- Page 43 Attribute Value Details 2 Line A Block layout 2 Line B (9 mm tape) 1+2 Line Block layout 1+2 Line (6 mm tape) Using Auto-Format Layouts...
-
Page 44: Automatic Currency Conversion
EDITING A LABEL Automatic Currency Conversion Using the currency conversion function you can easily convert Euros to and from other currencies and add the two prices to the text of your label. Simply select the currency you want to work with and the layout of the result to easily create labels with prices in both Euros and another currency. - Page 45 Currency Conversion Options Attribute Value Details CHF (Swiss franc) DKK (Danish krone) GBP (British pound) NOK (Norwegian krone) SEK (Swedish krona) Currency AUD (Australian dollar) CAD (Canadian dollar) HKD (Hong Kong dollar) USD (US dollar) ANY1 ANY2 EUR 1st Order EUR 2nd (SPACE) Separator...
-
Page 46: Converting Currency
EDITING A LABEL Converting Currency Press the key to display the Tools menu, and then select “Currency Conversion” using the keys. Press the key. The Currency Conversion screen is displayed. Select the conversion direction using the keys, and type in the value to be converted. Press the key to complete the conversion. -
Page 47: Label Printing
LABEL PRINTING Label Preview Using the Preview function you can check the layout of the label before printing it onto the label. Press the key. An image of the label is displayed on the screen. The length of the label is shown in the lower-right corner of the screen. -
Page 48: Printing Multiple Copies
LABEL PRINTING Press the key. The message shown on the right is displayed while the label is being printed. To stop printing, press the key to turn off the P-touch. • When the battery is low the message “Recharge Battery!” appears after printing. Recharge the battery before continuing printing, or connect the AC adapter directly to the P-touch to continue printing. -
Page 49: Auto-Numbering Labels
Auto-numbering Labels Using the numbering function you can create a set of sequentially numbered labels from a single label format. Make sure that the appropriate tape cassette is inserted and ready for printing. Hold down the key and press the key to display the print options screen, and then select “Number”... -
Page 50: Mirror Printing
LABEL PRINTING • Press the key to return to the previous step. • Unless set otherwise, the tape is automatically cut after each copy is printed. Refer to “Tape Cutting Options” on page 49 to change this setting. • The figures shown on the screen during printing indicate the “count / number of copies”. •... -
Page 51: Tape Cutting Options
Press the key. The message shown on the right is displayed while the label is being printed. • Press the key to return to the previous step. • Text should be printed on clear tape when using the mirror printing function. •... - Page 52 LABEL PRINTING Tape Cutting Setting Description Example Automatically cuts the tape after each label Margin L is printed. The labels have a 24 mm margin 24 mm 24 mm on the left and right ends. • When printing labels one at a time: 22.5 mm Automatically cuts a piece of blank tape before printing the label, and then cuts...
-
Page 53: Attaching Labels
Attaching Labels If necessary, trim the printed label to the desired shape and length using scissors, etc. Peel the backing from the label. Position the label and then press firmly from top to bottom with your finger to attach the label. •... -
Page 54: Using The File Memory
USING THE FILE MEMORY You can store up to ten of your most frequently used labels in the file memory. Each label is stored as a file, allowing you to quickly and easily recall your label when needed again. • When the file memory is full, each time you save a file you will need to overwrite one of your stored files. -
Page 55: Opening A Stored Label File
Opening a Stored Label File Press the key to display the Tools menu, and then select “File” using the keys. Press the key to display the File screen, and then select “Open” using the keys. Press the key. The file number of a stored label is displayed. The label text is also displayed to identify the label. -
Page 56: Deleting A Stored Label File
USING THE FILE MEMORY Deleting a Stored Label File Press the key to display the Tools menu, and then select “File” using the keys. Press the key to display the File screen, and then select “Delete” using the keys. Press the key. -
Page 57: Maintaining Your P-Touch
MAINTAINING YOUR P-touch Resetting the P-touch You can reset the internal memory of your P-touch when you want to clear all saved label files, or in the event the P-touch is not behaving normally. With the power turned off, hold down the keys and press the key. -
Page 58: Cleaning The Tape Cutter
MAINTAINING YOUR P-touch Cleaning the Tape Cutter Tape adhesive can build up on the cutter blade after repeated use, taking the edge off the blade which may result in the tape jamming in the cutter. • About once every year, wipe the cutter blade using a cotton swab moistened with alcohol. -
Page 59: Troubleshooting
TROUBLESHOOTING What to do when... Problem Cause Solution The screen ‘locks’, or Refer to “Resetting the P-touch” on page 55 and reset the the P-touch does not internal memory to the initial settings. If resetting the P- respond normally. touch does not solve the problem, disconnect the AC adapter and remove the rechargeable battery for more than 5 minutes. - Page 60 TROUBLESHOOTING Problem Cause Solution The label is not Has text been entered? A label will not be printed if printed after pressing there is no text entered. key. Is the tape cassette installed Check the tape cassette is correctly, and is there installed correctly, and that enough tape remaining? there is enough tape...
- Page 61 Problem Cause Solution The ink ribbon is Is the ink ribbon in the tape If the ink ribbon is broken separated from the cassette loose, or did you replace the tape cassette. If ink roller. pull on the label coming out not, leave the tape uncut and of the tape exit slot? remove the tape cassette,...
-
Page 62: Error Messages
TROUBLESHOOTING Error Messages When an error message appears on the display, follow the directions provided below. Press any key to clear the error message. Message Cause/Remedy The rechargeable battery is running low. Charge the battery or connect the AC adapter before continuing. An incompatible AC adapter is connected. - Page 63 Message Cause/Remedy The length of the label to be printed using the text entered is longer than 1 m. Edit the text so that the length of the label is less than 1 m. An 18 mm tape cassette is not installed when an Auto-Format for 18 mm tape is selected.
- Page 64 TROUBLESHOOTING Message Cause/Remedy The result of the currency conversion exceeds 10 digits. Enter a smaller value for conversion. There is no exchange rate entered for the currency conversion. Enter an exchange rate. The bar code data entered is less than the minimum four digits.
-
Page 65: Appendix
APPENDIX Specifications Main Unit Item Specification Input Device (Keyboard) 58-key, QWERTY layout keyboard Display Display device Dot matrix LCD Character display 15 characters x 2 lines (48 dot x 128 dot) Printing Print method Thermal printer Print head 128 dot / 180 dpi (112 dots used) Print height 15.8 mm max. - Page 66 APPENDIX Item Specification Memory Memory size Maximum 459 characters File storage Maximum 10 files Other Features Frame Total of 14 frame patterns (Including Underline) Auto-Format Templates: 10 Block layouts: 18 mm: 8, 12 mm: 4, 9 mm: 3, 6 mm: 1 Screen contrast 5 levels (+2, +1, 0, -1, -2) Power Supply...
-
Page 67: Index
INDEX AC adapter ......... 16, 19 new line ..........23 Accented Character List ....27 accented characters ......26 Power Supply ........16 aligned ..........30 Auto power-off time ......21 rechargeable battery charging ........17 Battery charger ......... 12 installing ........ - Page 70 LW5570001...
Need help?
Do you have a question about the P-Touch 18R and is the answer not in the manual?
Questions and answers