Table of Contents
Advertisement
Quick Links
Advertisement
Table of Contents

Related Manuals for Cybernet CyberMed N19


Summary of Contents for Cybernet CyberMed N19
- Page 1 CYBERNET CyberMed N19 User Guide...
-
Page 2: Fcc-B Radio Frequency Interference Statement
FCC-B Radio Frequency Interference Statement This equipment has been tested and found to comply with the limits for a class B digital device, pursuant to part 15 of the FCC rules. These limits are designed to provide reasonable protection against harmful interference in a residential installation. -
Page 3: Safety Instructions
Safety Instructions Always read the safety instructions carefully. Keep this equipment away from humidity. Lay this equipment on a reliable flat surface before setting it up. The openings on the enclosure are for air convection hence protect the equipment from overheating. DO NOT COVER THE OPENINGS. Confirm the voltage of the power source and adjust accordingly to 110/220V before connecting the equipment to the power inlet. -
Page 4: Environmental Factors
3. Do not use the CyberMed N19 in a wet or high-moisture environment. 4. Do not place the CyberMed N19 near heat-generating sources. 5. Do not place the CyberMed N19 in a location where it may come in contact with chemical fumes, steam or excessive dust. - Page 5 Antimicrobial Coating Test Report:...
-
Page 6: Weee Statement
WEEE Statement (Waste Electrical and Electronic Equipment) The WEEE directive places an obligation on EU-based manufacturers, distributors, retailers and importers to take-back electronics products at the end of their useful life. A sister Directive, ROHS (Restriction of Hazardous Substances) compliments the WEEE Directive by banning the presence of specific hazardous substances in the products at the design phase. -
Page 7: Table Of Contents
WEEE Statement ............. v Introduction .............. 1 CyberMed N19 Specifications ........1 CyberMed N19 Specifications, continued ....2 CyberMed N19 Series Overview ......3 Box Contents ............4 On Screen Display Buttons ............... 7 ... -
Page 8: Introduction
Introduction Thank you for purchasing the CyberMed N19 all in one medical computer. With antimicrobial coating, a 19-inch display, and the power to run any EMR application, the CyberMed N19 is perfect for any medical environment. CyberMed N19 Specifications Processor Support Intel®... -
Page 9: Cybermed N19 Specifications, Continued
CyberMed N19 Specifications, continued: Windows 7, Windows 8, Linux (OpenSUSE, Fedora, OS Support Ubuntu) Power Supply Medical Grade External AC Adapter. DC: 65 watts, AC Input: 100~240V AC, DC Output: 19V, 3.42A White Color Dimensions 43cm (w) x 47.5cm (h) x 25.5cm (d) (with stand) Weight 9.75 kg with base, 7.10 kg without base... -
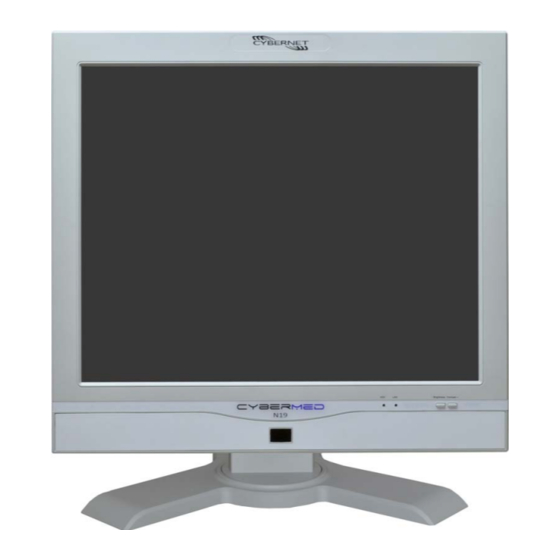
Page 10: Cybermed N19 Series Overview
CyberMed N19 Series Overview Front of Unit: Touch Screen: Model Name: Touch Screen CyberMed N19 User Guide Page 3... -
Page 11: Box Contents
5. Driver disc 6. Printed manual Before setting up your system and running it, please make sure the package contains all of the above. If any items are damaged or missing, contact Cybernet immediately. CyberMed N19 All-in-One PC Power cord... - Page 12 Back of Unit: Bottom Panel I/O ports: DC In HDMI USB2.0 Audio I/O S/PDIF Out Optional TV Tuner CyberMed N19 User Guide Page 5...
- Page 13 Left Side: Right Side: Power Button and USB Ports Power Button Ports CyberMed N19 User Guide Page 6...
-
Page 14: On Screen Display Buttons
+ (right) button. The screen will exit automatically in a matter of seconds if no selection is made. On Screen Display Icons The Icons are as follows: Brightness- Select to toggle lesser brightness. Brightness+ Select to toggle greater brightness. CyberMed N19 User Guide Page 7... - Page 15 System Ventilation: System Ventilation Heat Sink Ventilation, System Ventilation and Stand: System Heat Sink Ventilation Ventilation System Stand CyberMed N19 User Guide Page 8...
-
Page 16: System Assembly
Forceps/tweezers can be used to pick up tiny screws or set up the jumpers. Rubber gloves can prevent injury from static charge. An electric screwdriver can be used to secure all screws more quickly. CyberMed N19 User Guide Page 9... -
Page 17: Orientation Of Key Parts
Orientation of Key Parts Touch Panel Controller Heat Sink Memory Modules Mini-PCIe Card CyberMed N19 User Guide Page 10... -
Page 18: Cybermed N19 Disassembly
ORIENTATION: These instructions assume that the top of the CyberMed is away from you and the bottom or I/O controller board is nearest you. Place the CyberMed N19 face down on a padded surface. Remove the four screws from the base plate that attach the stand to the LCD, supporting the base while removing the last screw. - Page 19 Open System: CyberMed N19 User Guide Page 12...
-
Page 20: Installing The Memory Module Ddr3 So-Dimm
DIMM slot. 3. Press the memory module down, and the metal clip and each side of the DIMM slot will automatically close. 4. Repeat the steps to install another memory module to meet your needs. CyberMed N19 User Guide Page 13... -
Page 21: Installing The Hard Disk Drive
SATA cable to the motherboard. 3. Connect the SATA power cable to the Hard Disk Drive as shown at left. 4. Connect the other end to the motherboard: 5. Fasten the chassis with 4 screws as shown. CyberMed N19 User Guide Page 14... -
Page 22: Installing The Mini-Pcie Cards (Optional)
45° angle. Then push it in until the golden finger on the mini-PCIe card is deeply inserted in the mini-PCIe slot. 2. Press down the mini-PCIe card and secure with screw to complete the installation. CyberMed N19 User Guide Page 15... -
Page 23: Installing The Cover
Installing the Cover 1. Secure the metal cover with 17 screws. 2. Secure the plastic cover with 11 screws. 3. Secure the stand with 4 screws. CyberMed N19 User Guide Page 16... - Page 24 CyberMed N19 User Guide Page 17...
-
Page 25: Cybernet's E-Recycling Sop
Cybernet’s e-recycling SOP Cybernet has an e-recycling program that is very easy to use. Just follow the steps explained below or go to our website at www.cybernetman.com. 1. Request an RMA via phone, email or support request. 2. We will arrange a call tag to have the product picked up. Just have it packed and ready to ship.
Need help?
Do you have a question about the CyberMed N19 and is the answer not in the manual?
Questions and answers