
Related Manuals for Dell Venue 7 3000 SERIES


Summary of Contents for Dell Venue 7 3000 SERIES
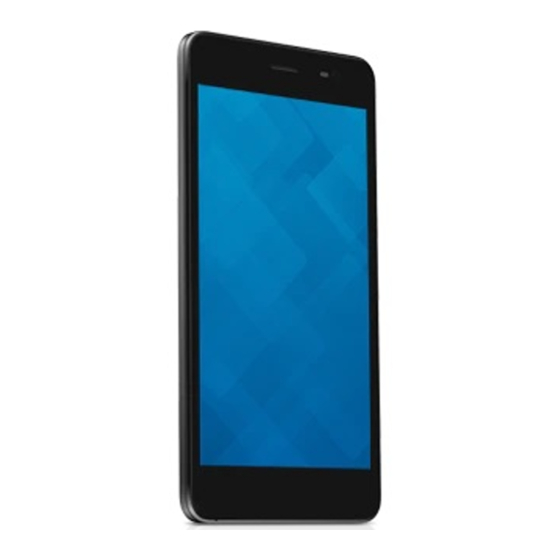
- Page 1 Venue 7 3000 Series User's Manual Marketing model: Venue 3741 Regulatory model: T02C Regulatory type: T02C001...
- Page 2 WARNING: A WARNING indicates a potential for property damage, personal injury, or death. Copyright © 2014 Dell Inc. All rights reserved. This product is protected by U.S. and international copyright and intellectual property laws. Dell and the Dell logo are trademarks of ™...
-
Page 3: Table Of Contents
Contents Features ........5 Charging the Battery . - Page 4 Protecting Your Device ....21 Apps ....... 24 Bluetooth.
-
Page 5: Features
Features Part Functionality Front camera Use to make video calls or to capture front photos and videos. Ambient-light Detects the ambient light to allow screen-brightness to sensor be adjusted automatically. Earpiece Used to transfer sound. Microphone Use for recording sound or to input voice in other voice-based apps. - Page 6 Part Functionality Battery-charging When the device is charging, the battery-charging status light status light flashes. 10. Power button • Press and hold to turn on your device. • Press and release to lock or unlock the screen. • While the device is turned on, press and hold to open the options menu.
-
Page 7: Charging The Battery
Charging the Battery NOTE: Your device may not be fully charged when you receive it. It is recommended to charge the device for 4 hours for the first time. CAUTION: Use only the power adapter and/or cable that shipped with the device. -
Page 8: Inserting The Microsd Card And Micro-Sim Card (Optional)
Inserting the MicroSD Card and Micro-SIM Card (optional) Open the card-slot door Insert the cards into the respective slots and push the cards in until they click in place Close the card-slot door NOTE: Make sure the cards are correctly aligned and are inserted all the way. NOTE: Turn off your device before inserting the microSD card and micro-SIM card. -
Page 9: Getting Started
Getting Started Turning on/off the device To turn on your device, press and hold the power button for 3 seconds. NOTE: When your device is fully discharged, it is recommended to connect the device to the power adapter for charging for 3-5 minutes and then turn on the device. -
Page 10: Customizing The Screen
Customizing the screen After finishing Android setup, follow the instructions on the screen to customize the home screen. Getting Started... -
Page 11: Locking And Unlocking Your Device
Locking and unlocking your device Press the power button to turn off the screen and lock your device. You can also configure your device to automatically lock after a certain period of inactivity. → Settings → Display → Sleep to set the time after which you want the device to enter sleep state and lock itself. -
Page 12: Status Bar
Status bar The status bar at the top of the screen displays notifications from apps, time, status of various devices such as battery, SIM card, Bluetooth, and so on. 1. Notification panel displays notification icons to inform you of new emails, missed calls, unread messages, and so on. -
Page 13: Screen Orientation
Screen orientation For optimal viewing experience, the screen orientation changes automatically depending on how you hold the device. To toggle auto-rotate, slide down the status panel and tap the AUTO ROTATE icon Keys and functions Back • Tap to return to the previous screen or to exit the current app. • In text input mode, tap to close the on-screen keyboard. -
Page 14: Using Your Device
Using Your Device Contacts → People. To view and manage your contacts, tap Creating a contact → People → Create a new contact. 1. Tap 2. Sign in to an existing Google account or create a new Google account to back up your contacts online or choose the option to save the contacts on the device to keep local. -
Page 15: Text Entry
Text entry You can type text using the on-screen keyboard. To open the on-screen keyboard, tap a text box. To close the keyboard, tap the back key • Tap to type letters. • Tap and hold to type numbers. • Tap to delete a character, symbol, or a space to the left of the cursor. • Tap and hold to delete text to the left of the cursor. -
Page 16: Calls
Un-mounting the SD card → Settings → Storage. 1. Tap 2. Tap Unmount → OK to remove the SD card. CAUTION: It is recommended that you unmount the SD card before removing it. Removing the SD card while it is in use may cause data loss or result in app errors. -
Page 17: Internet
Internet You can connect your device to Wi-Fi or mobile networks to access the Internet. Connecting to the Internet using Wi-Fi NOTE: The range and quality of the Wi-Fi signal is affected by the distance between the device and the wireless router, the number of connected devices, infrastructure, and objects through which the signal is transmitted. -
Page 18: Using The Airplane Mode
Connecting to the Internet using mobile broadband → Settings → Wi-Fi, then touch Wi-Fi to disable it. 1. Tap 2. The device automatically searches for the signal and connects to the network. 3. When the device is connected to a mobile-broadband network, the network type appears in the status bar. -
Page 19: Email
Email You can create POP3, IMAP, and exchange email accounts from web-based email services on your device. Opening the email app → Email Setting up an email account 1. On the email screen, type the email address and password of the email account (the same as the account on your computer). -
Page 20: Customizing Your Device
Creating and sending emails → Email. 1. Tap 2. Select an email account to use, if you have more than one account on your device. 3. Tap to compose a new mail. 4. Type the recipient’s email address in the To field. If you are sending the email to multiple recipients, separate their email addresses with a comma. -
Page 21: Sound Settings
Sound settings To change the sound and ringtone settings: → Settings → Sound and then select the desired item under Sound settings. Volumes Adjust the volume for music, videos, games, notification, and alarms. Phone ringtone Set the ringtones of the phone. Default notification Select a default ringtone for notifications. - Page 22 Creating a screen unlock pattern → Settings → Security → Screen lock → Pattern. 1. Tap 2. Drag your finger to draw the unlock pattern by connecting at least four dots in a vertical, horizontal and/or diagonal direction. Take your finger off the screen when a pattern is drawn.
- Page 23 Password This security method requires you to enter a password that you need to enter every time to unlock the device. If incorrect unlock passwords are entered for five consecutive times, the device forces a 30-second delay before you can try again. Creating a password →...
-
Page 24: Apps
Apps Camera Your device has a camera that allows you to capture and share high-quality pictures and videos. Using the camera app → Camera to open the app. 1. Viewfinder screen. 2. Tap to open or close the camera setting options. and then tap to switch between front and rear camera. -
Page 25: Bluetooth
5. Copy the desired files such as music or pictures from your device to the computer, or vice versa. NOTE: The steps above are applicable to Microsoft Windows. Bluetooth Bluetooth is a short-range wireless communications technology that lets your device connect to other Bluetooth devices such as headsets, computers, other mobile devices, and so on. -
Page 26: Gallery
Gallery → To view and manage the pictures and videos stored on your device, tap Gallery Sharing or deleting albums All pictures and videos are grouped in separate albums according to their dates, sources, or folders in which they are stored. For example, pictures taken using the device are grouped as Camera, and downloaded pictures are grouped as Download. -
Page 27: Calendar
Calendar Use the calendar to schedule and manage your events, meetings, and appointments. Opening the calendar → Calendar to open the app. Adding a new event 1. On the Calendar screen, tap to open the new event details screen. 2. Type the event name, location, description and configure options such as time period, repetition, reminders and so on. -
Page 28: Troubleshooting
Troubleshooting Security Problems Possible causes Possible solutions The SIM card's PIN You have entered an incorrect Contact your service code is blocked. PIN code three consecutive provider to get the PUK times. code. System problems Battery does not The battery or battery charger is A possible cause for charge. - Page 29 Messaging problem Unable to send or Your device is in airplane mode Slide the status panel with no wireless connectivity. down and then disable receive text airplane mode. messages. The network signal strength is Try moving to a different not strong enough. location for better signal reception.
-
Page 30: Specifications
Specifications Marketing model Venue 3741 Regulatory model T02C Regulatory type T02C001 Temperature range 0°C – 40°C (30°F – 104°F) Battery 4100 mAh Weight 330 g (0.73 lb) Dimensions: Height 199 mm (7.83 inches) Width 103 mm (4.06 inches) Depth 9.85 mm (0.39 inches) Display: Type 6.95 inches TN panel...
Need help?
Do you have a question about the Venue 7 3000 SERIES and is the answer not in the manual?
Questions and answers