Table of Contents
Advertisement
Available languages
Available languages
Quick Links
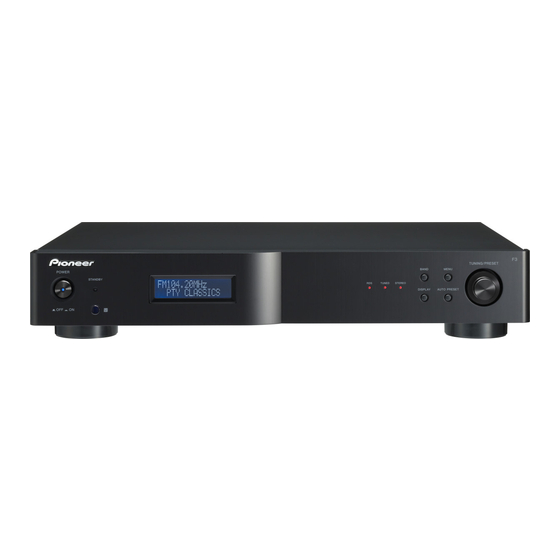
F3
Discover the benefits of registering your product online at
http://www.pioneer.co.uk
Découvrez les nombreux avantages offerts en enregistrant votre produit en ligne
http://www.pioneer.fr
maintenant sur
Bitte nutzen Sie die Möglichkeit zur Registrierung Ihres Produktes
http://www.pioneer.de
unter
Ontdek nu de voordelen van online registratie! Registreer uw Pioneer product via
http://www.pioneer.nl - http://www.pioneer.be
Registra il tuo prodotto su
scopri subito quali vantaggi puoi ottenere!
Registre su producto en
(o en http://www.pioneer.eu) Descubra los beneficios de registrarse on-line:
Operating Instructions | Mode d'emploi | Bedienungsanleitung |
Handleiding | Istruzioni per I'uso | Manual de instrucciones
F-F3-
FM/AM Tuner
Tuner AM/FM
UKW/MW-Tuner
FM/AM-tuner
Sintonizzatore FM/AM
Sintonizador FM/AM
(or http://www.pioneer.eu).
(oder http://www.pioneer.eu)
http://www.pioneer.it
http://www.pioneer.es
J
(ou http://www.pioneer.eu).
(of http://www.pioneer.eu).
(o http://www.pioneer.eu) e
Advertisement
Chapters
Table of Contents

Related Manuals for Pioneer F-F3-J


Summary of Contents for Pioneer F-F3-J
- Page 1 (ou http://www.pioneer.eu). Bitte nutzen Sie die Möglichkeit zur Registrierung Ihres Produktes http://www.pioneer.de unter (oder http://www.pioneer.eu) Ontdek nu de voordelen van online registratie! Registreer uw Pioneer product via http://www.pioneer.nl - http://www.pioneer.be (of http://www.pioneer.eu). http://www.pioneer.it Registra il tuo prodotto su (o http://www.pioneer.eu) e scopri subito quali vantaggi puoi ottenere! http://www.pioneer.es...
- Page 2 Location: rear of the unit IMPORTANT CAUTION RISK OF ELECTRIC SHOCK DO NOT OPEN CAUTION: The lightning flash with arrowhead symbol, The exclamation point within an equilateral within an equilateral triangle, is intended to TO PREVENT THE RISK OF ELECTRIC triangle is intended to alert the user to the alert the user to the presence of uninsulated SHOCK, DO NOT REMOVE COVER (OR...
- Page 3 AC outlet when left the power cord once in a while. When you find it unused for a long period of time (for example, when damaged, ask your nearest PIONEER authorized on vacation). D3-4-2-2-2a_A_En service center or your dealer for a replacement.
-
Page 4: Table Of Contents
Inserting the battery ....6 your Pioneer amplifier ....20 Installing the tuner . -
Page 5: Before You Start
Before you start Chapter 1: Before you start Features What’s in the box High Quality Audio Parts Please confirm that the following accessories are in the box when you open it. • Schottky Barrier Diode • Remote control unit • Gold Plated Terminal •... -
Page 6: Inserting The Battery
Before you start • Lithium batteries may present a fire or chemical burn hazard if misused. Do not Inserting the battery disassemble, heat above 100 °C, or Insert the lithium battery (CR2025) into the incinerate. remote control as shown below. The battery •... -
Page 7: Connections
Connections Chapter 2: Connections Connecting antennas Making cable connections Connect the AM loop antenna and FM antenna as shown in the illustration (page 8). To Make sure not to bend the cables over the top improve reception and sound quality, connect of this unit (as shown in the illustration), since external antennas (See Connecting external... - Page 8 Connections fig. A fig. C fig. B AM loop antenna FM antenna AC IN ANTENNA LINEOUT CONTROL UNBAL 75Ω LOOP Pull off the protective shields of both AM Place the AM loop antenna on a flat antenna wires. surface, pointing in the direction that produces best reception.
-
Page 9: Connecting Analog Audio Sources
Connections Connecting analog audio sources LINEOUT CONTROL To analog input Amplifier • Use the RCA/phono jack audio cable to connect this unit’s LINE OUT connectors to the analog input connectors of an amplifier. Plugging in Make sure to complete all connections before connecting to an AC outlet. -
Page 10: Controls And Displays
Controls and displays Chapter 3: Controls and displays Front panel TUNING/PRESET BAND MENU POWER STANDBY TUNED STEREO DISPLAY AUTO PRESET RDS indicator POWER OFF ON Lights when an RDS broadcast is received, and STANDBY indicator flashes during RDS search. Display TUNED indicator Lights when a station is properly tuned in. -
Page 11: Remote Control Unit
Controls and displays BAND In the preset mode, turning this dial moves the Selects FM or AM. selected preset channel up or down. The auto tuning operation cannot be used when in this MENU mode. Use to enter/exit menu mode. When inputting station names, use this dial to The unit times out if no operation is performed select desired characters (page 18). - Page 12 (page 15). between the remote and the remote sensor on the unit. VOLUME Use to adjust your Pioneer amplifier’s sound • The remote has a range of about 7 m at an volume. angle of about 30º from the remote sensor.
-
Page 13: Listening To Fm/Am
Listening to FM/AM Chapter 4: Listening to FM/AM • If a station cannot be preset automatically due to poor reception, use the “Manual Auto preset memory tuning” operation to tune in the station, then preset it using the manual “Preset stations”... -
Page 14: Search Mode
Listening to FM/AM Manual tuning Search Mode TUNING/PRESET BAND MENU POWER STANDBY TUNED STEREO DISPLAY AUTO PRESET Auto tuning TUNING/PRESET BAND MENU POWER STANDBY TUNED STEREO DISPLAY AUTO PRESET DIMMER DISP A/B/C D/E/F DIMMER DISP MEMORY A.PRESET/A.TUNE TUNE+ A/B/C MENU D/E/F ENTER TUNE-... - Page 15 Listening to FM/AM Improving FM stereo sound Press the TUNING/PRESET dial or ENTER button to set the preset mode. If the TUNED or STEREO indicator fails to light when tuning into an FM station due to a weak Watching the display, either turn the reception signal, press the MPX button to TUNING/PRESET dial, or press the ST + or switch the tuner into mono reception mode.
-
Page 16: Preset Stations
Listening to FM/AM While the preset channel number is flashing, press one of the preset channel Preset stations range (A to J) buttons to select the desired memory block (A to J). TUNING/PRESET BAND MENU POWER STANDBY TUNED STEREO DISPLAY AUTO PRESET While the preset channel number is flashing, either turn the TUNING/PRESET... -
Page 17: An Introduction To Rds
Listening to FM/AM An introduction to RDS RDS Search/PTY Search/TP Search Radio Data System (RDS) is a system used by most FM radio stations to provide listeners with Searching for RDS programs various kinds of information, such as the name One of the most useful features of RDS is the of the station and the kind of show being ability to search for a particular kind of radio... -
Page 18: Naming Station Presets
Listening to FM/AM Displaying RDS information Input the name you want. Choose from the following characters for a Use the DISPLAY button to display the name up to eight characters long. different types of RDS information available. ABCDEFGHIJKLMNOPQRSTUVWXYZ • Press the DISPLAY button for RDS information. -
Page 19: Last Function Memory
Listening to FM/AM Last function memory Initialization of the microprocessor • This unit is equipped with a last function memory which stores the input and output • When the indication of the display is not setting conditions as they were normal or when the operation of the unit immediately before the power is switched does not shows the reasonable result, the... -
Page 20: Other Connections
• For an external AM antenna, use 5 m to 6 m of vinyl-insulated wire and set up either Connect the CONTROL IN jack of this tuner indoors or outdoors. Leave the loop to the CONTROL OUT jack of your Pioneer antenna connected. Only use the included amplifier. AM loop antenna. -
Page 21: Additional Information
Sometimes the trouble may lie in another component. Investigate the other components and electrical appliances being used. If the trouble cannot be rectified even after performing the checks listed below, ask your nearest Pioneer authorized service center or your dealer to carry out repair work. - Page 22 Additional information Problem Remedy Considerable noise in radio • Connect the AM antenna and adjust the direction and position for best broadcasts. reception. You may also connect an external indoor or outdoor AM antenna (page 20). • Fully extend the FM wire antenna, position for best reception, and secure to a wall.
-
Page 23: Specifications
..420 mm (W) x 78 mm (H) x 350 mm (D) Copyright © 2007 Pioneer Corporation. Weight (without package)....4.3 kg... - Page 24 Emplacement : Panneau arrière IMPORTANT ATTENTION DANGER D´ELECTROCUTION NE PAS OUVRIR Ce symbole de l’éclair, placé dans un ATTENTION: Ce point d’exclamation, placé dans un triangle équilatéral, a pour but d’attirer POUR ÉVITER TOUT RISQUE triangle équilatéral, a pour but d’attirer l’attention de l’utilisateur sur la présence, à...
- Page 25 électrique. Vérifier le câble d’alimentation de temps en temps. Contacter le service après-vente prévoyez une période prolongée de non utilisation (par exemple avant un départ en vacances). PIONEER le plus proche ou le revendeur pour un remplacement. D3-4-2-2-2a_A_Fr S002_Fr Si vous souhaitez vous débarrasser de cet appareil, ne le mettez pas à...
- Page 26 Insertion de la pile ..... 6 capteur de votre amplificateur Pioneer ..20 Installation du syntoniseur ....6 06 Informations complémentaires...
-
Page 27: Avant La Mise En Service
Avant la mise en service Chapitre 1 : Avant la mise en service Caractéristiques Contenu de l’emballage Équipement audio haute qualité Veuillez vérifier que les accessoires suivants se trouvent bien dans la boîte lorsque vous • Diode Schottky l’ouvrez. • Terminal plaqué or •... -
Page 28: Insertion De La Pile
Avant la mise en service • En cas d’ingestion, veuillez contacter un médecin immédiatement. Insertion de la pile • Les piles au lithium peuvent présenter un Insérer la pile au lithium (CR2025) dans la risque de feu ou de brûlures chimiques télécommande comme indiqué... -
Page 29: Connexions
Connexions Chapitre 2 : Connexions Connecter les antennes Raccorder les câbles Connectez l’antenne en boucle AM et l’antenne FM de la manière indiquée sur le Assurez-vous de ne pas plier les câbles schéma (page 8). Pour améliorer la réception au-dessus de cet appareil (comme indiqué sur et la qualité... - Page 30 Connexions fig. A fig. C fig. B Antenne cadre AM Antenne FM AC IN ANTENNA LINEOUT CONTROL UNBAL 75Ω LOOP Retirez les gaines protectrices de chacun Placez l’antenne cadre AM sur une surface des fils de l’antenne AM. plane, tournée dans la direction de la meilleure réception.
-
Page 31: Connexion De Sources Audio Analogiques
Connexions Connexion de sources audio analogiques LINEOUT CONTROL Vers l’entrée analogique Amplificateur • Utilisez la prise RCA/phono du câble audio pour raccorder les connecteurs LINE OUT de cet appareil aux entrées analogiques d’un amplificateur. Branchement Veillez à bien effectuer toutes les connexions avant de brancher l’appareil à... -
Page 32: Commandes Et Écrans
Commandes et écrans Chapitre 3 : Commandes et écrans Panneau avant TUNING/PRESET BAND MENU POWER STANDBY TUNED STEREO DISPLAY AUTO PRESET Voyant RDS POWER OFF ON S’allume lorsque l’appareil reçoit une diffusion Voyant STANDBY RDS et clignote pendant la recherche RDS. Voyant TUNED Écran S’allume lorsqu’une station est correctement... -
Page 33: Télécommande
Commandes et écrans BAND En mode préréglage, lorsque vous tournez ce bouton, le canal préréglé sélectionné Sélectionnez FM our AM. modifié, vers le haut ou vers le bas. La MENU commande de syntonisation automatique ne Sert à entrer/sortir du mode menu. peut être utilisée dans ce mode. - Page 34 Cette touche sélectionne une option ou exécute une commande. TUNE +/– Sert à régler la fréquence de réception. ST +/– Cette touche sélectionne les stations préréglées lors de l’écoute de la radio. 13 MUTE Sert à activer la fonction muet de votre amplificateur Pioneer.
-
Page 35: Écouter La Radio Fm/Am
Écouter la radio FM/AM Chapitre 4 : Écouter la radio FM/AM • Le canal A1 est syntonisé une fois l’opération de mise en mémoire du Mémoire de préréglage préréglage automatique terminée. automatique • Si une station ne peut être préréglée automatiquement à... -
Page 36: Mode Recherche
Écouter la radio FM/AM Syntonisation manuelle Mode recherche TUNING/PRESET BAND MENU POWER STANDBY TUNED STEREO DISPLAY AUTO PRESET Syntonisation automatique TUNING/PRESET BAND MENU POWER STANDBY TUNED STEREO DISPLAY AUTO PRESET DIMMER DISP A/B/C D/E/F DIMMER DISP MEMORY A.PRESET/A.TUNE TUNE+ A/B/C MENU D/E/F ENTER... - Page 37 Écouter la radio FM/AM Améliorer le son stéréo FM Appuyez sur le molette TUNING/PRESET ou la touche ENTER pour régler le mode de Si le voyant TUNED ou STEREO ne s’allume préréglage. pas lorsque l’appareil syntonise une station FM à cause d’un signal de réception faible, Tout en regardant l’écran, tournez le molette TUNING/PRESET ou appuyez sur la appuyez sur la touche MPX pour mettre le...
-
Page 38: Préréglage Des Stations
Écouter la radio FM/AM Lorsque le numéro de canal préréglé clignote, appuyez sur une des touches de la Préréglage des stations gamme de canaux de préréglage (A à J) pour choisir la gamme de mémoires désirée (A à J). TUNING/PRESET BAND MENU POWER... -
Page 39: Présentation Du Système Rds
Écouter la radio FM/AM Présentation du système RDS Recherche RDS/Recherche PTY/ Recherche TP Le système RDS (système de radiocommunication de données) est utilisé par la plupart des stations de radio FM pour Recherche de programmes RDS fournir aux auditeurs différents types d’informations, notamment le nom de la Une des caractéristiques les plus utiles du station et le type d’émissions diffusées. -
Page 40: Nommer Les Stations Préréglées
Écouter la radio FM/AM Affichage des informations du système Saisissez le nom de votre choix. Choisissez parmi les caractères suivants pour un nom comprenant jusqu’à huit caractères. La touche DISPLAY permet d’afficher les différents types d’informations RDS ABCDEFGHIJKLMNOPQRSTUVWXYZ disponibles. abcdefghijklmnopqrstuvwxyz •... -
Page 41: Fonction Last Function Memory
Écouter la radio FM/AM Fonction Last Function Memory Initialisation du microprocesseur • Cet appareil est équipé d’une mémoire de la dernière fonction utilisée qui enregistre • Lorsque l’affichage à l’écran n’est pas les conditions de réglage d’entrée et de normal ou que le fonctionnement de sortie dans l’état où... -
Page 42: Autres Connexions
Antenne FM externe Antenne AM externe amplificateur Pioneer Antenne extérieure De nombreux appareils Pioneer sont dotés de Antenne intérieure (câble avec protection vinyle) prises CONTROL SR pouvant être utilisées (5 m à 6 m) pour relier les appareils les uns avec les autres. -
Page 43: Informations Complémentaires
L’anomalie est parfois causée par un autre appareil. Vérifiez les autres appareils et le matériel électrique utilisé. Si ces vérifications ne vous permettent pas de remédier au dysfonctionnement, consultez le service après-vente agréé par Pioneer le plus proche de chez vous ou votre revendeur pour faire réparer l’appareil. - Page 44 Informations complémentaires Anomalie Action corrective Des grondements • Insérez la prise dans le sens contraire. (grésillements) se font entendre • Installez une antenne extérieure (page 20). sur les canaux AM. (Les signaux transmis via le cordon d’alimentation sont modulés par la fréquence de la source d’alimentation.) Présence d’un bruit...
-
Page 45: Caractéristiques Techniques
Consommation en mode veille... 0,5 W Dimensions Publication de Pioneer Corporation..420 mm (L) x 78 mm (H) x 350 mm (P) ©... - Page 46 Lage des Aufklebers : Rückwand des Gerätes WICHTIG CAUTION RISK OF ELECTRIC SHOCK DO NOT OPEN ACHTUNG: Das Blitzsymbol in einem Dreieck weist den Ein Ausrufezeichen in einem Dreieck weist Benutzer darauf hin, dass eine UM SICH NICHT DER GEFAHR EINES den Benutzer auf wichtige Bedienungs- und Berührungsgefahr mit nicht isolierten Teilen ELEKTRISCHEN SCHLAGES AUSZUSETZEN,...
- Page 47 Prüfen Sie das Netzkabel von Zeit zu Zeit. Sollte es von der Netzsteckdose getrennt werden. beschädigt sein, wenden Sie sich an Ihre nächste D3-4-2-2-2a_A_Ge autorisierte PIONEER-Kundendienststelle oder Ihren Händler, um es zu ersetzen. S002_Ge Falls der Netzstecker des Netzkabels dieses Gerätes nicht in die Zusatzsteckdose einer anderen Dieses Gerät ist für den Heimgebrauch vorgesehen.
- Page 48 Herzlichen Dank für den Kauf dieses Pioneer Produktes. Bitte lesen Sie diese Bedienungsanleitung sorgfältig, damit Sie wissen, wie Sie Ihr Gerät ordnungsgemäß bedienen. Bewahren Sie die Bedienungsanleitung anschließend an einem sicheren Ort auf, um ggf. später darauf zurückgreifen zu können.
-
Page 49: Vor Der Inbetriebnahme
Vor der Inbetriebnahme Kapitel 1: Vor der Inbetriebnahme Hauptmerkmale Mitgeliefertes Zubehör Erstklassige Audiobauteile Bitte überprüfen Sie, ob sich die aufgelisteten Artikel beim Öffnen der Verpackung darin • Schottkybarriere befinden. • Vergoldete Anschlussbuchsen • Fernbedienung 100 Sendestationen, voreingestellte • Lithium Batterie (CR2025) Sendergruppen (UKW/MW 100) •... -
Page 50: Batterie Einlegen
Vor der Inbetriebnahme • Bei unsachgemäßer Handhabe von Lithiumbatterien besteht Feuer- und Batterie einlegen Verätzungsgefahr. Zerlegen, erhitzen Legen Sie die Lithiumbatterie (CR2025) in die (über 100 °C) oder verbrennen Sie keine Fernbedienung gemäß der Abbildung ein. Die Batterien. mit diesem Gerät mitgelieferte Batterie wird in •... -
Page 51: Anschlüsse
Anschlüsse Kapitel 2: Anschlüsse Anbringen der Antennen Vornahme der Kabelanschlüsse Die MW-Drehrahmenantenne und UKW- Antenne anschließen, wie in der Abbildung Stellen Sie sicher, dass die Kabel nicht direkt (Seite 8) gezeigt. Schließen Sie die externen auf dem Gerät liegen (wie in der Abbildung Antennen an, um Empfang und Klangqualität gezeigt), da das von den Gerätspulen erzeugte zu verbessern... - Page 52 Anschlüsse fig. A fig. C fig. B MW-Rahmenantenne UKW-Antenne AC IN ANTENNA LINEOUT CONTROL UNBAL 75Ω LOOP Entfernen Sie die Isolierung der beiden Stellen Sie die MW-Rahmenantenne auf Drähten der MW-Antenne. eine ebene Oberfläche, ausgerichtet in die Richtung mit dem besten Empfang. Öffnen Sie die Klemmhebel, führen Sie Sorgen Sie dafür, dass die Antennendrähte jeweils ein Drahtende der MW-Antenne ganz...
-
Page 53: Anschluss Von Analogen Audioquellen
Anschlüsse Anschluss von analogen Audioquellen LINEOUT CONTROL Zum analogen Eingang Verstärker • Benutzen Sie das Cinch-Phonobuchsen- Kabel, um dieses Gerät über den LINE OUT-Anschluss an die analogen Eingangsanschlüsse eines Verstärkers anzuschließen. Anschlüsse vornehmen Stellen Sie sicher, dass alle Anschlüsse vorgenommen wurden, bevor Sie den Stecker in die Netzsteckdose stecken. -
Page 54: Bedienelemente Und Anzeigen
Bedienelemente und Anzeigen Kapitel 3: Bedienelemente und Anzeigen Frontplatte TUNING/PRESET BAND MENU POWER STANDBY TUNED STEREO DISPLAY AUTO PRESET RDS Anzeige POWER OFF ON Leuchtet auf wenn eine RDS Sendung STANDBY -Anzeige empfangen wird und blinkt während der RDS-Suche. Display TUNED Anzeige Leuchtet auf, wenn ein Sender richtig eingestellt ist. -
Page 55: Fernbedienung
Bedienelemente und Anzeigen BAND gegen den Uhrzeigersinn, um den Empfang in Richtung niedrigerer Frequenzen einzustellen. UKW oder MW wählen. Gehen Sie im Voreinstellungsmodus durch die MENU voreinstellten Kanläle, indem Sie am Aufruf und Verlassen des Menümodus. Tunerknopf drehen. Die automatische Wenn nach Aufruf des Menümodus innerhalb Sendersuche kann in diesem Modus nicht von ca. - Page 56 Übertragung des Signals zwischen VOLUME Fernbedienung und dem Sensor an der Für die Einstellung der Lautstärke Ihres Frontplatte verhindern. Pioneer Verstärkers. • Die Fernbedienung hat eine Reichweite von etwa 7 m bei einem Winkel von etwa DIMMER 30º zu dem Fernbedienungssensor.
-
Page 57: Ukw/Mw Hören
UKW/MW Hören Kapitel 4: UKW/MW Hören • Kanal A1 wird aufgerufen, nachdem der automatische Automatischer Voreinstellungsspeichervorgang beendet Voreinstellungsspeicher ist. • Falls ein Sender wegen schwacher Singalsqualität nicht automatisch abgestimmt werden kann, benutzen Sie DIMMER DISP das „Manuelle Sendereinstellung“ um den A/B/C Sender abzustimmen, und speichern Sie D/E/F... -
Page 58: Suchmodus
UKW/MW Hören Manuelle Sendereinstellung Suchmodus TUNING/PRESET BAND MENU POWER STANDBY TUNED STEREO DISPLAY AUTO PRESET Automatische Sendersuche TUNING/PRESET BAND MENU POWER STANDBY TUNED STEREO DISPLAY AUTO PRESET DIMMER DISP A/B/C D/E/F DIMMER DISP MEMORY A.PRESET/A.TUNE A/B/C TUNE+ MENU D/E/F ENTER TUNE- MEMORY A.PRESET/A.TUNE... - Page 59 UKW/MW Hören UKW-Stereoklang verbessern Drehen Sie den TUNING/PRESET Tunerknopf oder drücken Sie auf die ENTER - Falls die TUNED oder STEREO -Anzeige bei der Taste, um den Voreinstellungsmodus Sendereinstellung eines UKW-Senders wegen einzustellen. eines schwachen Signals nicht aufleuchtet, Schauen Sie auf das Display und drehen drücken Sie MPX -Taste, um in den Sie entweder den TUNING/PRESET Monoempfangsmodus des Tuners zu...
-
Page 60: Voreingestellte Sender
UKW/MW Hören Während die Nummer des voreingestellten Kanals blinkt, drücken Sie Voreingestellte Sender auf eine der Tasten für die Voreinstellungskanäle (A bis J) um den TUNING/PRESET BAND MENU POWER STANDBY TUNED STEREO gewünschten Voreinstellungsspeicherblock DISPLAY AUTO PRESET einzustellen (A bis J). Während die Nummer des voreingestellten Kanals blinkt, drehen Sie DIMMER... -
Page 61: Eine Einführung In Rds
UKW/MW Hören Eine Einführung in RDS RDS-Suche/PTY-Suche/TP-Suche Das Radio Data System (RDS) ist ein System, das von den meisten UKW-Radiosendern Suche nach RDS-Sendungen verwendet wird, um die Hörer mit Einer der praktischsten Merkmakel von RDS verschiedenen Arten von Information zu ist die Fähigkeit nah einem bestimmten versorgen –... -
Page 62: Sendervoreinstellungen Bennenen
UKW/MW Hören Anzeigen von RDS-Informationen Geben Sie den gewünschten Namen ein. Wählen Sie aus den folgenden Buchstaben Benutzen Sie die Taste DISPLAY, um die einen bis zu achtstelligen Namen aus. verschiedenen Arten von RDS-Informationen anzuzeigen. ABCDEFGHIJKLMNOPQRSTUVWXYZ • Drücken Sie DISPLAY für abcdefghijklmnopqrstuvwxyz RDS-Informationen. -
Page 63: Letzte-Funktion-Speicher
UKW/MW Hören Letzte-Funktion-Speicher Initialisierung des Mikroprozessors • Dieses Gerät verfügt über einen Letzte- Funktion-Speicher, der die Ein- und • Wenn die Anzeige auf dem Display nicht Ausgabeeinstellungen so speichert, wie normal ist oder der Betrieb des Geräts sie unmittelbar vor einer nicht die gewünschten Ergebnisse zeigt, Stromunterbrechung eingestellt waren. -
Page 64: Andere Anschlüsse
Verbinden Sie die CONTROL IN Buchse beiliegende MW-Rahmenantenne. dieses Tuners mit der CONTROL OUT Buchse • Für den Anschluss einer externen Ihres Pioneer Verstärkers. UKW-Antenne benutzen Sie einen Benutzen Sie ein Kabel mit Monoministecker PAL-Anschluss. an beiden Enden für die Verbindung. -
Page 65: Zusätzliche Informationen
Manchmal wird eine Störung auch durch ein externes Gerät verursacht. Überprüfen Sie alle anderen Komponenten und elektrischen Geräte. Wenn Sie das Problem nicht beheben können, wenden Sie sich für Reparaturen an die nächste Pioneer-Kundendienststelle oder an Ihren Händler. • Wenn die Anlage aufgrund externer Auswirkungen wie statischer Elektrizität nicht richtig funktioniert, ziehen Sie den Stecker aus der Steckdose und stecken Sie ihn nach kurzer Zeit wieder hinein, um den normalen Betrieb fortzusetzen. - Page 66 Zusätzliche Informationen Problem Abhilfe Brummgetöne treten während • Stecken Sie die Stecker andersherum hinein. MW Sendungen auf. • Installieren Sie eine Aussenantenne (Seite 20). (Die Signalübermittlung über den Stromnetzkabel wird durch die Eigenfrequenz der Stromquelle moduliert.) Beträchtliches Rauschen beim • Schliessen Sie die MW Antenne an und stellen Sie die Richtung und Radioempfang.
-
Page 67: Technische Daten
..420 mm (B) x 78 mm (H) x 350 mm (T) Urheberrechtlich geschützt © 2007 Pioneer Corporation. Gewicht (ohne Verpackung) ... . .4,3 kg... - Page 68 Plaats: Achterkant van apparaat BELANGRIJK CAUTION RISK OF ELECTRIC SHOCK DO NOT OPEN De lichtflash met pijlpuntsymbool in een WAARSCHUWING: Het uitroepteken in een gelijkzijdige gelijkzijdige driehoek is bedoeld om de OM HET GEVAAR VOOR EEN ELEKTRISCHE driehoek is bedoeld om de aandacht van de aandacht van de gebruikers te trekken op SHOCK TE VOORKOMEN, DEKSEL (OF RUG) gebruiker te trekken op de aanwezigheid van...
- Page 69 (bijv. wanneer u op Wanneer u de indruk krijgt dat het beschadigd is, dient vakantie gaat). D3-4-2-2-2a_A_Du u bij uw dichtstbijzijnde erkende PIONEER onderhoudscentrum of uw dealer een nieuw snoer te Als de netstekker van dit apparaat niet geschikt is kopen.
- Page 70 De tuner installeren ....6 Pioneer-versterker ..... 20...
-
Page 71: Voordat U Begint
Voordat u begint Hoofdstuk 1: Voordat u begint Kenmerken Inhoud van de doos Audio-onderdelen van hoge kwaliteit Controleer bij het openen van de doos of de volgende accessoires aanwezig zijn. • Schottky barrier diode • Afstandsbediening • Vergulde aansluiting • Lithiumbatterij (CR2025) 100 zenders, groepsvoorkeurzenders (FM/AM 100) •... -
Page 72: De Batterij Plaatsen
Voordat u begint • Neem direct contact op met een dokter als hij wordt ingeslikt. De batterij plaatsen • Lithiumbatterijen kunnen (chemische) Plaats de lithiumbatterij (CR2025) in de brandwonden veroorzaken indien verkeerd afstandsbediening zoals hieronder staat gebruikt. Haal ze niet uit elkaar, verwarm ze aangegeven. -
Page 73: Aansluitingen
Aansluitingen Hoofdstuk 2: Aansluitingen Antennes aansluiten De kabels aansluiten Sluit de AM-raamantenne en de FM-antenne aan zoals in de afbeelding (pagina 8). Om de Verzeker u ervan dat de kabels niet over de ontvangst en geluidskwaliteit te verbeteren bovenkant van het apparaat worden gebogen kunt u externe antennes aansluiten (Zie Een (zoals wordt weergegeven op de afbeelding),... - Page 74 Aansluitingen fig. A fig. C fig. B AM-raamantenne FM-antenne AC IN ANTENNA LINEOUT CONTROL UNBAL 75Ω LOOP Trek de buitenisolatie van beide Plaats de AM-raamantenne op een plat AM-antennedraden af. oppervlak en positioneer hem in de richting die de beste ontvangst verschaft. Druk de lipjes open, plaats een draad Zorg dat de antenne niet in contact komt met stevig in iedere aansluiting en laat...
-
Page 75: Analoge Audiobronnen Aansluiten
Aansluitingen Analoge audiobronnen aansluiten LINEOUT CONTROL Naar analoge invoer Versterker • Gebruik de RCA/phono jack audiokabel om de LINE OUT aansluitingen van dit apparaat aan te sluiten op de analoge ingangen van een versterker. Inschakelen Verzeker u ervan dat u alle aansluitingen heeft gemaakt alvorens het netsnoer in het stopcontact te steken. -
Page 76: Toetsen En Displays
Toetsen en displays Hoofdstuk 3: Toetsen en displays Voorpaneel TUNING/PRESET BAND MENU POWER STANDBY TUNED STEREO DISPLAY AUTO PRESET RDS-indicator POWER OFF ON Licht op als er een RDS-uitzending wordt STANDBY-indicator ontvangen en knippert tijdens het zoeken naar RDS. Weergave TUNED-indicator Licht op als er correct is afgestemd op een zender. -
Page 77: Afstandsbediening
Toetsen en displays BAND In de voorkeurmodus wordt door aan deze knop te draaien de volgende of vorige Selecteert FM of AM. voorkeurzender geselecteerd. In deze modus MENU kan geen gebruik worden gemaakt van Voor het openen/sluiten van de menumodus. automatisch afstemmen. - Page 78 VOLUME apparaat bevindt. Gebruik het om het volume van uw • De afstandsbediening heeft een bereik van Pioneer-versterker aan te passen. ongeveer 7 m bij een hoek van ongeveer DIMMER 30º vanaf de afstandsbedieningssensor. Dimt of maakt de display helderder (of schakelt •...
-
Page 79: Luisteren Naar Fm/Am
Luisteren naar FM/AM Hoofdstuk 4: Luisteren naar FM/AM • Er wordt automatisch op kanaal A1 afgestemd nadat het automatische instellen Automatisch het van het voorkeurgeheugen is afgerond. voorkeurgeheugen instellen • Als een zender niet automatisch kan worden vastgelegd door een slechte ontvangst, kunt u met behulp van DIMMER “Handmatig afstemmen”... -
Page 80: Zoekmodus
Luisteren naar FM/AM Handmatig afstemmen Zoekmodus TUNING/PRESET BAND MENU POWER STANDBY TUNED STEREO DISPLAY AUTO PRESET Automatische afstemming TUNING/PRESET POWER BAND MENU STANDBY TUNED STEREO DISPLAY AUTO PRESET DIMMER DISP A/B/C D/E/F DIMMER DISP MEMORY A.PRESET/A.TUNE A/B/C TUNE+ MENU D/E/F ENTER TUNE- MEMORY... - Page 81 Luisteren naar FM/AM Het FM-stereogeluid verbeteren Druk op de TUNING/PRESET-knop of ENTER-toets om de voorkeurmodus in te Als de TUNED- of STEREO-indicator niet schakelen. oplicht bij het afstemmen op een FM-zender door een zwak signaal, kunt u op de MPX-toets Kijk naar het scherm en selecteer de drukken om de tuner te schakelen naar de gewenste voorkeurzender door aan de...
-
Page 82: Voorkeurzenders
Luisteren naar FM/AM Druk op één van de voorkeurzender- intervalknoppen (A t/m J) terwijl het Voorkeurzenders voorkeurzendernummer knippert om het gewenste geheugeninterval (A t/m J) te TUNING/PRESET BAND MENU POWER STANDBY TUNED STEREO selecteren. DISPLAY AUTO PRESET Draai de TUNING/PRESET-knop, druk op de ST +/–... -
Page 83: Een Introductie Van Rds
Luisteren naar FM/AM Een introductie van RDS RDS Search/PTY Search/TP Search Radio Data System (RDS) is een systeem dat Naar RDS-programma’s zoeken door de meeste FM-radiozenders wordt gebruikt om luisteraars van informatie te Één van de meest nuttige functies van RDS is voorzien, zoals de naam van de zender of het de mogelijkheid om te zoeken naar een soort programma dat wordt uitgezonden. -
Page 84: Voorkeurzenders Voorzien Van Een Naam
Luisteren naar FM/AM RDS-informatie weergeven Voer de naam in die u wilt. Kies een naam van maximaal acht tekens op Met de DISPLAY-toets kunt u de verschillende basis van de volgende beschikbare karakters. soorten RDS-informatie weergeven. ABCDEFGHIJKLMNOPQRSTUVWXYZ • Druk op de DISPLAY-toets indien u de RDS-informatie wilt zien. -
Page 85: Laatste Functie-Geheugen
Luisteren naar FM/AM Laatste functie-geheugen Initialisatie van de microprocessor • Dit apparaat is voorzien van een laatste functie geheugen dat de invoer- en • Als de display verkeerde gegevens uitvoerinstellingen terugzet op de stand weergeeft of het apparaat niet juist waarin ze verkeerden voordat de stroom functioneert dient de microprocessor op werd uitgeschakeld. -
Page 86: Overige Aansluitingen
Deze tuner bedienen via de afstandsbedieningssensor van externe FM-antenne externe AM-antenne de Pioneer-versterker Buitenantenne Veel Pioneer-componenten zijn voorzien van Binnenantenne (met vinyl bedekt SR CONTROL aansluitingen, die kunnen draad) (5 m t/m 6 m) worden gebruikt om apparatuur met elkaar te... -
Page 87: Overige Informatie
• Zet de versterker aan. weergegeven. • Controleer of de versterker juist is aangesloten (raadpleeg Aansluitingen op pagina 7). • Druk op de MUTE-toets van uw Pioneer-versterker om het geluid aan te zetten. De afstandsbediening doet het • Vervang de batterij (pagina 6). - Page 88 Overige informatie Probleem Oplossing Ruis (gezoem) wordt • Plaats de stekker in de omgekeerde richting. weergegeven tijdens • Sluit een buitenantenne aan (pagina 20). AM-uitzendingen. (Signalen die worden verzonden via stroomkabels worden beïnvloed door de stroombronfrequentie.) Ernstige ruis in • Sluit de AM-antenne aan en pas de richting en positie aan voor een radio-uitzendingen.
-
Page 89: Technische Gegevens
..420 mm (B) x 78 mm (H) x 350 mm (D) Copyright © 2007 Pioneer Corporation. Gewicht (zonder verpakking) ... .4,3 kg... - Page 90 Posizione dell’etichetta : parte posteriore dell’apparecchio. IMPORTANTE CAUTION RISK OF ELECTRIC SHOCK DO NOT OPEN ATTENZIONE: Il simbolo del lampo con terminale a forma Il punto esclamativo in un triangolo di freccia situato all’interno di un triangolo PER EVITARE IL RISCHIO DI SCOSSE equilatero serve ad avvisare l’utilizzatore equilatero serve ad avvisare l’utilizzatore ELETTRICHE, NON RIMUOVERE IL...
- Page 91 PIONEER oppure al vostro rivenditore per la periodi di tempo relativamente lunghi (ad esempio, sostituzione del filo di alimentazione.
- Page 92 Inserimento della batteria ....6 telecomando dell’amplificatore Pioneer ..20 Installazione del sintonizzatore ... . 6...
-
Page 93: Informazioni Preliminari
Informazioni preliminari Capitolo 1: Informazioni preliminari Caratteristiche Contenuto della confezione Componenti audio di elevata qualità Verificare che i seguenti accessori siano inclusi nella confezione. • Diodo Schottky • Telecomando • Terminale placcato oro • Batteria al litio (CR2025) 100 stazioni, preselezioni gruppo (FM/AM 100) •... -
Page 94: Inserimento Della Batteria
Informazioni preliminari • Se ingerite, contattare immediatamente un dottore. Inserimento della batteria • Le batterie al litio potrebbero provocare Inserire la batteria al litio (CR2025) nel incendi o bruciature chimiche, se utilizzate telecomando come indicato di seguito. La in maniera errata. Non smontarle, non batteria in dotazione con questo apparecchio è... -
Page 95: Collegamenti
Collegamenti Capitolo 2: Collegamenti Collegamento delle antenne Collegamento dei cavi Collegare l’antenna a telaio AM e l’antenna FM come mostrato nell’illustrazione (pagina 8). Assicurarsi di non piegare i cavi sulla parte Per migliorare la ricezione e la qualità audio, superiore dell’apparecchio (come mostrato collegare antenne esterne (Vedere nell’illustrazione) poiché... - Page 96 Collegamenti fig. A fig. C fig. B Antenna AM a telaio Antenna FM AC IN ANTENNA LINEOUT CONTROL UNBAL 75Ω LOOP Eliminare gli schermi di protezione dei Posizionare l’antenna AM a telaio su una cavi dell’antenna AM. superficie piana e puntarla in una direzione che consenta una ricezione ottimale.
-
Page 97: Collegamento Di Fonti Audio Analogico
Collegamenti Collegamento di fonti audio analogico LINEOUT CONTROL All’ingresso analogico Amplificatore • Utilizzare il cavo per presa audio RCA/fono per collegare i connettori LINE OUT di questo apparecchio ai connettori di ingresso analogico di un amplificatore. Collegamento alla rete Prima di effettuare il collegamento ad una rete CA, assicurarsi di aver effettuato tutti i collegamenti. -
Page 98: Comandi E Display
Comandi e display Capitolo 3: Comandi e display Pannello anteriore TUNING/PRESET BAND MENU POWER STANDBY TUNED STEREO DISPLAY AUTO PRESET Indicatore RDS POWER OFF ON Si illumina quando si riceve un programma Indicatore STANDBY RDS e lampeggia durante la ricerca RDS. Display Indicatore TUNED Si illumina quando si sintonizza correttamente... -
Page 99: Telecomando
Comandi e display BAND selettore in senso antiorario per cambiare la ricezione verso le frequenze più basse. Selezione FM o AM. In modalità di preselezione, ruotando questo MENU selettore si sposta verso l’alto o il basso il Utilizzare per accedere/uscire dalla modalità canale preselezionato . - Page 100 12 Tasti di sintonizzazione ENTER Seleziona un’opzione o esegue un comando. TUNE +/– Utilizzare per cambiare la frequenza di ricezione. ST +/– Seleziona le stazioni preselezionate quando si ascolta la radio. 13 MUTE Utilizzare per attivare la funzione di disattivazione audio dell’amplificatore Pioneer.
-
Page 101: Ascolto In Fm/Am
Ascolto in FM/AM Capitolo 4: Ascolto in FM/AM • Il canale A1 viene sintonizzato una volta completata l’operazione della memoria di Memoria di preselezione preselezione automatica. automatica • Se non è possibile preselezionare automaticamente una stazione a causa della scarsa ricezione, utilizzare l’opzione DIMMER “Sintonizzazione manuale”... -
Page 102: Modalità Di Ricerca
Ascolto in FM/AM Sintonizzazione manuale Modalità di ricerca TUNING/PRESET BAND MENU POWER STANDBY TUNED STEREO DISPLAY AUTO PRESET Sintonizzazione automatica TUNING/PRESET BAND MENU POWER STANDBY TUNED STEREO DISPLAY AUTO PRESET DIMMER DISP A/B/C D/E/F DIMMER DISP MEMORY A.PRESET/A.TUNE TUNE+ A/B/C MENU D/E/F ENTER... - Page 103 Ascolto in FM/AM Per migliorare l’audio stereo FM Premere il selettore TUNING/PRESET o il tasto ENTER per impostare la modalità di Se l’indicatore TUNED o STEREO non si preselezione. illumina quando si sintonizza una stazione FM a causa di un segnale di ricezione debole, Guardando il display, ruotare il selettore premere il tasto MPX per portare il TUNING/PRESET o premere il tasto ST + o...
-
Page 104: Stazioni Preselezionate
Ascolto in FM/AM Mentre lampeggia il numero di canale preselezionato, premere uno dei tasti Stazioni preselezionate (da A a J) della gamma di canali preselezionati per selezionare il blocco di memoria TUNING/PRESET BAND MENU POWER STANDBY TUNED STEREO desiderato (da A a J). DISPLAY AUTO PRESET Mentre lampeggia il numero di canale... -
Page 105: Introduzione Alla Funzione Rds
Ascolto in FM/AM Introduzione alla funzione RDS Ricerca RDS/Ricerca PTY/Ricerca TP Il sistema RDS (Radio Data System) è usato da Ricerca di programmi RDS gran parte delle stazioni radio FM per fornire agli ascoltatori vari tipi di informazioni, tra cui Una delle funzioni più... -
Page 106: Per Assegnare Un Nome Alle Stazioni Preselezionate
Ascolto in FM/AM Visualizzazione delle informazioni RDS Inserire il nome desiderato. Scegliere tra i seguenti caratteri per un nome Usare il tasto DISPLAY per visualizzare i diversi della lunghezza massima di otto caratteri. tipi di informazioni RDS disponibili. ABCDEFGHIJKLMNOPQRSTUVWXYZ • Premere il tasto DISPLAY per le informazioni RDS. -
Page 107: Memoria Ultima Funzione
Ascolto in FM/AM Memoria ultima funzione Inizializzazione del microprocessore • Questo apparecchio è dotato di una memoria ultima funzione che memorizza le • Se l’indicazione del display è anormale o impostazioni di ingresso e uscita prima di l’apparecchio non funziona correttamente, spegnere l’apparecchio. -
Page 108: Altri Collegamenti
Antenna FM esterna Antenna AM esterna Pioneer Antenna esterna Molti componenti Pioneer dispongono di prese Antenna interna (cavo rivestito SR CONTROL, da utilizzare per collegare i in vinile) (da 5 m a 6 m) componenti in modo da poter adoperare il telecomando di un solo componente. -
Page 109: Informazioni Supplementari
Non viene emesso alcun suono. • Accendere l’amplificatore. • Assicurarsi che l’amplificatore sia collegato correttamente (consultare Collegamenti a pagina 7). • Premere il tasto MUTE sul vostro amplificatore Pioneer per annullare la disattivazione dell’audio. Il telecomando non • Sostituire le batterie (pagina 6). - Page 110 Informazioni supplementari Problema Soluzione Durante le trasmissioni AM si • Inserire la spina in direzione contraria. avverte un eco (rumori molesti) • Installare un’antenna esterna (pagina 20). (I segnali trasmessi sul cavo di alimentazione vengono modulati dalla frequenza di alimentazione). Interferenza considerevole nelle •...
-
Page 111: Specifiche Tecniche
..420 mm (L) x 78 mm (A) x 350 mm (P) Copyright © 2007 Pioneer Corporation. Peso (senza confezione) ....4,3 kg... - Page 112 Ubicación : Parte posterior del aparato IMPORTANTE CAUTION RISK OF ELECTRIC SHOCK DO NOT OPEN ATENCIÓN: La luz intermitente con el símbolo de punta El punto exclamativo dentro un triángulo de flecha dentro un triángulo equilátero. PARA PREVENIR EL PELIGRO DE CHOQUE equilátero convenido para avisar el usuário Está...
- Page 113 Revise el cable de alimentación está dañado, solicite el reemplazo del mismo al centro de servicio autorizado PIONEER más cercano, o a su distribuidor. S002_Sp Si desea deshacerse de este producto, no lo mezcle con los residuos generales de su hogar. De conformidad con la legislación vigente, existe un sistema de recogida distinto para los productos electrónicos que requieren un procedimiento adecuado de...
- Page 114 Colocación de la pila....6 sensor remoto del amplificador Pioneer ..20 Instalación del sintonizador ....6 06 Información adicional...
-
Page 115: Antes De Comenzar
Antes de comenzar Capítulo 1: Antes de comenzar Características Contenido de la caja Partes de audio de alta calidad Asegúrese de que los siguientes accesorios se encuentren en la caja cuando la abra. • Diodo con aislante Schottky • Mando a distancia •... -
Page 116: Colocación De La Pila
Antes de comenzar • En caso de ingestión, póngase en contacto con un médico de inmediato. Colocación de la pila • Las pilas de litio pueden presentar peligro Coloque la pila de litio (CR2025) en el mando a de incendio o de quemadura química en distancia como se muestra a continuación. -
Page 117: Conexiones
Conexiones Capítulo 2: Conexiones Conexión de las antenas Conexión de los cables Conecte la antena AM en bucle y la antena FM como se muestra en la ilustración (página 8). Asegúrese de no doblar los cables por encima Para mejorar la calidad del sonido y la de esta unidad (como muestra la ilustración), recepción, conecte antenas externas ya que el campo magnético producido por sus... - Page 118 Conexiones fig. A fig. C fig. B Antena de cuadro AM Antena FM AC IN ANTENNA LINEOUT CONTROL UNBAL 75Ω LOOP Quite los protectores de los dos cables de Coloque la antena de cuadro AM sobre la antena AM. una superficie plana y apunte hacia la dirección en la que se consiga una mejor Presione los conectores para abrirlos, recepción.
-
Page 119: Conexión De Las Fuentes De Audio Analógico
Conexiones Conexión de las fuentes de audio analógico LINEOUT CONTROL Para entrada analógica Amplificador • Utilice el cable de audio de la toma RCA/ fono para conectar los conectores LINE OUT de esta unidad a los conectores de entrada analógica de un amplificador. Conexión Asegúrese de completar todas las conexiones antes de conectar la unidad a una toma de CA. -
Page 120: Controles Y Pantallas
Controles y pantallas Capítulo 3: Controles y pantallas Panel frontal TUNING/PRESET BAND MENU POWER STANDBY TUNED STEREO DISPLAY AUTO PRESET Indicador RDS POWER OFF ON Se ilumina al recibir una emisión RDS y Indicador STANDBY parpadea durante la búsqueda RDS. Pantalla Indicador TUNED Se ilumina al sintonizar correctamente una... -
Page 121: Mando A Distancia
Controles y pantallas BAND En el modo de presintonización, al girar este Selecciona FM o AM botón se desplaza el canal presintonizado seleccionado hacia arriba o hacia abajo. La MENU sintonización automática no puede utilizarse Utilícelo para acceder/salir del modo menú. en este modo. - Page 122 VOLUME • El mando tiene un alcance de unos 7 m. a Utilícelo para ajustar el volumen del sonido del un ángulo de unos 30º desde el sensor amplificador Pioneer. remoto. • La operación con el mando a distancia DIMMER...
-
Page 123: Escucha De Fm/Am
Escucha de FM/AM Capítulo 4: Escucha de FM/AM • Si una emisora no puede presintonizarse automáticamente a causa de una Memoria de presintonización recepción pobre, utilice la “Sintonización automática manual” para sintonizar la emisora y, a continuación, presintonícela utilizando la “Emisoras presintonizadas”... -
Page 124: Modo De Búsqueda
Escucha de FM/AM Presintonización manual Modo de búsqueda TUNING/PRESET BAND MENU POWER STANDBY TUNED STEREO DISPLAY AUTO PRESET Sintonización automática TUNING/PRESET BAND MENU POWER STANDBY TUNED STEREO DISPLAY AUTO PRESET DIMMER DISP A/B/C D/E/F DIMMER DISP MEMORY A.PRESET/A.TUNE TUNE+ A/B/C MENU D/E/F ENTER... - Page 125 Escucha de FM/AM Mejora del sonido FM estéreo Pulse el rueda de TUNING/PRESET o el botón ENTER para ajustar el modo de Si el indicador TUNED o STEREO no se presintonización. enciende al sintonizar una emisora FM debido a una señal de recepción débil, pulse el botón Mire la pantalla y gire el rueda de MPX o cambie el sintonizador al modo de TUNING/PRESET o pulse el botón ST + o ST –...
-
Page 126: Emisoras Presintonizadas
Escucha de FM/AM Mientras el número del canal presintonizado está parpadeando, pulse uno Emisoras presintonizadas de los botones de rango de canales presintonizados (A a J) para seleccionar el TUNING/PRESET BAND MENU POWER STANDBY TUNED STEREO bloque de memoria deseado (A a J). DISPLAY AUTO PRESET Mientras el número del canal... -
Page 127: Una Introducción A Rds
Escucha de FM/AM Una introducción a RDS Búsqueda RDS/búsqueda PTY/ búsqueda TP Radio Data System (RDS) es un sistema utilizado por la mayoría de emisoras FM para ofrecer distintos tipos de información a sus Búsqueda de programas RDS oyentes, como el nombre de la emisora y el tipo Una de las características más útiles del RDS de programa que están emitiendo. -
Page 128: Nombre De Las Emisoras Presintonizadas
Escucha de FM/AM Visualización de información RDS Introduzca el nombre que desee. Elija un nombre utilizando hasta ocho de los Utilice el botón DISPLAY para ver los distintos siguientes caracteres. tipos de información RDS disponibles ABCDEFGHIJKLMNOPQRSTUVWXYZ • Pulse el botón DISPLAY para ver información de RDS. -
Page 129: Memoria De Última Función
Escucha de FM/AM Memoria de última función Inicialización del microprocesador • Esta unidad está equipada con una • Cuando la indicación de la pantalla no es memoria de última función que almacena normal o cuando el funcionamiento de la las condiciones de los ajustes de entrada y unidad no muestra el resultado razonable, salida tal y como estaban inmediatamente se necesita la inicialización del... -
Page 130: Otras Conexiones
Funcionamiento del sintonizador con el sensor antena FM externa antena AM externa remoto del amplificador Pioneer Antena exterior Muchos componentes Pioneer poseen tomas Antena interior (cable con aislamiento SR CONTROL que pueden utilizarse para vinílico) (5 m. a 6 m.) conectar componentes entre sí... -
Page 131: Información Adicional
Inspeccione los otros componentes y los aparatos eléctricos que esté utilizando. Si el problema no se puede solucionar después de comprobar los puntos indicados abajo, solicite al centro de servicio autorizado por Pioneer o a su distribuidor que le haga los trabajos de reparación necesarios. - Page 132 Información adicional Problema Solución Se escuchan sonidos • Inserte el enchufe en la dirección opuesta. retumbantes (zumbidos) • Instale una antena exterior (página 20). durante las emisiones AM. (Las señales transmitidas por el cable de alimentación se modulan mediante la frecuencia de la fuente de alimentación.) Hay demasiado ruido en las •...
-
Page 133: Especificaciones
..420 mm. (An) x 78 mm. (Al) x 350 mm. (Pr) Copyright © 2007 Pioneer Corporation. Peso (sin paquete).....4,3 kg... - Page 134 253 Alexandra Road, #04-01, Singapore 159936 TEL: 65-6472-7555 PIONEER ELECTRONICS AUSTRALIA PTY. LTD. 178-184 Boundary Road, Braeside, Victoria 3195, Australia, TEL: (03) 9586-6300 PIONEER ELECTRONICS DE MEXICO S.A. DE C.V. Blvd.Manuel Avila Camacho 138 10 piso Col.Lomas de Chapultepec, Mexico,D.F. 11000 TEL: 55-9178-4270 K002_B_En Printed in China / Imprimé...
Need help?
Do you have a question about the F-F3-J and is the answer not in the manual?
Questions and answers