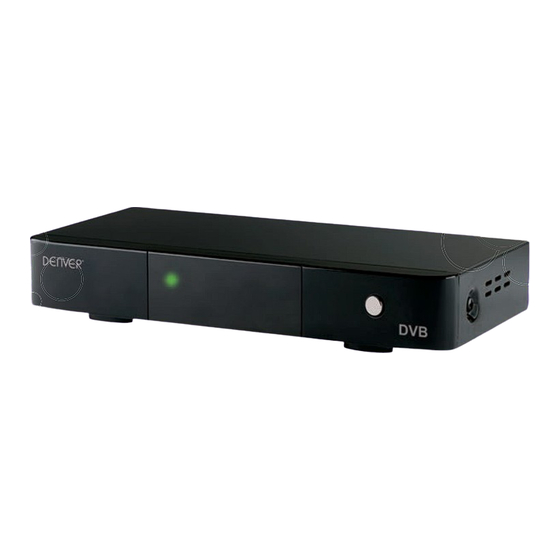
Summary of Contents for Denver DVBC-110HD
- Page 1 Instructional Manual Betjeningsvejledning Använderinstruktioner Benutzerhandbuch works for Yousee, Stofa + more...
- Page 2 Important safety instructions to be kept with the product Please read attentively To prevent fire and electric shock, do not expose this receiver to rain or moisture. In order to avoid any possible risk of electric shock, never attempt to open the unit. In case of breakdown, reparation should be made by qualified technicians.
- Page 3 - The plug must remain readily accessible after the installation of the product. Welcome Section Congratulations on choosing to buy a DENVER product. By doing so you now have the assurance and peace of mind that comes with purchasing a product made by one of the leading manufactory.
- Page 4 FAQ – DENVER DVB-C Congratulations with your digital cable-tv tuner. With this settop box you can enjoy digital TV signal, and get HD channels in full quality. To get a proper signal you need good cables with proper connectors and assembling. If you don’t have this, it can be hard to receive proper signal.
-
Page 5: Table Of Contents
1. Installation of STB ....................... 2 1.1 Front Panel ....................... 2 1.2 Rear Panel......................2 1.3 Connection ....................... 3 1.4 Remote ......................4 2. Installation Guide ......................5 3. Basic Operation ......................5 3.1 Program Organizer ................... 5 3.2 Installation Guide ....................6 3.3 System Setup .................... -
Page 6: Installation Of Stb
1. Installation of STB 1.1 Front Panel Power: Switch between Standby mode and active mode. Power lamp, red color in Standby mode, green color in active mode on/off: IR sensor: Receives the remote control signal. 1.2 Rear Panel 1. ANT IN Connect cable signal. -
Page 7: Connection
1.3 Connection Note: Before connect this STB to other devices, please close all devices’ power. 1.3.1 Connecting to cable signal To receive the broadcast signal, the cable signal should be connected to the CABLE IN connector at the back of the receiver. 1.3.2 Connecting to TV 1. -
Page 8: Remote
1.4 Remote : Switch between operation and standby modes. : Press to temporarily cut off the sound. 0-9: Enter number or select a channel number to watch. RCL: Switches to Last channel viewed. TV/R: Switch between TV and Radio mode. MENU: Displays the main menu. -
Page 9: Installation Guide
2. Installation Guide After all connections have been made properly, switch on TV and make sure the receiver is connected to the Main Power. Press Power button to switch receiver on. If you are using the receiver for the first time or restored to Factory Default, the Main Menu will appear on your TV screen. -
Page 10: Installation Guide
3.2 Installation Guide To access the menu, press MENU and select [Install Guide]. The Menu provides options to adjust the Channel Search settings. Select an option and press OK or RIGHT tothe setting page.Press EXIT to exit the Menu. 3.2.1 Search Setup (1) Country:Setup an country that it determine the time region. - Page 11 has multi-audio. You can set the subtitle language that was the default choice when the program has multi-subtitle 3.3.2 OSD setting You can set the OSD transparent and infobar show time. 3.3.3 TV Setting (1) TV mode If the video does not appear correctly, you need to change the settings. This should match the most common setting for TVs in your country.
-
Page 12: Tools
password. 3.3.8 Restore Factory Default Reset your Set Top Box to the Default Factory Settings. In Main Menu select [Restore Factory Default] and press OK or RIGHT to select. Enter your password or the default password '0000' and press OK to confirm. This option will delete all preset channels and settings. -
Page 13: Mutimeida
Record setup: you can view record device information. 3.7 MutiMeida You can play music, view the photo, see the movie Multimedia player feature also has been integrated on the receiver. You could show your preference photo, playing music and movie on multimedia player. Known supported file were illustration below. -
Page 14: Favorite List
4.2 Favorite List If you press “FAV” on the remote controller at No menu state, the favorite group list will be displayed on the screen. You can select one favorite group and press “OK” key to enter the favorite channel list 4.3 EPG (Electronic program guide) The EPG is an on-screen TV guide that shows scheduled programs seven days in... - Page 15 Additional information is available at the technical department of your city. ALL RIGHTS RESERVED COPYRIGHT DENVER ELECTRONICS A/S WWW.DENVER-ELECTRONICS.COM www.facebook.com/denverelectronics Importer:...
- Page 16 MED ENSAMRÄTT UPPHOVSRÄTT DENVER ELECTRONICS A/S ALLE RECHTE VORBEHALTEN URHEBERRECHTE DENVER ELECTRONICS A/S...


Need help?
Do you have a question about the DVBC-110HD and is the answer not in the manual?
Questions and answers