Table of Contents
Advertisement
Quick Links
Advertisement
Table of Contents

Related Manuals for General XL1G


Summary of Contents for General XL1G
- Page 1 XL1G Multi-line Laser INSTRUCTION MANUAL...
- Page 2 SAFETY Please read this instruction manual before operating this product. Please store this instruction manual in the carry case for future reference. CAUTION: Class 3 Laser Product Do not stare directly into the laser beam from apertures. Do not disassemble the instrument or attempt to perform any internal servicing as this will void your warranty.
-
Page 3: Item Checklist
ITEM CHECKLIST Please ensure the following items are included with your laser. If anything is missing please contact your retailer. INCHES Tripod spacer Indoor tripod Laser target Laser glasses General XL1G Carry case Charger Battery pack... -
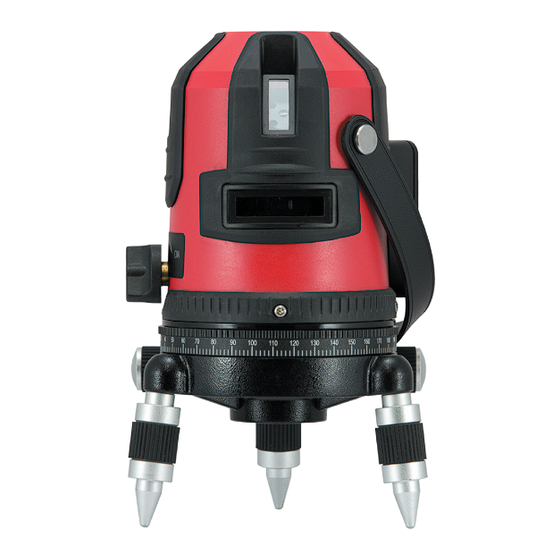
Page 4: Product Overview
PRODUCT OVERVIEW Control panel and bubble vial Carry strap Vertical laser ports (x2) Horizontal laser ports (x1) Power / locking switch 360° protractor base Adjustable support legs... -
Page 5: Control Panel
CONTROL PANEL Bubble vial Pulse mode indicator Horizontal line indicator Horizontal line Pulse mode Vertical line indicator Vertical lines... - Page 6 DETECTOR CONTROL PANEL* Laser sensor Direction arrows Power indicator Coarse / fine mode indicator On/off switch MODE Coarse / fine mode Sound on / off Bubble vial *The detector is an additional accessory which can be purchased from your retailer.
-
Page 7: Using Your Laser
USING YOUR LASER Power Supply The XL1G is powered by a lithium-ion battery pack. To charge the unit insert the charger into the port located on the side of the battery pack. Setting Up ‣ Select a place as close as practical to the work site. - Page 8 USING A CONSTRUCTION TRIPOD Instructions are for a domed or flat construction tripod only, and do not apply when using the indoor tripod supplied. ‣ Stand the tripod on a level surface with legs spaced for stability. ‣ Screw the tripod spacer into the base of the laser until firm. ‣...
- Page 9 USING A CONSTRUCTION TRIPOD (DIAGRAM) Tripod spacer Tripod yoke...
- Page 10 Using Your Detector* ‣ Press the pulse button on the control panel on top of the laser to enter into pulse mode. ‣ Switch the detector on and move it into the path of the laser beam. ‣ Hold the detector upright for horizontal beams. Rotate the detector 90° for vertical beams.
-
Page 11: Care And Maintenance
‣ Always turn the on/off lock to “off” when transporting the unit. ‣ Whenever possible, store the instrument in a dry, shady location. ‣ The XL1G should be calibrated every 6 months, if ongoing accurate levelling is required or an impact has occurred. -
Page 12: Warranty
WARRANTY The General XL1G comes with a 3 year manufacturers warranty. Our goods come with guarantees that cannot be excluded under the Australian Consumer Law. You are entitled to a replacement or refund for a major failure and for compensation for any other reasonably foreseeable loss or damage. You are also entitled to have the goods repaired or replaced if the goods fail to be of acceptable quality and the failure does not amount to a major failure. - Page 13 30 Day Free Service If your laser is out of calibration within the first 30 days of purchase you are entitled to a free calibration adjustment. For more information please contact your retailer or Spot-on. Customer Support To assist you with any queries or technical questions please contact the customer support line: 1300 658 338...
-
Page 14: Specifications
SPECIFICATIONS Specifications General XL1G Product code 70021 Warranty 3 Years Accuracy ±0.67mm at 10m Range 50m (detector) Levelling range ±9% / ±5° Laser class 3 Green Battery life 10 hours Battery type Lithium-ion (sealed pack) Vertical lines Horizontal lines IP rating Weight (kg) 0.90... - Page 16 www.spoton.com.au...
Need help?
Do you have a question about the XL1G and is the answer not in the manual?
Questions and answers