Phylink PLC-325PW User Manual
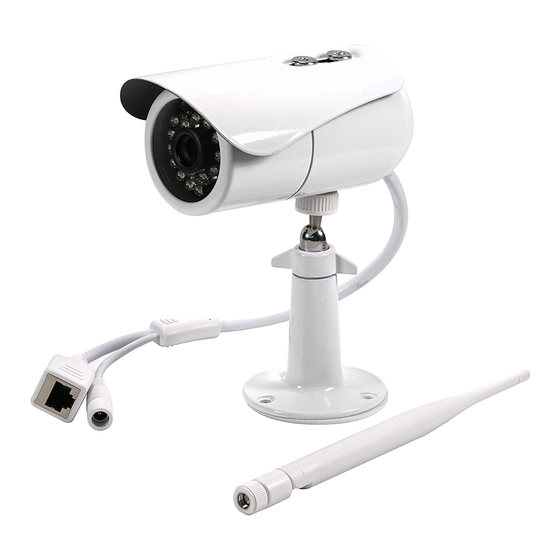
Bullet outdoor network camera
Hide thumbs
Also See for PLC-325PW:
- Quick install manual (37 pages) ,
- User manual (96 pages) ,
- Quick install manual (36 pages)
Table of Contents
Advertisement
User Manual - English
This manual applies to the following Phylink products.
Phylink Bullet Outdoor Network Camera
PLC-325PW / PLC-335PW
Please read this manual carefully before attempting to install or operate this product.
This User Manual is a work-in-progress and is constantly being updated.
You are invited to check the website regularly for updated versions.
V2.0
Advertisement
Table of Contents

Related Manuals for Phylink PLC-325PW

Summary of Contents for Phylink PLC-325PW
- Page 1 User Manual - English This manual applies to the following Phylink products. Phylink Bullet Outdoor Network Camera PLC-325PW / PLC-335PW Please read this manual carefully before attempting to install or operate this product. This User Manual is a work-in-progress and is constantly being updated.
-
Page 2: Table Of Contents
5.2.4 Reboot ..............................5.3 Camera ................................5.3.1 Camera Setup ............................5.3.2 Stream Setup ............................5.3.3 Image Setup ............................5.3.4 OSD Setup ............................. 5.3.5 Night Vision Setup ........................,.... Phylink Network Camera User Manual | Copyright 2014- 2016 Phylink Solutions LLC. All rights reserved. - Page 3 Appendix E: Manually entering TCP/IP Settings for a Camera ................Appendix F: Wireless Installation Considerations ....................Appendix G: Setting up the Camera over WiFi using WPS ..................9.0 Contact Us ..........................Phylink Network Camera User Manual | Copyright 2014- 2016 Phylink Solutions LLC. All rights reserved.
-
Page 4: Introduction
Thank you for purchasing a Phylink network video camera The Phylink Bullet Network Camera can be accessed remotely and also controlled from any PC/laptop over an Intranet/Internet via a web browser. The user friendly installation procedure and intuitive web-based interface allow easy integration with your home or business network or Wi-Fi. - Page 5 Black and White. Users can monitor objects clearly within 15 meters distance. Users also can choose to open or close the infra-red LED manually, and whether to change the images to black and white or color automatically. Phylink Network Camera User Manual | Copyright 2014- 2016 Phylink Solutions LLC. All rights reserved.
-
Page 6: Approval Information
This is a Class A product. In a domestic environment, this product may cause radio interference, in which case the user may be required to take adequate measures. Phylink Network Camera User Manual | Copyright 2014- 2016 Phylink Solutions LLC. All rights reserved. -
Page 7: Restrictions
Also, objects filled with liquids, such as vases, shall not be placed on the apparatus. The Power Adaptor supplied is not interchangeable. It should not be used with other product, and may cause product failure for other products. Phylink Network Camera User Manual | Copyright 2014- 2016 Phylink Solutions LLC. All rights reserved. -
Page 8: Maintenance
This product may cause interference with other wireless equipment that operate at 2.4GHz ISM band. In the event of interference please turn off one of the devices or move it to a safe distance. Phylink Network Camera User Manual | Copyright 2014- 2016 Phylink Solutions LLC. All rights reserved. -
Page 9: Minimum System Requirements
• Web Browser: Safari, Mozilla Firefox, Google Chrome and most other browsers • Plug-ins: Adobe flash Web Browser Compatibility: You can access the camera via various web browser. Phylink cameras work on most web browsers such as Firefox, Internet Explorer, Microsoft Edge (Windows 10), Chrome and Safari. Tips: Please note that browser itself does not support video decoding and playback, it needs to install plug-ins player. -
Page 10: Read Before Use
1.6.2 Change and protect your password All Phylink camera secured with the top secure AES(Advanced Encryption Standard) encryption, 128 bit secret key (AES) are used for digital video encryption, ensuring that all data sent between the user and the camera is encrypted, which prevents someone from accessing the information while it is in transit. -
Page 11: Product Overview
- Screw and plastic wall plug for wall mount AC/DC Camera External Power adaptor & Bracket Antenna Waterproof Setup CD Ethernet Junction box & Guide Cable Phylink Network Camera User Manual | Copyright 2014- 2016 Phylink Solutions LLC. All rights reserved. -
Page 12: Hardware Overview
The UID is the unique identifier for the camera. You can scan the QR code on the sticker using the iOS or Android app to add a camera. UID:VNW5V15K6RY7J4VWC7W1 Password: admin Infrared LEDs Used to illuminate the camera's field of view at night. Phylink Network Camera User Manual | Copyright 2014- 2016 Phylink Solutions LLC. All rights reserved. - Page 13 To learn how to set up the camera over Wi-Fi using WPS, please read “Appendix G: Setting up the Camera over Wi-Fi using WPS” towards the end of this manual. Phylink Network Camera User Manual | Copyright 2014- 2016 Phylink Solutions LLC. All rights reserved.
-
Page 14: Hardware Installation
4. For standalone recording without a computer, you need a MicroSD or MicroSDHC memory card. 5. Phylink outdoor cameras have the PoE feature. For powering the camera you can choose to use the included AC adapter or PoE injector/switch (Not included). -
Page 15: Connecting The Camera
3.3 Connection Camera with PoE (Optional) The PLC-325PW/PLC-335PW camera can be either connected with the included power adapter and network cable, or optionally with an Ethernet cable that is connected to an 802.3af compatible PoE Switch or PoE Injector. With a PoE setup, the Ethernet cable will transmit both power and data over a single cable eliminating the need for the power adapter. -
Page 16: Microsd Card Installation
For a new SD card which has never been used or formatted, you can use the camera’s format tool to format it. To learn how to format the SD card, please refer to the related technical articles on the Phylink support website. -
Page 17: Mount The Wi-Fi Antenna
Before physical installation, please ensure wireless settings are completed and operational – to set wireless up, you need to connect the camera directly to your router with an Ethernet cable. The included Weatherproof Junction Box provides a neat and waterproof termination of connections to the Phylink Bullet HD outdoor camera. - Page 18 Insert the RJ45 connector and DC plug connector into the rear cover of the Weatherproof Junction Box. Ensure the power and network cables align with their respective grooves at both sides of the sealing strip. Please refer to Figure 2. Phylink Network Camera User Manual | Copyright 2014- 2016 Phylink Solutions LLC. All rights reserved.
- Page 19 Front cover Stopper Groove for network cable Groove for power adapter cord Stopper Phylink Network Camera User Manual | Copyright 2014- 2016 Phylink Solutions LLC. All rights reserved.
-
Page 20: Positioning And Mounting
Do not try to remove the silver colored disks at the bottom of the camera. One is the microphone and the other is the reset button. Attempts to remove those could cause damage to the camera. Phylink Network Camera User Manual | Copyright 2014- 2016 Phylink Solutions LLC. All rights reserved. -
Page 21: Installation And Placement Tips
- Outside of this range, we would suggest using an Ethernet connection, Power over Ethernet, installing a Wi-Fi signal extender or repeater, or using HomePlug/Powerline technology. - Phylink camera is only compatible with 2.4GHz network. If your router is using the 5GHz band, please ensure it is operating in a mixed mode. -
Page 22: Adjust The Sunshade (Optional)
IR light from the underside of the sunshade would make the entire picture appear foggy. So, for maximum night vision range you should either move the sun shade all the way back or remove it entirely. Phylink Network Camera User Manual | Copyright 2014- 2016 Phylink Solutions LLC. All rights reserved. -
Page 23: Software Installation
If the camera is not located on the same local network as your iPhone, the app will NOT find it. To add a camera to the app remotely, click “ ” button to type the "UID" manually from the UID sticker on the camera cable. Phylink Network Camera User Manual | Copyright 2014- 2016 Phylink Solutions LLC. All rights reserved. - Page 24 4.2 Setting up Wi-Fi via iOS device section. Press " Save " button and the camera will show up on the “ My Camera ” screen. Phylink Network Camera User Manual | Copyright 2014- 2016 Phylink Solutions LLC. All rights reserved.
- Page 25 1. Add camera 2. View the app version 3. Sliding menu 4. Detect camera 5. Edit Camera, change settings and password 6. Audio mode 7. Video mode Phylink Network Camera User Manual | Copyright 2014- 2016 Phylink Solutions LLC. All rights reserved.
-
Page 26: Setting Up Wi-Fi Via Ios Device
Advanced Setting Network Setup > Press “ WiFi Networks ” , then the camera will search for available Wi-Fi networks around it. Select your network from the list. Phylink Network Camera User Manual | Copyright 2014- 2016 Phylink Solutions LLC. All rights reserved. - Page 27 ” button to complete the Wi-Fi setup. After a successful wireless setup, you can remove the network cable and the camera should work through the wireless network after a short delay. Phylink Network Camera User Manual | Copyright 2014- 2016 Phylink Solutions LLC. All rights reserved.
-
Page 28: Installation For Android Device
" to the camera to help identify this camera if more than one camera is in use. ( The default name is "Camera 0". ) Phylink Network Camera User Manual | Copyright 2014- 2016 Phylink Solutions LLC. All rights reserved. - Page 29 To add a camera to the app remotely, click the “ Type UID and password ” menu. Type the "UID" manually from the UID sticker on the camera cable. Phylink Network Camera User Manual | Copyright 2014- 2016 Phylink Solutions LLC. All rights reserved.
- Page 30 3. Start recording / Stop recording 4. Take a snapshot 5. Enable or disable speaking to the camera 6. Enable or disable receiving audio from camera Phylink Network Camera User Manual | Copyright 2014- 2016 Phylink Solutions LLC. All rights reserved.
-
Page 31: Setting Up Wi-Fi Via Android Device
And then go to Advanced Setting Network Setup > Press “Wi-Fi Setting” , then the camera will search for available Wi-Fi networks around it. Phylink Network Camera User Manual | Copyright 2014- 2016 Phylink Solutions LLC. All rights reserved. - Page 32 Select your wireless network from the list. Type in your Wi-Fi password and then press "OK" to save the settings. After a successful wireless setup, remove the network cable and the camera should work through the wireless network after a short delay. Phylink Network Camera User Manual | Copyright 2014- 2016 Phylink Solutions LLC. All rights reserved.
-
Page 33: Camera Setup On Pc/Mac
You can further configure or view your camera via the most popular web browsers such as FireFox, Internet Explorer, Microsoft Edge (Windows 10), Chrome and Safari. Phylink Camera Live is provided on the included CD, or you can download it from our technical support website, for both the Windows and Mac OS. -
Page 34: Accessing The Camera Using Camera Live (P2P Method)
4.5.2 Accessing the camera using Camera Live (P2P method) Phylink provides two accessing methods for different users: peer to peer and TCP/HTTP. The easier method is to use the P2P option to access the camera. When you access the camera using the Camera Live software on PC/Mac, the peer to peer connection will be established automatically. - Page 35 To learn more about Camera Live, please refer to " How to Access the camera using Camera Live " in Support - Technical Articles section from our technical support website. Phylink Network Camera User Manual | Copyright 2014- 2016 Phylink Solutions LLC. All rights reserved.
-
Page 36: Accessing The Camera Via Web Browser (Tcp/Http Method)
This chapter shows how to search for the camera at your local network and log in to the camera via browser on your computer. If you like to access the camera through the browser and have some background knowledge of the network, the Phylink camera can be accessed from most popular web browsers. This accessing method is base on IP/TCP/HTTP protocols. - Page 37 Hardware Installation 2. Phylink Camera Live can only search for a camera within your local network. That means your computer and your camera need to be connected to the same network router at your home or office. 3. Please note that browser itself does not support video decoding and playback, it needs to install a plug-in player.
-
Page 38: Wireless Setup Via Web Browser
4.5.4 Wireless Setup via Web Browser The Phylink camera can work in either wired or wireless mode. After a successful wireless setup, unplug the Ethernet cable, the camera will work through the wireless network with the router. Please note that if you have already set up the wireless connection via the iOS or Android device , you can skip this step. - Page 39 This will establish the connection. To learn how to set up the camera over Wi-Fi using WPS, please read “Appendix G: Setting up the Camera over Wi-Fi using WPS” towards the end of this manual. Phylink Network Camera User Manual | Copyright 2014- 2016 Phylink Solutions LLC. All rights reserved.
-
Page 40: Camera Settings
Once you have typed your password twice, click Save. The system will then ask you to login again. You should then see the following screen: Phylink Network Camera User Manual | Copyright 2014- 2016 Phylink Solutions LLC. All rights reserved. -
Page 41: Top Menu Of Camera Settings Page
To learn more about accessing the camera via browser, please refer to " How to access camera from web browser" in Support - Technical Articles section from our technical support website. Phylink Network Camera User Manual | Copyright 2014- 2016 Phylink Solutions LLC. All rights reserved. -
Page 42: Quick Setup With The Wizard
- System Time - Wi-Fi Setup - TCP/IP Setup This should help you get your camera setup and work very quickly at a basic level. Phylink Network Camera User Manual | Copyright 2014- 2016 Phylink Solutions LLC. All rights reserved. -
Page 43: System Page
It’s a great way to check if your camera has all the details needed to operate correctly. It also includes useful data when a problem occurs. Firmware version – For your current firmware version, check the phylink.com website to see if there are updates for your model. -
Page 44: Reboot
Click “Reboot” to restart the camera. Rebooting the camera will retain all the settings and configurations. A reboot is normally necessary after inserting a microSD card into the camera or formatting the microSD card. Phylink Network Camera User Manual | Copyright 2014- 2016 Phylink Solutions LLC. All rights reserved. -
Page 45: Camera
[Volume] Adjusts the sensitivity of the microphone from 0~10 where 0 is the lowest. Click “Apply” to confirm your settings. Tip: For most users, many of these settings can be left as default. Phylink Network Camera User Manual | Copyright 2014- 2016 Phylink Solutions LLC. All rights reserved. -
Page 46: Stream Setup
FTP Server. It can be from 20 to 100 where 100 is the best quality. [Audio] Select or disable the audio bit rate. [Authentication] Select or disable MPEG4 RTSP authentication. Phylink Network Camera User Manual | Copyright 2014- 2016 Phylink Solutions LLC. All rights reserved. - Page 47 A stream list page will be shown after clicking the stream name such as “Primary stream”. Tip: Phylink camera offers RTSP and HTTP video and audio streaming. This allows for integration with other third-party software, which use the camera’s stream in programs, such as Blue Iris, iSpy, Sighthound Video, Milestone XProtect Go and other leading software.
-
Page 48: Image Setup
Click “Apply” to confirm your settings. 5.3.4 OSD Setup This function can display system name, date and time, or user-defined text on screen. Phylink Network Camera User Manual | Copyright 2014- 2016 Phylink Solutions LLC. All rights reserved. -
Page 49: Night Vision Setup
IR night vision. You can actually hear a muted click when this filter moves in or out. This happens both during power-up and when light levels change between day & night. Phylink Network Camera User Manual | Copyright 2014- 2016 Phylink Solutions LLC. All rights reserved. - Page 50 3. For best IR night vision on outdoor cameras please refer to Hardware Installation Adjust the Sunshade chapter. Clean lens cover glass also helps extend the range and reduces fogginess. Phylink Network Camera User Manual | Copyright 2014- 2016 Phylink Solutions LLC. All rights reserved.
-
Page 51: Network
5.4.1 Wireless Setup The Phylink camera can work in the wired and wireless mode, if you have set the wireless up, unplug the Ethernet cable, the camera will work through the wireless network with the router. - Page 52 Tip: To learn more about setting up wireless via browser, please refer to " 4.5.4 Wireless Setup via Web Browser " chapter in this manual. Phylink Network Camera User Manual | Copyright 2014- 2016 Phylink Solutions LLC. All rights reserved.
-
Page 53: Tcp/Ip Setup
If you want to setup the TCP/IP settings before you connect to the camera, please read “Appendix E: Manually entering TCP/IP Settings for a Camera” towards the end of this manual. Phylink Network Camera User Manual | Copyright 2014- 2016 Phylink Solutions LLC. All rights reserved. - Page 54 For all additional cameras the start of the range increase by 2, for example your 2nd camera would have a starting RTP port of 30002, the 3rd camera would have 30004, 4th camera at 30006 etc. Phylink Network Camera User Manual | Copyright 2014- 2016 Phylink Solutions LLC. All rights reserved.
-
Page 55: Ddns Setup
2. To learn more about setting up DDNS for camera, please refer to " How to set up DDNS for camera " in Support - Technical Articles section from our technical support website. Phylink Network Camera User Manual | Copyright 2014- 2016 Phylink Solutions LLC. All rights reserved. -
Page 56: Upnp Setup
2. To learn more about setting up port forwarding for camera, please refer to "Setting up port forwarding for IP camera" in Support - Technical Articles section from our technical support website. Phylink Network Camera User Manual | Copyright 2014- 2016 Phylink Solutions LLC. All rights reserved. -
Page 57: P2P Setup
P2P vs TCP/HTTP Phylink provides flexible accessing methods for users. The easiest method is that use peer to peer method to access the camera. While you access the camera using PHYCAM app or Phylink Camera Live on PC/Mac, there will establishing automatically a peer to peer connection. -
Page 58: Storage
The Storage menu is located on the right side of the Settings screen. When you click on the “Storage” menu, a sub- menu of options will be displayed. 5.5.1 Storage Setup Phylink has inbuilt DVR software to record images and videos to its own Micro SD card (purchased separately) or NAS drive. [Storage] Select Enable to enable storage option. - Page 59 3. If you has a Synology NAS, please refer to " Setting up a camera with a Synology NAS " in Support - Technical Articles section from our technical support website. Phylink Network Camera User Manual | Copyright 2014- 2016 Phylink Solutions LLC. All rights reserved.
-
Page 60: Browse Storage
The total capacity of recorded files reach the specified "space Max", for example 32GB. b. The total number of recorded files reach the specified "Max files", example 5000. Phylink Network Camera User Manual | Copyright 2014- 2016 Phylink Solutions LLC. All rights reserved. -
Page 61: Format Sd Card
3. To learn more about SD card formatting, please refer to " Formatting the microSD card " chapter in Technical Articles - How to setup recording to MicroSD card. Phylink Network Camera User Manual | Copyright 2014- 2016 Phylink Solutions LLC. All rights reserved. -
Page 62: Task
Please note that this “Motion Detection” menu is entirely optional and is generally not used unless you have very specific requirements to treat motion on some parts of the screen different from other parts. Phylink Network Camera User Manual | Copyright 2014- 2016 Phylink Solutions LLC. All rights reserved. - Page 63 Sensitivity slider FireFox, Microsoft Edge, Chrome and Safari Click the checkbox to enable motion window Window 1 Threshold Threshold slider Sensitivity Sensitivity slider Threshold indicator Phylink Network Camera User Manual | Copyright 2014- 2016 Phylink Solutions LLC. All rights reserved.
- Page 64 Tips: 1. The Phylink cameras have four motion detection windows which can configured easily on your browser. These four windows are all salable, and configurable for sensitivity. To block out some frequently-moving objects which you don't care about, you can uncheck the window that contains these objects.
-
Page 65: Schedule Setup
[End time] End time of the alarm. [Days] Ticking this box activate the alarm daily on the specified times from Monday to Sunday. Click “Apply” to confirm your settings. Phylink Network Camera User Manual | Copyright 2014- 2016 Phylink Solutions LLC. All rights reserved. -
Page 66: Task Management
5.6.4 Task Management Phylink camera integrates a Task Management system for alarm and recording. The alarm that the motion detection triggers can be set to be active or inactive at certain times of the week. You can set up a schedule sending alarms to different places, such as emails, FTP , SD card or NAS even dropbox. -
Page 67: E-Mail Alarm Sending
5.6.4.1 E-mail alarm sending The Phylink camera can be configured to send an email when the Motion Detection alarm is triggered. The "Email alarm sending" allows you to set up the details of your email server account and have the camera send you an email with an attached JPEG snapshot. -
Page 68: Email Periodic Sending
You can try to set the filter rule of your email account. Phylink Network Camera User Manual | Copyright 2014- 2016 Phylink Solutions LLC. All rights reserved. -
Page 69: Ftp Alarm Sending
FTP server. The port is almost always 21, and typical servers need a username and password which means “Authentication” should be set to “Yes”. Phylink Network Camera User Manual | Copyright 2014- 2016 Phylink Solutions LLC. All rights reserved. -
Page 70: Ftp Periodic Sending
2. To learn how the camera works with dropbox, please refer to " Record snapshot and video to Dropbox " in Technical Articles section from our technical support website. Phylink Network Camera User Manual | Copyright 2014- 2016 Phylink Solutions LLC. All rights reserved. -
Page 71: Http Alarm Sending
Sending URL] Input the URL to which the camera will send an alarm to. [User name] Type your HTTP user name. [Password] Type your HTTP password. [Re-type password] Re-type your password. Click “Apply” to confirm your settings. Phylink Network Camera User Manual | Copyright 2014- 2016 Phylink Solutions LLC. All rights reserved. -
Page 72: Snapshot To Storage On Alarm
For example, if you want to avoid a flood of snapshots, you could set this time to 60 minutes so that you wouldn't get any new snapshots for 1 hour. Phylink Network Camera User Manual | Copyright 2014- 2016 Phylink Solutions LLC. All rights reserved. -
Page 73: Record To Storage On Alarm
“ Recording to storage” task will allow you to record footage and motion alerts directly to the MicroSD card or NAS for future review. The recorded files may be reviewed remotely on your phone / computer when using Phylink App / software. -
Page 74: Record To Storage Continuously
To learn how to setup recording to MicroSD card, please refer to " How to setup recording to MicroSD card " in Technical Articles section from our technical support website. Phylink Network Camera User Manual | Copyright 2014- 2016 Phylink Solutions LLC. All rights reserved. -
Page 75: Send Files In Storage To Ftp Server
5.6.4 .11 Send files in Storage to FTP Server Phylink camera has in-built FTP client software to upload images and videos to a FTP server. To send snapshots and videos stored on the Micro SD card to FTP server you need to insert a Micro SD card to the camera. Once successfully transferred, each original file on the Micro SD card will be deleted. -
Page 76: Push Notification
3600 seconds so that after a motion detection event you wouldn't get any new alerts for at least 1 hour. Click Apply to confirm your settings. Phylink Network Camera User Manual | Copyright 2014- 2016 Phylink Solutions LLC. All rights reserved. -
Page 77: Tools
[Add] Up to 64 users (including the admin) can be created. Click Add button to add another user. You will then need to fill out the user name plus the password for the new user. Phylink Network Camera User Manual | Copyright 2014- 2016 Phylink Solutions LLC. All rights reserved. -
Page 78: Date & Time
[Auto time setting (SNTP)] Enable or disable the auto time setting to update to the server below. [Time server] Type the SNTP server name. There are suggestions included. Click Apply to confirm your settings. Phylink Network Camera User Manual | Copyright 2014- 2016 Phylink Solutions LLC. All rights reserved. -
Page 79: Backup And Reset
[Offline Reboot] You can set the camera to ping with your router, if a connection isn't made then the camera will automatically reboot to try and re-establish a connection. Click Apply to confirm your settings. Phylink Network Camera User Manual | Copyright 2014- 2016 Phylink Solutions LLC. All rights reserved. -
Page 80: Firmware Upgrade
5.7.6 Firmware Upgrade From time to time a new firmware may be released for your Phylink camera. To check for updates, consult the Phylink website at http://www.phylink.com We do recommend you to update the latest firmware for your camera whenever we release one to take advantage of new features and bug fixes. - Page 81 Click " System" , you will get to the screen . If your firmware upgrade succeed , then the firmware version will be updated . Phylink Network Camera User Manual | Copyright 2014- 2016 Phylink Solutions LLC. All rights reserved.
-
Page 82: Troubleshooting
The video images might be noisy if the camera is used in a very low The camera is producing noisy images. light environment. Phylink Network Camera User Manual | Copyright 2014- 2016 Phylink Solutions LLC. All rights reserved. - Page 83 More FAQ and Troubleshooting guide, are available on our website, in Support - Troubleshooting section. You can also write to our technical support team by email at: support@phylink.com. Our engineer and customer service team will try their best to reply you in 24 hours.
-
Page 84: Glossary Of Terms
IP address of the primary DNS server, if configured for the IP camera. Subnet Mask Subnet mask of the LAN to which the IP camera is connected. Phylink Network Camera User Manual | Copyright 2014- 2016 Phylink Solutions LLC. All rights reserved. - Page 85 Tip: To understand more details for network terminology, please refer to Appendix A: A Quick Review of Networking Terminology. Phylink Network Camera User Manual | Copyright 2014- 2016 Phylink Solutions LLC. All rights reserved.
-
Page 86: Appendix
Each device also has a unique hardware address that is called a MAC address. This MAC address is unrelated to Macintosh computers. What’s special about this hardware address is that it is totally unique to each network device. Phylink Network Camera User Manual | Copyright 2014- 2016 Phylink Solutions LLC. All rights reserved. -
Page 87: Appendix B: Resetting The Camera Back To Factory Settings
After the restart, the camera will be at factory settings. This means the username and password will both be "admin" again, and all previous wireless network info is wiped out and replaced with the factory default as well. Phylink Network Camera User Manual | Copyright 2014- 2016 Phylink Solutions LLC. All rights reserved. - Page 88 Please note that after resetting the camera ,all your settings including the wireless setting will return to factory settings. So you have to connect the camera to router with the Ethernet cable and set wireless again. Phylink Network Camera User Manual | Copyright 2014- 2016 Phylink Solutions LLC. All rights reserved.
-
Page 89: Appendix C: Connecting Your Camera Directly To A Computer
4. Turn the power on to the camera. 5. The Status indicator LED on the camera will light up. You can now proceed to the Software Installation section. Phylink Network Camera User Manual | Copyright 2014- 2016 Phylink Solutions LLC. All rights reserved. -
Page 90: Appendix D: Recovering From A Failed Firmware Update Using Windows
Control Panel Network and Sharing Center Change adapter settings > > Note: You should change these settings on the Ethernet adapter, instead of wireless network adapter. Phylink Network Camera User Manual | Copyright 2014- 2016 Phylink Solutions LLC. All rights reserved. - Page 91 Power off and then power on the camera, it should work again. Tips: Unplugging the power or network cable will cause the uploading process failure. Phylink Network Camera User Manual | Copyright 2014- 2016 Phylink Solutions LLC. All rights reserved.
-
Page 92: Appendix E: Manually Entering Tcp/Ip Settings For A Camera
5. Type the Default Gateway (This should be your router’s IP address). Once you've entered the details click “ Apply ” then “ Exit ”. Phylink Network Camera User Manual | Copyright 2014- 2016 Phylink Solutions LLC. All rights reserved. - Page 93 IP address you chose is not the same as other devices on your local network as this will result in conflict and may cause the device to not work properly. Phylink Network Camera User Manual | Copyright 2014- 2016 Phylink Solutions LLC. All rights reserved.
-
Page 94: Appendix F: Wireless Installation Considerations
40 to 50 feet (12 to 15 meters) from the router, with one wall in between. If the signal strength less than 3 out of 5 bar, you may need a Wi-Fi range extender. Phylink Network Camera User Manual | Copyright 2014- 2016 Phylink Solutions LLC. All rights reserved. -
Page 95: Appendix G: Setting Up The Camera Over Wifi Using Wps
Appendix G: Setting up the Camera over Wi-Fi using WPS Phylink camera can be setup through a WPS connection if your router supports this function. To connect to your camera to router through WPS connection press the WPS button located on your router and then press the WPS button on the camera. -
Page 96: Contact Us
2. New firmware versions are released periodically and they provide new features, make improvement to existing features and fix known issues or bugs etc. We strongly recommend you to upgrade to the latest firmware version available for your Phylink product. To ensure that you have the most recent firmware, please visit www.phylink.com.
Need help?
Do you have a question about the PLC-325PW and is the answer not in the manual?
Questions and answers
audio is not working..
The document does not provide specific troubleshooting steps for audio issues with the Phylink PLC-325PW. However, it mentions a volume control bar and mute option in the live viewing window. To troubleshoot audio:
1. Ensure the camera is selected in the live viewing window (highlighted with a blue border).
2. Check that the mute option is not enabled.
3. Adjust the volume using the volume control bar.
No further audio troubleshooting steps are detailed in the provided information.
This answer is automatically generated