Russound DMS-3.1 Installation Manual
Hide thumbs
Also See for DMS-3.1:
- Installation manual (20 pages) ,
- Installation manual (24 pages) ,
- Quick start manual (5 pages)
Table of Contents
Advertisement
Advertisement
Chapters
Table of Contents

Subscribe to Our Youtube Channel
Related Manuals for Russound DMS-3.1


Summary of Contents for Russound DMS-3.1
- Page 2 Russound. This Electronic file and all documents contained within are private, confidential and the sole property of Russound/FMP, Inc. The concepts, ideas and information are proprietary and may not be disclosed to third parties. All Rights Reserved. Printed in the United States of America. This document, or parts thereof, may not be...
- Page 3 DMS-3.1 Digital Media Streamer Installation Manual DMS-3.1_Manual Rev 0.indd 1 DMS-3.1_Manual Rev 0.indd 1 9/30/11 12:12 PM 9/30/11 12:12 PM...
-
Page 4: Safety Instructions
Cet appareil numérique de la classe B est conforme à la norme appliance and cart combination should be for inspection. moved with care. Quick stops, excessive NMB-003 du Canada. Russound DMS-3.1 Installation Manual DMS-3.1_Manual Rev 0.indd 2 DMS-3.1_Manual Rev 0.indd 2 9/30/11 12:12 PM 9/30/11 12:12 PM... -
Page 5: Grounding An Outdoor Antenna
National Electrical Code, Section 810, ANSI/NFPA No. 70-1984. Antenna Lead-In Wire Grounding Conductors Ground Clamps Electric Service Equipment Power Service Grounding Electrode System Russound DMS-3.1 Installation Manual DMS-3.1_Manual Rev 0.indd 3 DMS-3.1_Manual Rev 0.indd 3 9/30/11 12:12 PM 9/30/11 12:12 PM... -
Page 6: Table Of Contents
Audio Connections with C-Series Controllers .............12 Ethernet Connections ......................13 AM/FM Connections, 12V Trigger In/Out ..............14 USB Device Playback ......................15 Menu Navigation with Russound User Interfaces .............16 SIRIUSXM Internet Radio ....................17 vTuner Internet Radio ......................18 Digital Music File Playback ..................19-20 Technical specifi cations ......................21... -
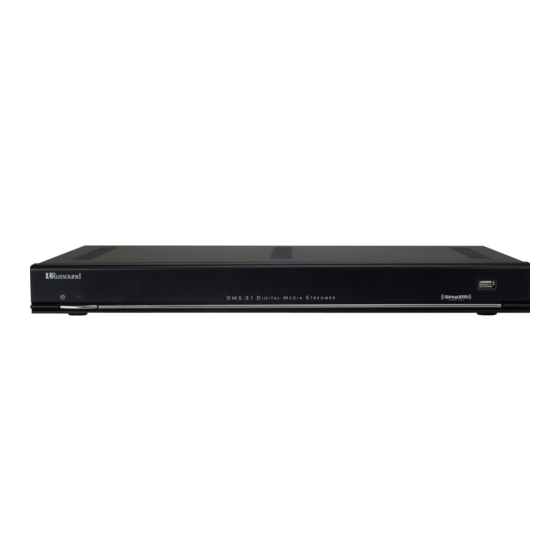
Page 7: Product Overview
The DMS-3.1 is connected to the Local Area Network in a home via a hardwired Ethernet connection for access to digital audio content. If used with a C-Series controller and a supported user interface, the DMS-3.1 can access... - Page 8 12VDC Trigger in/out Source ID Switch FM Antenna Connection Line Output (RCA) USB Playback Port AM Antenna Connection Ethernet Port DMS-3.1 Rear Panel Russound DMS-3.1 Installation Manual DMS-3.1_Manual Rev 0.indd 6 DMS-3.1_Manual Rev 0.indd 6 9/30/11 12:12 PM 9/30/11 12:12 PM...
- Page 9 Power LED Audio output The Power LED is lit solid red when the DMS-3.1 is powered on. This LED There are 4 sets of stereo RCA audio outputs to connect the DMS-3.1 to an can also indicate other DMS-3.1 status information as described under Status audio system.
-
Page 10: Standalone Application /Airplay Use
AirPlay speakers from you can stream content device. The DMS-3.1 must be on the same Local Area Network (LAN) as the to. Additionally, users can assign a custom name for each stream through its AirPlay enabled source of the content that is to be streamed. -
Page 11: Airplay Naming
Select "Bookmarks" in Safari Browser Select "Bonjour" under Collections Each stream on the DMS-3.1 can provide status and network profi le information The Safari browser shows collections of bookmarks including devices that are through it’s built in web server. Additionally, users can rename the DMS-3.1 discovered using the Bonjour service. - Page 12 Select DMS-3.1 Stream Select "AirPlay" and rename stream All DMS-3.1 streams that are enabled will be displayed in the Bookmark list for Once selected from the Bookmark list, the DMS-3.1 stream will serve up its web selection. Double-click the particular stream for which you would like to view portal.
-
Page 13: Status
Status Information Profi le Information The DMS-3.1 web portal also provides information about the selected DMS-3.1 The second option in the web portal is ‘Profi les’ . This displays the device name streaming module. The fi rst option is ‘Status’ . This provides information about and network profi le information for the selected DMS-3.1 streaming module. -
Page 14: Audio Connections With C-Series Controllers
AUDIO CONNECTIONS WITH C-SERIES CONTROLLERS The DMS-3.1 can be used with a Russound C-Series controller and supported For proper operation with C-Series controllers, the DMS-3.1 source ID user interfaces to access all features and provide amplifi cation for speakers in switches need to be set to correspond to the source inputs used on the multiple locations. -
Page 15: Ethernet Connections
The DMS-3.1 requires an Ethernet connection to the same Local Area Network The DMS-3.1 requires a DHCP enabled router to obtain its IP address on the (LAN) on which reside any AirPlay sources and if used, any DLNA / UPnP Media LAN as it does not directly support confi guration of a static IP address. - Page 16 12VDC Triggers Connect the included loop antenna for AM reception to the back panel, The DMS-3.1 provides a loop through for a 12VDC trigger signal. The DMS-3.1 attaching the GND (ground) and AM ends to the appropriate connections. It is...
-
Page 17: Usb Device Playback
USB 2.0-compliant storage device. The three is determined by that device. The DMS-3.1 fi lters the fi les based on being USB ports are each associated with one of the three streaming modules in the supported audio fi le types so any photo or movie fi les will not be shown. -
Page 18: Menu Navigation With Russound User Interfaces
Pressing the Menu button audio outputs of the DMS-3.1 are accessed from either a source list or through once will enter a currently playing mode’s respective menu or if no mode is a dedicated button on keypads or touchscreen devices. -
Page 19: Siriusxm Internet Radio
50 character subscribers need to update the username on the same screen. with a C-Series controller. So while, the same user account credentials can be entered into all streaming modules of the DMS-3.1, only one can stream content at any given time. Selection from another streaming module and will disconnect prior instances of SiriusXM internet radio streaming. -
Page 20: Vtuner Internet Radio
To create an account for the vTuner online web portal, users will need to provide the Access Code of their DMS-3.1 as well as a valid email address and a password. Select the “Get access code” option within the Internet Radio menu to display the access code. -
Page 21: Digital Music File Playback
Made in America Green Onions 3. Artist Name The DMS-3.1 can play various fi le formats which are listed in the technical 4. Album Name specifi cations in this manual. However, any content that is protected with DRM 5. Song Name (Digital Rights Management) can’t be played back. - Page 22 Content on a USB storage device such as portable hard disk drive can be accessed by simply connecting it to one of the three USB ports on the DMS-3.1. The USB storage device used must be formatted for a FAT16 or FAT32 fi le...
-
Page 23: Technical Specifications
Power LED Two Fast Blinks, Pause – AM/FM Tuner Frequency Range: AM 530 - 1710 kHz Critical Firmware Problem. Update to the fi rmware or contact Russound technical FM 87.7 - 107.9 MHz support for assistance. Antenna impedance AM: 300 Ohm balanced Impedance FM: 75 Ohm unbalanced Power LED Fast Blink –... -
Page 24: Warranty
WARRANTY Warranty Before returning a unit for repair, call Russound at (603) 659-5170 for a Return The Russound DMS-3.1 is fully guaranteed against all defects in materials Authorization number. Write this number on the shipping label and ship to: and workmanship for two (2) years from the date of purchase. During this... - Page 25 NOTES Russound DMS-3.1 Installation Manual DMS-3.1_Manual Rev 0.indd 23 DMS-3.1_Manual Rev 0.indd 23 9/30/11 12:12 PM 9/30/11 12:12 PM...
- Page 26 5 Forbes Road, Newmarket, NH 03857 Specifi cations are subject to change without notice. tel 603.659.5170 • fax 603.659.5388 Russound is not responsible for typographical errors or omissions. email: tech@russound.com www.russound.com AirPlay, the AirPlay logo, iPhone, and iPod touch are trademarks of Apple Inc., registered 28-1359 07/28/11, Rev.
- Page 27 SMS_USB_&_PWR_LED_Front_RevA_7_19_10.sch-1 - Wed Jul 28 15:07:39 2010...
- Page 28 32.768KHZ 18pF VDDANA XIN32 OSCSEL GNDANA 0.1uF 4.7uF 0.1uF VDDOSC 10uH 100k 10uF 0.1uF 10uF 0.1uF 10uF COMPANY: 4.7uF Russound Inc TITLE: Streamer DRAWN: DATED: 05/17/11 CHECKED: DATED: CODE: SIZE: DRAWING NO: REV: QUALITY CONTROL: DATED: RELEASED: DATED: SCALE: SHEET:...
- Page 29 Write Protected EEPROM for MAC Address 325-0059 CON2 C190 0.1uF M24C02-WDW6TP R216 MT29F2G08AADWP:D R215 ATMEL_SDA ATMEL_SCL R172 4.7k R174 APPLE_CHIP_RST# 325-0059 COMPANY: Russound Inc NC15 R126 100 MODE1 MODE0 ATMEL_SDA I2C_SDA R149 ATMEL_SCL TITLE: NRESET I2C_SCL Streamer R127 100 DRAWN: DATED: MEMORY...
-
Page 30: Streamer Power Wiring Diagram
C126 L7809CD2T C172 C173 C127 L78L33ACUTR .01uF 100uF 0.1uF .01uF 100uF 0.1uF 205-0121 R217 AUDIO_POWER SOT416 NTA4151PT1G MMBT3904 COMPANY: Russound Inc AN_+5V TITLE: Streamer R227 0 OHM DRAWN: DATED: POWER 05/17/11 C128 C130 C129 205-0014 100uF 0.1uF .01uF L78L05ACUTR CHECKED:... -
Page 31: Bridgeco
BRIDGECO_1_ETH_TX- 10.0K 10.0K ETH_TX- MIITXD0 BRIDGECO_1_ETH_TX+ ETH_TX+ MIITXD1 MIIRXD0 NWAIT MIIRXD1 NPD_RF R191 225-0042 AGND_1 C194 0.1uF COMPANY: Russound Inc TITLE: Streamer DRAWN: DATED: BRIDGECO_1 05/17/11 CHECKED: DATED: CODE: SIZE: DRAWING NO: REV: QUALITY CONTROL: DATED: RELEASED: DATED: SCALE: SHEET:... -
Page 32: Bridgeco
10.0K 10.0K BRIDGECO_2_ETH_TX- ETH_TX- MIITXD0 BRIDGECO_2_ETH_TX+ ETH_TX+ MIITXD1 MIIRXD0 R184 NWAIT MIIRXD1 NPD_RF 225-0042 AGND_2 C195 0.1uF COMPANY: Russound Inc TITLE: Streamer DRAWN: DATED: BRIDGECO_2 05/17/11 CHECKED: DATED: CODE: SIZE: DRAWING NO: REV: QUALITY CONTROL: DATED: RELEASED: DATED: SCALE: SHEET:... - Page 33 10.0K 10.0K BRIDGECO_3_ETH_TX- ETH_TX- MIITXD0 BRIDGECO_3_ETH_TX+ ETH_TX+ MIITXD1 MIIRXD0 NWAIT MIIRXD1 R188 NPD_RF 225-0042 AGND_3 C196 0.1uF COMPANY: Russound Inc TITLE: Streamer DRAWN: DATED: BRIDGECO_3 05/17/11 CHECKED: DATED: CODE: SIZE: DRAWING NO: REV: QUALITY CONTROL: DATED: RELEASED: DATED: SCALE: SHEET:...
- Page 34 C197 C198 C199 C200 C201 C202 C203 C204 0.1uF 0.1uF 0.1uF 0.1uF 0.1uF 0.1uF 0.1uF 0.1uF ETH_SWITCH_ENBL COMPANY: Russound Inc TITLE: Streamer DRAWN: DATED: ETHERNET_SWITCH 05/17/11 CHECKED: DATED: CODE: SIZE: DRAWING NO: REV: QUALITY CONTROL: DATED: RELEASED: DATED: SCALE: SHEET:...
- Page 35 C151 100k 100k C147 10uF TS462CDT 10uF R112 TUNER_AUD_R R110 U11-A R228 0 OHM R133 R134 100k 100k COMPANY: Russound Inc AGND AGND_4 C149 10uF TITLE: Streamer AGND_4 DRAWN: DATED: AUDIO 05/17/11 CHECKED: DATED: CODE: SIZE: DRAWING NO: REV: QUALITY CONTROL:...
- Page 36 AUDIO_L C137 C144 Source ID +12_VDC +3.3V_RDS 22pF 22pF STEREO TUNED AGND_4 5V to 3.3V SCB-1113-00-2 E DC B A +3.3V_RDS COMPANY: Russound Inc C139 C142 TITLE: Streamer 0.1uF 0.1uF DRAWN: DATED: TUNER 05/17/11 CHECKED: DATED: CODE: SIZE: DRAWING NO:...
- Page 37 SCLK/MDC MOSI/MDIO CONSOLE_TXD R237 4.7K 325-0167 4.7k SPI1_NPCS0 J11-1 SPI1_NPCS1 330R J11-2 3.3V Advanced Programming Cable SPI1_NPCS2 J11-3 +12V COMPANY: Russound Inc J11-4 Jumper Select J11-5 MICROSMD010 TITLE: Streamer DRAWN: DATED: COMM_&_MISC 05/17/11 CHECKED: DATED: CODE: SIZE: DRAWING NO: REV:...
- Page 38 CHASSIS BOTTOM,SMART MEDIA 525-0024 STREAMER,1U File Type Vault SILKSCREEN,REAR PLATE,SMART MUSIC 810-0063 Vaulted Document STREAMER DMS-3.1_Rear_Screen_011111.pdf Artwork / Silk Screens Russound File Type Vault PEM,3.6 DIA HOLE X14MM,THRU HOLE 620-0000 Vaulted Document STANDOFF-PEM-BSO.pdfDatasheetRussound PENN ENGINEERING: SO-63.6-14ZI STANDOFF,STEEL File Type Vault...
- Page 39 ECJ type caps.pdf DatasheetRussound File Type Vault 202-0043 C31,C48,C50,C189 CAP,SMT,4.7UF,CER,6.3V,20%,X5R,0805 Vaulted Document ABJ0000CE1.pdfDatasheetRussound Panasonic: ECJ-2FB0J475M File Type Vault Panasonic: ECJ-4YB1C106K Vaulted Document ABJ0000CE4.pdfDatasheetRussound C37- 202-0061 CAP,SMT,10UF,CER,16V,X5R,1210 C38,C42,C57,C62,C65,C90,C93,C99,C106,C109,C157,C179 File Type Vault TDK: CEC1SNKDG106 Vaulted Document Capacity C1005-C5750 (C2005-1411).pdfDatasheetRussound file://C:\Documents and Settings\pengel\Desktop\DMS-3.1 BOM.htm 9/29/2011...
- Page 40 Type Vault 220-0006 D4,D6,D14,D16-D17 LED,SMT,RED,660NM,WTR CLR,0603 Rohm: SML-310LTT86 Vaulted Document sml-310.pdf DatasheetRussound File Type Vault DIODE,SMT,SMALL SIGNAL,GP,SOD80-MINI- 213-0003 D8-D9 Vaulted Document LL4148.pdfDatasheetRussound DIODES INCORPORATED: LL4148 MELF File Type Vault FUZETEC: FSMD050-1812 222-0000 F1-F4,F6 PTC,SMT,POLYSWITCH,0.50A,RESET FUSE file://C:\Documents and Settings\pengel\Desktop\DMS-3.1 BOM.htm 9/29/2011...
- Page 41 Vaulted Document H1A25-104S0BKC007A-MolexAlt.pdf DatasheetRussound File Type Vault CONN,TH,STRAIGHT,2 PIN,0.100 325-0059 J22,J26,J28,J34 Vaulted Document Conn Top Component Inc.: H1A25102S0BKC007A CENTERS,HEADER H1A25-104S0BKC007A-MolexAlt.pdf DatasheetRussound File Type Vault 325-0020 CONN,TH,VERTICLE FFC,13POS,1.25MM SUNG KYUNG: SCB-1113-00-2 Vaulted Document 13pin vert con.pdf DatasheetRussound file://C:\Documents and Settings\pengel\Desktop\DMS-3.1 BOM.htm 9/29/2011...
- Page 42 RES.pdfDatasheetRussound File Type Vault Panasonic: ERJ-6ENF5601V Vaulted Document ERJ PRECISION CHIP RES.pdfDatasheetRussound 201-0097 R115 RES,SMT,5.6K OHM,1%,0.125W,0805 File Type Vault TDK: RTSCEF85601 Vaulted Document Resistance spec.pdf DatasheetRussound Panasonic: ERJ-6ENF4701V File Type Vault 201-0189 R116 RES,SMT,4.7K OHM,0.125W,1%,0805 file://C:\Documents and Settings\pengel\Desktop\DMS-3.1 BOM.htm 9/29/2011...
- Page 43 Resistance spec.pdf DatasheetRussound File Type Vault Panasonic: ERJ-6ENF1003V Vaulted Document ERJ PRECISION CHIP RES.pdfDatasheetRussound R2,R11,R78-R81,R86-R87,R90-R91,R109- 201-0094 RES,SMT,100K OHM,1%,0.125W,0805 File Type Vault R110,R113,R129,R133-R136,R326-R327 TDK: RTSCEF81003 Vaulted Document Resistance spec.pdf DatasheetRussound KOA SPEER ELECTRONICS,INC: RK73H2ATTD1003F File Type Vault file://C:\Documents and Settings\pengel\Desktop\DMS-3.1 BOM.htm 9/29/2011...
- Page 44 Vaulted Document H1164NL-Pulse.pdfDatasheetRussound PULSE: H1164NL BASE-TX File Type Vault IC,SMT, STEP-DOWN 205-0124 STMicroelectronics: ST1S10PHR Vaulted Document REG,3A,900KHZ,POWER SO-8 IC,ST MICRO,ST1S10.pdf DatasheetRussound File Type Vault 205-0009 IC,SMT,REG POS 1.5A 9V PREC,D2PAK STMicroelectronics: L7809CD2T Vaulted Document L78XX.pdf DatasheetRussound file://C:\Documents and Settings\pengel\Desktop\DMS-3.1 BOM.htm 9/29/2011...
- Page 45 HEX,BRASS TO SECURE 630-0001 NUT,HEX, JAM,M3,STEEL,ZINC PLATE STANDOFFS TO PCB File Type Vault Vaulted Document LOCTITE.pdf Document Russound LOCTITE,THREADLOCK,MEDIUM APPLY TO 470-0000 MCMASTER-CARR: 91458A82 STRENGTH HEX NUTS Vaulted Document LOCTITE- MSDS SHEET.pdfRegulatory /EMC Safety Russound file://C:\Documents and Settings\pengel\Desktop\DMS-3.1 BOM.htm 9/29/2011...
- Page 46 FOOT,19MM DIAX5.5MM HIGH,RUBBER INGOT CORP: RU-115 Vaulted Document RUBBER FEET RU-115.pdf 2D FileRussound File Type Vault TO ATTACH SCREW,MACHINE,PAN 610-0000 COVER TO Vaulted Document HEAD,PHILIPS,M3X6,STEEL,BLACK OXIDE M3X6MM PHILIPS PAN HEAD SCREW.pdf 2D File Russound CHASSIS file://C:\Documents and Settings\pengel\Desktop\DMS-3.1 BOM.htm 9/29/2011...
- Page 47 YILONDA\HONGRUI ELECTRONICS: A1.25-13P-155MM Vaulted Document FFC,1.25 PITCH,YILONDA.pdfDatasheetRussound File Type Vault CABLE ASM,SOLDER TERMINAL TO RING 465-0057 AC INLET G CONN TO CHASSIS GROUND TERMINAL TERMINAL,M3 STUD,16AWG,3 Vaulted Document 465-0057.pdf 2D File Russound INCH,GREEN,UL1015 WIRE,16AWG,3 460-0090 INCH,UL1015,GREEN,YELLOW STRIPE file://C:\Documents and Settings\pengel\Desktop\DMS-3.1 BOM.htm 9/29/2011...
- Page 48 Vault 425-0011 CONN,CRIMP TERMINAL,26AWG-18AWG CHAO KUEI MOLD INDUSTRIAL CO., LTD.: 39610301 Vaulted Document HEADER,CKM,3961.pdf DatasheetRussound WIRE,18AWG,6 460-0096 INCH,STRANDED,DISCRETE,BROWN,UL1617 WIRE,18AWG,6 460-0097 INCH,STRANDED,DISCRETE,WHITE,UL1617 TUBING,HEAT SHRINK,0.125IN(3.18MM) DIGI-KEY CORP: EPS2014-ND 462-0004 TUBING,BLACK,POLYOLEFIN 3M: EPS-200 1/4"BL 48"BX File Type Vault file://C:\Documents and Settings\pengel\Desktop\DMS-3.1 BOM.htm 9/29/2011...
- Page 49 MANUAL,USER,SMART MUSIC STREAMER 590-0031 BAG,POLY,CLEAR,180MMX285MM FOR MANUAL File Type Vault END CAP,SMART MUSIC 590-0063 Vaulted Document STREAMER,CARDBOARD DMS-3.1 END CAP SIZE 20110105 2D File Russound File Type Vault 590-0064 BOX,GIFT,DMS-3.1,DOUBLE CORRUGATED Vaulted Document DMS-3.1 BOX SIZE 20110105.pdf 2D File Russound File...
- Page 50 Vault 830-0000 DROP TEST SPECIFICATIONS Vaulted Document Drop Test Spec.zip DocumentRussound File Type Vault 830-0009 TEST PROCEDURE,DMS-3.1 Vaulted Document DMS-3.1 Test Procedure 1.4.doc DocumentRussound File Type Vault 830-0011 CONSTRUCTION NOTES,DMS-3.1 Vaulted Document DMS-3.1 Construction Notes 013111.doc DocumentRussound File Type Vault CABLE ASM,3.5MM MALE TO 3.5MM...
- Page 51 Rev 1.4 Rev 1.4 use with DMS-31v0.xml The purpose of this document is to provide a standardized full functional test process for the Russound® DMS-3.1 Digital Media Streamer. The approximate time needed to perform this test is 20 Minutes. Contents Inspection...
-
Page 52: Inspection
Inspection Russound customers expect the best; defects are unacceptable. Inspect the Unit Under Test visually for any blemishes, missing pieces and visual indications that may cause concern. Passing visual inspection is a condition of passing full test. Correct any defect before passing the Unit Under Test; if Unit Under Test has defects that cannot be corrected, notify your supervisor. -
Page 53: Load Mac Id To U22 M24C402
3. The range of MAC ID’s is 00:21:C7:04:00:00 to 00:21:C7:04:FF:FF which is to be used on any Russound Product requiring a MAC ID. 4. No Russound Products will have an identical MAC ID installed. Each device will have its own unique MAC ID. -
Page 54: Install Russound Usb Driver
1. Obtain the “Russound USB Driver” folder from Russound SQA Department. Copy and extract this folder to your computer. This file has been modified to include all USB devices used with Russound equipment. This is not the CDM 2.00.00.zip created by FTDI USB products. - Page 55 7. Select “Install form a list or specific location” then click “Next”. 8. Select “Search for the best driver in these locations. Place a checkmark in “Include this location in Search” Navigate to where the “Russound USB Driver” folder is located. Then click “Next”. DMS-3.1 Test Procedure...
- Page 56 9. Click “Continue Anyway” on the next dialog. 10. This dialog will display showing the USB Serial Converter is being installed. 11. The “Completing the Found New Hardware Wizard” displays and click “Finish”. DMS-3.1 Test Procedure 6 of 64...
- Page 57 “Install from a list or specific location” and navigate to the location you chose in Step 8. 14. The following dialog appears showing the USB Serial Port is being installed. DMS-3.1 Test Procedure 7 of 64...
- Page 58 Note: The “USB Serial Port (COM8)” will only display when the MCA-C5 is connected to the USB port of the computer. The Port listed may not be on COM8 and this is ok. DMS-3.1 Test Procedure 8 of 64...
-
Page 59: Install Rvcli Scripter
MCA-C5 Controller. 2. Turn on the MCA-C5. Note: The USB port is available when the MCA-C5 has AC Power applied. 3. Obtain the file RVCLIscripter_setup.exe from Russound. 4. Install RVCLIscripter_setup.exe on your computer. 5. Create a folder named RVCLI Scripts. - Page 60 Navigate to the RVCLI Scripts folder and open the current version of the DMS31v*.xml file. 15. The DMS-3.1 Test Scripts will be loaded into the Command Queue. 16. Place a check mark in the “Clear Log After Each Test” box.
-
Page 61: Sam-Ba
SAM-BA 1. Obtain the file “sam-ba_2.10.exe” from Russound SQA. 2. Install SAM-BA 2.10 using the default prompts. Open SAMBA 2.10 by clicking the icon 3. Close SAM-BA. DMS-3.1 Test Procedure 11 of 64... -
Page 62: Putty
Putty 1. Obtain the file “putty.exe” from Russound SQA. 2. Putty is an executable file. Copy “Putty” to your desktop. 3. Open “Putty”. The Warning Message will display. Click the “Always ask before opening this file” to remove the checkmark. - Page 63 6. Select the “Window” option in the Category window. Set the “Lines of scrollback” window to 9999. Note: This will allow you to capture all events in the log if problems occur. 6. Close Putty. DMS-3.1 Test Procedure 13 of 64...
-
Page 64: Rvcli App
RVCLI App 1. Obtain the file rvcli.exe, a self executing file, from Russound SQA. Place the file in a folder named “rvcli app”. Open the “rvcli app” folder. 2. Right click the file rvcli.exe and left click “Create Shortcut” in the drop down menu. - Page 65 Note: The IP address above will be different later on in the procedure. Note: Concerning the number 192.168.1.105:9641, The first section “192.168.1.105” is the IP Address of the DMS-3.1. The second section “:9641” is a Port number of the DMS-3.1.
-
Page 66: Prepare Usb Flash Drive
Prepare USB Flash Drive 1. Obtain the firmware files listed in this folder from Russound SQA. Place the files on a 2 Gig USB Flash Drive. Ensure the Flash Drive is no larger than 2 Gig. Important: The “dms31_v00.01.00_r72678.img” is for example only. -
Page 67: Load Firmware
3. Plug the Russound Advanced Programming Cable from the PC Serial Port to the J11 header of the DMS-3.1 Streamer. J11 is near the USB B port of the Streamer. 4. Ensure there is a black jumper installed on J21, jumper the two pins facing BridgeCo module 3. - Page 68 This step was to confirm the ATMEL Processor U7 is alive. Install the jumper on J28. 8. Open SAM-BA v2.10 Select the \usb\ARM0….this sets the USB port to load firmware. Select the at91sam9g20-ek processor. Read the next step before continuing. DMS-3.1 Test Procedure 18 of 64...
- Page 69 9. Click the “Connect” button when both windows are set as shown. 10. The SAM-BA v2.10 window displays. 11. In the “Scripts” window select “Enable NandFlash” and click the “Execute” button. The main window will display as shown. DMS-3.1 Test Procedure 19 of 64...
- Page 70 Click the yellow folder next to the “Send File” button to display the “Open” dialog. Navigate to the “Streamer Bootloader” folder and select the “at91bootstrap.bin”file, then click the “Open” button. Click the “Send File” button. 14. The main window will show the bootstrap file has been sent. DMS-3.1 Test Procedure 20 of 64...
- Page 71 Navigate to the “Streamer Bootloader” folder and Select the “uboot.bin”file, then click the “Open” button Click the “Send File” button. 16. The main window will show the “u-boot.bin” file has been sent. 17. Turn off the DMS-3.1. Close SAM-BA. DMS-3.1 Test Procedure 21 of 64...
- Page 72 18. Monitor the Putty window. Turn on the DMS-3.1 19. Many messages will fill the Putty window. These are a few examples. DMS-3.1 Test Procedure 22 of 64...
- Page 73 “Update Complete” “Please remove your USB Drive and reboot” Turn off the DMS-3.1 then remove the USB Flash Drive from the DMS-3.1. 21. Turn on the DMS-3.1 while monitoring the Putty window. The DMS-3.1 has installed firmware correctly when you see this login window.
-
Page 74: Load Bridgeco Module
This BridgeCo image file will be prepared by Russound and is a Linux image. Each Drive will have a label named BC Magic. 4. Plug the BC Magic USB Flash Drive into the following USB Slots of the DMS-3.1. The Front Panel USB Port, The Stream 2 USB Port, The Stream 3 USB Port. - Page 75 8. Turn on the DMS-3.1, the PC and Router are already on and running. 9. Many messages will be displayed in the Putty window as the DMS-3.1 boots up. Once you see the Russound Welcome screen display at the bottom type “root”...
- Page 76 12. The IP Address will be displayed on the second line of the eth0 section. The “inet addr:192.168.1.102” line is the IP address for this DMS-3.1, your IP may be different. 13. Open another Putty window. “Host Name” window has the IP address in previous step entered.
- Page 77 Many messages will display during the Upgrade Process. This will take approximately 3 minutes. Many messages will be displayed, do nothing until you see the message in the next step. Using username "root". root@192.168.1.102's password: root@dms31-0021c70400035:~# mfgUpgrade DMS-3.1 Test Procedure 27 of 64...
- Page 78 16. When you see “Please remove USB drive from Module 1, Do as instructed and remove the BC Magic drive from Port 1 of the DMS-3.1. Then press ‘c’ key to continue. ======================================================== ============= Remove USB drive from Module 1...
- Page 79 18. When you see “Please remove USB drive from Module 2, Do as instructed and remove the BC Magic drive from Port 2 of the DMS-3.1. Then press ‘c’ key to continue. ======================================================== ============= Remove USB drive from Module 2...
- Page 80 20. When you see “Please remove USB drive from Module 3, Do as instructed and remove the BC Magic drive from Port 3 of the DMS-3.1. Then press ‘c’ key to continue. ======================================================== ============= Remove USB drive from Module 3...
- Page 81 24. Record the MAC ID of each module in Step 6 and place in a spreadsheet. Confirm the Img Version, Cne Version, and BSL Version are current versions, The Current Versions are supplied by Russound SQA, check with them. DMS-3.1 Test Procedure...
- Page 82 3 for Module 3. Type in the MAC Address listed on the label for that BridgeCo module. After it is finished type “bcinfo” at the root prompt and confirm the MAC ID is correct for all modules. DMS-3.1 Test Procedure 32 of 64...
-
Page 83: Dlna Storage Device Setup
2. This procedure uses the Iomega 34337 1TB Home Media Network Storage Drive. You must first set up the drive before plugging it into the DMS-3.1 system. 3. Plug the drive into a switch or router connected to a Windows PC. - Page 84 Then set the Music folder for DLNA under the Multimedia section. Note: If you have another brand DLNA Storage Device ensure the Music Folder is set for DLNA. 6. Close the Iomega Home Storage Manager. 7. Continue by performing the “Initial Test Setup” section. DMS-3.1 Test Procedure 34 of 64...
-
Page 85: Initial Test Setup
Initial Test Setup Note: After loading firmware always cycle power on the DMS-3.1 before testing. 1. Connect the MCA-C5, DMS-3.1, and a 4 Port Router as shown in the picture. Computer 2. Follow the diagram in the picture ensuring that DMS-3.1 Stream 1 is connected to MCA-C5 Source 2... - Page 86 7. Take 3 USB Flash Drives and place several MP3 songs on each drive. Note: Each USB Drive can be no larger than 2 Gig 8. Install a USB Flash Drive in the following ports of the DMS-3.1: a) The Front Panel USB Port, b) The Stream 2 USB Port.
-
Page 87: Set Mca-C5 Sources
4. If the Command Queue window displays the DMS-3.1v* Test Scripts go the next step. If DMS-3.1v* is not displayed Click “File” the “Open Entire Test Suite” and Navigate to where the DMS-31v* is located and open it. DMS-3.1 Test Procedure 37 of 64... - Page 88 Left click once the “OK” button. 7. Wait until the “You are now testing group: DMS-3.1 IP Address” displays then proceed to the next step. Note: Once the Enable Sources Test has finished the MCA-C5 has been set up for Sources 2 – 5 to test the streamer.
- Page 89 10. If you see a scroll bar to the right of the 5 Sources in Step 9 perform a Factory Init…the next to last test of the DMS-3.1. Then repeat the “Set MCA-C5 Sources” section until the scroll bar is not seen and the correct names for the 5 Sources are listed.
-
Page 90: Turn On Dms-3.1
The 3 Green LED’s will Blink momentarily, then All six LED’s will be dark. Looking from the Rear of the DMS-3.1 you can look through the vent holes of the cover and view the six LED’s. Look at the vent holes on the Left side. -
Page 91: Ip Address & Mac Id
IP Address & MAC ID 1. Press the space bar at the “You are now testing group: DMS-3.1 IP Address”. 2. Press the space bar at the “You are about to run the test: IP Address” 3. An RVCLIScripter command will be sent to the MCA-C5 to return the IP Address of the DMS-3.1. - Page 92 In the “SSH” button ensure it is selected. Click the “Open” button. Your IP Address may be different than the example shown below. 5. The “192.168.1.104 Putty” window will open. Click the “Yes” button if the “Warning” message appears. DMS-3.1 Test Procedure 42 of 64...
- Page 93 BSL Version : 20100927 SPI Comms : DISABLED! Module 2 IP Address : 192.168.1.102 MAC Address : 00:07:F5:2E:EB:18 Img Version : 20101222 Cne Version : 20101222 BSL Version : 20100927 SPI Comms : DISABLED! root@dms31-0021c7040003:~# DMS-3.1 Test Procedure 43 of 64...
- Page 94 8. Type “ifconfig” at the “root@dms31-0021c7040003:~#” line and Enter. The line will appear as root@dms31-0021c7040003:~#ifconfig. Record the MAC ID of the eth0 line, this is the DMS-3.1 MAC ID. This MAD ID is listed to the right of Hwaddr…see the green arrow.
-
Page 95: Id Switches
Turn the screwdriver 1 turn each time a value is returned in the Logging Window. The Logging Window will appear as shown if the ID Switch Test passes. There is a 1 second wait period each time the ID Switch command is sent. DMS-3.1 Test Procedure 45 of 64... - Page 96 There is a 1 second wait period each time the ID Switch command is sent. 7. Each Stream ID Switch has 16 positions. The test passes only when the Logging Window displays all 16 positions. Set the ID Switch for Stream 1 to position 2. DMS-3.1 Test Procedure 46 of 64...
- Page 97 9. Set Stream 3 ID Switch to position 1. Repeat Steps 6 through 7 for Stream 3. Continue to Step 10 when the Logging Windows displays as shown below. Set the ID Switch for Stream 3 to position 4. DMS-3.1 Test Procedure 47 of 64...
- Page 98 Repeat Steps 6 through 7 for the Tuner ID Switch. Continue to Step 11 when the Logging Windows displays as shown below. Set the ID Switch for Tuner to position 5. 11. Continue by performing the “ID Switches Position Check” section. DMS-3.1 Test Procedure 48 of 64...
-
Page 99: Id Switches Position Check
Line 3 returns a value of 2 which is Source 3. Line 5 returns a value of 3 which is Source 4. Line 7 returns a value of 4 which is Source 5. 4. Continue by performing the “Trigger In & Out” section. DMS-3.1 Test Procedure 49 of 64... -
Page 100: Trigger In & Out
1. A cable with a 3.5mm mono plug on each end should be connected from the MCA-C5 #1 12VDC 100mA Trigger Output jack to the DMS-3.1 Trigger 100mA In jack, indicated by the Green Line. Connected a DC Multi-meter, positive tip, to the DMS-3.1 Trigger 100mA Out jack, indicated by the Red Line. - Page 101 Shut off the MKD-C5 and you should measure 0VDC. 6. Click “OK” button at the Factory Initialization group the click the “Stop” button at the Test dialog and close RVCLIScripter. 7. Continue by performing the “Airplay IC Status (U17)” section. DMS-3.1 Test Procedure 51 of 64...
-
Page 102: Airplay Ic Status (U17)
Type 192.168.1.105:9641 in the “Target” window at the end of the quotation mark. The Target window will be exactly as show below with a different IP Address "C:\Documents and Settings\johng\Desktop\rvcli.exe" 192.168.1.105:9641 Note: Your IP address will be different, except for :9641 at the end. DMS-3.1 Test Procedure 52 of 64... - Page 103 5. rvcli.exe will open displaying the window below. Note: If the “Shortcut to rvcli.exe” window does not stay open then recheck the DMS-3.1 IP address and enter it into the “Target” window of the “Properties” box of “Shortcut to rvcli.exe”...
-
Page 104: Radio And Usb Streams
(Stream 1 display screen appears) 3. Stream 1 is displayed. Continue with next step to select a stream. Note: If you don’t see the word “Stopped” below the clock this is ok, Continue by performing the next step. DMS-3.1 Test Procedure 54 of 64... - Page 105 Device you are using. Press the “OK” button again and continue. 6. Press and release the “OK” button, then (The Genre List displays) “-” button twice, then (This selects All Tracks) “OK” button (Then all songs on the Storage Device are listed) DMS-3.1 Test Procedure 55 of 64...
- Page 106 Sound from both speakers should be clear and free of distortion. Confirm this until completion of the test procedure. 10. Press and release the “Menu” button (The Stream Music List displays) “Menu” button (The Stream Menu displays) “-“ button until ( USB is selected) DMS-3.1 Test Procedure 56 of 64...
- Page 107 14. Repeat Steps 2 through 12 for Stream 3, follow the same directions except substitute Stream 3 from Steps 2 to 12. Continue to Step 15 if all tests pass for Stream 3. 15. Continue by performing the “AM/FM” section. DMS-3.1 Test Procedure 57 of 64...
-
Page 108: Am/Fm
“OK” button, then (Sources are displayed) “-” button until (DMS-3.1 Tuner is highlighted, selected) “OK” button, then (The DMS-3.1 Tuner is displayed) 2. Press the “+” or “-“ and change to an FM Station in your area. Confirm that RDS information appears across the keypad display. - Page 109 Then change to another AM Station in your area. Confirm sound is ok. The examples below change from 680Khz to 1270Khz to Confirm the AM can tune more than one station. 4. Continue by performing the “Factory Settings Prior to Shipping” section. DMS-3.1 Test Procedure 59 of 64...
-
Page 110: Aux Usb (Russound Only)
2. Remove the USB Flash Drive from Stream 2 USB Port. Plug the USB Flash Drive into the Aux USB Port located next to the Ethernet Port. 3. Open a SSH Putty Window using the IP address of the DMS-3.1 under test. Type root and enter. -
Page 111: Factory Settings Prior To Shipping
Stream 2 ID Switch to Position 3 Stream 3 ID Switch to Position 4 Tuner ID Switch to Position 5 2. You have finished testing the DMS-3.1. Box the product and check the packaging. DMS-3.1 Test Procedure 61 of 64... -
Page 112: Install Firmware (Russound Only)
7. Turn off the DMS-3.1 for 3 seconds and turn it on again. 8. Wait a minute for the DMS-3.1 to boot up. 9. Open a SSH Putty Window using the IP address of the DMS-3.1 under test. Type root and enter. - Page 113 10. The Version and Build numbers will be listed. Check with Russound SQA to make sure you have the current Version and Build. Refer to the example picture in Step 9, this is not the current firmware. 11. Type bcinfo at the prompt.
-
Page 114: Revision History
Revision History DMS-3.1 Procedure Revision History Revision Date Revision Summary Initial 11/09/2010 Initial release John G 1/26/2011 First Revision John G 3/10/2011 Second Revision John G 7/12/2011 Third Revision John G 8/08/2011 Fourth Revision John G Changes made from Rev 1.2 to Rev 1.3 on July 12, 2011 Sections 8.
Need help?
Do you have a question about the DMS-3.1 and is the answer not in the manual?
Questions and answers