Table of Contents
Advertisement
Advertisement
Table of Contents

Related Manuals for Activeon cx


Summary of Contents for Activeon cx
- Page 1 USER MANUAL www.activeon.com...
-
Page 2: Table Of Contents
8. User menu 8-1. Playback mode 8-2. User setting 9. Recharging Battery 10. Smart phone control 11. Connect ACTIVEON CX to smartphone(using ACTIVEON App) 12. Transferring data to computer 13. Firmware update 14. Features and specifications 15. Inside the Package ※... -
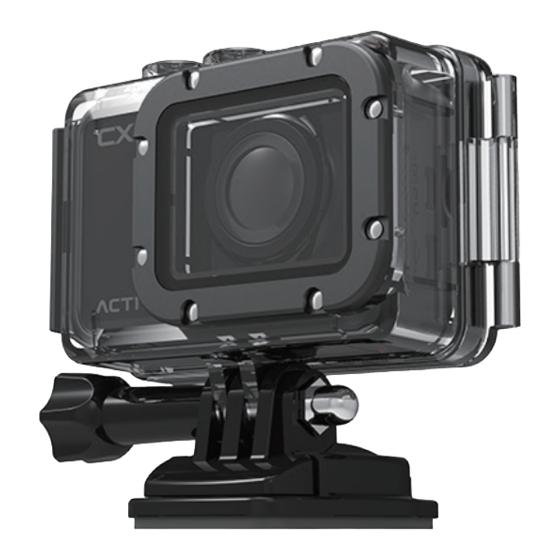
Page 3: Name Of Each Part
ENGLISH www.activeon.com * Please read this manual carefully before the use! 1. Name of each part Mode / Navigation Internal MIC LED Indicator Power / Shutter (Top, Bottom, Front, Back) LCD Screen Speaker Li-ion battery slot microSD Card Slot (microSD Card not included) -
Page 4: Operation & Button Description
2. Operation & button description ACTIVEON CX is operated by two buttons. ( button , button ) ● )button features “Power, Shutter and Enter”. ● )button features “Mode change, Navigation and User menu”. ● The feature of buttons are defined as below table. -
Page 5: Start The Camera
) button to move select bar on OSD menu or change setting 3. Start the camera 1. Open the battery cover and insert ACTIVEON CX Li-ion battery. 2. Insert microSD Card on the microSD Card slot. (The camera will not record when microSD Card is not inserted.) 3. -
Page 6: Lcd Screen Shot
4. LCD screen shot Video screen Description Function ① ② ③ ④ Current mode Shows current mode (video or photo) ① Shows current shooting mode Shooting (Video - Auto stop / Looping / Timelapse) ② mode (Photo - Self timer / Timelapse / Burst) Recording time Shows recording time information ③... -
Page 7: Graphical Icon Description
5. Graphical icon description Mode Function Icons Description Video mode Current mode Photo mode Battery Shows battery capacity status Shows FOV setting status (Super wide / Wide / Medium / Narrow) Zoom Shows current zoom level (None / x2 / x3 / x4) Live Shows current recording effect status (Sports / Aqua / Night) Effect... -
Page 8: Video Recording
Function Description Mode Icons Records video until set time. Auto stop (1min / 5min / 10min / 30min) Captures images in set intervals and creates a timelapse video file. Timelapse Video (1sec / 3sec / 5sec / 10sec /30sec / 60sec) Continuously records a video for a set time until you stop. -
Page 9: Photo Shoot
7. Photo shoot Press ( ) button to change to photo mode. ● Mode changes as ● Video mode Photo mode Photo burst Photo timelapse in turn. 1. Press ( ) button to shoot photo. 2. In 'Photo Timelapse' mode, Press ( ) button to stop photo shooting. -
Page 10: Playback Mode
8-1. Playback mode User can view recorded video or photo on the screen. ● Press ( ) button to select control panel on top menu. ● While the file is playing, you can call the play control panel by ( ) button. -
Page 11: User Setting
Function Operation Photo playback Press ( ) button to use control panel. Press ( ) button to select. 8-2. User setting Function Sub menu Description WiFi APP Turn on WiFi to connect with smartphone Turn off WiFi to disconnect with smartphone WiFi BACK Return to previous menu... - Page 12 Function Description Sub menu Shooting mode Manual / Self-Timer / Burst / Timelapse Self-Timer 5sec / 10sec / 15sec Burst 3 photos per 1 sec / 5 photos per 1 sec Photo Setting Timelapse 1sec / 3sec / 5sec / 10sec / 30sec / 60sec Megapixel 5MP / 4MP / 3MP BACK...
- Page 13 Function Description Sub menu Filter Off / Black&White / Warm / Negative / Sepia / Red / Green / Blue Time Stamp On / Off Effect Off / Aqua / Sports / Night Effect Setting White Balance Auto / 3000K / 5500K / 6500K 100 / 200 / 400 / 1600 / Auto BACK Return to previous menu...
-
Page 14: Recharging Battery
Function Description Sub menu Auto Power off Never / 1min / 2min / 3min Default Setting Yes / No Version Info Displays current camera software version General Setting Displays current WiFi SSID and Password WiFi Info BACK Return to previous menu 9. -
Page 15: Smartphone Control
10. Smartphone control By utilizing WiFi APP function of ACTIVEON, user can control the camera through smartphone. ● Compatible with iOS and Android OS. ● Before connecting the camera, download ‘ACTIVEON’ application from smartphone app store. ● Search for ‘ACTIVEON’... - Page 16 On your smartphone or tablet, turn the WiFi on and select the network CX0-xxxxxx under WiFi setting. ● Default password is ‘1234567890’ . ● 'ACTIVEON' app on your smartphone or tablet. ● Press 'Connect ACTIVEON' on the app, now you can control your ACTIVEON camera. ●...
-
Page 17: Transferring Data To Computer
While the camera is connected to a battery charger or car charger for recharge, ● the camera can record while it is recharging. 1. Power on ACTIVEON CX. 2. Connect the camera to a computer via USB cable. 3. The camera LCD will display as 'USB Ready' . -
Page 18: Firmware Update
13. Firmware update (Find the latest firmware at www.activeon.com) You can always find the latest firmware updates of ACTIVEON products on the website. (www.activeon.com) ● Firmware upgrade may not available if battery is too low. ● Recharge up to two cells of battery gauge for proper upgrade. -
Page 19: Features And Specifications
14. Features and specifications “ACTIVEON CX” 1080p 30fps Action camera ● Full HD(1920 x 1080) resolution, 30fps recording ● 196ft(60m) waterproof housing ● 5M pixel high precision digital image CMOS sensor ● (* Video recording 160 ° FOV) ● Built-in 2.0” LCD(320x240) screen ●... -
Page 20: Inside The Package
15. Inside the Package... -
Page 22: Caution
CAUTION It could be exploded if the battery is inappropriate type. Please insert proper type of battery according to instructions. The symbol means that according to local laws and regulations your product should be disposed of separatly from household waste. When this product reaches its end of life, take it to a collection point designated by local authorities. -
Page 23: Rf Exposure Information (Sar)
RF Exposure Information (SAR) NOTE : This appliance and its antenna must not be co-located of operation in conjuction with any other antenna or transmitter. A minimum separation distance of 20cm must be maintained between the antenna and the person for this appliance to satisfy the RF exposure requirements. This device meets the U.S. -
Page 24: Warranty
USA Warranty www.activeon.com... - Page 25 For assistance (USA) – If you purchased ACTIVEON product in USA and have questions regarding the product or this Limited Warranty, please call 1-858-798-3300. Or visit www.activeon.com. It is the Purchaser’ s responsibility to properly package and send the Product, together with a copy of the original proof of purchase, an explanation of the problem, and a return address to ACTIVEON at the Purchaser’...
- Page 26 EU Warranty www.activeon.com...
- Page 27 For assistance (EU) – If you purchased an ACTIVEON product in the EU and if you have questions regarding the Product or this Limited Warranty, please visit www.activeon.com. It is the Purchaser’ s responsibility to properly package and send the Product, together with a copy of the original proof of purchase, an explanation of the problem, and a return address to ACTIVEON.
Need help?
Do you have a question about the cx and is the answer not in the manual?
Questions and answers