
Subscribe to Our Youtube Channel
Related Manuals for Jazz HDV102


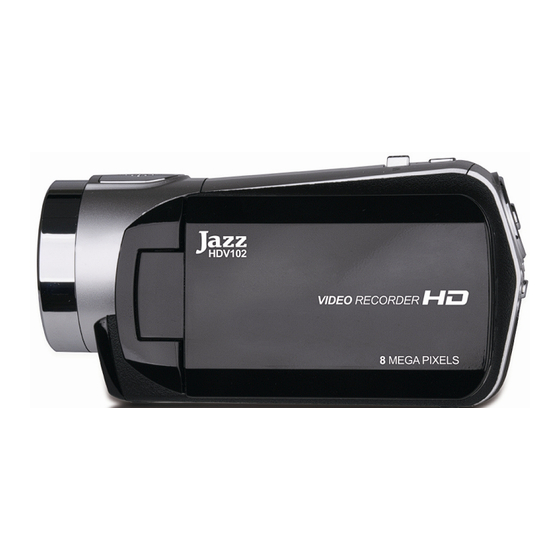
Summary of Contents for Jazz HDV102
-
Page 2: Fcc Declaration
Preface Thank you for purchasing this digital video recorder. Please read this manual carefully and keep in a safe place for further reference. Note: The product specifications and these operating instructions are printed based on latest available information and are subject to change without prior notice. The specifications of the particular video recorder you have purchased will apply even if these vary from this printed data. - Page 3 communications. However, there is no guarantee that interference will not occur in a particular installation. If this equipment does cause harmful interference to radio or television reception, which can be determined by turning the equipment off and on, the user is encouraged to try to correct the interference by one or more of the following measures: Reorient or relocate the receiving antenna.
- Page 4 SD Memory Card Contact pins / connectors LOCK slider • Please note that the SD card has tiny LOCK slider on the side for write protection of the SD memory card that helps avoid inadvertent deletion of image files. Set this slider to “un-LOCK”...
- Page 5 Keep recorder clean and take care to avoid scratching or damaging of the housing and the lens. Blow dust away and use soft cloth if the lens becomes dirty or contaminated. Do not use an organic solvent to clean lens. Remove batteries if you are not planning to use the recorder for an extended time.
- Page 6 Features The recorder incorporates the following features and functions: l Digital Video Recorder (supports 1280×720 HD video recording and other resolution options) l Digital Camera (8 Mega Pixels and other options for still pictures) l Mass Storage (Portable Disc) l 4x Digital Zoom Accessories The following accessories are packed together with the video recorder: USB Cable...
- Page 7 Know your Video Recorder...
- Page 10 Buttons and Function Indicators Buttons/Indicator Function Power Button Press to turn the video recorder ON and OFF Recording Button Press to Start / Stop Video Recording Shutter Button Press to take Still photo Tilt Left or Right to “zoom” the scene as desired Zoom Button MENU Button Press to enter MENU setting and press again to exit...
- Page 11 Press to confirm MENU/ option settings OK Button Press to START / STOP playing a video clip when Playback mode has been selected. With Playback mode selected; press DELETE Button to access Delete Button YES / NO delete options for selected Video clip or Still Photo. Self-Timer Indicator blinks when the Self-Timer is activated and count Indicator...
-
Page 12: Basic Functions
- Close the Battery Cover To remove / replace the SD/SDHC memory card press the card down again; the card will pop up and you may remove the card from the recorder. ───────────────────────────────────────────────────── Notes: Turn OFF the video recorder before inserting / changing the memory card; Insert the memory card correctly. - Page 13 Recording Video and taking Still Photos When recorder is powered ON it is ready to take Video Records or take Still Photos; see icons on the LCD Screen indicating both recording modes. Video Recording - Press the Recording Button to START recording a video clip, press it again to STOP recording.
- Page 14 - You may also press LEFT / RIGHT Buttons to Rewind or Fast forward the Video being viewed. Displayed Still Photos: Use the Left / Right button to scroll through and locate your stored Still Photos Selected photo will be displayed on the LCD screen as it had been taken When the selected photo is displayed, you may enter the “Pan”...
- Page 15 as a tripod to obtain the sharpest result. Self-Timer: Press the RIGHT Button to select 10 second delay time, or press it again to turn Self Timer OFF. -Press the Shutter Button and the recorder will take photo automatically in 10 seconds. -LED Support Light: Press the LED Light Button to turn ON/OFF the Support Light.
- Page 16 Icon Icon name Description Number of photos 9999 Indicates remaining number of photos available 00: Indicates remaining video recording time or actual Recording time 00:01 recording time if the Video Recording is in progress.
- Page 17 Recording mode Ready for Video Recording Indicates resolution of current Video Recording Video format selected. Fill light Indicates LED support light is turned ON Zoom indication Indicates current digital zoom magnification Exposure Indicates current selected exposure value Exposure Indicates current Exposure Metering scene area Metering area White balance Indicates the current white balance setting...
- Page 18 Self-timer Indicates self-timer count down delay time Image quality Indicates current selected still photo quality Image Size Indicates current resolution of still photo Photo taking Recorder is ready for taking still photo mode ◆ Video Recording / Camera (Still Photos) available setting When the recorder is active and ready for Video Recording or taking Still Photo you are able to change setting as desired.
- Page 19 Main Menu Submenu Description 3264x2448 8 Mega Pixels Resolution 2592×1944 5 Mega Pixels Resolution Resolution (Still Photo) 2048×1536 3 Mega Pixels Resolution 1280×1024 1.3Mega Pixels Resolution 1280 x 720 High Definition (HD) Format Movie Size 640 x 480 VGA Format (Video Resolution) 320 x 240 QVGA Format...
- Page 20 Tungsten Suitable for tungsten lamp light EV -2.0 to +2.0 Use the Left & Right Buttons to adjust Exposure (interval: 0.3EV) exposure / brightness compensation. Single Photo Taking available 2 second Self-Timer setting Driver Mode 10 s 10 second Self-Timer setting (Still Photo taking only) Three pictures...
- Page 21 Frame rate, HD resolution Frame Rate may be adjusted for VGA and QVGA, but HD format has its own pre-adjusted Frame Rate and can not be changed. • Internal Setting When the recorder is active and ready for video Recording or taking Still Photo you are also able to change Internal Setting of the Recorder.
- Page 22 60 Hz Selects 60Hz power / light frequency 1 minute Auto-OFF after 1min if unused Power Save 3 minutes Auto-OFF after 3 min if unused 5 minutes Auto-OFF after 5 min if unused Set the Date and Time of the recorder Date &...
- Page 23 Reset All Yes/No Return to Factory Setting (Default settings) Formatting the SD/SDHC memory card: You may need to Format inserted SD card if it is new it was used with other devices or if “Card Error” message is displayed. Select Internal Setting, scroll down to the Format option, press RIGHT Button to select sub-menu and press OK to confirm.
- Page 24 Please note that the Date & Time will be indicated on Video and Photo file properties, but not visible on the Video and Photo displayed images. The file properties may be read and reviewed on records when reviewing on the computer. PLAYBACK Mode Press the PLAYBACK button to enter the PLAYBACK Mode.
- Page 25 Icon Name of Icon Description Playback Indicates Playback Mode is selected Mode Indicates the location of current file and the File Number total number of files (time appears while playing back video clips) Prompt to press OK Button to playback PLAY video file.
- Page 26 MENU Setup / PLAYBACK Mode Press the MENU Button to display available options and change setting as you desire. Still Photo selected, see available options below: Main Menu Submenu Description Lock/Unlock Lock/unlock current file Lock Lock All Lock all files Unlock All Unlock all files Delete one file...
- Page 27 Photo image has slight reddish color Green Photo image has slight greenish color Blue Photo image has slight bluish color Binarize Photo image has binary data arrays Sunset Photo Image has sunset glow Warm Photo has warm color for best skin tones Cold Photo has cold color for cool image effect Contrast...
- Page 28 Rotate Photo 90 degrees. Then two options: Save – save the rotated photo Rotate Back – return to normal displayed Photo Resize – set different size (only smaller) than the Resize original Photo Add or Delete Voice Memo to the selected Photo Voice Memo Set or Cancel –...
- Page 29 1. Playback Photo icon 5. Timer of played Voice Memo 2. Number of Voice Memo file 6. Pause, Stop control options 3. Voice Memo icon 4. Icon of the Playback mode Voice Memo recording / playback time is limited to 30 seconds max. The Photo and the Voice Memo will be displayed on the recorder LCD screen and on TV –...
- Page 30 Playing back Video Movie; When the Video Movie is selected, only the LOCK and DELETE options are available (see table above) Playback Mode/ Internal Setting Settings are the same as for Video Recording/ Still Photo taking Mode - see page 21. Computer Connection for Video / Photo Download Your recorder will function as “Removable Disc”...
- Page 31 records using the USB or TV cable may not guarantee the best performance due to slow transfer rate. We suggest you remove the SD Card with recorded HD Video from the video recorder and insert card directly into the SD Card port of your computer or TV. Then the HD Video may be easily downloaded into the computer (as described above) or played back on HDTV.
- Page 32 Driver Installation Insert supplied CD into CD-ROM, and the installation guide program will run automatically. There are four keys on the guide window: Click the Install Driver button and follow steps to finish installation. Restart computer when installation completed. The installed Driver will be indicated as the “SPCA1528 PC Driver” with an icon inside computer’s Start →...
- Page 33 Operating Webcam Click the shortcut icon to open AMCAP window. The AMCAP computer window will display the scene visible through the recorder lens. MediaImpression Installation You may install MediaImpression software into your computer from installation CD. Software installation Click “Install MediaImpression” button and complete the installation as per the following steps...
- Page 34 Please restart the computer when prompted to complete the installation, computer will install MediaImpression shortcut / icon on the Desktop. Using MediaImpression This program will allow you to import / store all, or selected records from your video recorder (when connected) to your computer. The MediaImpression program will also provide “one button”...
- Page 35 Programs” to open MediaImpression After starting MediaImpression, click “Import” to import the media.
- Page 36 Choose the video recorder storage and choose the output location. Choose required file and click “Import” - selected file will be stored in the indicated output location.
- Page 37 Click “Go to Start Page” to return the main screen; click the “Video” or “All Media” to get the “YouTube” access. Choose file and click “Upload to YouTube” Enter your username and password to login to YouTube, execute upload / post selected Video.
- Page 38 Note that when software installation has been completed, please reboot the computer for the first time operation. 5. Specifications HD 1280×720 pixels Video Resolution VGA 640×480 pixels QVGA 320×240 pixels 8MP (3264 x 2448), 5MP (2592 × 1944), Photo Resolution 3MP (2048 ×...
- Page 39 Self-Timer 2s or 10s self-timer options Digital Zoom 4 X digital zooming White Balance Auto/Daylight/Cloudy/Fluorescent Light/Tungsten Lamp Exposure Compensation -2.0 to +2.0 Exposure Value range USB Port USB 2.0 TV Output NTSC / PAL selectable LCD Screen 2.0 inch TFT LCD Power Source 4 x AAA Alkaline Batteries (not supplied) Menu Language...
-
Page 40: Troubleshooting
Write protection switch on the SD card is set to LOCK position. Video or Photo file can Remove SD card and set the switch to non-LOCK position and not be deleted re-insert the card. HDV102 – 20111031...
Need help?
Do you have a question about the HDV102 and is the answer not in the manual?
Questions and answers
Where can I get a replacement battery and cables