Table of Contents
Advertisement
Advertisement
Chapters
Table of Contents

Related Manuals for Yongnuo YN 622N II


Summary of Contents for Yongnuo YN 622N II
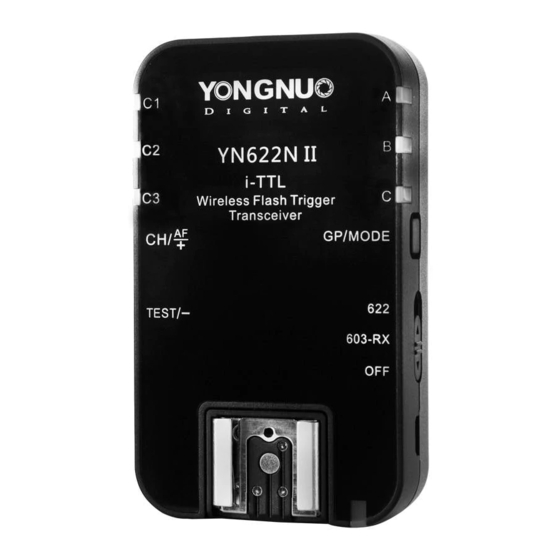
- Page 1 YN622N II i-TLL User Manual 用户手册...
-
Page 3: Table Of Contents
Contents General Description ....1 Function Introduction ....2 Supported Functions List ... . 3 Compatibility List . -
Page 4: General Description
General Description This product is a wireless transceiver, transmitting & receiving mode will automatically switched. to express conveniently, in this user manual, it is called transmitter (master control unit) when being installed on the hot shoe of the camera, while it is called receiver (slave unit) when a flash is installed or connected. -
Page 5: Function Introduction
Function Introduction Thank you for purchase the products of Yongnuo firstly. The new upgrade version YN622N II can set to "622" or "603- Ÿ RX" communication mode through the power switch, suppor ts re ce iving the trigge r signal of the YN560-... -
Page 6: Supported Functions List
Support flash zooming (auto) Ÿ Built-in AF assist beam emitter (AF Lamp) Ÿ Settings saved automatically Ÿ Compatible with YongNuo/ Nikon series flashes Ÿ Support PC port triggering strobe flashes Ÿ PC port support front/rear curtain sync and high- Ÿ... -
Page 7: Compatibility List
D70/D70S/D80/D90 D200/D300/D300S/D600 series /D700/D800 series D3000series/D5000series/D7000series Compatible i-TTL flash list : YongNuo YN465/YN467/YN468/YN565/YN568(For Nikon series) Nikon SB-600/SB-700/SB-800/SB-900/SB-910 List of that the master unit using master control mode on the transmitter is supported (refer to p15): SB-700/SB-900/SB-910/SU-800 ※ T h e f o l l o w f u n c t i o n s r e f e r t o t h e manufacturer of the camera and flash. -
Page 8: Name Of Parts
Name of Parts Communication State State Indicator 622 Standby (receive) Red( Go out Go out 622 Receiving Red(622 ) Blink Blink 622 i-TTL Transmitting Green(622 ) Blink Blink Orange(622 ) 622 Manual Transmitting Blink Blink Standby (receive) Orange( 603-RX Go out Go out Orange( 603-RX... -
Page 9: Preparation Before Use
Preparation Before Use 1. Installing the Batteries Open the cover and install two AA batteries (excluded)according to the + a n d - m a r k s , r e c h a r g e a b l e batteries of 1.2V can be used. -
Page 10: Preparation Before Use
Preparation Before Use 3 . I n s t a l l F l a s h o n t h e H o t S h o e of t h e Transceiver (as Receiver) 1. Install the transceiver into the flash bracket or other fixing devices (Not included in the product box). -
Page 11: Setting
Setting 1.Power switch The YN622N II adopts 3 sections of power Ÿ switch design. When it set in the “622” communication mode, the red indicator light will bright, when set in the “603-RX’ Red Indicator communication mode, the orange indicator (622mode) light will bright, “OFF”for power off. - Page 12 Setting 4.Transmitter group setting Method 1: 1).Half press the camera button to enter into the transmitting state. 2).Short press the [GP/MODE] button i n t h e t r a n s m i t s t a t e , s e t t h e 603-RX t r a n s m i t t i n g g r o u p , t h e n t h e indicator light will display the...
- Page 13 Setting 6.Set the flash parameter of each group on the transmitter (remote control mode) i-TLL transmitting state: increase/decrease the flash Ÿ exposure compensation(FEC), supporting the FEC set between -3 to +3 with 1/3 or 1 step. Manual transmitting state: increase/decrease the flash Ÿ...
- Page 14 YN622N II provides a general way of manual control of Ÿ the flash output . For the same manual flash output values of YN 622N II, even using different GN of the flash, the output is the same (in case not exceed the effective range of the flash).
- Page 15 Setting 7.Flash Shutter Sync: Refer to the camera’s setting. Supports front-curtain Ÿ sync, rear-cur tain sync and high speed synchronous (HSS/Auto FP*). *Using high-speed synchronization need to set the flash sync speed of the camera to AUTO FP. *The maximum high-speed synchronization speed is 1/8000s or 1/4000s (depends on the camera).
-
Page 16: Flash Awaking /Testing Flash
Flash Awaking and Testing Flash When half press the shutter button of the camera, the hot- Ÿ shoe flash will be awaken. In standby state, pressing the [TEST/-] button of the Ÿ transceiver will awake the flash. When loosening the button, the flash of the group having been selected will fire a test flash. -
Page 17: Usage
Usage 2 Transceiver kit packages C o m p o s e m u l t i p l e Ÿ Ÿ Use 1 off-camera flash or 1 off- groups through additional camera flash + 1 on-top flash. purchase transceiver. 1.Remote Control Mode: Ÿ... -
Page 18: Usage
Usage 3.Master Control Mode& On-top flash. 1.Power on of the on-top flash: First turn on the on- top flash, then turn on the transmitter. 2.The on-top flash use non master control model: Flash modes, exposure compensation (flash output), Ÿ zoom or other parameters set directly on the flash, not affected by the transmitter settings. - Page 19 PC Port Triggering (Support Super Sync *) Caution! Do not connect to the PC port any flash requiring trigger voltage more than 300V, or the transceiver may be damaged. Purchase corresponding PC flash sync cord according to Ÿ the different ports of the flashes needs . 1.
-
Page 20: References
Reference-About 603-RX The YN622N II supports receiving the triggering signal YN560-TX (RF603 communication mode), meanwhile supports the triggering signal(the flash set to M mode) of the RF603(II)、RF605(RF603 communication mode). 1.Set to the 603-RX mode through the power switch. 2.Set the same channel as the transmitter ( Shortly press the [ ]button). -
Page 21: References
References Firmware Update 1.Log in the YONGNUO official website: http://www.hkyongnuo.com/e-detaily.php?ID=363 to download the firmware update software and the latest firmware. 2.Power off, use Micro-USB(do not include) cable connect to PC. 3.Press the [ ] button and set the power on, all the indicator bright(green). -
Page 22: Troubleshooting
Troubleshooting 1. Fail to power on or automatic shutdown: ● The batter y is loaded inversely or exhausted; it will power off automatically when the batter y is going to be exhausted in case of being over discharged. ▲ Install the batter y according to the correct direction the batter y compartment indicates and ensure the batter y is full and restart the power (refer to page 6). -
Page 23: Specifications
Specifications System type: Digital FSK 2.4GHz wireless transceiver Distance: 100M Channel: 7 Flash mode: i-TTL, Manual flash Sync mode: front-curtain sync, rear-curtain sync, Hi-speed sync(Auto FP) Groups: A/B/C 3Groups(622);A/B/C/D/E/F 6Groups (603-RX) Max Sync speed: 1/8000s* Input: Hot-shoe(TTL,main contact) Output: Hot-shoe, PC port Firmware upgrade terminal: Micro USB Applicable batter y: AAX2 (suppor t 1.2V rechargeable batter y) - Page 25 目录 通用描述 ....1 产品功能简介 ....2 支持的功能列表 .
-
Page 26: 通用描述
通用描述 本 产 品 为 无 线 收 发 一 体 设 计 , 自 动 切 换 发 射 、 接 收 状 态。为方便表述,本说明书中将安装于相机热靴时将称 之为发射器(主控单元),安装或连接闪光灯时将称之为 接收器(从属单元)。 机顶闪光灯 或主控单元 YN622N II LCD屏幕显示 YN622N-TX 推荐选购YN622N-TX 无线引闪控制器作为发射 器使用,有关此产品的介绍,请浏览以下网页: http://www.hkyongnuo.com/s-detail.php?ID=339... -
Page 27: 产品功能简介
产品功能简介 首先感谢您选购永诺产品。 Ÿ 全新升级版YN622N II 可通过电源开关设置在622或 Ÿ 6 0 3 - R X 通 信 模 式 , 支 持 接 收 Y N 5 6 0 - TX/RF605(603模式)/RF603(II)系列产品的引闪信号, 拥 有 多 项 细 节 改 进 , 并 使 用 了 快 速 锁 定 设 计 , 支 持 USB固件升级。... -
Page 28: 支持的功能列表
支持的功能列表 快速锁定设计 Ÿ 支持USB固件升级 Ÿ 支持622通信模式,603-RX通信模式 Ÿ 支持的闪光模式:i-TTL,手动 Ÿ 快门同步:前帘同步,后帘同步,FP高速同步,支 Ÿ 持最高同步速度为1/8000s 支持通过收发器远程设置闪光灯参数(远程控制模式) Ÿ 支持i-TTL、手动、重复闪光混合使用(混合控制模 Ÿ 式) 支持发射器机顶安装闪光灯并支持i-TTL功能 Ÿ 支持发射器安装主控单元设置各分组闪光参数(主 Ÿ 控模式) 支持曝光补偿,闪光值锁定,自动包围曝光功能 Ÿ 支持模拟(造型)闪光、防红眼闪光 Ÿ 支持闪光灯头变焦(自动) Ÿ 内置辅助对焦灯功能 Ÿ 设置自动保存功能 Ÿ 兼容永诺全系列闪光灯、尼康闪光灯 Ÿ 支持PC接口触发影室灯 Ÿ PC接口输出支持前/后帘同步,并支持高速同步(超 Ÿ 级同步) 支持单触点闪光相机/闪光灯触发(最高同步速度为 Ÿ... -
Page 29: 兼容性列表
兼容性列表 本产品所支持的功能取决于使用的相机及闪光灯不同可 实现的功能不同。本说明书为假定使用兼容的相机/闪 光 灯 。 最 新 版 本 的 兼 容 性 列 表 及 本 用 户 手 册 请 访 问 www.hkyongnuo.com获取。 兼容的相机列表: 尼康 D70/D70S/D80/D90 D200/D300/D300S/D600系列/D700/D800系列 D3000系列/D5000系列/D7000系列 兼容的i-TTL闪光灯列表: 永诺 YN465/YN467/YN468/YN565/YN568(尼康系列) 尼康 SB-600/SB-700/SB-800/SB-900/SB-910 支持使用主控模式的主控单元列表(第15页): SB-700/SB-900/SB-910/SU-800 ※ 以下功能的使用请参阅相机及闪光灯制造商说明书: 闪光值锁定(FV LOCK),自动包围曝光(BKT)... -
Page 30: 各部位名称/指示灯状态说明
各部位名称/指示灯状态说明 通信状态 状态指示灯 频道指示灯 分组指示灯 红色(622) 熄灭 熄灭 622待机状态(接收) 红色(622) 闪烁 闪烁 622接收通信中 绿色(622) 闪烁 闪烁 622i-TTL闪光模式发射通信中 橙色(622) 闪烁 闪烁 模式 发射通信中 622手动闪光 橙色( 熄灭 熄灭 603-RX 603-RX待机状态(接收) 橙色( 闪烁 闪烁 603-RX模式接收通信中 603-RX ※此处保护薄膜可以撕去。 短按生效 长按生效 辅助对焦灯 热靴座 锁定释放按钮 频道/辅助对焦按钮 分组设置按钮... -
Page 31: 使用前准备
使用前准备 1.安装电池 打开电池仓,根据电池仓正负极 方 向 安 装 两 节 AA电 池 ( 不 含 ) , 可 以 使 用 两 节 1.2V充 电 电池。电池电量不足时,状态指 示 灯 将 会 单 独 闪 烁(红 色), 此 时 需更换电池。 ※ 长期不使用产品请将电池取出。 ※ 更换电池时,请两节一起更换。 2.安装/取下发射器... - Page 32 使用前准备 3.安装闪光灯于收发器热靴(作为接收器) 将 收 发 器 安 装 在 闪 光 灯 附 带 的 微 型 支 架 或 其 他 固 定 装 置 (不 含)。 2. 松开闪光灯锁定装置。 3. 将 闪 光 灯 热 靴 固 定 脚 完 全 插 入 收发器热靴座。...
- Page 33 设置 1.电源开关 YN622N II产品使用3段式电源开关设计,设 Ÿ 置在"622"通信模式,状态指示灯亮红色,设置 在 "603-RX"通 信 模 式 , 状 态 指 示 灯 亮 橙 色 , 红色指示灯亮 "OFF"为电源关闭。 (622模式) 配 合YN622C系 列 产 品 使 用 , 请 将 电 源 开 关 Ÿ 设 置 在 “622” 位 置 , 自 动 切 换 发 射 、 接 收 状 态。有关603-RX模式的使用,请参考说明书第...
- Page 34 设置 4.设置发射器分组 方法一: 1.半按相机按钮进入发射状态。 2.在发射状态下短按【GP/MODE】 按 钮 , 设 置 发 射 分 组 , 指 示 灯 显 示 603-RX 参与闪光的分组。 方法二: 在 待 机 状 态 下 按 住 【 TEST/-】 按 钮 不 放 , 同 时 短 按 【...
- Page 35 设置 6.在发射器设置各分组闪光参数(远程控制模式) 在i-TTL闪 光 发 射 模 式 , 增 加/减 小 曝 光 补 偿(FEC), Ÿ 支持曝光补偿在-3至+3之间以1/3或1档设置。 在 手 动 闪 光 发 射 模 式 , 增 加/减 小 闪 光 输 出 ( 第11 Ÿ 页)。 1).半按相机快门按钮进入发射状态。 2).进入发射状态时长按【+】或【-】按钮更改各组参数。...
- Page 36 设置 闪光灯手动输出控制( 远程控制模式) YN622N II提 供 了 通 用 的 手 动 控 制 闪 光 灯 输 出 功 率 Ÿ 方式。对于相同的YN622N II手动闪光输出值,即使使 用不同指数的闪光灯,其输出功率都是一样的(在不超 出闪光灯工作范围的情况下)。 YN622N II的M档 闪 光 输 出 值 最 小 为1, 闪 光 输 出 最 大 值...
- Page 37 设置 7.闪光快门同步 关于闪光快门同步的设置请参考相机说明书,并在相机 上进行设置。支持前帘同步、后帘同步、高速同步*。 *使用高速同步需设置相机闪光同步速度为自动FP。 *最 高 同 步 速 度 为 1/8000s或 1/4000s( 取 决 于 相 机)。 *部 分 相 机 机 型 不 支 持 高 速 同 步(无 自 动FP选 项), 使 用 该类相机时,快门速度会被限制在1/250s或更低。 8.辅助对焦灯 当 光 线 不 足 以 自 动 对 焦 时 会 启 Ÿ...
-
Page 38: 闪光灯唤醒、测试引闪
闪光灯唤醒、测试引闪 半按相机快门按钮时,热靴闪光灯将被唤醒。 Ÿ 待机状态下,按住收发器【TEST/-】按钮将唤醒闪光灯, Ÿ 松开按钮时,所选分组及装在该收发器上的闪光灯将被测试闪 光一次。 在发射状态下,短按测试按钮测试闪光一次。 Ÿ 示 例 :下 图 中 , 发 射 器 设 置 了 A+B两 组 闪 光 灯 , 按 下 Ÿ 【TEST/-】 按 钮 接 收 器A与B上 的 闪 光 灯 将 被 唤 醒 , 松 开 按 钮 时,闪光灯将测试闪光一次。... - Page 39 使用 双收发器套装应用 通过额外购买的收发器 使用1离机闪光灯,或 组成多分组应用。 1离机闪光灯+1机顶闪光灯。 1.远程控制模式: 将接收器上的闪光灯设置在i- Ÿ TTL闪光模式,该闪光灯将根据发 射 器 设 置 的 闪 光 模 式 及 参 数 闪 光 , 支 持 i-TTL/手 动 闪 光 。 (9- 11页) 2.混合模式控制 支持使用机顶及接收器上的 Ÿ 闪 光 灯 在 不 同 的 闪 光 模 式 下 同 时...
- Page 40 使用 3.主控模式及机顶闪光灯 1.开启机顶闪光灯的电源顺序: 先开启闪光灯电源,后开启发射器电源。 Ÿ 2.机顶闪光灯使用非主控模式: 闪光模式,曝光补偿(闪光功率),焦距等参数直 Ÿ 接在机顶闪光灯上设置,不受发射器设置影响。支持i- TTL, 手动闪光,重复闪光模式。 3.机顶闪光灯使用主控模式: 使用支持主控功能的机顶主控闪光灯或主控单元设 Ÿ 置各分组闪光模式及参数, 支持i-TTL, 手动闪光。 1.开 启 主 控 单 元 并 设 置 为 MASTER( 指 令 模 式 ) , 再打开发射器电源。 2.设 置 好 接 收 器 分 组 , 打 开 闪...
- Page 41 PC接口触发(支持超级同步*) 注意! 请勿使用超过300V触发电压的 闪光灯连接PC接口,否则可能 损坏收发器。 需根据不同接口的闪光灯选购PC闪光灯同步线。 Ÿ 1. 使用PC同步线带螺母一端连接接收器。 2. 连接线另一端连接影室灯或其他支持PC接口的闪光灯。 3. 设置相机快门同步为前帘、后帘同步。 4. 调整拍摄参数并拍摄照片。 * 超级同步-使用非高 速同步 闪光灯实现更高的同步速度,本 功能更适合闪光持续时间较长的影楼灯。(限PC接口输出) 1. 接收器通过PC接口连接闪光灯,闪光灯可能需要设置在手动 全功率闪光输出(1/1)。 2. 设置相机在手动曝光或快门优先模式,把快门同步设置为高 速同步,快门同步速度最高可设置在1/8000s,拍摄并检查 照片是否同步,可能会看到光线的层次变化,效果将根据相 机及闪光灯不同会有所不同。 ※ PC接口只作为输出。 ※ 可同时使用热靴座上的闪光灯和与PC接口连接的闪光灯。 ※ 使用C型相机,PC同步速度最高为1/250s或更低。...
- Page 42 参考-关于603-RX YN622N II支持接收YN560-TX/RF605(RF603 通信 模式)RF603(II)的引闪信号。 1.通过电源开关设置在603-RX模式 2.设置与发射器相同的频道(短按【 】按钮 ) 3.设置接收分组(短按【GP/MODE】按钮) 4.设 置 接 收 器 上 的 闪 光 灯 为 手 动"M”模 式 , 调 整 闪 光 灯输出,拍摄并引闪闪光灯。 分组功能对应YN560-TX/RF605。 Ÿ 建 议 仅 在 使 用 YN560-TX/RF603/RF605作 为 发 Ÿ...
- Page 43 参考 固件升级 1.登录永诺官网: http://www.hkyongnuo.com/s-detail.php?ID=363 下载升级程序及最新固件。 2.关闭产品电源,使用Micro-USB连接线(不含)与电脑连接。 3.按住【 】按钮的同时开机,所有指示灯将以绿色点亮, 进入固件升级界面。 4.按软件上的提示完成固件升级操作。 恢复出厂设置 1.) 同 时 按 住 【 】 + 【GP/MODE】按钮不放。 2.) 指示灯将从A→B→C→C1→C2→ YN622N II C3→状态指示红灯依次点 亮。 3.) 松开所有按钮即恢复出厂设置。 603-RX...
-
Page 44: 故障排除
故障排除 1.无法开机或自动关机: 电池装反或电池耗尽; 电池即将耗尽时会自动断电,防 Ÿ 止电池过放电。 ▲ 按照电池仓指示标志的正确方向安装(更换)电池,并 确保电池有电,重新开启电源。(参考第6页) 2.闪光灯不闪光: 确保所有设备电池电量充足,收发器与相机及闪光灯之 Ÿ 间的安装连接可靠,观察指示灯是否设置在相同的频道及 可控制的分组,闪光灯回电过程、进入过热保护状态、正 在调整焦距或闪光灯休眠可能导致漏闪,确保闪光灯在就 绪的状态,在使用前用测试按键唤醒及测试闪光灯。 检查接收器电源开关是否设置为正确的通信模式。比如 Ÿ 接收器设置了603-RX,将无法接收622的信号。 3. i-TTL闪光曝光过度或曝光不足 检查是否在相机机身或闪光灯上设置了曝光补偿;超出闪 光有效距离可能会曝光不足;TTL与手动闪光模式混合使用 时可能会过曝,此时手动灯适合作为背景灯使用。 在 使 用 过 程 中 遇 到 其 他 故 障 , 建 议 进 行 以 下 步 骤 解 Ÿ... - Page 45 规格 系统模式:数字FSK 2.4GHz无线收发器 距离: 100M 无线通道: 7个 闪光模式: i-TTL、手动闪光 同步模式: 前帘、后帘、高速同步 分组控制: A/B/C 3个组别 (622);A/B/C/D/E/F6个组别(603- 最高同步速度:1/8000s* 兼容闪灯:热靴闪光灯、影室闪光灯 输入:热靴(TTL触发,主触点触发) 输出:热靴(TTL输出),PC接口输出 固件升级接口:Micro USB接口 适用电池:AAX2节(支持1.2V充电电池) 待机时间:60小时 体积:91.5X53.5X43mm 重量:89克 有关最高同步速度 使 用 高 速 同 步 需 相 机 及 闪 光 灯 支 持 ,1/8000s或1/4000s为 相 机支持的最高同步速度。使用不支持高速同步的热靴闪光灯,...
- Page 48 V1.1...
Need help?
Do you have a question about the YN 622N II and is the answer not in the manual?
Questions and answers