Springfree S113 Assembly Instructions Manual
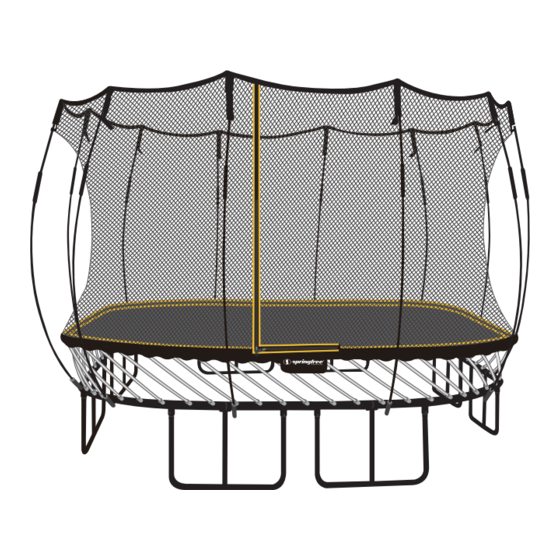
Trampoline & enclosure
Hide thumbs
Also See for S113:
- Assembly instructions manual (16 pages) ,
- Manual (16 pages) ,
- Assembly & installation (18 pages)
Advertisement
Quick Links
Download this manual
See also:
Manual
Trampoline & Enclosure Assembly Instructions
MAT DIAMETER
11 ft x 11 ft (3.4 m x 3.4 m)
MINIMUM NET HEIGHT FROM MAT
6 ft (1.8 m)
The information in this document is subject to change without notice.
© Copyright Springfree Trampoline Inc. 2005, 2014. All rights reserved.
MAT HEIGHT FROM GROUND
3 ft (0.9 m)
MAXIMUM USER WEIGHT
220 lbs (100 kg)
717706
Advertisement

Related Manuals for Springfree S113


Summary of Contents for Springfree S113
- Page 1 11 ft x 11 ft (3.4 m x 3.4 m) 6 ft (1.8 m) 3 ft (0.9 m) 220 lbs (100 kg) The information in this document is subject to change without notice. © Copyright Springfree Trampoline Inc. 2005, 2014. All rights reserved. 717706...
- Page 2 Do not hold onto, or place fingers Your Springfree trampoline has between the rods while someone is been designed for residential jumping on the trampoline.
- Page 3 Assembly Precautions: Read the following steps before beginning the assembly process. Keep small children at least 25 ft (7.5 m) away while assembling the trampoline; they could be injured by improperly assembled rods releasing and ejecting from the frame. Do not attempt to use the trampoline until it is completely assembled. Installation typically takes two hours to complete.
- Page 4 Part Quantity Part Quantity Spare C-clips White Mat Rods Black Net Rods Wrenches Spare Small Bolt & Nut TIP - Assemble the trampoline on a flat surface. Layout all parts listed as shown. SCAN HERE or visit http://springfr.ee/install-ov for a helpful installation overview video.
- Page 5 C-clips (Attached to Frame) Center Posts Lay out the remaining parts as shown. The coloured stickers all face upwards. If you are missing any parts please contact Springfree ® Trampoline directly. SCAN HERE or visit http://springfr.ee/step-2 for a helpful installation video for Step 2.
- Page 6 WARNING - Use the tools provided to fasten the nuts. Do not over tighten the nuts. Do not use power driver, torque wrench, or drill. TIP - Fastening the final two frame sections often requires additional effort. Two people may be required for assembly. Connect and fasten one frame section at a time together with the large nuts and bolts.
- Page 7 NOTE - Before proceeding, double check that all of the bolts and nuts are tightened. Use the tools provided to fasten the nuts. Do not over tighten the nuts. Do not use power driver, torque wrench, or drill. Lay out the mat with the yellow stripes facing upwards inside the trampoline frame. The blue tags on the mat should approximately align with the blue stickers on the frame.
- Page 8 NOTE - As you install the white mat rods into the mat rod sockets the net will become tight against the frame. Handle the net with care and be sure that it does not get caught or it may tear. Locate the green tag on the bottom edge of the net and match it with one of the green stickers...
- Page 9 WARNING - Treat any loaded rod with caution until you are sure it is properly installed or uninstalled. Keep your face well away from any loaded rod. WARNING - Both people must maintain a steady grip on the rod until it is securely installed in the mat rod holder.
- Page 10 Incorrect Position Have one person Inside Person: position them- Ensure that the mat selves inside the rod holder is frame of the tram- correctly positioned poline while the with the small tag other stands positioned outside Correct Position outside as shown. the mat rod holder pocket.
- Page 11 Outside Inside Person: Person: Rocking As the outside from your heels person pushes, to the balls of carefully pull the your feet, use rod in and up in your body weight the direction of the to push the white mat rod holder. mat rod towards the center of the mat.
- Page 12 WARNING - Treat any loaded rod with caution until you are sure it is properly installed or uninstalled. Keep your face well away from any loaded rod. NOTE - Follow the mat rod installation sequence. Do not install multiple mat rods in one location.
- Page 13 WARNING - Do not use the trampoline until it is completely assembled. Failure to follow these instructions may cause rods to break or eject from the trampoline frame. NOTE - Check that the net is not caught on the trampoline frame or the bolts – if the net catches, it may tear.
- Page 14 Secure Unfold and align WARNING - Treat any loaded rod with caution until you are sure it is properly installed or uninstalled. Keep your face well away from any loaded rod. Assemble the black net rods as shown.
- Page 15 WARNING - Never attempt to remove a black net rod from its net rod pocket or disengage (unlock) the rod sleeve while the black net rod is under tension. Insert ALL of the black net rods into the net rod pockets at the top edge of the net. Push the rod up into the pocket and past the catch.
- Page 16 If your trampoline is installed in an area susceptible to high winds or if you are looking for increased stability for your trampoline, we recommend the Springfree Ground Anchor, which has been designed specifically for the Springfree Trampoline. Ground Anchors can be purchased online at www.springfree.com.
Need help?
Do you have a question about the S113 and is the answer not in the manual?
Questions and answers