Electro-Voice rev Operating Instructions Manual
Uhf wireless microphone system
Hide thumbs
Also See for rev:
- Brochure (8 pages) ,
- Specification sheet (4 pages) ,
- Operating instructions manual (36 pages)
Table of Contents
Advertisement
Quick Links
Advertisement
Table of Contents

Related Manuals for Electro-Voice rev


Summary of Contents for Electro-Voice rev
- Page 1 Op er at ing In struc tions UHF WIRE LESS MI CRO PHONE SYSTEM User Guide...
-
Page 2: Table Of Contents
Handheld Trans mit ter, REV-PH ........ -
Page 3: Sec Tion 1 - Quick Set-Up
1. Do not con nect the re ceiver to any other equip ment yet! 1. With the trans mit ter and re ceiver on, mon i tor the REV Re ceiver main dis play screen. Note that the RF (1-100) 2. -
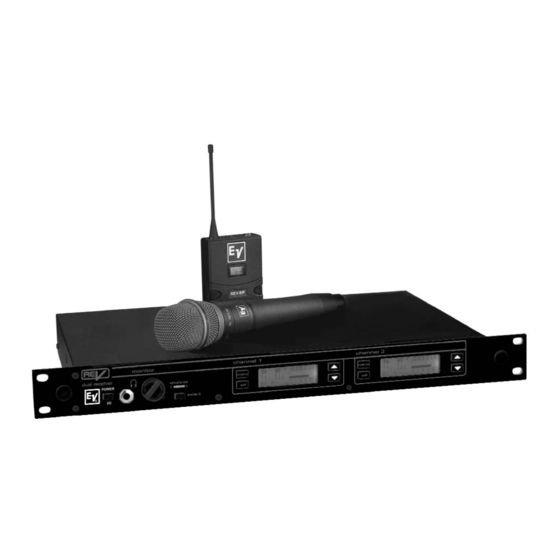
Page 4: Sec Tion 2 - Sys Tem De Scrip Tion
The REV Wire less Mi cro phone sys tem com bines fre quency quency (RF) sig nal pro cess ing of fer broad cast qual ity sig - - agil ity and ease of use like no other. The REV trans mit ters nal-to-noise and au dio clar ity. -
Page 5: Sec Tion 3 - De Tailed Com Po Nent De Scrip Tion
5. IEC Power Cord Connector 2. ¼” head phone jack with ad just able vol ume (chan nel se - - 6. XLR Bal anced Au dio Out put Con nec tor (two on REV-D) lec tion on REV-D) 3. Graph i cal Dis play 7. -
Page 6: 3.1 Re Ceiver Setup And Op Er A Tion
3.1 Re ceiver Setup and Op er a tion A. Re ceiver Setup E. ClearScan All: This func tion scans all of the groups (fac - - tory and user) and re turns a list of groups ranked by the 1. - Page 7 3. Low Hold RF Me ter will tell you if you have ad e quate put used for the REV is muted or turned down to a min i - - cov er age in the per for mance area. If the RF level mum level.
-
Page 8: Head Phone Operation
AUDIO 1 POWER 90-260 VAC 50-60Hz REMOTE ANTENNA REV-D ANTENNA up to 3 REV-DUAL (6 re ceiv ers) to two an ten nas with - - DUAL RECEIVER 12 Vdc 12 Vdc MADE IN U.S.A. 150 mA 150 mA HIGH... - Page 9 To power in line an tenna am pli fi ers, 12 volt power is avail able 1. Soft ware to mon i tor and con trol the REV re ceiv ers from a on the cen ter pin of the an tenna in jacks. This power is dis - -...
-
Page 10: Handheld Trans Mit Ter, Rev-H
Handheld Trans mit ter REV-HXX REV-HXX Con trols, Con nec tors, and In di ca tors Fig ure 7 Fig ure 6 View of Trans mit ter Controls Handheld Trans mit ter 1. Main Dis play - LCD (Chan nel, Fre quency and Bat tery 4. -
Page 11: Handheld Trans Mit Ter Setup And Op Er A Tion
3.2 Handheld Trans mit ter REV-HXX A. In sert Bat ter ies. Lower the bat tery cover by un screw ing G. RF Trans mit Level it com pletely. Slide down the in ner cover and in sert two 1. With the RF Trans mit Level dis played, press SET and AA bat ter ies, pos i tive ends to ward the dis play. -
Page 12: Handheld Trans Mit Ter, Rev-Ph
3.4 Handheld Trans mit ter REV-PHXX REV-PHXX Con trols, Con nec tors, and In di ca tors 7 5 5 0 5 0 Fig ure 8 Fig ure 9 Handheld Trans mit ter View of Trans mit ter Controls 1. Main Dis play - LCD (Chan nel, Fre quency and Bat tery 6. -
Page 13: Handheld Trans Mit Ter Setup And Op Er A Tion
A. In sert Bat ter ies. Re move the bat tery cover by un screw - - G. RF Trans mit Level ing it com pletely. In sert a 9V bat tery ter mi nal end first into 1. With the RF Trans mit Level dis played, press SET and the bat tery com part ment. -
Page 14: Bodypack Trans Mit Ter
Fig ure 13 Belt Clip Attachment REV-BP Con trols, Con nec tors, and In di ca tors 5. LCD Dis play (Chan nel or Fre quency, Bat tery Level In di ca tion) 1. An tenna - Flex i ble ¼ wave an tenna re mov able (re - - place ment part - see Sec tion 10) 6. -
Page 15: Bodypack Trans Mit Ter Setup And Op Er A Tion
REV re ceiver must also be put into in stru ment mode to op - - ti mize the sys tem for gui tar. Plug in the gui tar TA4 ca ble. -
Page 16: Sec Tion 4 - Re Ceiver Dis Play Screens And Func Tions
Sec tion 4 - Re ceiver Dis play Screens and Func tions Main Op er at ing Screen Fig ure 14 Main Operating Screen Dis play: 1. Group Num ber 18 fac tory + 2u user de fined 2. Chan nel Num ber: 01 to 16 3. -
Page 17: Group/Chan Nel Edit Screen
Group / Chan nel Edit Screen Fig ure 15 Group / Chan nel Edit Screen Dis play: 1. Fre quency Band Des ig na tion A or B 2. Group Num ber 18 fac tory + 2u user de fined 3. -
Page 18: Func Tions Screen
Func tions Screen Con trols: U s e [ U P ] [ D OW N ] t o s e l e c t a n d v i e w o t h e r func tions. Use [SET] to start the func tion Fig ure 16 Func tions Screen ClearScan All: searches all de fined fre quency groups for... -
Page 19: Clearscan Group
ClearScan Group: scans within the cur rently se - - chan nels lected fre quency group and dis plays the chan nels that are clear of in ter fer ence. Af ter press ing [SET] Press [MENU] to abort Af ter scan ning the cur rently se lected group, ClearScan will dis play the chan nels that are free of in ter fer ence. -
Page 20: Au Dio Edit
3. [UP] and [DOWN] change set ting that is flash ing. Gui tar Mode: When us ing the REV-BP as a wire less gui tar sys tem, the Bodypack trans mit ter and the re ceiver need to be set in Fig ure 24 Gui tar mode for op ti mal per for mance. -
Page 21: Sound Check Screen
Sound Check Screen: Dis play: 1. Bat tery Sta tus 2. Peak Au dio level held while screen is dis played Fig ure 27 3. Range of RF Sig nal Strength Sound Check Screen 4. Count Tone on or off in di ca tor 5. -
Page 22: Clear Group
Clear Group: Clear Group will de lete all chan nels within the se lected user group. Press [SET] to clear the group, and place the unit in the Group/Chan nel edit screen with Group=1, Chan nel=1. Group will be flash ing to en able the se lec tion of a new Fig ure 31 group. -
Page 23: Can Bus Ad Dress
Fig ure 34 Can Bus Screen REV-Dual has two ad dresses tied to gether. The Chan nel 1 is al ways even and Chan nel 2 is odd. Press [MENU] to re turn ra dio to its pre vi ous state. -
Page 24: Sec Tion 5 - Trans Mit Ter Screens And De Tail Func Tions
Sec tion 5 - Trans mit ter Screens and De tail Func tions Trans mit ter Dis play and Con trols: Dis play Mode: 1. Group and Chan nel 2. Fre quency 3. Trans mit ter Gain 4. RF Trans mit Power 5. -
Page 25: Sec Tion 6 - Guide Lines For Best Performance
- - The fac tory pre sets on the REV are op ti mized for con di tions quency co or di na tion is nec es sary to avoid in ter fer ence. All... -
Page 26: Sec Tion 7 - Trou Ble Shoot Ing Guide
In sert fresh bat tery in trans mit ter Interference An other REV sys tem in the in stal la - - Make sure all the chan nels in use are tion is on the same chan nel or the from the same group. - Page 27 Trou ble Shoot ing Guide (con tin ued) So lu tions Prob lem Pos si ble Causes Move the re ceiver to a dif fer ent Interference (continued) Re ceiver is too close to dig i tal sig nal location pro ces sor or sim i lar de vice Use ClearScan to change the op er at - - Strong elec tro mag netic field from...
-
Page 28: Sec Tion 8 - Tech Ni Cal Spec I Fi Ca Tions
(REV-PH with RE510 head) ........ -
Page 29: Sec Tion 9 - Fac Tory Ser Vice
Sec tion 9 - Fac tory Service Fac tory Ser vice (North Amer ica) If fac tory ser vice is re quired, ship the unit pre paid in its orig i nal car ton to: EV Au dio Ser vice c/o Telex Com mu ni ca tions, Inc. -
Page 30: Sec Tion 10 - Ac Ces So Ries And Parts
Sec tion 10 - REV AC CES SO RIES AND PARTS MODEL# OR DER # ½ Wave Colinear Rx An tenna C1, C2 (614-674 MHz) CLA-3 870658-3 (674-725 MHz) CLA-5 870658-5 (722-760 MHz) CLA-6 870658-6 D, E (798-865 MHz) CLA-8 870658-8 ½... - Page 31 REV AC CES SO RIES AND PARTS (con tin ued) MODEL# OR DER # Bodypack Pouch WP-1000 879553 Gui tar Cord MAC-G2 879526 767a Dynamic Head RC2-767A ACC000008D7 976 Dy namic Head RC2-967 ACC00000D9 RE410 Con denser Head RC2-410 ACC00000C4...
- Page 32 Made in U.S.A. March 2007 LIT000004TX Rev B...
Need help?
Do you have a question about the rev and is the answer not in the manual?
Questions and answers