Table of Contents
Advertisement
Quick Links
Advertisement
Table of Contents

Related Manuals for IDX VL-2PLUS


Summary of Contents for IDX VL-2PLUS
- Page 1 9. Schematics 1. FJ-3B charging board 10. Mounting layout 1. FJ-3B charging board 11. Wiring Diagram 12. Parts list 13. Packing Diagram IDX Company, Ltd. ©2008-2009 IDX Company, Ltd. All right reserved. Unauthorized copying and distribution is a violation of...
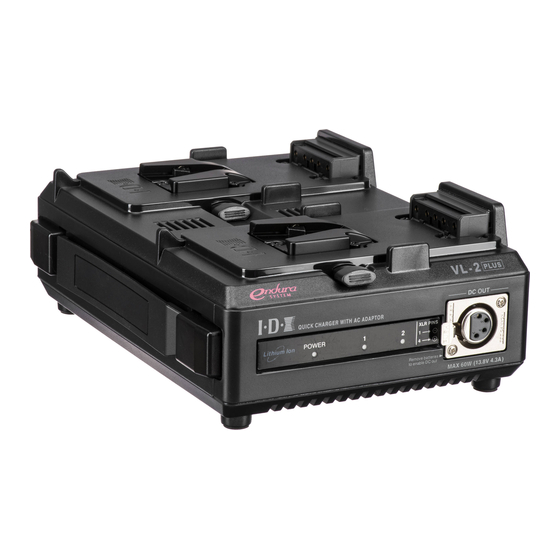
- Page 2 2-Channel Sequential Quick Charger with AC Adaptor VL-2PLUS. If any part or circuit is changed or modified, this information will be followed by supplementary service manual instructions which should be to be filed with this original manual. Model: VL-2PLUS IDX Company, Ltd.
- Page 3 Charge method : Li-ion -> Constant Current / Constant Voltage Ni-Cd -> Constant Current (-△V) Quick Charge Current : All IDX ENDURA & NP-L type Li-ion batteries: 2.3A All IDX Ni-Cd batteries: 1.9A DC Output : Maximum output in AC operation ->...
- Page 4 NO. XC09T0117 V1.0 3. Safety Precautions Do not attempt to open or modify this unit. All work should be carried out by IDX authorized service personnel only. Use only with compatible batteries listed in this manual. Charging non-compatible batteries may cause fire, electrical shock or other incidents.
- Page 5 2. Battery Check: After 3 seconds the LED will remain Red indicating that the VL-2PLUS is operating in quick charge mode, if a battery has a fault the LED will flash Amber. If a battery cannot be recovered or is detected as over-charged, the LED will flash Amber indicating a battery fault.
- Page 6 Push to release the battery from mount Cooling Fan Cooling inside of the VL-2PLUS Power Switch Turns ON/OFF the power of VL-2PLUS AC Inlet This is the unit’s IEC power socket (3-pin). Use the included accessory power cord to connect to at AC120~240V power outlet.
- Page 7 7. Disassembly Method 1. Removal of the Top cover 1. Remove the 4 rubber feet and then unscrew the 4 screws inside the feet. 2. Unclip the 2 lock-clip at the sides of the top cover carefully Model: VL-2PLUS IDX Company, Ltd.
- Page 8 DO NOT USE THE PART NUMBER SHOWN ON THE FOLLOWING DRAWINGS FOR ORDERING PARTS. THE CORRECT AND UPDATED PART NUMBER IS SHOWN IN THE PARTS LISTS, AND MAY BE SLIGHTLY DIFFERENT OR AMENDED SINCE THESE DRAWINGS WERE PREPARED. Model: VL-2PLUS IDX Company, Ltd.
- Page 18 NO. XC09T0117 V1.0 12. Parts list 1. General Parts Model: VL-2PLUS IDX Company, Ltd.
Need help?
Do you have a question about the VL-2PLUS and is the answer not in the manual?
Questions and answers