Table of Contents
Advertisement
Quick Links
Advertisement
Table of Contents

Related Manuals for Cobra 2004 cm50


Summary of Contents for Cobra 2004 cm50
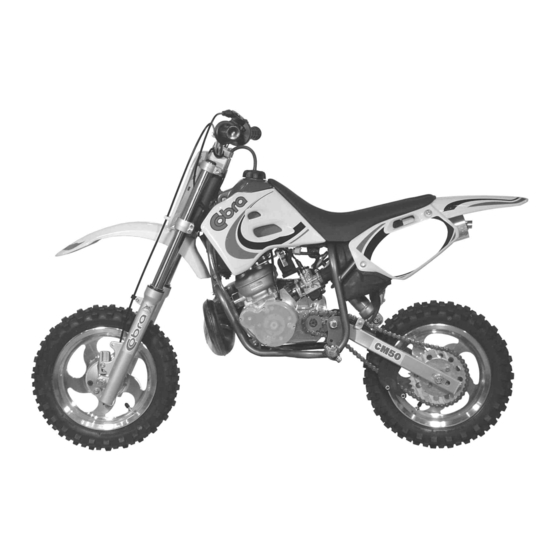
- Page 1 2004 CM50 Owners / Service / Parts “CHAMPIONS START HERE”...
- Page 2 For parts orders contact your local dealer To locate your closest Cobra dealer log on to www.cobramotorcycle.com or call (330) 549-9600 If you need technical assistance contact your local dealer or call the Cobra Technical Support Hotline at (330) 549-9603 Cobra Motorcycle MFG., Inc.
- Page 3 “WARNING” THE COBRA CM50 IS A COMPETITION MODEL ONLY AND IS NOT MANUFACTURED FOR, NOR SHOULD IT BE USED ON PUBLIC STREETS, ROADS OR HIGHWAYS.
-
Page 4: Table Of Contents
Table Of Contents Specifications - General....................5 Specifications - Torque Values ..................7 Optional Components ......................8 Break-In Procedure ......................9 Starting Procedure ......................10 General Tips........................11 Maintenance........................12 Schedule & Tips ......................12 M1: Replacing Transmission / Clutch Lubricant ............13 M2: Chain adjustment....................14 M3: Front brake adjustment..................15 M4: Rear brake adjustment ..................15 M5: Air Filter Cleaning ....................16 M6: Fork Oil Replacement ..................17... - Page 5 Parts – Front Wheel ....................34 Parts – Plastic Bodywork & Seat ................35 Parts – Rear Brake.....................36 Parts – Rear Wheel....................37 Parts – Shock......................38 Parts – Swingarm Assembly..................39 Service ..........................40 Engine Service......................40 Engine Removal .....................41 Complete Engine Disassembly Procedure............42 Top End Disassembly Procedure ................42 Splitting the Cases ....................43 Engine assembly ....................44 Clutch ...........................49...
-
Page 6: Specifications - General
Float Height 16mm + 0.5mm (0.63” + 0.020”) Transmission Speed Single Clutch Cobra 3 shoe Final drive ratio 13/37 T Chain 88 links 420 Transmission / clutch oil type Cobra Venom 3 Shoe Clutch Milk, or Dexron III Quantity 235 ml (8.0oz) - Page 7 Chassis Front tire 2.50 - 10 Pressure 15 psi minimum Rear tire 2.75 - 10 Pressure 15 psi min. (20 psi for hard pack or rocky conditions) Front fork Marzocchi 32mm Fork oil type SAE 20 weight Fork oil amount 200 ml (6.8 oz) oil change, 220 ml (7.4 oz) rebuild Collapsed fork oil height 70 mm (2.75”) spring in, no spacer...
-
Page 8: Specifications - Torque Values
Specifications - Torque Values Torque Value Size & Fastener ft-lb in-lb Remarks Cylinder head nuts ¼” Crankcase bolts 6 x 1.0 Spark plug (SP) (SP) (SP) 14 x 1.25 Stator bolts Stator cover bolts Clutch cover bolts 6 mm Clutch 10 x 1.25*** Engine mount bolts 8 mm... -
Page 9: Optional Components
Optional Components Call your dealer, or the factory, for details • Carburetor jets • Sprockets o Front o Rear • Suspension Springs Weight of Rider (lb) Fork Spring Shock Spring Less than 38 (light) KCMZ0012A SCMUOH04 (275 lb/in) 38 – 45 (std) KCMZ0012 SCMUOH05 (285 lb/in) 46 to 55 (stiff) -
Page 10: Break-In Procedure
Break-In Procedure Your Cobra CM50 is a close-tolerance high performance machine and break-in time is very important for maximum life and performance. The CM50 can be ridden hard after the first ½ hour break-in time but it is recommended that no adjustments are made to the carburetion or suspension until the full 8 hours of bike break-in has elapsed. -
Page 11: Starting Procedure
(i.e. the side of the cylinder is warm to touch). CAUTION: Never rev an engine full throttle when it's cold or slightly warmed up. Cobra recommends that you tell your child to take it easy the first couple of minutes in practice until the engine comes up to full operating temperature. -
Page 12: General Tips
General Tips Always wear a helmet and other protective riding gear. Cobra recommends that you tell your child to take it easy the first couple of minutes in practice until the engine comes up to full operating temperature. Make sure your riders’ foot is not resting on the foot brake while they are... -
Page 13: Maintenance
• Every 10 hours of operation Replace the fork oil. Have the shock oil replaced by a Certified Cobra Mechanic. CAUTION: Because of the amount of heat generated by the clutch and engine during extended periods of riding, it is advisable to remove the ignition cover afterward to allow the ignition to cool off. -
Page 14: M1: Replacing Transmission / Clutch Lubricant
M1: Replacing Transmission / Clutch Lubricant Tools needed: • 225 ml (7.6 oz) Cobra Venom 3 Shoe Clutch Milk (Part # MCMUGF01), or Dexron III Automatic Transmission Fluid. • 13 mm combination wrench Procedure: 1. Begin this procedure with a bike that has been ridden more than 5 minutes but less than 10 minutes. -
Page 15: M2: Chain Adjustment
4. After it has drained, reinstall the bolt being sure that the copper gasket is in place. Torque to 15 Nm (11 ft-lb). 5. Reapply oil from oil fill plug 235 cc Cobra Venom 3 Shoe Clutch Milk, or Dexron III Automatic Transmission Fluid, thru the fill plug. -
Page 16: M3: Front Brake Adjustment
M3: Front brake adjustment Tools recommended for front brake maintenance: • 10mm open end wrench Figure 3, from the brake lever Figure 4, from the brake hub From the brake lever: 1. Loosen the locking nut on the brake lever. 2. -
Page 17: M5: Air Filter Cleaning
NOTE: The Cobra is equipped with a special designed Air box. It is very important to keep the air filter clean and properly oiled with high quality water-resistant foam filter oil. It’s very important to oil your filter consistently each time because varied amounts of oil will change your carburetor jetting. -
Page 18: M6: Fork Oil Replacement
M6: Fork Oil Replacement Tools required • 5 & 6 mm Allen wrench • 19 mm wrench or socket (two required) • Spring clip remover Disassembly 1. Remove the front wheel. 2. Remove the fork legs from the triple clamps. 3. -
Page 19: Parts
Parts Parts – Airbox and Inlet System Figure 7 Airbox and Inlet System REF # PART # DESCRIPTION ZCMU0032 GASKET – REED TO CYLINDER ECKG0205 REED VALVE ZCMU0031 GASKET – MANIFOLD TO REED ECKG0203 INLET MANIFOLD HCWF0601 6MM FLAT WASHER HCBC0625 M6X25 SOCKET HEAD CAP SCREW MCKGHO01... - Page 20 Parts – Bars and Controls Figure 8 Bars and Controls REF # PART # DESCRIPTION FCMU0066 THROTTLE ASSEMBLY FCMU0068 THROTTLE COVER TCMU0008 GRIPS (SET OF TWO) FCMU0067 THROTTLE CABLE FCMU0033 KILL SWITCH ASSEMBLY KCMZ0001 M8X50 SOCKET HEAD CAP SCREW (4 REQ’D) KCMZ0003 LOWER HANDLE BAR CLAMP (2 REQ’D) KCMZ0002...
-
Page 21: Parts - Carburetor
Parts - Carburetor Carburetor REF. # PART # DESCRIPTION RCCM0001 COMPLETE CARBURETOR 14MM RCMU0305 CARB SLIDE RCMU0601 NEEDLE RCMU0002 ATOMIZER RCMU0092 MAIN JET RCMU0055 PILOT JET CHOKE JET RCMU0301 FLOAT RCMU0102 RUBBER CABLE CAP SEAL RCMU0003 CABLE ADJUSTER RCMU0006 TOP CARB SCREW RCMU0106 CARB TOP ZCMU0007... -
Page 22: Parts - Coolant System
Parts – Coolant System Figure 10 Coolant System REF # PART # DESCRIPTION ECMU0061 RADIATOR WITH CAP MCMUHO02 RADIATOR HOSE LEFT MCMUCL02 HOSE CLAMP ECHA003 MOUNTING BRACKET – RADIATOR BOTTOM HCBC0607 M6X50 SOCKET HEAD CAP SCREW HCNL0601 6MM LOCK NUT MCKGGR00 GROMMET –... -
Page 23: Parts - Electrical System
Parts – Electrical System Figure 11 Electrical System REF # PART # DESCRIPTION IAMU0001 COIL W/SPARK PLUG CAP ECMU0065 SPARK PLUG, CHAMPION (8339-1) ECMU0067 OPTIONAL HOTTER PLUG (8332-1) ECMU0066 OPTIONAL COLDER PLUG (8904-1) FCMU0033 KILL SWITCH ASSEMBLY HCBC0516 SCREW, M5 X 16 (2 PER) HCNL0601 6MM LOCK NUT ECMU1210... -
Page 24: Parts - Engine - Bottom End And Transmission
Parts – Engine – Bottom End and Transmission Figure 12 Engine Bottom End and Transmission REF # PART # DESCRIPTION ECKG0017 CRANKCASE, IGNITION SIDE ECMU0020L BEARING, TRANSMISSION PRECISION ECKG0004 SNAP RING, WATER PUMP ZCKG2001 GASKET, CRANKCASE ECMU0103 SECONDARY SHAFT, TRANSMISSION WITH GEAR ECMU0017 SEAL, CRANKSHAFT ECMU0016... -
Page 25: Parts - Engine - Clutch And Kick Starter
Parts – Engine – Clutch and Kick Starter Figure 13 Engine – Clutch and Kick Starter REF # PART # DESCRIPTION ECMU0206 CLUTCH COVER COMPLETE WITH KICK LEVER ZCMU0030 CLUTCH COVER GASKET ECMU0207 KICKSTART GEAR SMALL HCBC0608 M6X55 SHCS CLUTCH CVR SCREW LNG (2 REQD) CENTER HCBC606 M6X45 SHCS CLUTCH COVER SCREW SHORT (4 REQD) ECMUOO37... -
Page 26: Parts - Engine - Ignition And Water Pump
Parts – Engine – Ignition and Water Pump Figure 14 Engine – Ignition and Water Pump REF # PART # DESCRIPTION ECKG0001 IGNITION COVER ZCKG0101 IGNITION COVER GASKET HCBC0802 COVER SCREW, SHCS 802X1-3/4 ECKG0070 WATER PUMP BELT ECKG0075 WATER PUMP PULLEY, FAN TYPE - DRIVEN ECMU0080 BELT RETAINER HCBC1033... -
Page 27: Parts - Engine - Top End
Parts – Engine – Top Figure 15 Engine – Top End REF # PART # DESCRIPTION ECKG0041 CYLINDER ZCKG0002 BASE GASKET ECMU0043 PISTON KIT ECMU0055 PISTON RINGS (2 PER SET) ECMUSR00 SNAP RING FOR PISTON (2 REQ'D) ECKG0012 WRIST PIN ECMU0077 BEARING, WRIST PIN ZCMUOR07... -
Page 28: Parts - Exhaust System
Parts – Exhaust System Figure 16 Exhaust System REF # PART # DESCRIPTION XCCM2004 2004 CM EXHAUST PIPE ZCMUOR30 HEADER PIPE O-RINGS (2 REQ’D) XCMU0005 EXHAUST SPRING - SHORT MCMUGR06 PIPE GROMMET MALE MCMUGR07 PIPE GROMMET FEMALE MCMUSP02 PIPE GROMMET SPACER HCWF1478 PIPE GROMMET WASHER HCBF0635... -
Page 29: Parts - Forks & Triple Clamps
Parts – Forks & Triple Clamps Figure 17 Front Forks and Triple Clamp REF # PART # DESCRIPTION KCMZ0029 OUTER FORK LEG – RIGHT (NON BRAKE) SIDE KCMZ0031 OUTER FORK LEG ASSY – RIGHT WITH SEAL & SWIPER NOT SHOWN KCMZ0020 OUTER FORK LEG –... -
Page 30: Parts - Forks - Leg Assembly
Parts – Forks – Assembly Figure 18 REF # PART # DESCRIPTION KCMZ0004 FORK PLUG – BLACK KCMZ0007 SNAP RING FOR FORK CAP KCMZ0008 INNER FORK CAP - WHITE KCMZ0009 O-RING UNDER FORK CAP KCMZ0111 PRELOAD SLEEVE KCMZ0012 FORK SPRING KCMZ0013 SWIPER KCMZ0014... -
Page 31: Parts - Frame - Engine, Tank, And Pipe Mounts, Brake Snake
Parts – Frame – Engine, Tank, and Pipe Mounts, Brake Snake Figure 19 Frame – Engine, Tank, and Pipe Mounts, Brake Snake REF # PART # DESCRIPTION FAMU0004 FRAME 2004 CM50 HCBH1403 SWINGARM BOLT HCNL1402 SWINGARM LOCK NUT (M14X1) HCBH0880 M8X80 SOCKET HEAD CAP SCREW HCNL0801... -
Page 32: Parts - Frame - Seat, Fender, R Side Panel, Brake Pedal, Silencer & Shock Mounts
Pedal, Silencer & Shock Mounts Figure 20 Frame – Seat, Fender, Right Side Panel, Brake Pedal, Silencer & Shock Mounts REF # PART # DESCRIPTION FAMU0004 FRAME 2004 CM50 HCBB0630 M6X30 BUTTON HEAD CAP SCREW HCHA0003 6MM CLIPNUT HCBF0620 M6X20 FLANGE HEAD BOLT... -
Page 33: Parts - Frame - Radiator, Footpeg, Chain Roller, And Airbox Mounts
Parts - Frame – Radiator, Footpeg, Chain Roller, and Airbox Mounts Figure 21 Frame – Radiator, Footpeg, Chain Roller, and Airbox Mounts REF # PART # DESCRIPTION FAMU0004 FRAME 2004 CM50 ECHA003 MOUNTING BRACKET – RADIATOR BOTTOM HCBC0607 M6X50 SOCKET HEAD CAP SCREW HCNL0601 6MM LOCK NUT MCKGGR00 GROMMET –... -
Page 34: Parts - Front Brakes
Parts – Front Brakes Figure 22 Front Brakes REF # PART # DESCRIPTION BCMU0300 BRAKE HUB – FRONT BCMU0113 BRAKE ARM – FRONT BCMU0005 CABLE CLAMP, WASHER & NUT BCMU0006 CABLE ADJUSTOR BCMU0110 BRAKE SHOE (PAIR) BCMU0010 SPRING – BRAKE RETURN BCMU0011 PUSH NUT –... -
Page 35: Parts - Front Wheel
Parts – Front Wheel Figure 23 Front Wheel REF # PART # DESCRIPTION WAMU0300 FRONT WHEEL COMPLETE WCMU0250 FRONT TIRE 10X2.50” WCMUTU10 TUBE 10” WCMU0014 FRONT AXLE HCWF1202 WASHER – AXLE WCMU0023 FRONT WHEEL SPACER WCMU0020 BEARING – WHEEL (2 REQ’D) WCMU0004 SPACER –... -
Page 36: Parts - Plastic Bodywork & Seat
Parts – Plastic Bodywork & Seat Figure 24 Plastic and Seat REF # PART # DESCRIPTION NOT SHOWN TCMU0020 GRAPHIC KIT TCHA0107 FRONT FENDER NOT SHOWN HCBF0616 FENDER BOLT, M6X16 FLANGE HEAD (4 REQD) TCMU0005 NUMBER PLATE - FRONT NOT SHOWN HCBF0620 M6X20 FLANGE HEAD BOLT –... -
Page 37: Parts - Rear Brake
Parts – Rear Brake Figure 25 Rear Brake System REF # PART # DESCRIPTION BAMU0301 BRAKE PEDAL BCMU0008 CABLE – BRAKE SNAKE BCMU0009 CRIMP – BRAKE SNAKE HCBB0803 M8X40 BUTTON HEAD SCREW HCNL0801 8MM LOCK NUT HCBH0602 M6X25 HEX HEAD BOLT (BRAKE STOP ADJUST) HCNS0601 6MM NUT BCCM0105... -
Page 38: Parts - Rear Wheel
Parts – Rear Wheel Figure 26 Rear Wheel REF # PART # DESCRIPTION WACM0100 WHEEL COMPLETE – REAR WCMU0275 TIRE – REAR 10X2.75” WCMUTU10 TUBE – 10” PCMU0137 SPROCKET – 37T PCMU0059 RUBBER SPROCKET DAMPERS WCMU0016 REAR AXLE HCPA0002 AXLE HEAD FIXING PLATE WCMU0001 REAR WHEEL SPACER (SPROCKET SIDE) WCMU0020... -
Page 39: Parts - Shock
Parts – Shock Figure 27 REAR SHOCK REF# PART # DESCRIPTION SACM2004 SHOCK ABSORBER SCMUOH05 SPRING – STANDARD (285 lb/in) SCMUOH04 SPRING – LIGHT (275 lb/in) SCMUOH06 SPRING – HEAVY (295 lb/in) HCBC1001 M10X45 SHCS... -
Page 40: Parts - Swingarm Assembly
Parts – Swingarm Assembly Figure 28 Swingarm REF # PART # DESCRIPTION GACM2004 SWINGARM ASSEMBLY (CONTAINS ITEMS 1 - 13) GAMU0004 SWINGARM GCMU0001 SWINGARM BUSHING (SINGLE PIECE) GCMU0009 SPACER - PIVOT TUBE GCMU0017 CHAIN GUARD HCFH0516 M5X16 FLAT HEAD SCREW HCWF0501 5MM FLAT WASHER HCNL0501... -
Page 41: Service
• There appears to be a wide range of variability in reading compression gauges across the country. • The head volume of this Cobra Motorcycle is very small and so requires many kicks ~20 before you establish the most accurate reading possible. -
Page 42: Engine Removal
dropped to 90% of its original value the engine will be down on power and would benefit from a rebuild. When it’s dropped to 80% it really needs rebuilt! Using the table below will help you determine monitor the condition of your top end. Engine is Fresh Engine Down on Power Engine NEEDS Rebuilt... -
Page 43: Complete Engine Disassembly Procedure
Remove the special nut / starter gear that holds on the clutch (special tool available, contact your local dealer). With the Cobra flywheel / clutch puller (#MCMUTL68), remove the clutch from the crankshaft (details in Clutch Service portion of this manual). -
Page 44: Splitting The Cases
INSPECTION NOTE: Inspect the cylinder head for deposits and abrasions. 1. If there are deposits they should be removed a. Black oily deposits (indicating a rich mixture or improper oil type/quantity) can be removed with solvent b. Crusty deposits (indicating dirt ingestion) can be removed with solvent and may require some scraping. -
Page 45: Engine Assembly
CAUTION: Take caution when handling the crankshaft. It is the main power transfer to the rest of the engine. If it is out of alignment, it will cause premature failure of your bearings which can lead to serious damage to the cylinder and the rest of the engine. - Page 46 Figure 29 Figure 30...
- Page 47 9. Insert dowel pins in the left side case as shown in figure 27. Figure 31 10. Apply gasket sealer (ThreeBond 1104 gasket material or equivalent) to the mating surfaces of both crankcase halves. 11. Apply the crankcase gasket to the left crank case half being sure to install the gasket behind the connecting rod.
- Page 48 16. Install the piston rings. CAUTION: Be sure to align the piston such that the arrow on the top piston surface points to the exhaust (front of bike/engine). 17. Apply gasket sealer (ThreeBond #1104, semi-drying liquid gasket material) to the cylinder deck areas around the coolant passage and cylinder studs as shown in figure 29.
- Page 49 21. Install cylinder head insert. 22. Install O’rings as shown in figure 31. Figure 35 23. Install the cylinder head and torque to 9.2 ft-lb (12 Nm) 24. Install stator reinstalling the grommet and wires (snug the bolts). 25. Install the rotor per Rotor Installation section, under the S3: Ignition portion of this manual.
-
Page 50: Clutch
3. Remove the clutch nut (not left hand thread) on the end of the crankshaft with the clutch nut removal tool. 4. Attach the COBRA CLUTCH PULLER. There are three 6mm clutch puller holes located on the ends of the center hub. (figures 32 & 33) You must use a draw type puller to remove the clutch. - Page 51 CLUTCH WASHER STACKUPS: Once the clutch is removed, and cool to touch, carefully put it into a vice and remove the center shoulder bolt out of each clutch shoe. You will probably have to heat the center hub again to remove the bolts. Once you get a bolt loosened, carefully remove it with the shoe and observe the way the spring washers are stacked.
- Page 52 Clutch shoe wear: • If the clutch has been slipping and shows signs of glazing, it is best to replace the shoes. We have found that once the shoes are glazed, even if deglazed with emery paper or a file, the performance is reduced. •...
- Page 53 CLUTCH ASSEMBLY: 1. After cleaning or replacing the spring washers, reassemble the stack up of washers. CAUTION: It is important to reassemble the washer stack to that recommended or to your own specialized stack. CAUTION: It is also important that all three shoes are stacked the same. (See figure 34) 2.
-
Page 54: Ignition
Prior to tightening the six clutch cover bolts, press the kick lever down to ensure proper kick gear alignment. Figure 40 9. Put pipe back on and add oil (235 ml (8.0 oz) Cobra 3 Shoe Clutch Milk (Part # MCMUGF01) or Dexron III ATF. Ignition Stator care Stator failure will result from running the bike hot. -
Page 55: Ignition
3. Improper spark plug heat range. Never run a hotter plug than the specified spark plug. 4. Clutch slippage. See “CLUTCH” section for causes of slippage. CAUTION: • Because of the amount of heat generated by the clutch and engine during extended periods of riding, it is advisable to remove the ignition cover afterward to allow the ignition to cool off. -
Page 56: Cooling System
6. Set the dial indicator to zero 7. Turn the crankshaft clockwise until the dial indicator reaches 0.05)” (1.3mm) from top dead center. 8. Line up the lines on the stator and the rotor (figure 37). Otherwise loosen the three 10X32 bolts to adjust the stator. 0.050”... - Page 57 Cobra has tested numerous brand name automotive and racing coolant / antifreeze solutions and has found Liquid Performance Propylene Glycol based Mini Coolant / Antifreeze to have the greatest effect on reducing cylinder head temperatures. Radiator fluid removal: 1. Remove the coolant drain plug (A) on the front of the engine case (figure 39).
- Page 58 6. Remove kick-starter cover using a 5mm hex key. (item 3 six places) 7. Remove clutch and basket. 8. Unscrew water elbow fitting. (Figure 40) Figure 44 8. Remove ignition cover using a 9/64” hex key (four places) 9. Remove belt retainer screw using a 1/8” hex key. (Figure 41 - item 1) 10.
- Page 59 Figure 47 14. Reinstall new bearings, seal and impeller. Clean all threads and use green (wicking / bearing retainer) thread locker. 15. Using a liberal amount of grease on the outside seal, bearings and inside of case, reinstall bearing assembly by using a 0.500” ID by 1.000” OD steel tube 2” long and tap on end of tube per figure 44.
-
Page 60: Es6: Fuel & Air System
Fuel & AiR System Carburetor: Tools recommended for Carburetor carburetor service: • Small flat head screwdriver REF. # PART # DESCRIPTION RCCM0001 COMPLETE CARBURETOR 14MM • WD-40 RCMU0305 CARB SLIDE • 8mm socket RCMU0601 NEEDLE RCMU0002 ATOMIZER RCMU0092 MAIN JET RCMU0055 PILOT JET CHOKE JET... - Page 61 Your Cobra is equipped with an adjustable carburetor. Some fine-tuning may be needed according to weather condition and altitude. Proper jetting is very important for engine performance and engine life. Serious damage to the engine can occur if not properly adjusted.
- Page 62 have water or dirt in the carburetor bowl. Use automotive carburetor cleaner or WD-40 to clean the carburetor inside and out. STOCK CARBURETOR SETTINGS The 2003 KING stock carburetor settings from the factory are: • 55 pilot jet • 92 main jet Cleaning the carburetor: Clean the carburetor in a well-ventilated area, and take care that there is no spark or flame anywhere near the working area;...
-
Page 63: Exhaust
Reeds: • The reeds must lay flat on the reed cage. • If the reed tips aren’t lying flat, replace them immediately. • The reeds must have a tight seal on the reed cage. • If the reed is damaged in any way, replace it. This means cracks, chips, and ruptures. -
Page 64: Wheels & Tires
• 11mm wrench or socket • 19mm wrench The Cobra is the only 50cc to have the rear wheel damping system. This feature prevents engine impact shock caused by hard landings. This design allows the cushioned sprocket to move forward and backwards separately from the wheel. - Page 65 Rear wheel pullers Disassembly: 1. Remove axle, back wheel assembly. 2. Pull the rear wheel pullers out of the back of the swing arm. Figure 53 Rear wheel alignment: By eye, ensure that the rear sprocket is running true (in-line, planar) with the front sprocket.
-
Page 66: Cs2: Suspension
Suspension See the parts and optional components sections of this manual for the springs and valving available for heavier and lighter riders. Front forks tuning The front forks are designed with the damping components in separate fork legs. The compression damping duties are performed in the right fork leg and the rebound damping duties are performed in the left fork leg. -
Page 67: Troubleshooting
Troubleshooting 1) Engine not behaving properly a) Carburetor top is installed backwards (happens a lot) b) The carburetor slide indexing pin is missing 2) Engine is down on power a) Clutch engagement is not set properly b) Jetting is incorrect c) Silencer needs repacked d) Exhaust pipe Has excess carbon buildup... -
Page 68: Index
Index Air Filter Forks Maintenance........16 Adjustment........65 Airbox Parts ..........28 Parts ..........18 Frame Parts........30 Bars and Controls ......19 Front Brake Break-In..........9 Adjustment........15 Carburetor Parts ..........33 Parts ..........20 Front Wheel Parts ......34 Service ...........59 Fuel System Specifications ........5 Service ...........59 Chain General Tips........11 Adjustment........14 Hardware and Fasteners Chassis... - Page 69 Bars and Controls ......19 Damper ..........63 Bottom End & Transmission ..23 Parts ..........37 Carbutetor........20 Pullers ..........64 Clutch & Kick Starter....24 Reeds ..........62 Coolant System ......21 Shock Electrical ........22 Parts ..........38 Engine ..........23 Spark Plug Exhaust ..........27 Recommended .......5 Forks..........28 Specifications ........5 Frame ..........30 torque values........7 Front Brake........33...
Need help?
Do you have a question about the 2004 cm50 and is the answer not in the manual?
Questions and answers