Table of Contents
Advertisement
Available languages
Available languages
Quick Links
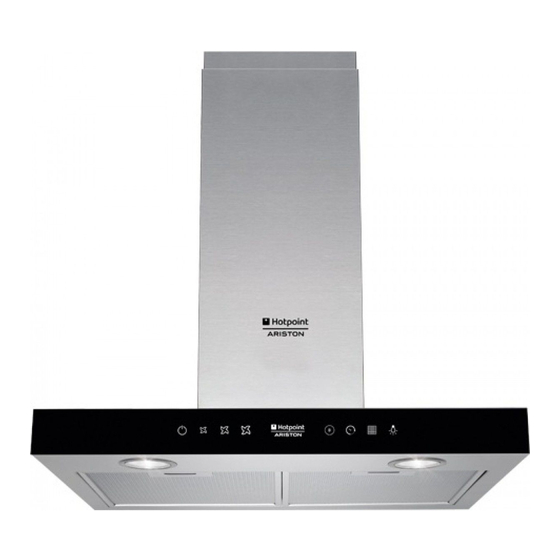
HLB 6.7.AT(CF)
HLB 6.7.AT(CF)
HLB 6.7.AT(CF)
HLB 9.8ASH (CF) X/HA
HLB 9.8ASH (CF) X/HA
HLB 9.8ASH (CF) X/HA
Italiano
Istruzioni per l'uso
CAPPA
Sommario
Istruzioni per l'uso,1
Avvertenze,10
Assistenza,22
Installazione,24
Comandi TBOX-LUCE,25
Manutenzione e cura,28
Anomalie e rimedi,29
English
Operating Instructions
COOKER HOOD
Contents
Operating Instructions,1
Warnings,11
Assistance,22
Installation,30
TBOX-LUCE controls,31
Maintenance and care,33
Troubleshooting,35
Français
Mode d'emploi
HOTTE DE CUISINE
Sommaire
Mode d'emploi,1
Installation,36
Español
Manual de instrucciones
CAMPANA
Sumario
Manual de instrucciones,1
Advertencias,14
Asistencia,22
Instalación,43
Portuges
Instruções para a utilização
EXAUSTOR
Índice
Instruções para a utilização,1
Advertências,15
Assistência,22
Instalação,49
Advertisement
Table of Contents

Related Manuals for Hotpoint HLB 6.7.AT


Summary of Contents for Hotpoint HLB 6.7.AT
-
Page 1: Table Of Contents
HLB 6.7.AT(CF) HLB 6.7.AT(CF) HLB 6.7.AT(CF) HLB 9.8ASH (CF) X/HA HLB 9.8ASH (CF) X/HA HLB 9.8ASH (CF) X/HA Français Mode d’emploi HOTTE DE CUISINE Sommaire Mode d’emploi,1 Avertissements,12 Assistance,22 Installation,36 Commandes TBOX-LUCE,37 Entretien et soin,40 Anomalies et remèdes,42 Italiano Español Istruzioni per l’uso... - Page 2 Nederlands Gebruiksaanwijzing AFZUIGKAP Inhoud Gebruiksaanwijzing,2 Attentie,17 Service,23 Installatie,55 TBOX-LUCE bediening,56 Onderhoud en verzorging,59 Storingen en oplossingen,61 Polski Instrukcja obsługi OKAP Spis treści Instrukcja obsługi,2 Ostrzeżenia,18 Serwis Techniczny,23 Instalacja,62 Elementy sterownicze TBOX-LUCE,63 Konserwacja i pielęgnacja,66 Usterki i środki zaradcze,68 Türkçe Kullanım talimatları OCAK DAVLUMBAZ İçindekiler Kullanım talimatları,2...
- Page 3 Ø 8 x 40 Ø 5 x 45 Ø 3,5 x 9,5 Ø 8 x 40 Ø 5 x 45 Ø 3,5 x 9,5 ø 150-125mm ø 150mm...
- Page 4 Ø120mm Ø120mm Ø150mm Ø150mm Ø120 Ø120 Ø150 Ø150 Ø150mm...
- Page 5 Ø...
- Page 6 ø 120 ø 150...
- Page 7 ø 3,5 x 9,5 ø 150...
- Page 8 Ø...
- Page 9 ø 3,5 x 9,5...
-
Page 10: Avvertenze
• Prima di qualsiasi operazione di pulizia o manutenzione, disinserire la cappa dalla rete elettrica togliendo la spina Avvertenze o staccando l’interruttore generale dell’abitazione. ! E’ importante conservare questo • Per tutte le operazioni di installazione manuale per poterlo consultare in ogni momento. -
Page 11: Warnings
• E’ severamente vietato cucinare cibi a fiamma libera sotto la cappa; l’impiego di fiamma libera è dannoso ai filtri e Warnings può dar luogo ad incendi, pertanto deve essere evitato in ogni caso. ! Keep this manual for reference. If you •... -
Page 12: Avertissements
• Before cleaning or servicing the unit, • Strictly observe all local regulations disconnect it from the mains by pulling in relation to the technical and safety the power plug or disconnecting the measures to be employed in fumes extraction. main circuit breaker. - Page 13 Sécurité générale • Les enfants doivent être surveillés afin • La distance minimale entre la surface d'éviter qu'ils ne jouent avec l'appareil. où sont posés les récipients de cuisson • N'utilisez jamais l'appareil sans filtre et la partie la plus basse de la hotte de anti-graisse correctement monté...
- Page 14 • Il est conseillé de nettoyer fréquemment Seguridad general l'appareil, aussi bien à l'intérieur qu'à • La distancia mínima entre la superficie l'intérieur (AU MOINS UNE FOIS PAR de apoyo de los recipientes en la placa MOIS, en respectant dans tous les cas de cocción y la parte inferior de la ce qui est expressément indiqué...
-
Page 15: Advertências
• No dejar que los niños jueguen con el • El incumplimiento de las instrucciones aparato. de limpieza de la campana y de sustitución y limpieza de los filtros • No utilizar el aparato sin el filtro de implica riesgos de incendio. grasas instalado correctamente. - Page 16 • O exaustor NUNCA deve ser utilizado 55 cm se o exaustor for instalado sobre uma placa de cozedura eléctrica. como plano de apoio, salvo indicação expressa em contrário. Se as instruções de instalação do dispositivo de cozedura a gás especificam um distância maior, é...
-
Page 17: Attentie
• Não utilizar ou deixar o exaustor sem • De kap is voorzien van bevestigingspluggen lâmpadas correctamente montadas, die geschikt zijn voor de meeste wanden por possível risco de choque eléctrico. of plafonds. Het is echter noodzakelijk een gekwalificeerde technicus te •... -
Page 18: Ostrzeżenia
• De afgezogen lucht mag niet worden • Wij wijzen elke verantwoordelijkheid af gekanaliseerd in een afvoerleiding die voor eventuele problemen, schade, of brand, veroorzaakt door het apparaat, gebruikt wordt voor afvoergassen van als gevolg van het niet naleven van gasapparaten of apparaten die andere de instructies die in deze handleiding brandstoffen gebruiken. - Page 19 • Okap wyposażony jest w rozporowe • W pomieszczeniu należy zapewnić kołki mocujące, które są odpowiednie do odpowiednią wentylację, jeśli okap większości ścian/sufitów. Należy jednak kuchenny jest używany równocześnie skonsultować się z wykwalifikowanym z innymi urządzeniami na gaz lub inne paliwa.
-
Page 20: Uyarılar
• Nie korzystać z okapu bez prawidłowo Davlumbaz bir elektrikli set üstü ocağın zamontowanych lamp, ani też nie üzerine kurulmuşsa 55 cm pozostawiać go w takim stanie w związku Gazlı ocağın kurulum talimatlarında z możliwym niebezpieczeństwem daha fazla bir mesafe belirtilmişse o porażenia prądem elektrycznym. - Page 21 • Davlumbaz gaz veya diğer yakıtlarla çalışan başka bir ekipmanla aynı anda kullanılıyorsa oda yeterince havalandırılmalıdır. • Çekilen gaz, gazlı veya diğer yakıtlı ekipmanların yanma gazlarını tahliye etmek için kullanılan bir kanala verilmemelidir. • Hava çekme ile ilgili tüm talimatlara uyun.
-
Page 22: Assistance,22
Assistenza Asistencia ! Non ricorrere mai a tecnici non autorizzati. ! No llame nunca a técnicos no autorizados. Comunicare: Comunique: • Il tipo di anomalia; • El tipo de anomalía; • Il modello della macchina (Mod.) • El modelo de la máquina (Mod.) •... -
Page 23: Service
Service ! Wendt u nooit tot niet erkende monteurs. Dit dient u door te geven: • Het soort storing; • Het model apparaat (Mod.) • Het serienummer (S/N) Deze laatste informatie bevindt zich op het typeplaatje op het apparaat Serwis Techniczny ! Nigdy nie korzystać... - Page 24 Totale (W) ! Evitare cambiamenti drastici di sezione del condotto. Alogena 2 x 20 ! Usare un condotto con l’interno più liscio possibile. HLB 6.7.AT(CF) ! Il materiale del condotto deve essere approvato HLB 9.8ASH (CF) X/HA normativamente. Alogena 2 x 20 ! Non collegare la cappa a condotti di scarico dei fumi prodotti da combustioni (caldaie, caminetti, stufe, ecc.).
- Page 25 T1 (ON/OFF). Nel caso di impostazione del timer la Modelli con Pulsantiera Touch control cappa si spegne automaticamente alla fine del conteggio. glass (basic) HLB 6.7.AT(CF) T1 T2 T3 T4 T5 T6 T7 T8 T1 ON/OFF motore Premendo il pulsante a cappa spenta, si imposta la prima velocità.
- Page 26 Modelli con Pulsantiera Touch control glass + display (high) HLB 9.8ASH (CF) X/HA T1 T2 T3 T4 T5 T6 T7 T8 D1: DGT Velocità D2: Gruppo di 2 DGT Tempo I1: Indicatore Filtro Grassi T1 ON/OFF motore I2: Indicatore Filtro Carbone Premendo il pulsante a cappa spenta, si imposta la prima velocità.
- Page 27 • per eseguire l’impostazione del tipo di cappa, accedere - La calibrazione automatica: avviene quando la cappa viene alimentata o dopo aver scelto il piano dal menu al menù, selezionare tramite T4 la voce C6 e tramite T5 configurazione. impostare il valore 0 se si desidera la cappa in modalità - La calibrazione manuale: (o su richiesta) è...
- Page 28 Manutenzione del filtro al carbone (B) Il filtro carbone trattiene gli odori sgradevoli derivanti dalla Manutenzione e cura cottura. La saturazione del filtro carbone si verifica dopo un uso più o meno prolungato, a seconda del tipo di cucina Attenzione! Prima di qualsiasi operazione di pulizia o e della regolarità...
- Page 29 Montaggio: Inserire il filtro Cavo elettrico all’interno del box facendo Se il cavo di alimentazione è danneggiato esso può essere attenzione alla direzione (la sostituito dal costruttore o dal suo servizio assistenza parte cava del filtro deve tecnica in modo da prevenire ogni rischio. essere rivolta verso la cappa).
-
Page 30: Installation
! Avoid suddenly changing the diameter of the duct. ! The duct must have as smooth an inner surface as Halogen 2 x 20 HLB 6.7.AT(CF) possible. ! The duct must be made of regulatory material. HLB 9.8ASH (CF) X/HA... - Page 31 The hood can be turned off manually by pressing the T1 button (ON/OFF). If the timer is set, the hood turns off Models with Touch control glass (basic) automatically when the set time runs out. HLB 6.7.AT(CF) T1 T2 T3 T4 T5 T6 T7 T8 T1 motor ON/OFF When the button is pressed with the hood off, the first speed is set.
- Page 32 T8 lights ON/OFF Models with Touch control glass + display It turns the work lights of the hood on and off. (high) HLB 9.8ASH (CF) X/HA T1 T2 T3 T4 T5 T6 T7 T8 D1: DGT Speed D2: Assembly of 2 DGT Time T1 motor ON/OFF I1: Grease Filter Indicator When the button is pressed with the hood off, the first speed...
- Page 33 - Manual calibration: (or upon request) is set in the The Automatic mode activates after 10 minutes from the configuration menu. This procedure is advised, and may sensor turning off the hood motor. be started, in case of malfunctioning of the sensor (which, Configuration table for example, may occur in case of blackout while cooking or after a long time since the use).
- Page 34 Servicing the grease filter (A) High Performance odour filter maintenance. (Drawing The grease filter retains the cylindrical filter + aesthetic box The activated carbon filter absorbs unpleasant cooking particles of grease produced during cooking; it must be odours. To obtain an excellent ventilation performance, the filter is bigger than standard filters and is installed inside the cleaned at least once a month box placed above the hood.
-
Page 35: Troubleshooting
Replacing the bulbs Troubleshooting Disconnect the unit from the mains and remove the grease filter. Caution! Make sure the bulbs are cool before touching them. If something does not work, make the following simple checks before contacting Technical Service: 1. Extract the guard by prising it out with a small flat head If the hood does not operate: screwdriver or something... - Page 36 (W) totale (W) ! Utilisez un conduit le plus lisse possible à l'intérieur. Halogène 2 x 20 HLB 6.7.AT(CF) ! Le matériau du conduit doit être de approuvé par la législation. HLB 9.8ASH (CF) X/HA Halogène 2 x 20 ! Ne raccordez pas la hotte à...
-
Page 37: Commandes Tbox-Luce
T5 et T6. T7 s’allume alors pour indiquer le type d’installation à l’aide de deux couleurs de LED : blanc pour HLB 6.7.AT(CF) l’installation à évacuation extérieure (par défaut), rouge pour l’installation en version recyclage. Il est possible de changer de type d’installation en appuyant cycliquement sur la... - Page 38 Modèles avec Touch control glass + display (high) HLB 9.8ASH (CF) X/HA T1 T2 T3 T4 T5 T6 T7 T8 D1: Chiffre Vitesse D2: Groupe de 2 chiffres Temps I1: Indicateur Filtre à graisses I2 : Indicateur Filtre Charbon T1 Marche/Arrêt moteur I4 : Indicateur Menu Lorsque l’on appuie sur ce bouton alors que la hotte est éteinte, on active la première vitesse.
- Page 39 Légende configuration Sélection du type de plan de cuisson : lors de l’installation (en service) il faut choisir le type de plan de cuisson (électrique, induction, gaz) présent sous la hotte. Tout de Code suite après la sélection du plan de cuisson, la procédure Sens Explication réglage...
-
Page 40: Entretien Et Soin
Entretien des filtres à graisse (dual) (Dessin filtre dual) Entretien et soin Le filtre à graisse retient les particules de graisse provenant de la cuisson. Les performances de ce filtre dépassent Attention ! Avant toute opération de nettoyage ou d'entretien, largement celles d’un filtre standard grâce à... - Page 41 Accrocher d’abord le panneau f r o n t a l d u b o î t i e r a u x languettes présentes dans le bas puis pousser sur le haut du panneau jusqu’à ce que les pivots entrent dans leur logement.
-
Page 42: Anomalies Et Remèdes
MISE AU REBUT Cet appareil est conforme à la Directive Européenne 2012/19/CE relative aux déchets d'équipements électriques et électroniques (DEEE). En veillant à mettre au rebut correctement ce produit, l'utilisateur contribue à prévenir les éventuelles conséquences négatives pour l'environnement et la santé. présent sur le produit ou sur la Le symbole documentation qui l'accompagne indique que ce produit ne... -
Page 43: Instalación
! Utilizar un conducto de la longitud mínima indispensable. ! Utilizar un conducto con el menor número de curvas posible. Halógena 2 x 20 HLB 6.7.AT(CF) ! Evitar cambios de sección drásticos del conducto. ! Utilizar un conducto cuyo interior sea lo más liso posible. Halógena 2 x 20 HLB 9.8ASH (CF) X/HA... -
Page 44: Mandos Tbox-Luce
Modelos con Touch control glass (basic) Apagado de la campana La campana se puede apagar manualmente pulsando la HLB 6.7.AT(CF) tecla T1 (ON/OFF). Si se ha programado el timer, la campana se apaga automáticamente al finalizar el tiempo programado. T1 T2 T3 T4... - Page 45 Modelos con Touch control glass + display (high) HLB 9.8ASH (CF) X/HA T1 T2 T3 T4 T5 T6 T7 T8 D1: Dígito de Velocidad D2: Grupo de 2 dígitos para Tiempo I1: Indicador Filtro de Grasas T1 ON/OFF motor I2: Indicador Filtro de Carbón Al pulsar esta tecla con la campana apagada, se selecciona I4: Indicador de Menú...
-
Page 46: Mantenimiento Y Cuidados
• es posible desplazarse por el menú con las teclas T4 y La calibración del sensor puede ser automática o manual (“a pedido”). En ambos casos, la duración de la T5. Con T4 se ven los distintos elementos del menú (C1, C2, C3, C4, etc.);... - Page 47 • Secar con un paño suave; si la campana es de acero Desmontaje: Quitar el filtro inoxidable, seguir la dirección del satinado del metal d e c a r b o n e s a c t i v o s presionando las dos palancas delanteras que lo fijan en la Limpieza periódica...
-
Page 48: Anomalías Y Soluciones
Montaje: Instalar el filtro en la caja prestando atención a ELIMINACIÓN la dirección (la parte hueca Este aparato lleva la marca CE de conformidad con la del filtro debe estar dirigida Directiva Europea 2012/19/EC sobre desechos de aparatos eléctricos y electrónicos (RAEE). Su eliminación correcta hacia la campana). -
Page 49: Instalação
! Use uma conduta com o menor número de curvas possível. ! Evite alterações drásticas de secção da conduta. Halogénea HLB 6.7.AT(CF) 2 x 20 ! Use uma conduta com o interior o mais liso possível. ! O material da conduta deve ser aprovado pelas normas, HLB 9.8ASH (CF) X/HA... -
Page 50: Comandos Tbox-Luce
T7, alternando as cores dos LEDs. Modelos com Touch Control Glass (básico) Desligamento do exaustor O exaustor pode ser desligado manualmente pressionando HLB 6.7.AT(CF) a tecla T1 (ON/OFF). No caso da configuração do temporizador, o exaustor desliga-se automaticamente no final da contagem. - Page 51 Modelos com Touch Control Glass + ecrã T8 ON/OFF luzes Permite acender e desligar as luzes de trabalho do exaustor (alto) HLB 9.8ASH (CF) X/HA T1 T2 T3 T4 T5 T6 T7 T8 1 ON/OFF motor D1: DGT Velocidade Ao pressionar o botão com o exaustor desligado, configura D2: Grupo de 2 DGT Tempo a primeira velocidade.
-
Page 52: Manutenção E Cuidado
• com o exaustor em OFF ou stand-by, pressionando Procedimento de calibragem do sensor automático durante algum tempo as teclas T4 e T5, acede ao menu; - Calibragem: para que o procedimento de calibragem seja eficaz, esta deve ser feita em condições de ambiente irá... - Page 53 Substituição do filtro de carvão (B) O filtro de carvão retém os cheiros desagradáveis derivados Primeira limpeza da cozedura. A saturação do filtro de carvão verifica-se após • Retire as películas de protecção • Elimine as impurezas com uma esponja húmida e pouco um uso mais ou menos prolongado, consoante o tipo de cozinha e a regularidade da limpeza do filtro de gorduras.
-
Page 54: Anomalias E Soluções
Montagem: Insira o filtro no Cabo eléctrico interior da caixa, prestando Se o cabo de alimentação estiver danificado, pode atenção ao sentido (a parte ser substituído pelo fabricante ou pelo seu serviço de côncava do filtro deve estar assistência técnica, de forma a evitar todos os riscos. virada para o exaustor). -
Page 55: Installatie
! Gebruik een zo kort mogelijke leiding. Halogeen 2 x 20 HLB 6.7.AT(CF) ! Gebruik een leiding die zo min mogelijk bochten heeft ! Vermijd drastische veranderingen in de sectie van de leiding. ! Gebruik een leiding met een zo glad mogelijke binnenkant. -
Page 56: Tbox-Luce Bediening
Modellen met Toch control glass (basic) Hierdoor wordt T7 verlicht met twee kleuren LED om het type installatie aan te geven: wit voor installatie van HLB 6.7.AT(CF) de afzuigversie (standaard), rood voor installatie van de filterversie. Het is mogelijk het type installatie te wijzigen door één of meerdere keren op toets T7 te drukken... - Page 57 Modellen met Toch control glass + display (high) HLB 9.8ASH (CF) X/HA T1 T2 T3 T4 T5 T6 T7 T8 D1: DGT Snelheid D2: Groep van 2 DGT Tijd I1: Aanwijzer Vetfilter I2: Aanwijzer Koolstoffilter T1 ON/OFF motor Als u op de knop drukt terwijl de afzuigkap uit is, wordt I4: Aanwijzer Menu eerste snelheid ingesteld.
- Page 58 Legenda voor configuratie Selectie van het type kookplaat: tijdens de installatie (bij gebruik) wordt het soort kookplaat geselecteerd (elektrische-, inductie- of gaskookplaat) dat onder de kap Instellingscode Betekenis uitleg aanwezig is. Direct na het selecteren van de plaat wordt de Zet de timer van het Timer vetfilter volledige procedure voor automatische ijking uitgevoerd.
-
Page 59: Onderhoud En Verzorging
Onderhoud en verzorging Belangrijk! Haal de stekker uit het stopcontact of zet de hoofdschakelaar in huis uit om de kap los te koppelen van het elektriciteitsnet, voor u de reinigings- of onderhoudshandelingen uitvoert. Eerste reiniging • Verwijder het beschermfolie • Verwijder onzuiverheden met een vochtige spons en een beetje neutraal reinigingsmiddel •... - Page 60 Het wordt aangeraden om handschoenen te dragen en Onderhoud high performance geurfilters. (Tekening een trapje te gebruiken om deze handelingen uit te voeren. rond filter + sierkastje) Het koolstoffilter houdt de vervelende luchtjes die tijdens De lampen vervangen het koken vrijkomen vast. Om uitstekende afzuigprestaties Schakel het apparaat los van het lichtnet en verwijder de te bereiken, is het filter groter dan de standaardfilters en is vetfilters.
-
Page 61: Storingen En Oplossingen
Storingen en oplossingen Als iets niet lijkt te functioneren dient u, voor u de Servicedienst inschakelt, eerst deze eenvoudige controles uit te voeren: Als de afzuigkap niet werkt: Controleer of: • er geen stroomonderbreking is. • er wel een snelheid is ingesteld. Als de kap een zwak rendement heeft: Controleer of: •... -
Page 62: Instalacja
Oznaczenie modelu pobór ! Należy użyć przewodu o jak najmniejszej ilości łuków prądu (W) ! Należy unikać znacznych zmian w przekroju przewodu. HLB 6.7.AT(CF) Halogenowa 2 x 20 ! Należy korzystać z przewodu o jak najbardziej gładkiej powierzchni wewnętrznej. ! Materiał, z którego wykonany jest przewód, musi być... -
Page 63: Elementy Sterownicze Tbox-Luce
LED: biały dla Modele z Touch control glass (basic) instalacji wyciągowej (ustawienie domyślne), czerwony dla instalacji filtrującej. Rodzaj instalacji można zmienić HLB 6.7.AT(CF) naciskając cyklicznie przycisk T7, co spowoduje zmienianie się kolorów diod LED. Wyłączanie okapu... - Page 64 Modele z Touch control glass + wyświetlacz (high) HLB 9.8ASH (CF) X/HA T1 T2 T3 T4 T5 T6 T7 T8 T1 ON/OFF silnika Naciśnięcie przycisku przy wyłączonym okapie, powoduje ustawienie pierwszej prędkości. Naciśnięcie przycisku podczas pracy okapu powoduje jego przejście w stan OFF. T2 Prędkość...
- Page 65 • w celu przeprowadzenia kalibracji ręcznej, należy wejść do menu, wybrać przy użyciu T6 hasło C4, o czym przy użyciu T7 ustawić wartość 1. Następnie należy nacisnąć przycisk T1 i poczekać przez okres czasu zalecany do przeprowadzenia kalibracji. Wybór rodzaju płyty kuchennej: podczas instalacji dokonuje się...
-
Page 66: Konserwacja I Pielęgnacja
Legenda konfiguracji Do czyszczenia należy użyć wilgotnej szmatki, neutralnego detergentu w płynie i letniej wody. Należy unikać stosowania produktów o właściwościach Wyjaśnienie Znaczenie ściernych lub korozyjnych. regulacji Uwaga: Nieprzestrzeganie zasad związanych z czyszczeniem T i m e r f i l t r a Z e r u j e t i m e r f i l t r a okapu i wymianą... - Page 67 Montaż: Wprowadzić filtr do Demontaż: Wyjąć filtr z obudowy, zwracając uwagę aktywnym węglem naciskając na jego ustawienie (wklęsła dwie umieszczone z przodu część filtra musi być zwrócona dźwignie, które mocują go do w stronę okapu). okapu. Z a m o c o w a ć f i l t r ś r u b ą Montaż: Zaczepić...
-
Page 68: Usterki I Środki Zaradcze
USUWANIE To urządzenie posiada znak zgodności z Dyrektywą Europejską 2012/19/WE, Waste Electrical and Electronic Equipment (WEEE). Upewniając się, że ten produkt zostanie usunięty w prawidłowy sposób, użytkownik przyczynia się do zapobiegania potencjalnemu negatywnemu wpływowi na środowisko i zdrowie. na produkcie lub na dołączonej do niego Symbol dokumentacji informuje, że to urządzenie nie powinno być... -
Page 69: Kurulum
Model kodu düşürür ve çalışma gürültüsünü artırır. Buna aykırı hareket etmenin doğurabileceği sonuçlardan Halojen 2 x 20 HLB 6.7.AT(CF) üretici sorumlu değildir. Halojen 2 x 20 HLB 9.8ASH (CF) X/HA ! Amaca uygun en kısa kanalı kullanın. -
Page 70: Tbox-Luce Kumandaları
Davlumbaz, T1 düğmesine (AÇMA/KAPATMA) basılarak elle kapatılabilir. Zamanlayıcı ayarlanmışsa, belirlenen süre Dokunmatik kumanda camlı modeller (temel) dolunca davlumbaz otomatik olarak kapanır. HLB 6.7.AT(CF) T1 T2 T3 T4 T5 T6 T7 T8 T1 Motor AÇIK/KAPALI Davlumbaz kapalıyken düğmeye basılınca, birinci hız ayarlanır. - Page 71 Dokunmatik kumanda camlı + ekranlı modeller (yüksek) HLB 9.8ASH (CF) X/HA T1 T2 T3 T4 T5 T6 T7 T8 D1: DGT Hızı D2: 2 DGT Saati Grubu I1: Gres Filtresi Göstergesi T1 Motor AÇIK/KAPALI I2: Karbon Filtresi Göstergesi Davlumbaz kapalıyken düğmeye basılınca, birinci hız I4: Menü...
-
Page 72: Bakım Ve Temizlik
- Otomatik kalibrasyon: davlumbaza güç verilince veya • davlumbaz türünü ayarlamak için menüye girin, T4 konfigürasyon menüsünden ilgili işletim modu seçilince düğmesiyle C6’yı seçin ve davlumbazı havalandırma başlatılır. moduna getirmek için T5 düğmesiyle değeri 0, filtreleme - Manuel kalibrasyon: (isteğe bağlı) konfigürasyon moduna getirmek içinse aynı... - Page 73 Takma: Aktif karbon filtresini Düzenli temizleme Davlumbazın içi ve dışı düzenli olarak (en az yağ filtresine davlumbazın küçük metal uyguladığınız bakım sıklığı kadar) temizlenmelidir. Nemli dilleri üzerine önce arkadan, bir bez ve ılık suyla seyreltilmiş nötr sıvı deterjan kullanın. daha sonra iki kola bastırarak Aşındırıcı...
-
Page 74: Sorun Giderme
Takma: Filtreyi, montaj ISKARTAYA ÇIKARMA yönüne dikkat ederek (filtrenin Bu cihaz, 2012/19/EC Atık Elektrikli ve Elektronik Ekipman delikli tarafı davlumbaza (WEEE) direktifine uygun olarak işaretlenmiştir. Üniteyi doğru bakmalıdır) kutusunun doğru bir şekilde ıskartaya çıkaran bir kullanıcı, çevrenin ve içine yerleştirin. halka sağlığının korunmasına katkıda bulunmuş... - Page 76 195125090.00 05/2014 - XEROX FABRIANO...
Need help?
Do you have a question about the HLB 6.7.AT and is the answer not in the manual?
Questions and answers