Panasonic DMC-GF2C Lumix Basic Operating Instructions Manual
Hide thumbs
Also See for DMC-GF2C Lumix:
- Basic operating instructions manual (56 pages) ,
- Operating instructions manual (113 pages) ,
- Instrucciones básicas de funcionamiento (50 pages)
Table of Contents
Advertisement
Quick Links
Basic Operating Instructions
Digital Camera/
Lens Kit/Double Lens Kit
DMC-GF2C/DMC-GF2K
Model No.
DMC-GF2W
Before use, please read these instructions completely.
More detailed instructions
on the operation of this
camera are contained in
"Operating Instructions for Advanced
Features (PDF format)" in the supplied
CD-ROM. Install it on your PC to read it.
VQT3C50
GN
Advertisement
Table of Contents

Related Manuals for Panasonic DMC-GF2C Lumix


Summary of Contents for Panasonic DMC-GF2C Lumix
-
Page 1: Basic Operating Instructions
Basic Operating Instructions Digital Camera/ Lens Kit/Double Lens Kit DMC-GF2C/DMC-GF2K Model No. DMC-GF2W Before use, please read these instructions completely. More detailed instructions on the operation of this camera are contained in “Operating Instructions for Advanced Features (PDF format)” in the supplied CD-ROM. -
Page 2: Information For Your Safety
Dear Customer, We would like to take this opportunity to thank you for purchasing this Panasonic Digital Camera. Please read these Operating Instructions carefully and keep them handy for future reference. Please note that the actual controls and components, menu items, etc. of your Digital Camera may look somewhat different from those shown in the illustrations in these Operating Instructions. - Page 3 Part numbers: RP-CDHM15 (1.5 m), RP-CDHM30 (3.0 m) In the event of abnormal operation (e.g. if the unit emits smoke or an unusual smell), immediately stop operating the unit and consult the Panasonic Customer Care Centre on 132600. Keep this unit as far away as possible from electromagnetic equipment (such as microwave ovens, TVs, video games etc.).
- Page 4 -If you see this symbol- Information on Disposal in other Countries outside the European Union This symbol is only valid in the European Union. If you wish to discard this product, please contact your local authorities or dealer and ask for the correct method of disposal.
-
Page 5: Table Of Contents
Contents Information for Your Safety ....................2 Standard Accessories ...................... 6 Names and Functions of Components ................8 About the Lens....................... 12 Attaching/Detaching the Lens..................13 Attaching the Shoulder Strap..................15 Charging the Battery ...................... 16 • Approximate operating time and number of recordable pictures ......18 Inserting and Removing the Card (optional)/the Battery.......... -
Page 6: Standard Accessories
Standard Accessories Check that all the accessories are supplied before using the camera. Product numbers correct as of December 2010. These may be subject to change. Digital Camera Body (This is referred to as camera body in these operating instructions.) Interchangeable Lens “LUMIX G 14 mm/F2.5 ASPH.”... - Page 7 DMC-GF2W DMC-GF2C H-H014 VYF3371 VFC4605 DMC-GF2K H-FS014042 VYC1009 VYF3201 VFC4315 DMW-BLD10E DE-A94A K2CJ29A00002 K1HY14YY0009 K1HY14YY0008 VKF4385 VFF0756 VKF4840 VFC4634 VGQ0C14 VGQ0R99 DMC-GF2C ¢1 Supplied in only DMC-GF2K ¢2 Supplied in only DMC-GF2W ¢3 Supplied in only (ENG) VQT3C50...
-
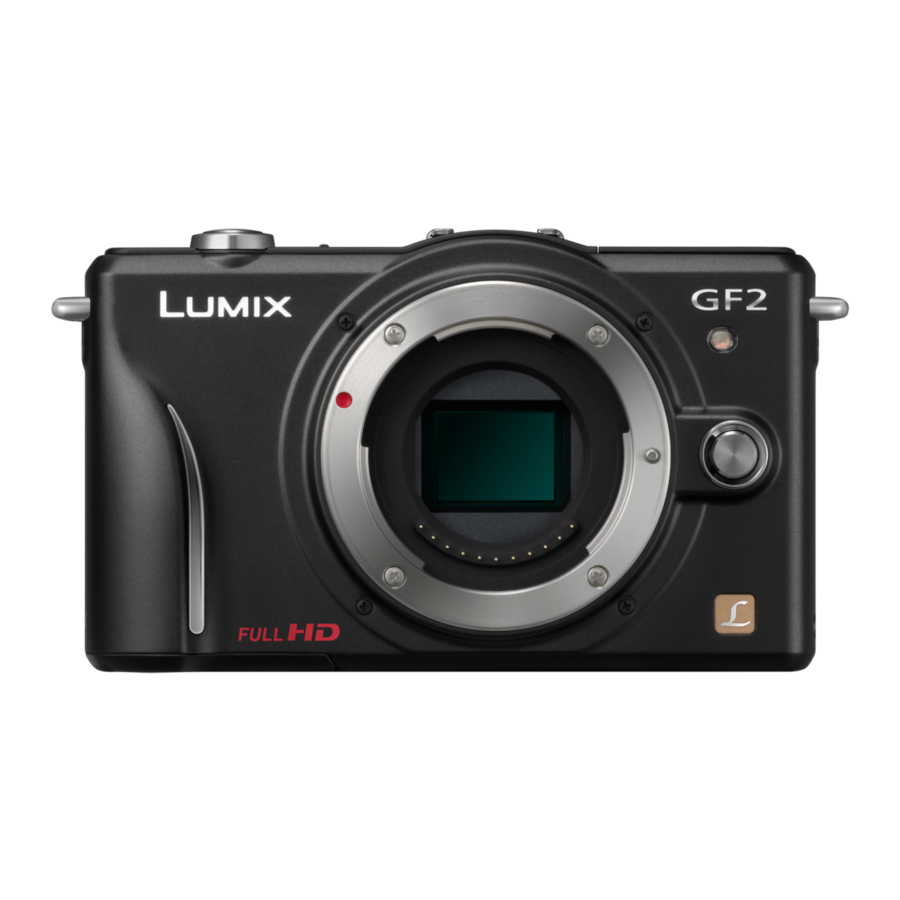
Page 8: Names And Functions Of Components
Names and Functions of Components ∫ Camera body Sensor Self-timer indicator/ AF Assist Lamp Flash Lens fitting mark Mount Lens lock pin Lens release button Flash open button Speaker 10 Rear dial 11 Touch panel/LCD monitor 12 Playback button 13 [Q.MENU/Fn] button/ Delete/Return button 14 [MENU/SET] button 15 Cursor buttons... - Page 9 When using an AC adaptor, ensure that the Panasonic DC coupler (DMW-DCC9; optional) and AC adaptor (DMW-AC8G; optional) are used. • Always use a genuine Panasonic AC adaptor (DMW-AC8G; optional). • When using an AC adaptor, use the AC cable supplied with the AC adaptor. •...
- Page 10 ∫ Lens H-H014 (LUMIX G 14 mm/F2.5 ASPH.) 31 Lens surface 32 Focus ring 33 Contact point 34 Lens fitting mark H-FS014042 (LUMIX G VARIO 14 –42 mm/F3.5– 5.6 ASPH./MEGA O.I.S.) 35 Tele 36 Lens surface 37 Focus ring 38 Wide 39 Zoom ring 40 Contact point 41 Lens fitting mark...
- Page 11 Touch Panel This touch panel is a type that detects pressure. Touch the screen Drag To touch and release the touch panel. A movement without releasing the touch panel. Use this to perform tasks such as selecting This is used when performing tasks such as icons or images displayed on the touch panel.
-
Page 12: About The Lens
About the Lens ∫ Micro Four Thirds™ mount specification lens This unit can use the dedicated lenses compatible with the Micro Four Thirds System lens mount specification (Micro Four Thirds mount). • Select a lens that matches the scene being recorded and your use of the pictures. -
Page 13: Attaching/Detaching The Lens
Attaching/Detaching the Lens • Check that the camera is turned off. • Change lenses where there is not a lot of dirt or dust. Attaching a lens to the camera body Turn the lens rear cap A and the body cap B in the direction of the arrow to detach them. - Page 14 Detaching a lens from the camera body Attach the lens cap. Press the lens release button D while turning the lens as far as possible in the direction of the arrow to detach it. • Always attach the body cap to the camera body so that dirt or dust does not get inside.
-
Page 15: Attaching The Shoulder Strap
Attaching the Shoulder Strap • We recommend attaching the shoulder strap when using the camera to prevent it from dropping. Pass the shoulder strap through the shoulder strap eyelet on the camera body. A: Shoulder strap eyelet Pass the end of the shoulder strap through the ring in the direction of the arrow and then pass it through the stopper. -
Page 16: Charging The Battery
The camera has a function for distinguishing batteries which can be used safely. The dedicated battery (DMW-BLD10E) supports this function. The only batteries suitable for use with this unit are genuine Panasonic products and batteries manufactured by other companies and certified by Panasonic. (Batteries which do not support this function cannot be used.) Panasonic cannot in any way guarantee the quality, performance or... - Page 17 Connect the AC cable. • Disconnect the charger from the electrical socket and detach the battery after charging is completed. ∫ About the [CHARGE] indicator The [CHARGE] indicator turns on: The [CHARGE] indicator is turned on and charging will start. The [CHARGE] indicator turns off: The [CHARGE] indicator...
-
Page 18: Approximate Operating Time And Number Of Recordable Pictures
∫ Charging time Charging time Approx. 120 min • The indicated charging time is for when the battery has been discharged completely. The charging time may vary depending on how the battery has been used. The charging time for the battery in hot/cold environments or a battery that has not been used for a long time may be longer than normal. - Page 19 CIPA is an abbreviation of [Camera & Imaging Products Association]. • Temperature: 23 oC/Humidity: 50%RH when LCD monitor is on. • Using a Panasonic SD Memory Card (2 GB). • Using the supplied battery. • Starting recording 30 seconds after the camera is turned on.
- Page 20 ∫ Recording motion pictures (when using the LCD monitor) – [AVCHD] (Recording with picture quality set to [FSH]) When the interchangeable lens (H-H014) is used Continuous recordable time Approx. 130 min Actual recordable time Approx. 70 min When the interchangeable lens (H-FS014042) is used Continuous recordable time Approx.
-
Page 21: Inserting And Removing The Card (Optional)/The Battery
Inserting and Removing the Card (optional)/the Battery • Check that this unit is turned off. • We recommend using a Panasonic card. Slide the release lever in the direction of the arrow and open the card/battery OPEN LOCK door. •... -
Page 22: About The Card
Check that the PC and other equipment are compatible when SDXC Memory Card using the SDXC Memory Cards. (48 GB, 64 GB) http://panasonic.net/avc/sdcard/information/SDXC.html • Only cards bearing the SDHC logo (indicating that the card conforms to SD video standards) may be used as 4 GB to 32 GB cards. - Page 23 If operation fails due to vibration, impact or static electricity, perform the operation again. • Please confirm the latest information on the following website. http://panasonic.jp/support/global/cs/dsc/ (This Site is English only.) Note • Keep the Memory Card out of reach of children to prevent swallowing.
-
Page 24: Setting Date/Time (Clock Set)
Setting Date/Time (Clock Set) The clock can be setup with the following procedure at the time of purchase. Change the clock setting in [CLOCK SET] of the [SETUP] menu. For details, read the PDF. • The clock is not set when the camera is shipped. Turn the camera on. -
Page 25: Selecting The [Rec] Mode
Selecting the [REC] Mode Press [MENU/SET]. Touch [REC MODE]. • A screen listing the [REC] Mode is displayed. Touch the [REC] Mode to select. ∫ List of [REC] Modes Programme AE Mode The subjects are recorded using your own settings. Aperture-Priority AE Mode The shutter speed is automatically determined by the aperture value you set. -
Page 26: Taking A Still Picture
Taking a Still picture Taking Pictures with Your Favourite Settings (Programme AE Mode) The camera automatically sets the shutter speed and the aperture value according to the brightness of the subject. You can take pictures with greater freedom by changing various settings in [REC] Mode menu. -
Page 27: Playing Back Pictures
Playing Back Pictures Press [(]. A [(] button Forward or rewind the image by dragging the screen horizontally. Forward: drag from right to left Rewind: drag from left to right • It is also possible to forward or rewind the image by pressing 2/1 of the cursor button. -
Page 28: Recording Motion Picture
[REC] Mode: Recording Motion Picture This can record full high definition motion pictures compatible with the AVCHD format or motion pictures recorded in Motion JPEG. Audio will be recorded in stereo. The functions available when recording motion pictures differ according to the lens you are using, and the operational sound of the lens may be recorded. -
Page 29: Playing Back Motion Pictures
Motion pictures in AVCHD format that can be played back on this unit are [AVCHD] motion pictures that were recorded with this unit, AVCHD format (including [AVCHD Lite]) motion pictures recorded with Panasonic digital cameras (LUMIX) only. Press [(]. Select a picture with a Motion Picture icon ([ ]) and then touch [ ] to play back. - Page 30 ∫ Operations performed during Motion Picture Playback Display control panel by touching screen. • If no operation is performed for 2 seconds, it will return to original status. Operate control panel by touching. ¢ C Fast rewind, Frame-by-frame rewind D Play/Pause ¢...
-
Page 31: Taking Pictures Using The Automatic Function (Intelligent Auto Mode)
ñ [REC] Mode: Taking Pictures using the Automatic Function (Intelligent Auto Mode) The camera will set the most appropriate settings to match the subject and the recording conditions so we recommend this mode for beginners or those who want to leave the settings to the camera and take pictures easily. -
Page 32: Scene Detection
Scene Detection When the camera identifies the optimum scene, the icon of the scene concerned is displayed in blue for 2 seconds, after which its colour changes to the usual red. When taking pictures [i-PORTRAIT] > ¦ [i-SCENERY] [i-MACRO] • [i-NIGHT PORTRAIT] Only when [ ] is selected... -
Page 33: Af Tracking Function
AF Tracking Function It is possible to set the focus and exposure to the specified subject. Focus and exposure will keep following the subject automatically even if it moves. ∫ When operating the touch panel You can lock the subject by touching it. •... - Page 34 Defocus control function You can set to your preferred blurriness. Touch [ ] to display the setting screen. × × Touch the slide bar to set. Recording of pictures or motion pictures. • It is also possible to record a picture by touching [ •...
-
Page 35: Deleting Pictures
Deleting Pictures Once deleted, pictures cannot be recovered. Press [(]. A [(] button To delete a single picture Select the picture to be deleted, and then touch Touch [DELETE SINGLE]. Touch [YES]. (ENG) VQT3C50... -
Page 36: Setting The Menu
Setting the Menu When [MENU/SET] is pressed, [REC MODE] and 5 menus ([REC], [MOTION PICTURE], [CUSTOM], [SETUP], and [PLAYBACK]) are displayed. In the 5 different menus, there are menus that allow you to setup the recording or playback to your preference, or make it more fun and easier to use the camera. -
Page 37: Setting Menu Items
Setting menu items This section describes how to setup the menu items. • If you set [MENU RESUME] in the [CUSTOM] menu to [ON], the screen shows the last selected menu item when the camera was turned off. It is set to [ON] at the time of purchase. Press [MENU/SET]. - Page 38 Select the settings by pressing 3/4 or by rotating the rear dial. • The figure on the right is an example of setting [I.DYNAMIC] from [OFF] to [HIGH]. Press [MENU/SET] or the rear dial to set. Press [ ] to close the menu. •...
-
Page 39: Compensating The Exposure
[REC] Mode: Compensating the Exposure Use this function when you cannot achieve appropriate exposure due to the difference in brightness between the subject and the background. Look at the following examples. Properly Underexposed Overexposed exposed Compensate the exposure Compensate the exposure towards positive. -
Page 40: Taking Pictures By Specifying The Aperture/Shutter Speed
±´ [REC] Mode: Taking Pictures by Specifying the Aperture/ Shutter Speed Aperture-priority AE Set the aperture value to a higher number when you want a sharp focus background. Set the aperture value to a lower number when you want a soft focus background. Set [REC] Mode to [ Rotate the rear dial to set the aperture value. -
Page 41: Taking Picture By Setting The Exposure Manually
² [REC] Mode: Taking Picture by Setting the Exposure Manually Determine the exposure by manually setting the aperture value and the shutter speed. The Manual Exposure Assistance appears on the lower portion of the screen to indicate the exposure. Set [REC] Mode to [ Rotate the rear dial to set the aperture and shutter speed. -
Page 42: Reading The Operating Instructions (Pdf Format)
Web Site. http://get.adobe.com/reader/otherversions ∫ To uninstall the Operating Instructions (PDF format) Delete the PDF file from the “Program Files\Panasonic\Lumix\” folder. • When the contents in the Program Files folder cannot be displayed, click the [Show the contents of this folder] to display them. -
Page 43: Specifications
Specifications Digital Camera Body (DMC-GF2): Information for your safety Power Source: DC 8.4 V Power Consumption: 2.6 W (When recording with LCD Monitor) [When the Interchangeable lens (H-H014) is used] 2.7 W (When recording with LCD Monitor) [When the Interchangeable lens (H-FS014042) is used] 1.7 W (When playing back with LCD Monitor) [When the Interchangeable lens (H-H014) is used] 1.8 W (When playing back with LCD Monitor) - Page 44 Shutter speed: 60 seconds to 1/4000th of a second Metering range: EV 0 to EV 18 White Balance: Auto White Balance/Daylight/Cloudy/Shade/Incandescent lights/Flash/White set1/White set2/White Balance K set Exposure (AE): Programme AE (P)/Aperture-priority AE (A)/Shutter-priority AE (S)/Manual exposure (M)/AUTO Exposure Compensation (1/3 EV Step, j3 EV to i3 EV) Metering Mode: Multiple/Centre weighted/Spot LCD monitor:...
- Page 45 Recording quality Motion pictures: [AVCHD] (With audio) ¢ When set to [FSH]: 1920k1080 pixels (50i recording/ Approx. 17 Mbps)/ ¢ When set to [FH]: 1920k1080 pixels (50i recording/ Approx. 13 Mbps)/ ¢ When set to [SH]: 1280k720 pixels (50p recording/ Approx.
- Page 46 Battery Charger (Panasonic DE-A94A): Information for your safety Input: 110 V to 240 V, 50/60 Hz, 0.2 A Output: 8.4 V, 0.65 A Battery Pack (lithium-ion) (Panasonic DMW-BLD10E): Information for your safety Voltage/capacity: 7.2 V/1010 mAh VQT3C50 (ENG)
- Page 47 Interchangeable Lens (H-H014) “LUMIX G 14 mm/F2.5 ASPH.” Focal length: f=14 mm (35 mm film camera equivalent: 28 mm) Aperture type: 7 diaphragm blades/circular aperture diaphragm Aperture range: F2.5 Minimum aperture value: Lens construction: 6 elements in 5 groups (3 aspherical lenses) In focus distance: 0.18 m to ¶...
- Page 48 HDMI, the HDMI Logo, and High-Definition Multimedia • Interface are trademarks or registered trademarks of HDMI Licensing LLC in the United States and other countries. HDAVI Control™ is a trademark of Panasonic Corporation. • QuickTime and the QuickTime logo are trademarks or •...
Need help?
Do you have a question about the DMC-GF2C Lumix and is the answer not in the manual?
Questions and answers