Table of Contents
Advertisement
K33930
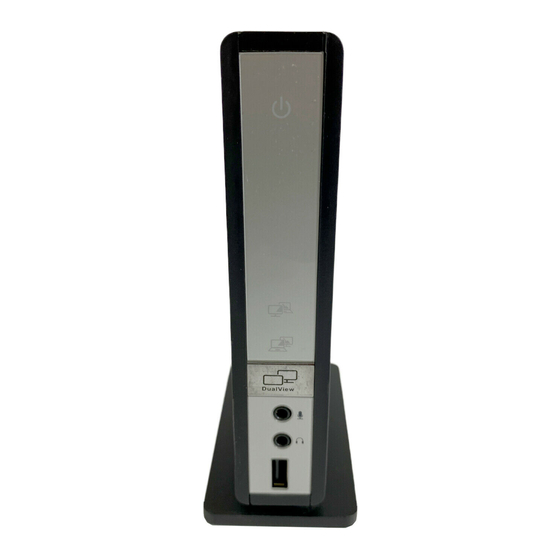
Universal Notebook Docking Station with VGA/DVI
Windows XP/Vista Instruction Guide
Setting Up the Docking Station
System Requirements
Supported Operating Systems
Windows XP
•
Windows Vista (32-bit and 64-bit)
•
Windows 7 (32-bit and 64-bit)
•
Recommended System Specifications
Kensington Docking Stations can be used on netbooks, laptops/laptops, and desktops
running processors ranging from Intel Atom N270 to single, dual, and quad core CPUs.
Performance depends on the laptop's processing power. For best results, we recommend the
following minimum system configuration:
1.2GHz Single Core CPU
•
512MB memory
•
An available USB 2.0 port
•
30MB of free disk space
•
DVI or VGA display up to 1920 X 1200 (2048 X 1152 for widescreen format)
•
Internet access for software updates
•
In addition, for Windows Vista systems, we recommend a Windows Experience Index (WEI)
score of at least 3 in the "Graphics; Desktop performance for Windows Aero" category and an
overall score of at least 3, as recommended by Microsoft.
Setup and Software Installation
When you plug the Universal Notebook Docking Station with VGA/DVI and Ethernet into your
laptop for the first time, the software is automatically installed.
Note: We recommend that you save any work and close all running programs before starting
the installation process.
www.kensington.com
Advertisement
Table of Contents

Related Manuals for Kensington K33930


Summary of Contents for Kensington K33930
- Page 1 • Recommended System Specifications Kensington Docking Stations can be used on netbooks, laptops/laptops, and desktops running processors ranging from Intel Atom N270 to single, dual, and quad core CPUs. Performance depends on the laptop's processing power. For best results, we recommend the following minimum system configuration: 1.2GHz Single Core CPU...
-
Page 2: Install The Software
1. Install the Software Insert the Software Installation CD into your laptop's CD drive, and follow the onscreen instructions. If prompted, restart your laptop after software installation. 2. Power the Docking Station Plug the power adapter into a working outlet and connect the other end to the Docking Station's power adapter jack on the back panel. - Page 3 3. Connect the USB Cable to the Docking Station Connect the "B" end of the USB cable provided to a matching port on the back panel of the Docking Station. 4. Connect Your Monitor to the Docking Station Plug your monitor's DVI cable into the DVI/VGA connector on the back panel of the Docking Station.
- Page 4 5. Connect the USB Cable to Your Notebook Connect the "A" end of the USB cable to your laptop. The attached monitor is set as your main display (showing the Windows task bar at the bottom of the screen), and your laptop screen is set as your extended display (showing your Windows desktop).
-
Page 5: Using Your Docking Station
Using Your Docking Station You may connect devices to their respective ports on the Docking Station while your laptop is running. A slight delay is normal before the laptop recognizes new devices. If you experience problems using your Docking Station, please see Troubleshooting for help. - Page 6 VGA Monitors First plug the DVI-to-VGA adapter into the DVI output of the Docking Station, then plug the VGA cable into the adapter. HDMI Monitors First plug the DVI-to-HDMI adapter (included with some models) into the DVI output of the Docking Station, then plug the HDMI cable into the adapter.
-
Page 7: Audio Ports
settings with the video output of the Docking Station. Refer to your monitor's user manual for instructions on how to do the auto-adjust procedure. Audio Ports The Docking Station is equipped with microphone input and two stereo audio ports. The front audio port is typically used for connecting a headset, while the rear audio port is typically used for external speakers. -
Page 8: Video Modes
Docking Station. Use the "Safely Remove Hardware" function from the taskbar before removing the USB cable from your laptop. Video Modes Kensington Docking Stations and Multi-Display Adapters increase the amount of visible workspace available to you by allowing you to extend your laptop's desktop onto multiple displays. - Page 9 To set video modes, see Using the Taskbar Menu. The following modes are available: Attached Video Mode Notebook Screen Best for: Monitor Using the attached monitor as the main center of focus with the Set as main monitor Main Display Extended Display laptop screen providing...
-
Page 10: Notebook Monitor Off
Extend The Extend option sets your laptop screen as the primary display and the attached monitor as the extended display. Notebook Monitor Off The Notebook Monitor off option sets the attached monitor as the primary display and turns your laptop screen off. You would typically use this mode when your laptop is closed, as with some proprietary docking stations. -
Page 11: Screen Resolution
You can also check the Kensington website at www.software.kensington.com for the latest software updates. Screen Resolution Screen resolution refers to the number of pixels displayed onscreen horizontally and vertically. A higher resolution means that you can see more of your image on the screen without scrolling or panning. -
Page 12: Color Quality
Color Quality Color quality defines the number of different colors that can be shown on the screen at the same time. The greater the color quality, the better the picture quality. Screen Rotation The picture on your screen may be rotated as required. For instance, if your attached monitor is physically rotated to the left (counterclockwise) for viewing in portrait mode, click Rotated Left to adjust the picture on the display. -
Page 13: Video Mode Options
Video Mode Options From the menu, click the video mode you want: Extend • Set as main monitor • Notebook monitor off • Mirror • • Video Modes for a description of each mode. Note: Clicking Extend To allows you to select whether the extended display appears to the right of, to the left of, above, or below the primary display. -
Page 14: Uninstalling The Software
• Uninstalling the Software On your laptop, click the Start Menu and navigate to All Programs > Kensington Universal Notebook Docking Station and select Uninstall. Note: We recommend that you restart your laptop after uninstalling the software. -
Page 15: Troubleshooting
Securing Your Docking Station You can use the Kensington security slot to connect a Kensington Lock (sold separately) to secure your Docking Station by locking it to your desk. See the user manual of the K-Lock device for further instructions on how to use the device. -
Page 16: Video Output
Make sure that the software has been installed following the installation steps. The • Kensington icon for your Docking Station should be visible in the system tray. Make sure that you did not disable the video output by accidentally pressing and •... - Page 17 On Windows Vista systems, some video clips cannot be played on the attached monitor when it is set as the extended display. To play these video clips, move the video application to your laptop screen. Kensington regularly updates video playback support in extended mode; check the Kensington website for software updates.
-
Page 18: Technical Support
Telephone Support There is no charge for technical support except long-distance charges where applicable. Please visit www.kensington.com for telephone support hours. In Europe, technical support is available by telephone Monday to Friday 09:00 to 21:00 (Central European time). Supported Operating Systems Call from a phone where you have access to your product •... - Page 19 Hungary 20 9430 612 Ireland 01 601 1163 Italia 02 4827 1154 México 55 15 00 57 00 Nederland 053 482 9868 Norway 22 70 82 01 Österreich 01 790 855 701 Portugal 800 831 438 Schweiz/Suisse 01 730 3830 Sweden 08 5792 9009 United Kingdom 0207 949 0119 United States 1 800 535 4242...
Need help?
Do you have a question about the K33930 and is the answer not in the manual?
Questions and answers