Table of Contents
Advertisement
Advertisement
Table of Contents

Related Manuals for Braun NovoScan 3in1


Summary of Contents for Braun NovoScan 3in1
- Page 1 Multi-Scanner (Film&Photo) User’s manual...
- Page 2 For customers in North and South America For customers in USA This device com plies with Part 1 5 of the FCC rules. Operation is subject to the follow ing two conditions: (1) This device may not cause harmful interference. Film/Slide Scanner (2) This device must accept any interference received, including interference that ma...
-
Page 3: System Requirements
1. System Requirements • Personal computer, laptop, desktop or IBM compatible with Pentium 166 MHz minimum, and with an active USB (Universal Serial Bus) port. • Windows 2000 / XP / Vista / 7, CD ROM drive, color monitor, mouse and keyboard. 2. -
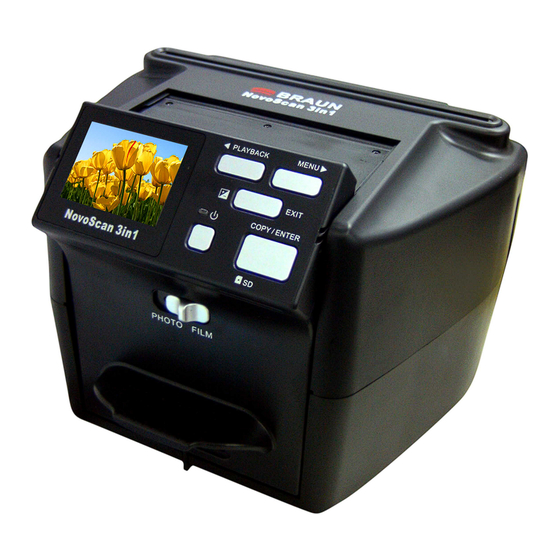
Page 4: Name Of Parts
3. Name of parts... - Page 5 Photo Tray 5’’x 7’’ Photo Tray 4’’x 6’’ Photo Tray 3’’x 5’’...
- Page 6 We strongly suggest using a clean, dry, non-alcohol cotton swab to insert into the film scanner slot and clean the glass surface periodically to produce a clear image. Please make sure your film, slide and holder are clean before inserting into the scanner as well. Dust or dirt on the film, slide and holder will affect the quality of your scanned images.
-
Page 7: Film Holder
b. Put a slide in the slide slot as shown. Note: Do not flip the slide. If flipped, the pictures will be scanned backwards. c. Close the film/slide holder 4.2 Film holder a. Open the film holder as illustrated... - Page 8 b. Put a film in the film slot as shown. Note: Do not flip the film. If flipped, the pictures will be scanned backwards. c. Close the film/slide holder...
- Page 9 4.3 Photo holder a. First insert the photo in to the appropriately sized photo tray.
- Page 10 b. Insert the tray in to the photo tray slot. 5. Insert and take out SD card ( optional ) • Insert SD card before scanning. • Built in memory will be suspended when the SD card is in use. Note: This device does not support hot-plug.
-
Page 11: Quick Start
6. Quick Start 6.1 Plug AC/DC adaptor onto AC power source; connect standard USB connector to the AC/DC adaptor and mini-USB connector to the device to power up the device. Notice: 1. Connect the AC power source to the device first time the device will turn on automatically. 2. - Page 12 Photo mode allows you to scan a photo, by switching the Slide/Film switch to Photo position. You also need to pull the LCD display panel outward all the way to the end to a lock position. “Pull Out” icon is displayed on LCD display if the panel is not reaching the Photo lock position. Insert the slide or film tray into the scanner and move the tray carefully to adjust the film.
- Page 13 For Film Mode Select Function • Press the Function button to enter function mode. You can see the icon on the screen. Press the Left or Right buttons to select function. • Select Home Press Start button to back to capture mode. •...
- Page 14 To enter the Format, to select ‘ do not format’ (X) or ‘ format’ (√) press the Start button to confirm. Caution: Formatted files cannot be recovered. • TV Output Connect the scanner to your TV with TV cable. NTSC: Setting the TV Output to NTSC. PAL: Setting the TV Output to PAL.
- Page 15 For Photo Mode Connect to AC power source to turn on the device. Press the power button, and you can see the power LED light will become red. Insert the photo tray into the scanner. Press the Start button to capture a picture Power On/Off: ‧...
- Page 16 Caution: Formatted files cannot be recovered. ‧ TV Output Connect the scanner to your TV with TV cable. NTSC: Setting the TV Output to NTSC. PAL: Setting the TV Output to PAL. ‧ E xposure value Enter the EV mode, press the Left or Right button to select, and press Start button to confirm. Exposure compensation helps you change the exposure setting manually to adjust object lighting.
- Page 17 • Single When you select the icon, press Start button to confirm. You need press Left or Right buttons to review the next / previous picture. • Slide Show Use the Slide Show feature to continue display your photos on the scanner screen panel. Once selected the Slide Show Mode, camera will automatically play all the photos.
-
Page 18: Downloading Images To Your Computer
•Copy to Card Select the icon, the inside memory copy to memory card. • Exit Select the icon, and press Start button to confirm, then you will back the playback mode. 7. Downloading Images to Your Computer For Windows 98/ME customers: When connected the scanner to the computer with the USB cable, the “USB Mass Storage driver”... -
Page 19: Installing The Software
For Windows 2000/ME/98: Double click on “My computer”, and then double click on Removable Disk (i:) in the DCIM files. (All the photos and videos are stored here). 8. Installing the software • Installing the software 1. Insert the installation CD into the CD-ROM drive and the installation CD menu should appear. 2. - Page 20 3. C lick on Y es to agree t o the terms and 4. C lick N ext t o have P hotoImpressions conditions. download into your Programs folder. 5. Click Next to continue. 6 . PhotoImpressions will start the setup process.
- Page 21 7. Once you get this to this screen select 8. Click on Finish to complete and restart the "Clear All" so that PhotoImpressions does computer. not take over the files on your computer. 9. The installed software will automatically create a “PhotoImpression 6” logo on your desktop. Restart the computer and remove the installation disk.
-
Page 22: Main Menu
9. Now you can start to edit the picture as you like: First , click on th e “PhotoImpression 6” icon on the desktop. Follow the i nstructions to open the software, and click on the picture to select, then use the Arcsoft tools to edit the pictures. - Main Menu The Main Menu appears in the upper left corner of the workspace many of the program's key options and controls are available in the Main Menu. - Page 23 Scan Primary Folders Only - S cans folders most commonly used for storing media, such as My Documents, My Pictures and Desktop. Scan All Folders - S cans y our entire c omputer for m edia (ex cept Windows and Program Files folders).
- Page 24 Here you can: Acquire images from connected TWAIN compliant devices such as scanners and some digital cameras. Assign names to ima ge files as they are acquired (using today's date or a de scriptive word). How to acquire images from a TWAIN compliant device: Select a scanner or other TWAIN device from the drop down list.
- Page 25 Edit P hoto Editing Tools The Photo Editing Tools module includes a complete set photo enhancement, editing and retouching controls. The window can be stretched to provide a large size view of the active photo. Double click the module's tool bar to maximize the window to fill the computer screen. In addition to the large photo workspace, the Photo Editing Tools module includes five distinct sets of controls: Enhance...
- Page 26 1. Move the sliders to adjust the level of Brightness and Contrast and to make the image more Sharp. 2. U se the z oom slider to g et a closer lo ok a t h ow the adjustment affects t he photo.
- Page 27 Auto Fix 1. Simply click the "Fix Red-Eye" button to automatically find and fix all red-eye. 2. If not all of the redeye is fixed, used the "Click to Fix" method. Manual Fix 1. Use the zoom slider on the toolbar to zoom in on the photo. 2.
- Page 28 Choose the crop orientation (portrait or landscape). Select a fixed proportion for the crop rectangle (4:6, 5:7, 8:10) or choose "Custom" if you want to use another proportion. Resize the crop rectangle by clicking and dragging the red lines. Move the crop rectangle into position by clicking and dragging inside the red box. Click "Crop".
- Page 29 sharp or smooth. Drag the second slider to increase or decrease the amount of blur. Click "Apply" if you like the result. Click "Cancel" if you do not. Saving Your Results When you're done editing a photo, click Save As to save your results. You can choose to overwrite the original file or save a new one.
- Page 30 Clone The Clone tool is good for removing unwanted elements from a photo. It can also be used for fun effect, like moving a nose from one person to another. How to use the Clone tool to remove a telephone pole from the background of a photo: Establish a source point for the Clone tool by holding the Shift key and clicking on an area of the sky that you want to use to paint over the telephone pole.
- Page 31 Sharpen Sharpen blurry areas. Please click and drag the sliders below to change the brush size and transparency. Blur Smooth out rough areas. Please click and drag the sliders below to change the brush size and intensity. Paint Brush Let you "paint" on your image when you click and drag the mouse. Please click and drag the sliders below to change the brush size and transparency.
-
Page 32: Specification
10.Specification Interface: USB 1.1 Image Sensor: 5 mega CMOS sensor Lens: F no.=5.5, 5 Glass elements , View angle=66° Panel 2.4" TFT Focus Range: Two Fixed focus ( Photo .Film) Exposure Control: Automatic / Manual (-2.0 EV~ +2.0EV) Color Balance: Automatic Scan high resolution 2592X1680 (film) , 2592X1800 (photo)
Need help?
Do you have a question about the NovoScan 3in1 and is the answer not in the manual?
Questions and answers