Table of Contents
Advertisement
Quick Links
Download this manual
See also:
User Manual
Advertisement
Table of Contents

Related Manuals for Nikkai A75HQ

Summary of Contents for Nikkai A75HQ
- Page 1 Set Top Box Digital receiver A75HQ OWNER'S MANUAL Digital Freeview Receiver A75HQ English Read this manual before installation and use.
-
Page 2: Safety Information
SAFETY INFORMATION TO REDUCE THE RISK OF FIRE AND ELECTRIC SHOCK, DO NOT EXPOSE THIS UNIT TO RAIN OR MOISTURE. CAUTION Water and Moisture- do not use this video product near water for To reduce the example, near a bath tub, wash bowl, kitchen sink or laundry risk of fire and electric shock, do not remove the cover (or back) of tub, in a wet basement, or near a swimming pool and the like. -
Page 3: Table Of Contents
CONTENTS SAFETY INFORMATION INTRODUCTION About STB Front panel Rear panel Remote control SYSTEM CONNECTION General about connections Connecting to the TV Connecting a HiFi system GETTING STARTED Switching on for the first time Automatic channel scan Manual channel scan OPERATION Changing channels Accessing the Channel Schedule CHANNEL LIST... -
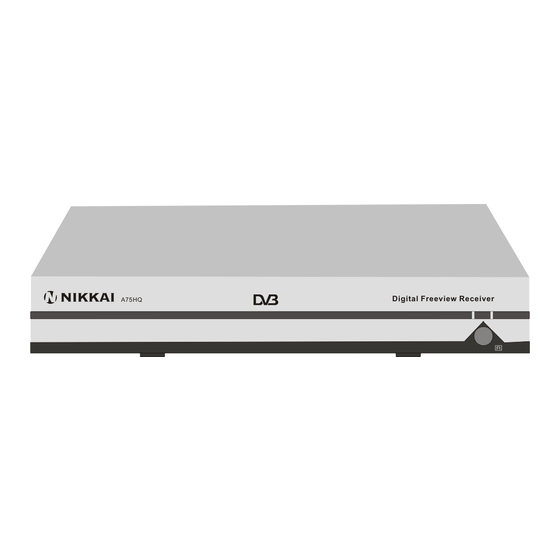
Page 4: Introduction
INTRODUCTION About the STB Front panel Standby indicator Digital Freeview Receiver A75HQ Remote sensor Rear panel TV aerial AC Mains for an external TV aerial Coaxial Digital Audio RS232 Serial port Loop through for an external device TV SCART for connection to the TV... -
Page 5: Remote Control
Remove the batteries if the unit will not be used for a prolonged period of time. Digital Freeview Receiver A75HQ Remote sensor The remote control transmits a directional infrared beam. Be sure to aim the remote... - Page 6 INTRODUCTION Power On/Standby (Switch the STB ON/STANDBY mode) Recall (Reverts to previous channel) MUTE STANDBY Channel up/down INFO SUBTITLE List (Open up the channel list for shortcut) Menu RECALL (Open up menu) VOL+ Cursor ( to select sub-menu from the main menu ) LIST VOL-...
-
Page 7: System Connection
SYSTEM CONNECTION General There are many different types of equipments that you can connect to the STB. In this manual you will see some of the most common ways to connect your equipment. Connecting to the TV with SCART Aerial RF cable RS232 Scart cable... -
Page 8: Getting Started
GETTING STARTED Switching on for the first time Turn on your TV set and select the corresponding AV input (with the AV key, or simular, on the television remote control). Turn on the main power supply to the STB, the indicator on the front of the unit will turn red and then green. -
Page 9: Operation
OPERATION Changing Channels There are four ways of channel selection - stepping through the channel list, selection by number, from the on-screen channel list, and using the Channel Schedule. Stepping through the channel list: Press the "UP" or "DOWN" cursor button to browse up and browse down the available channels. Selection by number: Enter the complete channel number directly by remote control to select desired channel. -
Page 10: Channel List
CHANNEL LIST Channel List The Channel List presents a list of all channels found during the channel search. From the Channel List you can watch and listen to the selected channels, delete them from the list, edit the name of the channel, set a password to access the channel. Channel List Favourite List Press "MENU "... -
Page 11: Favourite List
FAVORITE LIST Favorite list This menu allows the user to store a list of your favourite channel. So that you can access them more easily. In this STB, you have five favourite lists to set, each family member can have his own favourite list. -
Page 12: System Setting
SYSTEM SETTING Many aspects of your STB can be set to reflect your circumstances and preference. The SETTINGS menu screen is accessed from main menu. A/V setting This menu allows the users to set TV shape, Video Output and OSD Transparency. Press the "MENU"... -
Page 13: Change Pin Code
SYSTEM SETTING Change Pin Code This menu allows users to change pin code. Enter the system setting menu, press "UP" or "DOWN" cursor button to highlight the Change Pin Code menu. A/V Setting First Time Installation Press "OK" button to enter the sub-menu. System Info Enter the old pin code using the numeric buttons(Default pin code is Change Pin Code... -
Page 14: Troubleshooting
TROUBLESHOOTING In some region, the digital terrestrial signal may be weak. So you'd better use the antenna in which the booster was built,for watching the weak sinal channels. Problem Possible cause What to do Mains lead unplugged Standby light not lit Check mains lead Mains fuse blown Check fuse... -
Page 15: Specification
SPECIFICATIONS TUNER & CHANNEL RF INPUT CONNECTOR x1 (IEC-TYPE, IEC169-2, FEMALE) RF OUTPUT CONNECTOR x1 (IEC-TYPE, IEC169-2, MALE (LOOPTHROUGH)) FREQUENCY RANGE: 470MHz ~862MHz (UHF) SIGNAL LEVEL: -15 ~ -70 dbm DECODER MPEG-2 ISO/IEC 13818 TRANSPORT STREAM PROFILE LEVEL MPEG-2 MAIN PROFILE @MAIN LEVEL MAX.
Need help?
Do you have a question about the A75HQ and is the answer not in the manual?
Questions and answers