Table of Contents
Advertisement
Advertisement
Table of Contents

Related Manuals for TaoTronics TT-BS003


Summary of Contents for TaoTronics TT-BS003
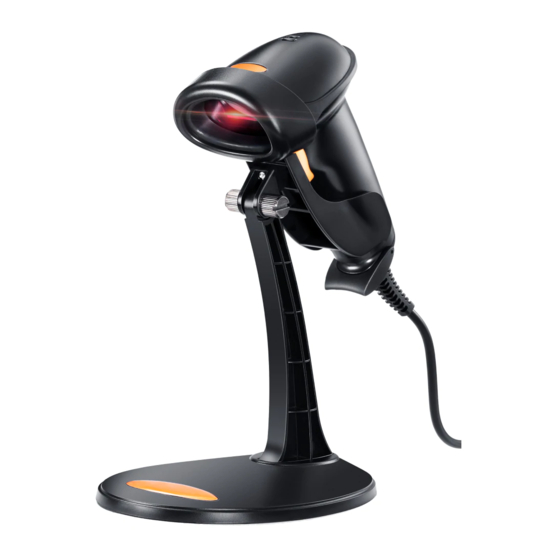
- Page 1 USER’S GUIDE LASER BARCODE SCANNER...
- Page 2 Contents English User Manual --------------------- 1 - 9 Troubleshoots ------------------------------ 10-14 Japanese User Manual ------------------ 15 - 25...
- Page 3 Technical parameters Input voltage DC 5 V ± 0.25 V Power 425 mW (work); 500 mW (instantaneous) Current 85 mA (work); 100 mA (maximum moment) Light Visible light laser diode, wavelength 650 nm Laser Level Laser Level two laser safety standards Decoding speed 100 times / sec scan angle...
-
Page 4: Installing The Interface Cable
Installing the Interface Cable Installation procedures: (1) Plug the modular (RJ45) connector of the cable into the bottom of the scanner until you hear a click sound. (2) Turn off your PC or terminal (3) Unplug the keyboard from the PC or terminal. (4) Plug the keyboard into a connector of the Y cable that mates with it. -
Page 5: Output Mode
Multiscan Functions Defaults Version Output Mode Serial Buzzer Mode Good Read Beep Tone-None Good Read Beep Tone-Reset Good Read Beep Duration LED Power Save Mode-Enable Reading Mode Single Scan Single Scan No Trigger Multi Scan Multi Scan No Trigger Continuous Scan Pulse Scan... - Page 6 Language German France Spain Portugal Universal Baud Rate 1200 2400 4800 9600 19200 38400...
- Page 7 Data Bit BITS-8 BITS-7 tops Bit BITS-1 BITS-2 Parity Bit NONE EVEN Symbol On/Off CODE11 Enable Disable CODE128 Enable Disable...
- Page 8 CODE 39 Enable Disable FULL ASCII Enable FULL ASCII Disable CODE 93 Enable Disable CODABAR Enable Disable Interleaved 2 Of 5 Enable Disable Industrial 2 Of 5 Enable Disable...
- Page 9 MSI/PLESSEY Enable Disable UPC-A UPC-E Enable Disable EAN-13 Enable Disable EAN-8 Enable Disable Enable Disable...
- Page 10 OTHER I OTHER I Expand UPC-E to UPC-A Enable Expand UPC-E to UPC-A Disable Expand UPC-A to EAN-13 Enable Expand UPC-A to EAN-13 Disable Convert EAN-13 to ISBN Enable Convert EAN-13 to ISBN Disable UPC/EAN Supplements Disable UPC/EAN Supplements-2 ONLY UPC/EAN Supplements-5 ONLY UPC/EAN Supplements-2&5 ONLY CODABAR Send Chars Disable...
- Page 11 OTHER II Termination Char-CR Termination Char-LF Termination Char-CR+LF Disable TERMINATION CHAR -TAB REMOVE TERMINATION CHAR TAB Codes Preamble‘STX’ Codes Preamble ‘ETX’ Convert To Uppercase Convert To Lowercase...
- Page 12 Troubleshooting on using this scanner 1. How to get into manual mode? Please hard press the yellow trigger for 8 about seconds. Please keep in mind that manual mode cannot be setup everlasting. It will enter into auto mode once it plug out your PC and plugged in again 2.
- Page 13 7. Bar code directions setting Down arrow Up arrow Left arrow Right arrow 8. How to setup my scanner so that it will only read the 10 digits in the middle of a UPC-A bar code Delete the first digit UPC-A do not send system number Delete the last digit UPC-A do not send check number...
- Page 14 9. How to setup my scanner so that it will only read the 10 digits in the middle of a UPC-E bar code Delete the first digit UPC-E do not send system number Delete the last digit UPC-E do not send check number 10.
- Page 15 14. set time and date after your bar code 1 then 2 15. UPC-A omit the first digit 16. UPC-E omit the first digit 17. Delete five and the last three 18. Add 4 zeros in front of bar code 19.
- Page 16 20. F9 AND F8 DATA+F9 DATA+F8 Note: Please scan the bar code 0B whenever you want to delete the original special setup Please do not hesitate to contact us at support@TaoTronics.com ,if you have any further problems upon your scanner. -14-...
- Page 17 レーザーバーコードリー ダー 取扱説明書 日本語 工場出荷時のデフォルト状態 -15-...
- Page 18 はじめに Taotronics をご購入いただきまして、誠にありがとうございます。 本製品をご使用する前に、必ず本書をお読みの上で、内容を十分にご理解した上で正しく使用 してください。 注意事項 機械は絶対に分解・改造しないでください。 幼児の手の届かない場所でご利用ください。 光源を目に当てたり見つめたりしないでください。 医療機械・原子力設備等人命に関わる機器として使用しないでください。 バーコードの読取以外で使用しないでください。 安全に正しくご使用いただくために ケーブルの着脱時は、必ず本製品に接続している機器の電源をきってください。 本製品を直射日光が長時間あたる場所、粉塵の多い場所、湿気が多い場所、油煙や湯気 のあたる場所、急激な温度変化のある場所、暖房器具等発熱物の近くでは使用・保管しな いでください。 本製品は精密機械ですので、落下させる場合破損する恐れがあります。 本製品の受光部に、水・油・ほこり等を付着させないでください。 シンナー・ベンジン等の溶剤で拭いたり、殺虫剤を掛けたりしないでください。 製品保証とアフターサービス 1 年の安心保証 お買い上げ日から 1 年間の保障を提供いたします。 この期間中に製品は問題がある場合、 弊社に連絡ください。条件によって、商品の修理或いは返品を提供いたします。 お問い合わせ: ウェブサイト:www.taotronics.com メール:support.jp@taotronics.com 受付時間:8:00~17:00、月~金(土、日祝祭日は休み)
- Page 19 製品仕様 定格入力 5V±0.25V 425 ミリワット(作業);500 ミリワット(瞬間が パワー 最大です) 85 ミリアンペア(作業);100 ミリアンペア(瞬 消費電流 間が最大です) 光源 650nm 可視光半導体レーザー スキャンレート 100 スキャン/秒 読取角度 ±60°,±65°,±42° 分解能 0.1mm (4mil) UPC-A,UPC-E,EAN-13,EAN-8, ISBN/ISSN,Code 39,Code 39 (FullASCll),Interleaved 2of5 (ITF), 読取可能コー Industrial 2of5,Codabar ド , Code 128 , Code 93 , Code 11 , MSI/Plessey,UCC/EAN128 提示方式...
- Page 20 ケーブルの取扱について 次の手順でケーブルを交換してください。 (1) 「カチッ」と音がするまでにケーブルの一端をスキャナー底部に挿し込みます。 (2) コンピューター或は端末設備の電源を切ってください。 (3) ケーブル他の一端をコンピューター或は端末設備に接続します。 (4) コンピューター或は端末設備を起動します。 (5) バーコードを読むよりインターフェイスを設定します。 ご注意:当バーコードリーダーは USB モードを黙認します。若しくはキーボードモードを替えるな らば、キーボード接続用ケーブルを変えてキーボードモード設定のバーコードをスキャンします。 若しくは RS232 モードを替えるならば、RS232 口接続用ケーブルを変えて RS232 モード設定の バーコードをスキャンします。 キーボードインターフェイス出力信号 PS/2 (オス) PS/2 (メス) ピン 機能 ピン 機能 PC DATA KB DATA PC CLK KB CLK -18-...
- Page 21 RS-232 ポート出力信号 USB ポート出力信号 DB9(メス) ピン 信号 ピン 信号 スキャン機能 バージョン番号 デフォルト インターフェースの設定 USB モード RS232 モード ブザー 音を OFF にします 音を ON にします -19-...
- Page 22 ボリュームを下げます 省電力モード シングルスキャンモード シングルトリガなしモード 多重スキャンモード 多重トリガなしモード 自動連続スキャンモード モード パルス ドイツ アメリカ フランス スペイン ポルトガル 全世界通用 -20-...
- Page 23 バイト率 1200 2400 4800 9600 19200 38400 データビット なし Even -21-...
- Page 24 バーコードインストール CODE 11 CODE 128 CODE 39 Full ASCII モード ON Full ASCII モード OFF CODE 93 -22-...
- Page 25 CODABAR Interleaved 2of5 (ITF) Industrial 2of5 MSI/PLESSEY UPC-A -23-...
- Page 26 EAN-13 EAN-8 コンバート UPC-E を UPC-A に変換(ON) UPC-E を UPC-A に変換(OFF) UPC-A を EAN-13 に変換(ON) UPC-A を EAN-13 に変換(OFF) EAN-13 を ISBN に変換(ON) EAN-13 を ISBN に変換(OFF) UPC/EAN に 5 桁コードを付加します UPC/EAN に 2 桁&5 桁コードを付加します CODABAR 桁数転送設定(ON) CODABAR 桁数転送設定 (OFF) CODE39 桁数転送設定(ON)...
- Page 27 付加設置コード2 拡張子を付加します-リターン 拡張子を付加します- 改行 拡張子を付加します-リターン& 拡張子をキャンセルします-リターン 改行 バーコードに拡張子 TAB を付加します バーコードに拡張子 TAB をキャンセルします バーコード先頭「STX」コードを付加します バーコード後ろ「ETX」を付加します 大文字 に転換 小文字に転換 -25-...
- Page 28 E-Mail: support@taotronics.com Tel: 1-888-456-8468 # 4 (Monday-Friday: 9:00 – 18:00 PST) Address: 2880 Zanker Rd, Suite 203, San Jose, CA 95134 Europe Union E-Mail: support.uk@taotronics.com (United Kingdom) support.de@taotronics.com (Germany) support.fr@taotronics.com (France) support.es@taotronics.com (Spain) support.it@taotronics.com (Italy) EU Importer: ZBT International Trading GmbH...
Need help?
Do you have a question about the TT-BS003 and is the answer not in the manual?
Questions and answers