
Related Manuals for Tieline Bridge-IT

Summary of Contents for Tieline Bridge-IT
- Page 1 Bridge-IT IP Codec User Manual Software Version: 2.14.88 Manual Version: v.2.2_20151125 November, 2015...
-
Page 2: Table Of Contents
Part IX Configuring AES3 Audio Part X Headphone/Output Monitoring Part XI Language Selection Part XII About Program Dialing Part XIII Getting Connected Quickly 1 10 Quick Steps to Connect Bridge-IT ........................... 30 2 Monitoring IP Connections ........................... 33 3 Load and Dial Custom Programs ........................... -
Page 3: Contents
........................... 126 2 Configuring IP Settings ........................... 131 3 Configuring Input/Output Settings ........................... 135 4 Configure SIP Settings ........................... 137 5 Load, Unload and Dial a Program ........................... 140 6 Lock or Unlock Programs ........................... 143 © Tieline Pty. Ltd. 2015... - Page 4 3 Tips for Creating Reliable IP Connections ........................... 186 4 Testing IP Network Connections ........................... 187 5 Software Licences ........................... 189 6 Compliances and Certifications ........................... 197 7 Trademarks and Credit Notices ........................... 198 Part XXI Specifications Index © Tieline Pty. Ltd. 2015...
-
Page 5: Part I How To Use The Documentation
Codec hardware elements are in bold Capitals, e.g. Help Button Press the (information/help) button on the codec when navigating codec menus to display a help dialog on the LCD screen suggesting actions which can be performed from the current menu item. © Tieline Pty. Ltd. 2015... -
Page 6: Part Ii Warnings And Safety Information
DO NOT USE Tieline codecs during thunderstorms and lightning. You may suffer an injury using a Tieline codec, or any device connected to a LAN connection during a thunderstorm. This can lead to personal injury and in extreme cases may be fatal. Protective devices can... -
Page 7: Part Iii Glossary Of Terms
Generally not well- suited to streaming live audio because buffering (latency) is employed to ensure data packets are received in order Time-to-Live is the setting used in multicast servers to ensure data packets © Tieline Pty. Ltd. 2015... - Page 8 IP. Unicast Broadcasting of a single stream of data between two points. Wide Area Network; a computer network spanning regions and/or countries to connect separate LANs © Tieline Pty. Ltd. 2015...
-
Page 9: Part Iv Introduction To The Codec
Bridge-IT transports audio streams reliably, simply and effectively over IP data networks such as wired and wireless LANs, WANs, the internet, satellite IP, Wi-MAX and Wi-Fi. Bridge-IT is perfect for a large range of broadcast and professional applications that include: · Studio-to-Transmitter Link (STL) applications ·... - Page 10 · Multi-region plug pack 12 volt 1 Amp power supply · Phoenix 7-way connector for control port activation If any of the parts are incorrect, missing, or damaged, contact Tieline or your nearest authorised dealer. © Tieline Pty. Ltd. 2015...
-
Page 11: Part V Front Panel Controls
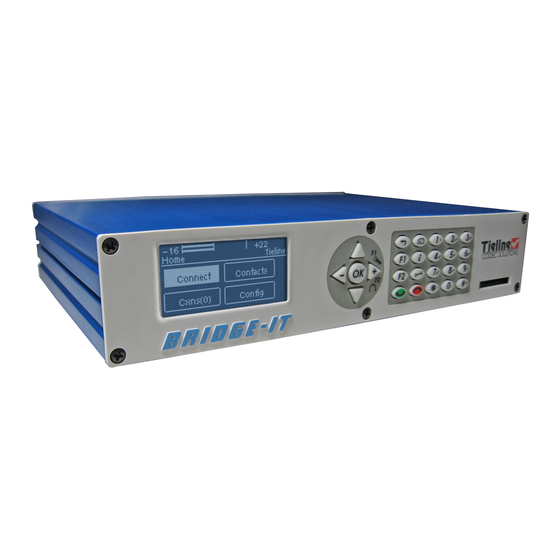
Bridge-IT Manual Front Panel Controls Bridge-IT features a full hardware front panel interface with menu navigation buttons, an LCD display with PPM metering and a dialing keypad. The codec also features an SDHC card slot, which can be used for automatic program audio backup, audio playout and in-store audio recordings. - Page 12 Important Note: The default Auto Dim time-out is reduced from 30 seconds to 10 seconds when the Auto Lock function is enabled (to lock the front panel controls). Disabling Auto Dim mode will override all time-out periods and the LCD will remain fully illuminated at all times. © Tieline Pty. Ltd. 2015...
-
Page 13: Part Vi Rear Panel Connections
Levels) XLR Analog and AES3 Outputs Bridge-IT features two balanced XLR analog audio outputs and a digital XLR AES3 (AES/EBU) audio output. Both the analog and digital outputs can be used simultaneously and the AES3 output can send both mono and stereo signals via the single XLR output. -
Page 14: Lan Port
Bridge-IT Manual Stereo Headphone Jack Output Bridge-IT has a 6.35mm (1/4") stereo headphone output jack for monitoring audio inputs 1 and 2 and return link audio. Channel 1 is mapped directly to the left headphone output and channel 2 is mapped directly to the right headphone output. -
Page 15: Part Vii Navigating Codec Menus
Use the navigation arrows to scroll up and down. Features Codec Home Screen Elements 1 Up Arrow Arrow indicating menus can scroll upwards 2 Down Arrow Arrow indicating menus can scroll downwards © Tieline Pty. Ltd. 2015... - Page 16 Bridge-IT Manual Codec Menu Overview © Tieline Pty. Ltd. 2015...
- Page 17 Bridge-IT Manual Connect Menu © Tieline Pty. Ltd. 2015...
- Page 18 Bridge-IT Manual IP Setup Menu Navigation © Tieline Pty. Ltd. 2015...
- Page 19 Bridge-IT Manual Settings Menu © Tieline Pty. Ltd. 2015...
-
Page 20: Part Viii Adjusting Input/Meter Levels
The Tieline G5 audio reference scale displayed on the codec screen is -16dBu to +22dBu when you connect to a codec in Tieline's Merlin, Genie or Bridge-IT IP codec families. Set audio levels so that audio peaks average at the nominal 0vu point. This represents a program level of +4 dBu leaving the codec. - Page 21 Audio Metering when Connecting to Tieline G3 Codecs New generation Genie, Merlin and Bridge-IT IP codecs have more audio headroom than Tieline G3 audio codecs, therefore metering needs to be adjusted when connecting to a Commander or i-Mix G3 codec.
- Page 22 Ch 1 level indication with percentage of gain indicated, i.e. 68. 4 Input 2 Level Control Ch 1 level indication with percentage of gain indicated, i.e. 68 5 Ch1/2 Gang Indication Indicates whether ganging is enabled or disabled © Tieline Pty. Ltd. 2015...
- Page 23 · The gain setting for both channels is automatically set to match the gain level of the lowest of the two channels when ganging is configured. · If one channel is turned on when ganging is configured then the other one will be turned on automatically. © Tieline Pty. Ltd. 2015...
-
Page 24: Part Ix Configuring Aes3 Audio
AES3 output. For example, if you are streaming audio using Tieline Music (32kHz sampling), file playback will be re-sampled to 32kHz if the SD card file is 44.1kHz or 48kHz. In this example the AES3 output sample rate will be 32kHz. - Page 25 3. Navigate to AES3 SR and press 4. Select a preferred sample rate then press Tieline normally recommends selecting STL Silence Mode for audio monitoring if using AES3. If using Auto Select make sure the algorithm sample rate and the AES3 SR sample rate setting are the same.
-
Page 26: Part X Headphone/Output Monitoring
· The same audio is routed to the analog and AES XLR outputs. · When inputs are routed to the outputs, input 1 is sent to output 1 and input 2 is sent to output © Tieline Pty. Ltd. 2015... -
Page 27: Part Xi Language Selection
English is the default language in the codec. To adjust this setting: 1. Press the SETTINGS button. 2. Navigate to System and press 3. Use the navigation buttons to select Language and press 4. Select a language and press © Tieline Pty. Ltd. 2015... -
Page 28: Part Xii About Program Dialing
The codec uses the concept of 'program' dialing to connect using peer-to-peer, multicast or multi- unicast connections. A Program configures a Tieline codec to send or receive an Audio Stream. The attributes of each audio stream and associated connections are embodied within a program when it is created, including the configuration, dialing and answering parameters. - Page 29 New programs can be created using either the codec front panel or the Programs panel in the Toolbox web-GUI. (For web-GUI configuration see Configuring a Multicast Server Program Configuring a Multicast Client Program). © Tieline Pty. Ltd. 2015...
-
Page 30: Part Xiii Getting Connected Quickly
(see Configuring IP Addresses). 13.1 10 Quick Steps to Connect Bridge-IT Important Notes: · The following procedure will create a custom peer-to-peer connection program using the codec front panel keypad and navigation buttons. It instructs how to connect your codec over IP for the very first time without using the Toolbox web-GUI and your computer for configuration. - Page 31 IP and press the button. 3. Select your preferred IP Session mode. In this Peer-to-Peer connection example we have selected Tieline, which uses Tieline session data, then press the button. Note: Select SIP or Sessionless if these connections are required.
- Page 32 10.Press the CONNECT button to make a connection. The Wait Connecting screen appears during the connection process. After successfully connecting the codec will display connection details. Use the down navigation © Tieline Pty. Ltd. 2015...
-
Page 33: Monitoring Ip Connections
Cxn Stats (connection statistics) screen. This displays the performance of the codec in sending IP audio packets across the network. Analysis is historic and assessed over 60 seconds and 10 minutes of connection time. © Tieline Pty. Ltd. 2015... - Page 34 ‘Packet arrival history’ is cleared when you hang up a connection. Following is an analysis of possible causes and solutions for the packet analysis statistics displayed on the screen. © Tieline Pty. Ltd. 2015...
-
Page 35: Load And Dial Custom Programs
1. Press the red DISCONNECT button on the numeric KEYPAD at any time to hangup a connection. 2. Use the right navigation button to select Yes and press the DISCONNECT button or the button to confirm the connection hangup. © Tieline Pty. Ltd. 2015... -
Page 36: Redialing A Connection
4. Navigate to A/Recon and press to toggle between Enabled and Disabled. Important Note: When Auto Reconnect is enabled, the dialing codec will continue to attempt a connection with the remote codec until Disconnect is pressed either on the © Tieline Pty. Ltd. 2015... -
Page 37: Speed Dialing Connections
2. Connect to the codec using the Toolbox web-GUI and use the Master panel to load the program and connect. Dialing Multiple Connections via the Front Panel 1. Press the HOME button to return to the Home screen. © Tieline Pty. Ltd. 2015... -
Page 38: Creating A Multicast Server Program
· A multicast client program is used by codecs to receive multicast IP audio packets. Prerequisites: · Bridge-IT firmware v.1.01.00 r4219 or higher. · ToolBox web-GUI v.1.2.2.3 or higher. · A multi-unicast license installed in the dialing codec (Note: the multi-unicast license includes multicast server capability). - Page 39 TTL value you need to use is dependent upon your network infrastructure. Please consult your network administrator if you are unsure about how to configure this setting. 7. Select Data to enable or disable data in the audio stream. See RS232 Data Configuration more information on data connections. © Tieline Pty. Ltd. 2015...
- Page 40 Press the CONNECT button to make a connection. 2. Select and load the multicast client program on each of the multicast client codecs and dial the multicast IP address to begin receiving multicast audio packets. © Tieline Pty. Ltd. 2015...
-
Page 41: Creating A Multicast Client Program
Use the procedure which follows to configure a multicast client program and allow the codec to receive multicast IP audio packets. Prerequisites: · Bridge-IT firmware v.1.01.00 r4219 or higher. · ToolBox web-GUI v.1.2.2.3 or higher. · A multi-unicast license installed in the dialing codec (Note: the Multi-Unicast license includes multicast server capability). - Page 42 RS232 Data Configuration more information on data connections. 8. Select Proto (protocol) to select the audio protocol and adjust the Local Audio Port. Select UDP/IP +RTP for RFC compliant IP streaming. Press to save settings. © Tieline Pty. Ltd. 2015...
-
Page 43: Dialing Sip Peer-To-Peer
· Both codecs connecting over SIP need to be configured · SIP dialing is only supported over peer-to-peer connections, not multi-unicast connections. · Tieline G3 codecs do not support AAC and will default to MPEG Layer 2 if a Bridge-IT © Tieline Pty. Ltd. 2015... -
Page 44: Dialing Sip Addresses
· Some Telcos and ISPs may block SIP traffic over UDP port 5060. · When connecting to a Tieline G3 codec using SIP you need to manually select the G3 audio reference level in the codec. To do this select SETTINGS >... -
Page 45: Deleting Programs
If you are unsure about which algorithm to use, see Selecting an Algorithm for more details on each algorithm available in the codec. 1. Press the HOME button to return to the Home screen. © Tieline Pty. Ltd. 2015... - Page 46 2. Use the navigation buttons to select Connect and press the button. 3. Select IP and press the button. 4. Select Tieline session mode and press the button. Note: algorithm profiles are only available for Tieline session connections. 5. Use the down navigation button to select Setup and press the button.
- Page 47 Available Profiles The following profiles are pre-configured in all Bridge-IT codecs. Note: AAC and aptX Enhanced algorithm profiles are not available unless valid licenses have been installed in the codec. Profiles...
-
Page 48: Sdhc Card Backup
· If you create a single file name ensure you add the file extension, e.g. "test.mp3", or the file will not play back. · If you create a directory name, all the files within the directory will be played back. We © Tieline Pty. Ltd. 2015... -
Page 49: Lock Or Unlock A Program In The Codec
Lock or Unlock a Program in the Codec By default Tieline codecs will attempt to answer a call from another codec if possible. For example, if a mono program is loaded in the codec and a stereo incoming call is detected, the codec will adjust and load a compatible answering program. -
Page 50: Locking The Front Panel
Note: The time-out period is the time in seconds before the codec front panel is relocked after being used. 5. If you want to change the default Admin PIN or User PIN, navigate to each in turn and press to enter a new PIN. © Tieline Pty. Ltd. 2015... -
Page 51: Part Xiv Connecting To The Toolbox Web-Gui
Bridge-IT Manual Connecting to the ToolBox Web-GUI There are three graphical user interface (GUI) options for configuring Tieline G5 codecs: 1. Java Toolbox Web-GUI: codecs can be fully configured including program creation, dial and hangup, command and control. 2. HTML5 Toolbox Web-GUI: most codec settings can be configured, dial and hangup existing programs only, plus codec command and control. -
Page 52: Opening The Java Or Html5 Web-Gui & Login
2. When you launch Toolbox an authentication dialog prompts you to enter a password to login. The first time you log in you can enter the default setting "password" and click the OK button. Tieline highly recommends you click the hyperlink in the login dialog or visit... - Page 53 1. Click to launch the HTML5 Toolbox Web-GUI. 2. When you launch Toolbox for the first time an authentication dialog prompts you to enter the user name "admin" and password "password" to login, then click the OK button. Tieline highly recommends you change the password (see Changing the Default Password).
- Page 54 6. Type the IP address of your codec into your browser with a full colon and then the new port number. Important Note: Any new port specified must be within the range 2000 to 65535 inclusive. © Tieline Pty. Ltd. 2015...
-
Page 55: Changing The Default Password
The default password for the Toolbox Web-GUI is password. Enter this in the authentication dialog to use the Web-GUI initially and then Tieline highly recommends changing the default password to protect your codec from being tampered with during live broadcasts. Note: In the HTML5 Web-GUI authentication dialog it is necessary to enter admin as the User Name. -
Page 56: Installing Usb Drivers
2. Unzip the file and save it to your PC. 3. Connect a USB cable between your PC and the Bridge-IT USB port on the rear panel of the codec. 4. The PC should detect that a new device has been attached and launch the Found New Hardware Wizard. -
Page 57: Launching The Gui Over Usb
Java Toolbox Web-GUI Introduction Important Note: The default password for the web-GUI is password. This has to be entered to initially use the Toolbox web-GUI. For additional security Tieline highly recommends changing the authentication login password using the codec keypad and... - Page 58 Click to select a program before loading or connecting Disconnect button Click to disconnect the currently selected audio stream or a specific connection. Note: this button becomes a Connect or Unload button when all audio streams are disconnected. © Tieline Pty. Ltd. 2015...
- Page 59 Ensure the program is not loaded or the delete function will not work). Maximize/Minimize Click to maximize a panel to view it in full-screen mode, or click to minimize back to the default panel size Close button Click to close the Connect panel. © Tieline Pty. Ltd. 2015...
- Page 60 Close button Click to close the panel Input Sliders/Faders Input gain control sliders/faders Analog/AES3 Indication Indicates whether the codec input is configured for analog or digital audio sources 10 Input PPM meter Input PPM meter © Tieline Pty. Ltd. 2015...
- Page 61 Right-click to view audio stream bit-rate and jitter buffer statistics Maximize/Minimize Click to maximize a panel to view it in full-screen mode, or click to minimize back to the default panel size Close button Click to close the panel © Tieline Pty. Ltd. 2015...
- Page 62 Click to program a relay to toggle based on connection connection status status Maximize/Minimize Click to maximize a panel to view it in full-screen mode, or click to minimize back to the default panel size Close button Click to close the Rules panel © Tieline Pty. Ltd. 2015...
- Page 63 Ethernet Port or LAN. 13 IPv6 details IPv6 addressing details and configuration 14 MAC Address Device MAC address 15 IPv4 details IPv4 addressing details and configuration 16 Save Settings button Saves all configuration settings © Tieline Pty. Ltd. 2015...
- Page 64 2 Resources Links to open the user manual in a new browser, or view support information 3 Support Logs Click to download diagnostic information that can be sent to Tieline support 4 Event Logs Click to download user-viewable event logs...
-
Page 65: Part Xvi Java Toolbox Web-Gui Codec Configuration
An IP address is a unique address to identify a device on a TCP/IP network. Your codec uses dual IP protocol stacks to allow your codec to work on both IPv4 and IPv6 networks. Your Tieline codec supports both DHCP (default) IP addressing and static IP addresses for dialing IPv4 connection endpoints. - Page 66 Internet Service Provider or to your own local area network (LAN). By default the codec is configured for DHCP-assigned IP addresses. Static IP addresses are fixed addresses that are recommended for studio installations, so that IP address dialing remains the same over time for incoming codec connections. © Tieline Pty. Ltd. 2015...
- Page 67 LAN. This address is allocated by the codec internally based on MAC address details. Auto Address Assignment By default the codec is programmed for connecting to an IPv6 router which automatically allocates IPv6 address details, as displayed in the following example. © Tieline Pty. Ltd. 2015...
- Page 68 2. Click the Options button at the top of the Settings panel. 3. Click in the QoS text box and enter the new value. 4. Click the Save Settings button at the bottom of the panel to save the new setting. © Tieline Pty. Ltd. 2015...
-
Page 69: Configuring Input/Output Settings
1. Click the Input Settings symbol. 2. Select Type and click to select either Analog or AES3. 3. When you select AES3, the display changes to reflect 100% input levels; slider and input on/off controls are locked on. © Tieline Pty. Ltd. 2015... - Page 70 3. When ganged, the two channel sliders move in sync with each other when dragged using a mouse-pointer. 4. Click the Link symbol to temporarily disable the ganging function and fine-tune channel audio levels. Click the Link symbol again to resume ganging. © Tieline Pty. Ltd. 2015...
- Page 71 Input 1 can be configured to supply 15 volt phantom power if required; this is disabled by default. 1. Click the Input Settings symbol on channel 1. 2. Click to select the Phantom check box. © Tieline Pty. Ltd. 2015...
- Page 72 1. Click the Settings symbol at the top of the screen to open the Settings panel. 2. Click the Audio tab and use the drop-down menu to select your preferred AES Output Clock setting, then click Save Settings. © Tieline Pty. Ltd. 2015...
-
Page 73: Configuring Mono Or Stereo Peer-To-Peer Programs
3. Enter a name for the Audio Stream and configure the codec to dial, answer or dial and answer. Then click Next. © Tieline Pty. Ltd. 2015... - Page 74 4. This audio stream connection in the wizard will allow the codec to dial. Enter the name of the connection in the text box, then click Next. 5. Follow the instructions on the right-hand side of the panel to configure the transport settings for the connection, then click Next. © Tieline Pty. Ltd. 2015...
- Page 75 (using Tieline sesssion data), the Local Audio Port is automatically configured as UDP audio port 9000 by default. This is the default audio port used by all Tieline IP codecs for the first audio stream connection. Click to deselect the Automatic check-box to change this setting.
- Page 76 · Auto Jitter Adapt and the preferred auto jitter setting using the drop-down arrow for Buffer priority, or · Fixed Buffer Level and enter the Jitter Depth (5000ms maximum). · Local and Remote FEC settings if required. © Tieline Pty. Ltd. 2015...
- Page 77 1. Enter a name for the answering connection and click Next. 2. Follow the instructions on the right-hand side of the panel to configure the Transport, Session Protocol and Audio Port settings for the connection, then click Next. © Tieline Pty. Ltd. 2015...
- Page 78 5. Click Finish and the newly created program will be displayed in the left pane within the Programs panel and in the Master panel. Select and connect audio streams in a program using the Master panel, or dial the program manually using the codec front panel. © Tieline Pty. Ltd. 2015...
-
Page 79: Configuring Multi-Unicast Dialing Programs
· If you are dialing to both G3 and Bridge-IT, Merlin or Genie codecs, by default the Audio Reference Level will be configured for the compatibility of the codec dialed first. - Page 80 5. Follow the instructions on the right-hand side of the panel to configure the transport settings for the connection, then click Next. Note: only the first connection dialed in a multi-unicast program can encode and decode audio. All other connections are unidirectional and encode only. © Tieline Pty. Ltd. 2015...
- Page 81 (using Tieline sesssion data), the Local Audio Port is automatically configured as UDP audio port 9000 by default. This is the default audio port used by all Tieline IP codecs for the first audio stream connection. Click to deselect the Automatic check-box to change this setting.
- Page 82 8. Select the Enable Auto Reconnect check-box if you want to enable this feature. This is enabled by default. 9. Select the Create another dialing connection check-box to configure a new connection for an additional endpoint, then click Next. © Tieline Pty. Ltd. 2015...
- Page 83 The Master panel in the ToolBox web-GUI is used to monitor connection details and view PPMs, as displayed in the following image. Click the blue arrow in the Program/Cxn column to expand and minimize connection details (as displayed below). © Tieline Pty. Ltd. 2015...
-
Page 84: Configuring Multicast Server Programs
Multicast connections are sessionless and do not use Tieline session data. As a result, it is imperative that all codecs are configured with the same connection settings prior to connecting, or they will not be able to join multicast streaming sessions. - Page 85 (Note: the Multi-Unicast license includes multicast server capability). · Use firmware higher than 2.8.xx in the Bridge-IT, Genie and Merlin families of codecs to transmit auxiliary data. Multicast Server versus Multicast Client Programs Two different types of multicast programs need to be created when multicasting: ·...
- Page 86 5. Follow the instructions on the right-hand side of the panel to configure the transport settings for the connection, then click Next. Note: select UDP/IP +RTP for RFC-compliant streaming. If auxiliary data is enabled the audio stream will not be RFC-compliant. © Tieline Pty. Ltd. 2015...
- Page 87 · The TTL value you need to use is dependent upon your network infrastructure. Please consult your network administrator if you are unsure about how to configure this setting. · Use firmware higher than 2.8.xx in the Bridge-IT, Genie and Merlin families of codecs to enable auxiliary data.
-
Page 88: Configuring Multicast Client Programs
· Forward Error Correction (FEC) is not available for multicast connections. · Use firmware higher than 2.8.xx in the Bridge-IT, Genie and Merlin families of codecs to enable auxiliary data. · It is not possible to connect to a G3 codec and receive multicast IP audio streams. - Page 89 Multicast Server or Multicast Client when you first create the program in the wizard. · Use firmware higher than 2.8.xx in the Bridge-IT, Genie and Merlin families of codecs to enable auxiliary data. 6. Configure the multicast IP address and audio port (the same multicast address and port must be used for both the server and client programs), then specify which IP streaming interface is used to dial this connection, e.g.
- Page 90 Click Next to select Enable File Playback on silence detection, or ii. Click Save Program to save the program at this point. When you save the program it will be confirmed by the following message. © Tieline Pty. Ltd. 2015...
-
Page 91: Configuring Sip Settings
· SIP dialing is only supported over peer-to-peer connections, not multi-unicast connections. · Tieline G3 codecs do not support AAC and will default to MPEG Layer 2 if a Bridge-IT codec configured for AAC attempts to connect. · Some Telcos and ISPs may block SIP traffic over UDP port 5060. - Page 92 > SIP > Accounts to verify that the account has been registered to the SIP server. The registration symbol appears when it is activated successfully. Important Notes: Some ISPs may block SIP traffic over UDP port 5060. © Tieline Pty. Ltd. 2015...
-
Page 93: Configuring Sip Programs
4. This audio stream connection in the wizard will allow the codec to dial. Enter the name of the connection in the text box, then click Next. © Tieline Pty. Ltd. 2015... - Page 94 SIP user name to dial successfully. · The default UDP audio port when using SIP is 5004 in Tieline codecs. To contact a codec that is behind a firewall or NAT-enabled router, it is essential that this and all other relevant ports are open and forwarded to the other device.
- Page 95 10.Enter a name for the answering connection and click Next. 11.Follow the instructions on the right-hand side of the panel to configure the Transport, Session Protocol and Audio Port (preconfigured for SIP) settings for the connection, then click Next. © Tieline Pty. Ltd. 2015...
- Page 96 Caution: If the codec LAN cable is disconnected and the IP address changes when dialing in SIP mode, you will need to reboot the codec, otherwise the codec will not be able to reconnect. © Tieline Pty. Ltd. 2015...
-
Page 97: Dial And Disconnect A Program
2. Click Connect to load the program and connect all audio streams. Disconnecting a Program 1. Click to highlight the audio stream in the Connections pane of the Master panel. 2. Click Disconnect to end the connection. © Tieline Pty. Ltd. 2015... -
Page 98: Dial And Disconnect Multi-Unicast Connections
1. Click to select the program in the Connections pane, e.g. Multi-unicast to Codec A & B in the following example. 2. Click the Disconnect button. 3. Click Yes in the confirmation dialog to disconnect all audio stream connections. © Tieline Pty. Ltd. 2015... - Page 99 Disconnect a Single Audio Stream Connection 1. Click to select the audio stream connection you want to disconnect. 2. Click the Disconnect button. 3. Click Yes in the confirmation dialog to disconnect all audio stream connections. © Tieline Pty. Ltd. 2015...
-
Page 100: Lock Or Unlock Programs
To view configuration settings for an existing program, or edit settings: 1. Open the web-GUI and click the Programs symbol at the top of the screen to display the Programs panel. 2. Click to select a program in the left-hand pane. © Tieline Pty. Ltd. 2015... - Page 101 2. Click to select a program listed on the left hand side of the Programs panel and then right- click to display menu options. 3. Select and click Delete Program. 4. Click Yes in the confirmation dialog. © Tieline Pty. Ltd. 2015...
- Page 102 Bridge-IT Manual 5. Alternatively, click Delete Program next to the program name in the top-right corner of the Programs panel. © Tieline Pty. Ltd. 2015...
-
Page 103: Reset Factory Default Settings
2. Click the Reset/Restore button at the top of the Settings panel. 3. Click one of the reset options available. 4. A confirmation dialog appears for each option, click Yes to proceed or No to cancel the reset function. © Tieline Pty. Ltd. 2015... -
Page 104: Backup And Restore Functions
PC to save the configuration file. Save Restoring Configuration File Settings 1. Open the web-GUI and click the Settings symbol at the top of the screen to display the Settings panel. © Tieline Pty. Ltd. 2015... - Page 105 6. Click Restore to copy the configuration file settings onto the codec; confirmation of successful file restoration is provided. 7. The codec will reboot automatically to ensure the restored configuration is loaded successfully. © Tieline Pty. Ltd. 2015...
-
Page 106: Web-Gui Software License Installation
Prior to installation you will need connect your codec to a PC and ensure you are connected to the internet. You should also check that you have received notification by email from Tieline that your new license file is ready to download from TieServer. -
Page 107: Download Logs
Help panel. 2. Click Download Logs. 3. Save the file to your computer and then send it as a .zip file to Tieline support via support@tieline.com Download Event Logs Event logs can be downloaded from the codec and viewed using any text editor, e.g. Microsoft®... -
Page 108: Rs232 Data Configuration
· When connecting to G3 codecs over IP only in-band data is available via the Music and MusicPLUS algorithms. · Use firmware higher than 2.8.xx in the Bridge-IT, Genie and Merlin families of codecs to enable auxiliary data over multicast connections. -
Page 109: Creating Rules
2. Use the navigation buttons on the front panel to select Connect and press the button. 3. Select IP and press the button. 4. Select your preferred IP Session mode (Tieline or Sessionless). 5. Use the down navigation button to select Setup and press the button. - Page 110 3. Click the drop-down Program arrow to select an individual program which will be connected and disconnected by the change in the control port input states. 4. Check the Rule summary and click Create Rule to save the settings. © Tieline Pty. Ltd. 2015...
- Page 111 4. Check the Rule summary and click Create Rule to save the settings. Invalid Rules Any rule in the Rules panel related to a deleted program is invalid. An Invalid error warning will be © Tieline Pty. Ltd. 2015...
- Page 112 1. Click the Rules button at the top of the web-GUI screen to open the Rules panel. 2. Click the Delete button next to the rule you want to delete. 3. Click Yes in the confirmation dialog. © Tieline Pty. Ltd. 2015...
-
Page 113: Upgrading Codec Firmware
Bridge-IT Manual Upgrading Codec Firmware 16.19 To download the latest codec firmware visit http://www.tieline.com/Support/Latest-Firmware. Manual Firmware Upgrades The following procedure explains how to perform codec firmware upgrades with a downloaded firmware file saved to your PC. 1. Click the Settings button at the top of the web-GUI screen. - Page 114 Bridge-IT Manual Important Note: Firmware upgrade files are very large and it is usually much quicker to download the file to your PC first and then upgrade the codec manually using the Manual Firmware Upgrade procedure. © Tieline Pty. Ltd. 2015...
-
Page 115: Part Xvii Html5 Toolbox Web-Gui Introduction
Opening a Panel & Adjusting Screen Position Click an item in the Menu bar to display available panel options, then click to select and open a panel. New panels automatically open in the top left of the screen. © Tieline Pty. Ltd. 2015... - Page 116 Bridge-IT Manual Position the mouse pointer over a panel's Title bar and click and drag to move a panel and reposition it in a preferred screen position. © Tieline Pty. Ltd. 2015...
- Page 117 4 Load Unload Click Load to load the currently selected program in the button Programs list; the button changes automatically to Unload after loading, to allow unloading of a program when required. © Tieline Pty. Ltd. 2015...
- Page 118 Click to close the panel. Statistics Panel Feature Description 1 Show/Hide Arrow Click to show/hide audio stream statistics. 2 Show/Hide Arrow Click to show/hide individual connection statistics. 3 Close button Click to close the panel. © Tieline Pty. Ltd. 2015...
- Page 119 Bridge-IT Manual PPMs Panel Feature Description 1 PPM Meters 4 PPM meters. 2 Close button Click to close the panel. © Tieline Pty. Ltd. 2015...
- Page 120 Bridge-IT Manual Inputs Panel for Input Adjustments Important Note: Tieline codecs have different input configurations, therefore the image shown may not reflect the number of inputs displayed in your codec Web-GUI. Feature Description Settings button Click to adjust input Name, Type and IGC.
- Page 121 Click to configure a relay to toggle based on connection's status connection status. Back / Add New Rule button Click to add a new rule, or exit the rule creation function. Close button Click to close the panel. © Tieline Pty. Ltd. 2015...
- Page 122 Click to open the panel; select a license file and install it in the codec. 10 Firmware tab Click to open the panel; view software versions and perform an upgrade. 11 SIP tab Click to open the panel and edit or view SIP configuration © Tieline Pty. Ltd. 2015...
- Page 123 12 Options tab Click to open the panel; configure RS232 and QoS data settings, lock a loaded user Program and adjust Session Port settings and SNMP. Also configure the AES Output Clock sample rate. © Tieline Pty. Ltd. 2015...
- Page 124 Click to open the codec user manual in a new browser, or view support information (Note: the codec name displayed will vary by product type) 3 Support website link Click to visit the support page on the Tieline website. 4 Email Support Click to email Tieline support. 5 Event Logs...
- Page 125 Language Selection The HTML5 Toolbox Web-GUI offers language support for several languages. 1. Click on the Language drop-down menu arrow in the top right-hand corner of the Web-GUI page. 2. Select the preferred language to display. © Tieline Pty. Ltd. 2015...
-
Page 126: Part Xviii Html5 Toolbox Web-Gui Configuration
If programs are saved in the codec they are displayed in the Program Loader panel. 1. Click to select a program in the Program Loader panel and click the Load button to load it in the codec. © Tieline Pty. Ltd. 2015... - Page 127 To unload a program click the Unload button. Dial a Loaded Program 1. Click the Connect button in the Quick Connect panel to dial a loaded program. Note: After connecting, the Connect button changes to a Disconnect button. © Tieline Pty. Ltd. 2015...
- Page 128 Bridge-IT Manual Disconnect a Loaded Program 1. Click the Disconnect button in the Quick Connect panel. 2. Click Yes in the confirmation dialog to disconnect the connection. © Tieline Pty. Ltd. 2015...
- Page 129 3. Click the select the appropriate Sample Rate and Bit Rate for the connection. Note: If only one sample rate is available this will be automatically selected. 4. Click in the Destination text box and enter the IP address of the destination codec. 5. Click the Connect button to dial. © Tieline Pty. Ltd. 2015...
- Page 130 PPM 3 displays the level of return audio. When connecting with a stereo program, the codec displays audio on PPM1 and 2 for inputs 1 and 2 and PPM 3 and 4 for the return audio. © Tieline Pty. Ltd. 2015...
-
Page 131: Configuring Ip Settings
An IP address is a unique address to identify a device on a TCP/IP network. Your codec uses dual IP protocol stacks to allow your codec to work on both IPv4 and IPv6 networks. Tieline codecs support both DHCP (default) IP addressing and static IP addresses for dialing IPv4 connection endpoints. - Page 132 Internet Service Provider, or to your own local area network (LAN). By default the codec is configured for DHCP-assigned IP addresses. Static IP addresses are fixed addresses that are recommended for studio installations, so that IP address dialing remains the same over time for incoming codec connections. © Tieline Pty. Ltd. 2015...
- Page 133 1. Click the Edit button in the Network panel to configure settings. 2. By default the codec is configured to connect to an IPv6 router which automatically allocates IPv6 address details, as displayed in the following example. 3. Click Save to store all configuration settings. © Tieline Pty. Ltd. 2015...
- Page 134 3. Click the Edit button at the bottom of the panel. 4. Click in the QoS DSCP text box and enter the preferred value. 5. Click the Save button at the bottom of the panel to save the new setting. © Tieline Pty. Ltd. 2015...
-
Page 135: Configuring Input/Output Settings
Codec inputs are configured for analog line level audio sources by default. 1. Click the Input Settings symbol. 2. Select Type and click to select either Analog or AES3. 3. When you select AES3 each input is automatically configured for 100% input levels; © Tieline Pty. Ltd. 2015... - Page 136 1. Open the HTML5 Toolbox Web-GUI and click Settings, then click Options to open the Options panel. 2. Click the Edit button to configure settings. 3. Click the AES Output Clock drop-down menu to select your preferred AES Output Clock setting, then click Save. © Tieline Pty. Ltd. 2015...
-
Page 137: Configure Sip Settings
· Failover and SmartStream PLUS redundant streaming are not available with SIP connections. · When connecting to a Tieline G3 codec using SIP you need to manually select the G3 audio reference level in the codec. To do this select SETTINGS >... - Page 138 4. Enter the account details into the relevant text boxes. 5. Enter the Registration Timeout (this shouldn't need to be adjusted from the default setting). 6. Click to select the Activate Account check-box and click Save to create the account in the codec. © Tieline Pty. Ltd. 2015...
- Page 139 > SIP > Accounts to verify that the account has been registered to the SIP server. The registration symbol appears when the account has been activated successfully. Important Notes: Some ISPs may block SIP traffic over UDP port 5060. © Tieline Pty. Ltd. 2015...
-
Page 140: Load, Unload And Dial A Program
2. Click to select a program in the Program Loader panel and then click Load to load the program in the codec. Note: the currently loaded program has the check-box symbol displayed next to its name. © Tieline Pty. Ltd. 2015... - Page 141 2. Click the audio stream Connect/Disconnect symbol and then click Connect; this connects all connections associated with this audio stream. 3. Click the connection Connect/Disconnect symbol and then click Connect; this connects an individual audio stream connection. © Tieline Pty. Ltd. 2015...
- Page 142 2. Click the audio stream Connect/Disconnect symbol and then click Disconnect to disconnect an individual audio stream and all associated connections. 3. Click the connection Connect/Disconnect symbol to disconnect an individual audio stream connection. © Tieline Pty. Ltd. 2015...
-
Page 143: Lock Or Unlock Programs
Options to display the Options panel. 2. Click the Edit button to configure settings. 3. Click the Lock Loaded User Program check-box to lock or unlock a user program in the codec. 4. Click Save to store the new configuration. © Tieline Pty. Ltd. 2015... -
Page 144: Reset Factory Default Settings
2. Click one of the available reset options to adjust codec settings, or reboot the codec. Note: Hover with the mouse pointer over the Information symbol to view a tool-tip for each reset option. 4. A confirmation dialog appears for each option; click Yes to proceed. © Tieline Pty. Ltd. 2015... -
Page 145: Backup And Restore Functions
Reset to display the Reset panel. 2. Click Restore. 3. Click to select the check-boxes and confirm your restore settings. For example, you could select the Include programs check-box and deselect the Include system check-box if you are only © Tieline Pty. Ltd. 2015... -
Page 146: Html5 Software License Installation
Prior to installation you will need connect your codec to a PC and ensure you are connected to the internet. You should also check that you have received notification by email from Tieline that your new license file is ready to download from TieServer. -
Page 147: Download Logs
1. Open the HTML5 Toolbox Web-GUI and click Settings in the Menu Bar, then click Help to display the Help panel. 2. Click Download Logs. 3. Save the file to your computer and then send it as a .zip file to Tieline support via support@tieline.com © Tieline Pty. Ltd. 2015... -
Page 148: Rs232 Data Configuration
2. Click Download Event Log to view the log in a new web-browser window. Clearing Logs This option should only be used if instructed to by Tieline support staff. To clear all event and other logs in the codec via the front panel, see the... - Page 149 · When connecting over IP to G3 codecs only in-band data is available via the Music and MusicPLUS algorithms. · Use firmware higher than 2.8.xx in the Bridge-IT, Genie and Merlin families of codecs to enable auxiliary data over multicast connections.
-
Page 150: Creating Rules
3. Click to select the appropriate rule for your requirements. See the Rules panel section in Using the Toolbox HTML5 Web-GUI for an explanation of the action each rule can perform. Note: When rules have been configured previously they are displayed when the Rules panel is opened. © Tieline Pty. Ltd. 2015... - Page 151 2. Click the drop-down arrows to select the control port input used to connect and the alternative input for disconnecting. 3. Click the drop-down Program arrow to select an individual program which will be connected and disconnected by the change in the control port input states. © Tieline Pty. Ltd. 2015...
- Page 152 3. Click the drop-down Program arrow to select a specific program which will affect the relay toggle function, or use the default setting whereby any program will toggle the relay output. 4. Check the Rule summary and click Create Rule to save the settings. © Tieline Pty. Ltd. 2015...
- Page 153 1. Open the Toolbox HTML5 Web-GUI and click Rules in the Menu Bar to display the Rules panel. 2. Click to select the rule you want to delete. 3. Click the Delete button. 4. Click Yes in the confirmation dialog. © Tieline Pty. Ltd. 2015...
-
Page 154: Upgrading Codec Firmware
Bridge-IT Manual Upgrading Codec Firmware 18.13 To download the latest codec firmware visit http://www.tieline.com/Support/Latest-Firmware. Firmware Upgrades The following procedure explains how to perform codec firmware upgrades with a downloaded firmware file saved to your PC. 1. Open the Toolbox HTML5 Web-GUI and click Settings in the Menu Bar, then click Firmware to display the Firmware panel. -
Page 155: Part Xix Front Panel Configuration Tasks
By default the codec is programmed for DHCP-assigned IP addresses. DHCP IP addresses are automatically assigned and can change each time you connect to your Internet Service Provider or by a router on your local area network (LAN). © Tieline Pty. Ltd. 2015... - Page 156 IPv4 at all times. To adjust this setting: 1. Press the SETTINGS button. 2. Select LAN and press the button. 3. Use the down navigation button to select ETH1 or a VLAN interface. © Tieline Pty. Ltd. 2015...
-
Page 157: Dns Server
Control Only) and press the button. 6. Use the down navigation button to scroll to Priority. 7. Press the button to enter a number from 0 to 7 inclusive. 8. Press the button to confirm this setting. © Tieline Pty. Ltd. 2015... -
Page 158: Selecting An Algorithm
Overview of Tieline Algorithms 1. The Tieline Music algorithm is optimized for audio bit rates as low as 19.2kbps with only a 20 millisecond encode delay. It offers 15 kHz mono from 24Kbps to 48Kbps. 2. Tieline MusicPLUS delivers up to 20 kHz mono from 48kbps upwards. It can also deliver up to 20 kHz stereo from 96kbps upwards, offering huge savings on your IP data bills and outstanding audio quality. - Page 159 Opus Voice High quality low bit rate remotes (9.6kbps -64kbps) Opus Mono Very high quality mono remotes, STLs and audio distribution (48kbps -128kbps) Opus Stereo Very high quality stereo remotes, STLs and audio distribution (64kbps -256kbps) © Tieline Pty. Ltd. 2015...
- Page 160 For example, if MP2 algorithms are used, program delays will be much longer than when using Tieline Music or MusicPLUS algorithms. This is due to the additional inherent encoding delays involved when using MP2 algorithms. This can be a major consideration for live applications that integrate remote-crosses into a broadcast.
- Page 161 STLs and audio better quality at distribution w here higher bit rates some delay is tolerable · Moderate delay · Tieline Music or at moderate to MusicPLUS deliver high bit rates low er delay © Tieline Pty. Ltd. 2015...
- Page 162 · Very low delay low delay voice quality at low bit rates remotes at extremely low bit rates. · "Opus Mono" and "Opus Stereo" are perfect for high fidelity remotes, STLs and © Tieline Pty. Ltd. 2015...
- Page 163 When selecting linear (PCM) uncompressed audio or AAC, MPEG and aptX® Enhanced algorithms, it is possible to select different either 32kHz, 44.1kHz and 48kHz sample rates as required. Tieline Music runs at 32kHz sampling and MusicPLUS runs at 48kHz sampling. G.711 and G.722 will always run at a 32kHz sampling rate (downsampled to 8kHz and 16kHz respectively).
-
Page 164: Configuring The Jitter Buffer
· Manage forward error correction (FEC). Tieline codecs can be used to program either a fixed or automatic jitter buffer and the setting you use depends on the IP network you are connecting over. Over LANs, WANs and wireless networks the automatic jitter buffer generally works well. - Page 165 After the initial connection period the jitter buffer is adapted to suit the current network conditions and is usually reduced. Establish a connection for at least 5 minutes prior to broadcasting, so that © Tieline Pty. Ltd. 2015...
- Page 166 FEC is being used. Fixing Jitter Buffer Settings The default jitter-buffer setting in Tieline codecs is 500 milliseconds. This is a very reliable setting that will work for just about all connections. However, this is quite a long delay and we recommend that when you set up an IP connection you test how low you can set the jitter-buffer in your codec.
-
Page 167: Configuring Forward Error Correction
8. Select the remote codec FEC setting in the Remote FEC screen and press 9. Check that the settings are correct in the RTP Settings screen. The four FEC settings in Tieline codecs are outlined in the following table with their bit rate ratios. © Tieline Pty. Ltd. 2015... - Page 168 FEC according to the available uplink bandwidth at each end for best performance. As an example, if you want 15 kHz mono (using the Tieline Music Algorithm) you will need at least a 24kbps connection for audio. Adding 100% FEC will add another 24kbps making your bit rate 48kbps plus some overhead of around 10kbps is required.
-
Page 169: Configuring Encode/Decode Direction
RS232 Data Configuration for more details). RPTP data is automatically enabled when using the Tieline Music or MusicPLUS algorithms over IP. It is also possible to enable synchronized out- of-band data using any algorithm via the RS232 data port on the codec. - Page 170 Important Note: For more information about how to configure relay operations with a PC using the Toolbox web-GUI, please see Creating Rules. Configuring the Codec to Send RS232 Data Once Data is enabled, the codec can also be connected to external devices and send RS232- © Tieline Pty. Ltd. 2015...
- Page 171 Connector Pins Important Notes: · Codecs using Bridge-IT firmware lower than v2.8.xx cannot activate relays on Tieline G3 codecs or send RS232 data to them. · It is important that you enable serial port flow control within the codec. Flow control regulates the flow of data through the serial port.
-
Page 172: Configuring Tcp/Udp Ports
The session port uses the TCP protocol because it is more likely to get through firewalls – ensuring critical session data (including dial, connect and hang-up data) will be received reliably. The default session and audio port settings in Tieline codecs, for both TCP and UDP connections, are outlined in the Installing the Codec at the Studio section of the manual. -
Page 173: Configuring Qos For Broadcasts
(port used by the local codec to receive audio from the remote codec). It is also possible to configure the remote and local audio ports for a codec using Tieline session data to establish IP connections. This may be required because some firewalls require symmetric port configuration. -
Page 174: Configuring Data Packet Time-To-Live
Check with your IT administrator before changing this setting. By default the codec is configured for Assured Forwarding and more details about DSCP are available on Wikipedia at http://en.wikipedia.org/wiki/Dscp. Configuring Bridge-IT for QoS 1. Press the SETTINGS button. -
Page 175: Reset And Restore Factory Default Settings
5 Clear Logs Deletes codec event and log history. Note: This should only be performed if instructed to by Tieline support staff. Important Note: After restoring factory defaults, always reboot the codec using the Reboot Codec function, not by removing power from the codec. -
Page 176: Installing Software Licences
Installing Software Licences Bridge-IT XTRA codecs include all software and algorithm feature options when purchased. Other Bridge-IT codecs can be upgraded to include aptX® Enhanced encoding via an additional license purchase and upgrade. Contact Tieline at sales@tieline.com, or your favorite dealer, if you need to purchase a software license upgrade. - Page 177 Bridge-IT Manual 6. Navigate to Reset and press the button. 7. Navigate to Reboot Codec and press the button. 8. Select Yes and press the button to reboot the codec. © Tieline Pty. Ltd. 2015...
-
Page 178: Part Xx Reference
The following instructions are intended to help you configure your internet connection and Tieline codecs at the studio to enable incoming calls over the internet from a remote Tieline codec. It is assumed that you have a basic understanding of your IP network and how to configure IP devices. If... - Page 179 TCP and UDP ports, or not configuring NAT and port forwarding correctly. The following table lists the firewall ports you need to open for each model of Tieline codec if they are dialing your router at the studio. If the remote codec is also connected to a LAN with a firewall you may also need to open the ports at the remote end of the link to connect successfully.
- Page 180 5004, 5006, 5008, 5010, 5012, 5014 Configuring a Static Public or Private IP Address in Bridge-IT (v.2.x firmware) To enter a static IP Address into the codec for NAT: 1. Press the HOME button to return to the Home screen.
-
Page 181: Getting Connected
IP address and you know this address. If you dial the studio using a cell-phone data network at the remote site you will not normally experience any firewall or port blocking issues at the remote end of the link using default Tieline ports. - Page 182 Diagnosing Port Blocking via the Remote Codec LQ If you attach your Tieline codec at the remote site to a LAN with access to the internet you can often dial and connect to the studio without any problem. It is less likely that a firewall will block outgoing TCP and UDP ports.
- Page 183 For more IP network information please see the section titled Understanding IP Networks which discusses: · Private versus public IP addresses. · Static versus DHCP assigned IP addresses. · Network Address Translation (NAT), port forwarding and firewalls. © Tieline Pty. Ltd. 2015...
-
Page 184: Understanding Ip Networks
(DHCP) and static. Most ISPs assign a dynamic public IP address by default, which can often change without you knowing. This is suitable for a quick demo of your Tieline codec, but for a permanent installation you will need to request a permanent static public IP address. - Page 185 Port Forwarding: Tieline TCP and UDP Port Settings For your Tieline Codec to communicate over the public internet an IP Address alone is not sufficient. In TCP/IP and UDP networks the codec port is the endpoint of your connection. Ports are doorways for IP devices to communicate with each other.
-
Page 186: Tips For Creating Reliable Ip Connections
256 kbps for a studio codec and 64 kbps for a field unit connection. 5. Use good quality equipment to connect your codecs to the internet. (Tieline successfully uses Cisco® switching and routing equipment.): · If you are using a DSL or ADSL connection make sure you purchase a high quality modem that can easily meet your speed requirements. -
Page 187: Testing Ip Network Connections
IP address. · Visit www.portforward.com and download the port checking application to verify your router's ports are open. Note: Using a port scanner to test a codec will be unsuccessful if you try to scan and © Tieline Pty. Ltd. 2015... - Page 188 (codec). This is useful because the more routers that packets traverse, the more latency your connection will have, and the less reliable it will be. © Tieline Pty. Ltd. 2015...
-
Page 189: Software Licences
Web Browser Interface or from the Tieline website <http://tieline.com>. You may request a copy for the open source software on DVD by contacting our support team on +61 (0)8 9249 6688. Tieline Pty Ltd will charge a small handling fee for distribution of this software. - Page 190 Copyright (c) 2004, Jan Kneschke, incremental. All rights reserved. • net-snmp o Copyright 1989, 1991, 1992 by Carnegie Mellon University. All rights reserved. o Derivative Work - 1996, 1998-2000 o Copyright 1996, 1998-2000 The Regents of the University of California. All rights reserved. © Tieline Pty. Ltd. 2015...
- Page 191 Copyright (c) 1993 Branko Lankester <branko@hacktic.nl>. o Copyright (c) 1993 Ulrich Pegelow <pegelow@moorea.uni-muenster.de>. o Copyright (c) 1995, 1996 Michael Elizabeth Chastain <mec@duracef.shout.net>. o Copyright (c) 1993, 1994, 1995, 1996 Rick Sladkey <jrs@world.std.com>. o Copyright (C) 1998-2001 Wichert Akkerman <wakkerma@deephackmode.org>.. © Tieline Pty. Ltd. 2015...
- Page 192 OF CONTRACT, TORT OR OTHERWISE, ARISING FROM,OUT OF OR IN CONNECTION WITH THE SOFTWARE OR THE USE OR OTHER DEALINGS IN THE SOFTWARE. Open Source ISC style Licenses: • bind o Copyright (C) 2004-2011 Internet Systems Consortium, Inc. ("ISC") o Copyright (C) 1996-2003 Internet Software Consortium. © Tieline Pty. Ltd. 2015...
- Page 193 SPECIAL, EXEMPLARY, OR CONSEQUENTIAL DAMAGES (INCLUDING, BUT NOT LIMITED TO, PROCUREMENT OF SUBSTITUTE GOODS OR SERVICES; LOSS OF USE, DATA, OR PROFITS; OR BUSINESS INTERRUPTION) HOWEVER CAUSED AND ON ANY THEORY OF LIABILITY, WHETHER IN © Tieline Pty. Ltd. 2015...
- Page 194 This package is an SSL implementation written by Eric Young (eay@cryptsoft.com). The implementation was written so as to conform with Netscapes SSL. This library is free for commercial and non-commercial use as long as the following © Tieline Pty. Ltd. 2015...
- Page 195 FITNESS FOR A PARTICULAR PURPOSE. HEWLETT-PACKARD COMPANY WILL NOT IN ANY EVENT BE LIABLE FOR ANY DIRECT, INDIRECT, SPECIAL, INCIDENTAL OR CONSEQUENTIAL DAMAGES (INCLUDING LOST PROFITS) RELATED TO ANY USE, REPRODUCTION, MODIFICATION, OR DISTRIBUTION OF THE SOFTWARE OR DOCUMENTATION. Open Source Info-ZIP license: © Tieline Pty. Ltd. 2015...
- Page 196 Zip-Bugs or Info-ZIP e-mail addresses or of the Info-ZIP URL(s). 4. Info-ZIP retains the right to use the names "Info-ZIP," "Zip," "UnZip," "WiZ," "Pocket UnZip," "Pocket Zip," and "MacZip" for its own source and binary releases. © Tieline Pty. Ltd. 2015...
-
Page 197: Compliances And Certifications
Tieline Technology; 1/25 Irvine Drive, Malaga, Western Australia 6090. EN 55 022 Statement This is to certify that Tieline Bridge-IT is shielded against the generation of radio interference in accordance with the application of EN 55 022: 2006 Class A. Technical documentation required by the conformity assessment procedure is kept at the head office of Tieline Technology;... -
Page 198: Trademarks And Credit Notices
8. Java is a trade mark Sun Microsystems Inc. in the United States and/or other countries. 9. Other product names mentioned within this document may be trademarks or registered trademarks, or a trade name of their respective owner. © Tieline Pty. Ltd. 2015... -
Page 199: Part Xxi Specifications
Ratio Sample Frequencies Sample 16kHz, 32kHz, 44.1kHz, 48kHz Frequencies Algorithms Opus, Tieline Music, Tieline MusicPLUS, G.711, G.722, MPEG Layer 2 IP (Pro version only) AAC-LD, AAC-ELD, AAC-LC, AAC-HE, AAC-HEv2 IP (Pro version only) 16/24 bit Enhanced apt-X IP (uncompressed) Linear PCM16 Data and Control Interfaces USB 2.0 (Type B) host port on the rear panel... -
Page 200: Index
DC power IGC Auto Level digital intelligent gain control headphone output metering phantom power opto-isolated outputs quick adjustment of levels rear panel relay inputs Auto Reconnect operation RS-232 programming of USB 2.0 slave Contrast Adjustment © Tieline Pty. Ltd. 2015... -
Page 201: Tieline Pty. Ltd
Factory default settings disconnect a program or audio stream restoration of, via codec DNS settings Factory defaults - HTML5 Toolbox DSCP restore via web-GUI IPv4 address configuration Factory defaults - Java Toolbox © Tieline Pty. Ltd. 2015... - Page 202 Lock programs - HTML5 Toolbox IP overheads Logs clear history via web-GUI - J - Logs - HTML5 Toolbox send logs to Tieline view event logs Java Toolbox Web-GUI configure connections Logs - Java Toolbox © Tieline Pty. Ltd. 2015...
- Page 203 Multi-unicasts - Java Toolbox configuration static IP addresses dial & disconnect Programs dialing about multicasts about multi-unicasts - N - about peer-to-peer calls audio streams deleting Navigating menus how to dial multiple connections © Tieline Pty. Ltd. 2015...
- Page 204 Rear Panel Connections peer-to-peer connections Redialling connections SIP - HTML5 Toolbox configure SIP settings Relay closures Relays pin outs session description protocol programming SIP server configuration Reset SIP - Java Toolbox factory default settings configure SIP programs © Tieline Pty. Ltd. 2015...
- Page 205 PC SIP panel installing drivers skin selection statistics panel - V - theme selection Web-GUI - Java Toolbox dial an audio stream VLAN Configuration disconnect an audio stream © Tieline Pty. Ltd. 2015...
Need help?
Do you have a question about the Bridge-IT and is the answer not in the manual?
Questions and answers