Table of Contents
Advertisement
Advertisement
Table of Contents

Subscribe to Our Youtube Channel
Related Manuals for Logik LVD6W13


Summary of Contents for Logik LVD6W13
- Page 1 Instruction / Installation Manual Air-vented Tumble Dryer LVD6W13...
-
Page 3: Table Of Contents
Contents Safety Warnings ..........................4 Unpacking ............................. 9 Installing Your Dryer ........................10 Choosing the Right Location for Your Dryer ....................10 Moving and Installing ........................ 11 Moving the Dryer from One Location to Another ..................11 Installing the Vent Hose ............................11 Levelling the Dryer .............................. -
Page 4: Safety Warnings
Safety Warnings For your continued safety and to reduce the risk of injury or electric shock, read all instructions carefully before using the unit and keep them for future reference. Please follow all the safety precautions listed below. Retain this manual. Include this manual if you pass the unit onto a third party. - Page 5 • Do not stack the tumble dryer on top of other appliances. • Any electrical work required to install the appliance should be carried out by a qualified person. • Failure to install, maintain and/or operate the dryer according to the manufacturer’s instructions may result in conditions which can lead to bodily injury and/or property damage.
- Page 6 • Do not use heat to dry clothing containing foam rubber (may be labelled “Latex Foam”), plastic, or similarly-textured rubber-like materials. Foam rubber materials under certain circumstances, when heated, can be ignited by spontaneous combustion. • Do not use fabric softeners or products to eliminate static unless recommended by the manufacturer of the fabric softener or product.
- Page 7 cable. Pulling the cable may cause an electric shock or a fire. • Do not touch the laundry inside the dryer, not until the drum has completely stopped. Even if the drum is spinning at low speed it can cause an injury. Take particular care of children. •...
- Page 8 • Do not pour water directly onto any part of the dryer. It may cause a short circuit or electric shock. • Keep burning objects, such as candles or cigarettes, away from the dryer. They may cause a fire or damage. •...
-
Page 9: Unpacking
Thank you for purchasing your new Logik Dryer. We recommend that you spend some time reading this instruction manual in order that you fully understand all the operational features it offers. You will also find some hints and tips to help you resolve any issues. -
Page 10: Installing Your Dryer
INSTALLATION Installing Your Dryer Please read and follow the instructions carefully. • In addition to the instructions mentioned here, special regulations of the relevant power supply companies may apply. If in doubt, have the dryer connected by a qualified technician. •... -
Page 11: Moving And Installing
INSTALLATION Moving and Installing Two or more people are required to carry the dryer and for any installation work. Moving the Dryer from One Location to Another Before you move the dryer: • Turn off the power source, and disconnect the mains cable. •... -
Page 12: Levelling The Dryer
INSTALLATION Levelling the Dryer There are 4 levelling feet on the underside. They must be adjusted to make sure the dryer is level. 1. Adjust all four feet. 2. Use a spirit level to ensure the dryer is level. Connecting to the Mains Supply For your safety: •... -
Page 13: Product Overview
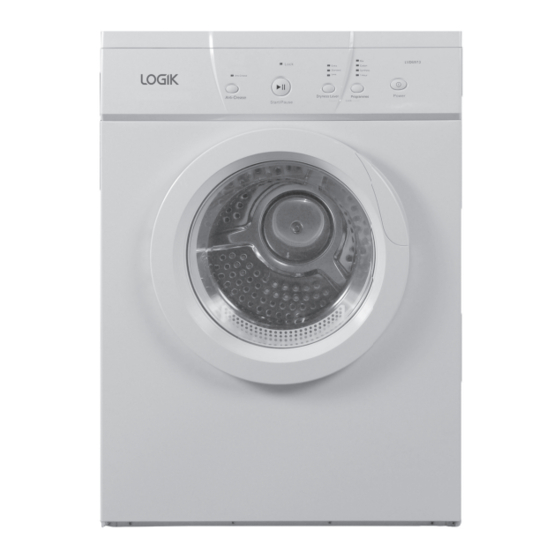
Product Overview The unit Control Panel Door Handle Window... -
Page 14: Control Panel
Control Panel Lock Extra Cotton Sandard Synthetic Anti-Crease Light 1 Hour Power Programme Dryness Level Anti-Crease Start/Pause Lock 1. Anti-Crease Button 5. Programme Indicator Select to loosen up clothes after drying to • Indicator lights up when a programme has reduce creasing. -
Page 15: Preparation
Preparation Read the following to understand how best to prepare your laundry for drying. Preparing to Tumble Dry Laundry • Before loading laundry into the tumble dryer, thoroughly spin the laundry in the washing machine. This will reduce remaining moisture content and help dry your laundry faster. -
Page 16: Selecting The Programme
Selecting the Programme Below are the available programmes, additional functions and optional settings. Spin speed can be selected separately for certain programmes. Clothing Dryness Total Drying Description Load (kg) Programme Type Level Time* Suitable for particularly thick or multi-layered cotton clothing. Cotton Extra Cotton... -
Page 17: Dry Programme Setting
Dry Programme Setting First Time Use Before the first use, wipe the dryer drum with a damp cloth to remove any residues which may have been produced during production. Alternatively, run a brief drying cycle (around 1 Hr) with damp cloths in the drum. Standard Drying Cycle 1. -
Page 18: Removing Laundry
Removing Laundry Always allow the unit to complete the drying cycle before removing laundry. 1. Press the Power button to switch off the dryer. Unplug the dryer if necessary. 2. Open the dryer door and remove your laundry. Switching Off Press the Power button to switch off the dryer. -
Page 19: Maintenance - Cleaning The Dryer
Maintenance – Cleaning the Dryer Cleaning the Drum Any rust left inside the drum by metal articles must be removed immediately with chlorine-free detergent. Never use steel wool. Do not put laundry in the dryer when cleaning the drum. Cleaning the Exterior of your Dryer •... -
Page 20: Hints And Tips
Hints and Tips Problems Description / Possible Cause Solution Dryer will not start • Power cut. • Restore power. • The plug is not firmly • Check the plug and make sure it is inserted into the mains. fully and firmly inserted into the mains •... -
Page 21: Troubleshooting
Drying cycle is • Lint filter / Vent Hose is • Clean the lint filter / Vent Hose before unusually long. clogged. and after each use of the dryer. • Laundry load exceeds • Select a more suitable drying drying capability of selected programme, or remove some laundry. -
Page 22: Specifications
Specifications Model LVD6W13 Rated Voltage 220 - 240V~ Rated Frequency 50 Hz Rated Power Input 1,800 - 2,200 W Dimensions of the Product 595mm (W) x 555mm (D) x 840mm (H) Weight of the Product 33 kg Maximum Mass of Dry Cloth... -
Page 23: Product Fiche
Product Fiche Model: LVD6W13 Rated capacity: 6 kg Dryer Type: Air-Vented Energy efficiency class: C Energy consumption 451.6 kWh per year, based on 160 drying cycles of the standard cotton programme at full and partial load, and the consumption of the low-power modes. Actual energy consumption per cycle will depend on how the appliance is used. - Page 24 EU. For more information, please contact the local authority or your retailer where you purchased the product. DSG Retail Ltd. (co. no. 504877) Maylands Avenue, Hemel Hempstead, Herts., HP2 7TG, UK. IB-LVD6W13-131111V1...
Need help?
Do you have a question about the LVD6W13 and is the answer not in the manual?
Questions and answers