Draytek Vigor2860 Series Quick Start Manual
Vdsl2 security firewall
Hide thumbs
Also See for Vigor2860 Series:
- User manual (944 pages) ,
- Quick start quide (67 pages) ,
- Quick start manual (56 pages)
Table of Contents
Advertisement
Quick Links
Advertisement
Table of Contents

Subscribe to Our Youtube Channel
Related Manuals for Draytek Vigor2860 Series


Summary of Contents for Draytek Vigor2860 Series
-
Page 2: Quick Start Guide
Vigor2860 Series VDSL2 Security Firewall Quick Start Guide Version: 4.01 Firmware Version: V3.8.2 (For future update, please visit DrayTek web site) Date: November 20, 2015... - Page 3 Intellectual Property Rights (IPR) Information © All rights reserved. This publication contains information that is protected Copyrights by copyright. No part may be reproduced, transmitted, transcribed, stored in a retrieval system, or translated into any language without written permission from the copyright holders. The following trademarks are used in this document: Trademarks ...
-
Page 4: European Community Declarations
County, Taiwan 303 Product: Vigor2860 Series DrayTek Corp. declares that Vigor2860 Series of routers are in compliance with the following essential requirements and other relevant provisions of R&TTE 1999/5/EC, ErP 2009/125/EC and RoHS 2011/65/EU The product conforms to the requirements of Electro-Magnetic Compatibility (EMC) Directive 2004/108/EC by complying with the requirements set forth in EN55022/Class B and EN55024/Class B. - Page 5 Web registration is preferred. You can register your Vigor router via http://www.draytek.com. Firmware & Tools Updates Due to the continuous evolution of DrayTek technology, all routers will be regularly upgraded. Please consult the DrayTek web site for more information on newest firmware, tools and documents.
-
Page 6: Table Of Contents
1. Introduction......................1 2. Package Content ....................2 3. Panel Explanation....................3 3.1 Vigor2860 / Vigor2860L......................3 3.2 Vigor2860ac/Vigor2860n-plus/Vigor2860n/Vigor2860Ln ..............6 3.3 Vigor2860Vac / Vigor2860Vn-plus ................... 12 4. Hardware Installation ..................15 5. Software Configuration ..................16 5.1 Quick Start Wizard for Network Connection................16 5.1.1 For WAN1 (ADSL/VDSL2) .................. -
Page 7: Introduction
Vigor2860 series is a VDSL2 router with multi-subnet for secure and efficient workgroup management. It integrates IP layer QoS, NAT session/bandwidth management to help users control works well with large bandwidth. By adopting hardware-based VPN platform and hardware encryption of... -
Page 8: Package Content
Take a look at the package content. If there is anything missed or damaged, please contact DrayTek or dealer immediately. Phone Adapter (V models) Quick Start Guide RJ-45 to RJ-45 Cable RJ-11 to RJ-45 Cable (Annex B) (Annex B) RJ-11 to RJ-11 Cable (Annex A) -
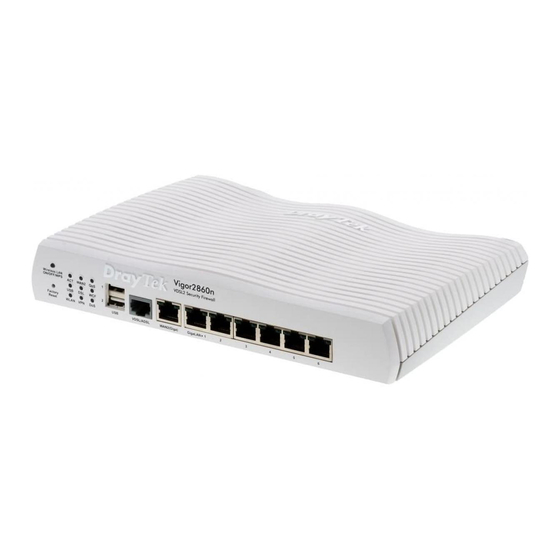
Page 9: Panel Explanation
Status Explanation ACT (Activity) Blinking The router is powered on and running normally. The router is powered off. WAN2 Internet connection is ready. Internet connection is not ready. Blinking The data is transmitting. The QoS function is active. USB1~2 / USB USB device is connected and ready for use. - Page 10 (Giga) Blinking The data is transmitting. Right The port is connected with 1000Mbps. The port is connected with 10/100Mbps Left The port is connected. GigaLAN The port is disconnected. Blinking The data is transmitting. Right The port is connected with 1000Mbps. The port is connected with 10/100Mbps Switch on Rear Side (Available for Vigor2860L)
- Page 11 Magnetic antenna must be installed on the antenna socket before connecting to Vigor router. There are two mounting holes for installing antennas. If only one antenna shall be installed, please use the mounting hole (major signal transmitted hole) near to the SIM card slot.
-
Page 12: Vigor2860Ac/Vigor2860N-Plus/Vigor2860N/Vigor2860Ln
Status Explanation ACT (Activity) Blinking The router is powered on and running normally. The router is powered off. WAN2 Internet connection is ready. Internet connection is not ready. Blinking The data is transmitting. The QoS function is active. USB device is connected and ready for use. Blinking The data is transmitting. - Page 13 2.4G/5G/WLAN 2.4G/5G: Wireless access point with bandwidth of 2.4GHz/5GHz is ready. WLAN: Wireless access point is ready. It will blink slowly while wireless traffic goes Blinking through. ACT and WLAN LEDs blink quickly and simultaneously when WPS is working, and will return to normal condition after two minutes.
- Page 14 Switch on Rear Side (Available for Vigor2860Ln) Interface Description Wireless LAN For Vigor2860n : ON/OFF/WPS Press the button and release it within 2 seconds. When the wireless function is ready, the green LED will be on. Press the button and release it within 2 seconds to turn off the WLAN function.
- Page 15 Factory Reset Restore the default settings. Usage: Turn on the router (ACT LED is blinking). Press the hole and keep for more than 5 seconds. When you see the ACT LED begins to blink rapidly than usual, release the button. Then the router will restart with the factory default configuration.
- Page 16 Magnetic antenna must be installed on the antenna socket before connecting to Vigor router. There are two mounting holes for installing antennas. If only one antenna shall be installed, please use the mounting hole (major signal transmitted hole) near to the SIM card slot.
- Page 17 There are two types of antennas provided for Vigor2860Ln, which must be installed in different locations carefully and correctly. Wrong installation might cause bad signal of wireless connection. Therefore, pay attention to the installation of antennas by referring to the following illustration. Holes for Antennas with Socket Holes for Antennas...
-
Page 18: Vigor2860Vac / Vigor2860Vn-Plus
Status Explanation ACT (Activity) Blinking The router is powered on and running normally. The router is powered off. WAN2 Internet connection is ready. Internet connection is not ready. Blinking The data is transmitting. Line A PSTN phone call comes (in and out). However, when the phone call is disconnected, the LED will be off. - Page 19 The port is connected with 10/100Mbps Left The port is connected. GigaLAN The port is disconnected. Blinking The data is transmitting. Right The port is connected with 1000Mbps. The port is connected with 10/100Mbps Interface Description Wireless LAN Wireless band will be switched /changed according to the ON/OFF/WPS button pressed and released.
- Page 20 Line Connector for PSTN life line. Connecter for a power adapter. ON/OFF Power Switch.
- Page 21 This section will guide you to install the router through hardware connection and configure the router’s settings through web browser. Before starting to configure the router, you have to connect your devices correctly. (For the hardware connection, we take “n” model as an example.) Connect the DSL interface to the land line jack with a DSL line cable.
-
Page 22: Hardware Installation
To access Internet, please finish basic configuration after completing the hardware installation. The Quick Start Wizard is designed for you to easily set up your router for Internet access. You can directly access the Quick Start Wizard via Web Configurator. Make sure your PC connects to the router correctly. Note You may either simply set up your computer to get IP dynamically from the router or set up the IP address of the computer to be the same... - Page 23 Now, the Main Screen will pop up. Click Wizards>>Quick Start Wizard. Note The home page will change slightly in accordance with the router you have. If your router can be under an environment with high speed NAT, the configuration provide here can help you to deploy and use the router quickly. The first screen of Quick Start Wizard is entering login password.
-
Page 24: For Wan1 (Adsl/Vdsl2)
please choose WAN2; if 3G USB modem is used, please choose WAN3 or WAN4. Then click Next for next step. WAN1, WAN2, WAN3 and WAN4 will bring up different configuration page. Refer to the following for detailed information. WAN1 is specified for ADSL or VDSL connection. Click Next to go to the following page. - Page 25 Choose WAN1 as WAN Interface and click the Next button; you will get the following page.
- Page 26 After finished the above settings, simply click Next. Please manually enter the Username/Password provided by your ISP. Then click Next for viewing summary of such connection. Click Finish. A page of Quick Start Wizard Setup OK!!! will appear. Then, the system status of this protocol will be shown. Now, you can enjoy surfing on the Internet.
- Page 27 Choose WAN1 as WAN Interface and click the Next button; you will get the following page. Please type in the IP address/mask/gateway information originally provided by your ISP. Then click Next for viewing summary of such connection. Click Finish. A page of Quick Start Wizard Setup OK!!! will appear. Then, the system status of this protocol will be shown.
-
Page 28: For Wan2 (Ethernet)
WAN2 is dedicated to physical mode in Ethernet. If you choose WAN2, please specify physical type. Then, click Next. On the next page as shown below, please select the appropriate Internet access type according to the information from your ISP. For example, you should select PPPoE mode if the ISP provides you PPPoE interface. - Page 29 Click PPPoE as the Internet Access Type. Then click Next to continue. Please manually enter the Username/Password provided by your ISP. Click Next for viewing summary of such connection. Click Finish. A page of Quick Start Wizard Setup OK!!! will appear. Then, the system status of this protocol will be shown.
- Page 30 Choose WAN2 as the WAN Interface and click the Next button. The following page will be open for you to specify Internet Access Type. Click PPTP/L2TP as the Internet Access Type. Then click Next to continue.
- Page 31 Please type in the IP address/mask/gateway information originally provided by your ISP. Then click Next for viewing summary of such connection. Click Finish. A page of Quick Start Wizard Setup OK!!! will appear. Then, the system status of this protocol will be shown. Now, you can enjoy surfing on the Internet.
- Page 32 Choose WAN2 as the WAN Interface and click the Next button. The following page will be open for you to specify Internet Access Type. Click Static IP as the Internet Access type. Simply click Next to continue.
- Page 33 Please type in the IP address information originally provided by your ISP. Then click Next for next step. Click Finish. A page of Quick Start Wizard Setup OK!!! will appear. Then, the system status of this protocol will be shown. Now, you can enjoy surfing on the Internet.
- Page 34 Choose WAN2 as WAN Interface and click the Next button. The following page will be open for you to specify Internet Access Type. Click DHCP as the Internet Access type. Simply click Next to continue.
- Page 35 After finished the settings above, click Next for viewing summary of such connection. Click Finish. A page of Quick Start Wizard Setup OK!!! will appear. Then, the system status of this protocol will be shown. Now, you can enjoy surfing on the Internet.
-
Page 36: For Wan3/Wan4 (Usb)
Choose WAN3/WAN4 as WAN Interface. Then, click Next for getting the following page. - Page 37 After finished the settings above, click Next for viewing summary of such connection. Click Finish. A page of Quick Start Wizard Setup OK!!! will appear. Then, the system status of this protocol will be shown. Now, you can enjoy surfing on the Internet.
-
Page 38: For Lte Wan
Choose LTE as WAN Interface. Then, click Next for getting the following page. -
Page 39: Customer Service
Now, you can enjoy surfing on the Internet. If the router cannot work correctly after trying many efforts, please contact your dealer for further help right away. For any questions, please feel free to send e-mail to support@draytek.com.
Need help?
Do you have a question about the Vigor2860 Series and is the answer not in the manual?
Questions and answers