
Subscribe to Our Youtube Channel
Related Manuals for Leviton omnilte


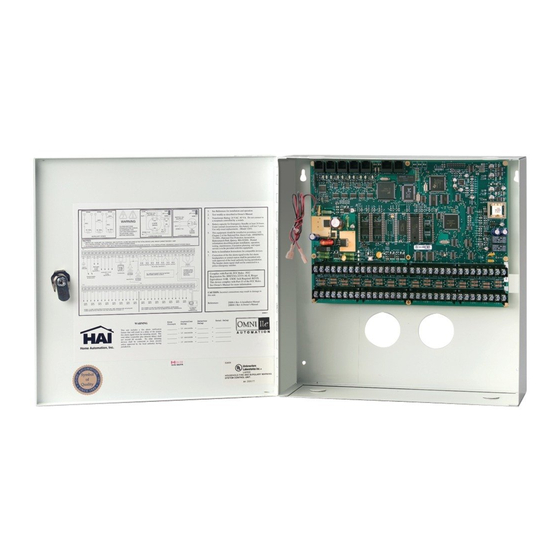
Summary of Contents for Leviton omnilte
-
Page 1: Installation Manual
Control & Security System Installation Manual Includes the SIA CP-01 Control Panel Standard Features for False Alarm Reduction... - Page 3 WARNINGS AND CAUTIONS • Read and understand all instructions. Follow all warnings and instructions marked on the product. • Do not use this product near water - e.g., near a tub, wash basin, kitchen sink or laundry tub, in a wet basement, or near a swimming pool.
-
Page 4: Table Of Contents
CONTENTS INTRODUCTION ..........................1 PLANNING ..................................1 INSTALLATION ..........................2 CONTROLLER HOOKUP ............................... 2 ABOUT SECURITY ZONES ............................4 BURGLAR ZONE HOOKUPS ..........................4 ABOUT FIRE ZONES ..............................5 TWO-WIRE SMOKE DETECTORS .......................... 6 FOUR-WIRE SMOKE DETECTORS ........................6 TELEPHONE CONNECTIONS ............................9 DIGITAL SUBSCRIBER LINE (DSL) CONNECTIONS .................... - Page 5 DIGITAL COMMUNICATOR ......................33 DESCRIPTION OF CONTACT ID ..........................33 DESCRIPTION OF 4/2 FORMAT ..........................34 3/1 FORMAT ................................. 34 OPENING AND CLOSING REPORTS ......................... 34 INSTALLER SETUP ........................35 SETUP CONTROL ................................ 35 X-10 HOUSE CODE ............................... 35 UPB NETWORK ID ..............................35 X-10 3-PHASE ...............................
- Page 6 SERIAL 1 FUNCTION ............................51 SERIAL 2 – SERIAL 5 RATE ..........................51 SERIAL 2 – SERIAL 5 FUNCTION ......................... 51 LEVITON Access Control ............................52 Enrolling Access Control Readers .......................... 52 Deleting Access Control Readers ........................... 52 Unlock Time ................................53 Exit Time .................................
-
Page 7: Introduction
INTRODUCTION This installation guide is intended as an aid to installing the Omni LTe Control & Security System. The installer should also have thoroughly reviewed and understood the Omni LTe Owner's Manual, which has important information regarding final setup of the system. This manual assumes that the installer has a basic understanding of installing a security system. -
Page 8: Installation
INSTALLATION Go over your plan with your customer. 1. Install the entire system. Refer to sections in this manual to see how to install various components. 2. Follow the Power-Up and Checkout procedures. 3. Explain the basics to the customer. Deliver all manuals and documentation. 4. -
Page 9: Figure 1 - Controller Hookup
1/4" SPACING BLACK WIRE TO - RED WIRE TO + YUASA NP7-12 BATTERY OR EQUIVALENT 12V 7AH THE BATTERY IS NON-POWER LIMITED. THE BATTERY LEADS MUST BE SEPERATED FROM ALL OTHER POWER LIMITED/CLASS II WIRING IN THE ENCLOSURE BY AT LEAST 1/4" Status COLD WATER PIPE POWER TRANSFORMER... -
Page 10: About Security Zones
ABOUT SECURITY ZONES Each of the 32 security zone (16 wired and/or 16 wireless) on an Omni LTe system may be configured as a burglary zone, a fire zone, a temperature zone, or an auxiliary input. Zones 1-4, however, are the only inputs that can be used with 2-wire smoke detectors. -
Page 11: About Fire Zones
2. End of line resistor: 1000 ohms. Maximum loop resistance EXCLUDING end of line resistor is a 150 ohms. Use LEVITON Model 1503A0011 End of Line Resistor Assembly in UL Listed Installations. 3. Smoke detectors are reset when the security system is armed. -
Page 12: Two-Wire Smoke Detectors
TWO-WIRE SMOKE DETECTORS Omni LTe supports two-wire smoke detectors connected to Zones 1-4. 1. Use normally open (closed for alarm) two-wire "SYSTEM" type smoke detectors (See - 2-Wire Smoke Detector Compatibility Chart). 2. Smoke detectors must be connected to Zones 1-4 and configured as a Supervised Fire Zone. 3. -
Page 13: Figure 3 - Two-Wire Fire Zone Connections
WHEN Z1-Z4 IS CONFIGURED AS A SUPERVISED FIRE OR GAS ZONE, THE CORRESPONDING ZONE JUMPERS J11-J14 MUST BE IN "SMK" POSISTION SYSTEM SENSOR MODEL 2100TS BOTTOM PLATE ZONE ZONE SYSTEM SENSOR MODEL 2100TS BOTTOM PLATE ZONE ZONE MODEL 1503A0011 1K OHM EOL RESISTOR FIGURE 3 - TWO-WIRE FIRE ZONE CONNECTIONS Page 7... -
Page 14: Figure 4 - Four-Wire Fire Zone Connections
WHEN Z1-Z4 IS CONFIGURED AS A SUPERVISED FIRE OR GAS ZONE, THE CORRESPONDING ZONE JUMPERS J11-J14 MUST BE IN "SMK" POSISTION GREEN YELLOW BLACK BLACK SYSTEM SENSOR MODEL 2112/24TR YELLOW BOTTOM GREEN PLATE SYSTEM SENSOR MODEL 2112/24TR BOTTOM PLATE ZONE YELLOW ZONE GREEN... -
Page 15: Telephone Connections
TELEPHONE CONNECTIONS 1. If an RJ31X jack has been supplied by the telephone company, it is probably wired correctly and the controller can be connected by plugging the supplied 8 conductor telephone cable into the RJ31X jack. The other end of the cable is spaded. -
Page 16: Figure 5 - Rj31X Jack Connections
BEND TAB UP IF NECESSARY TO ENSURE TIGHT FIT RED(-) GREEN(+) TELEPHONE NETWORK INTERFACE CUSTOMER ACCESS RED(-) GREEN(+) SURGE ARRESTOR SURGE ARRESTOR MUST BE GROUNDED! RJ11 HOUSE PHONE TO TELCO JACK(S) INTERFACE AT SURGE ARRESTOR TO ALL HOUSE TELEPHONES OR PBX FIGURE 5 - RJ31X JACK CONNECTIONS Page 10... -
Page 17: Lcd Console Hookup
RED(-) GREEN(+) TELEPHONE NETWORK RED(-) GREEN(+) INTERFACE CUSTOMER DSL SPLITTER ACCESS SURGE ARRESTOR VOICE SURGE ARRESTOR LINE IN MUST BE GROUNDED! RJ11 TO ALL HOUSE HOUSE TELEPHONES PHONE DATA JACK(S) DSL MODEM COMPUTER FIGURE 6 - RJ31X JACK CONNECTIONS LCD CONSOLE HOOKUP 1. -
Page 18: Console Setup
CONSOLE SETUP The console has different operating options that can be setup from the console to the user's preference. If more than one console is being used, it is required that you give each console a different address. You can change the address of a console through the console setup mode. -
Page 19: Figure 7 - Console Connections
FOR MODEL NUMBERS SEE NOTE 1 UNDER "LCD CONSOLE HOOKUP" CONSOLE FACE (SNAPS ON TO BOTTOM PLATE) CONTROL SECURITY BUTTONS TEMP STATUS FIRE BOTTOM PLATE EVENTS MESSAGE SETUP CANCEL MENU CONSOLE PC BOARD (MOUNTED TO CONSOLE FACE) SUPPLIED CABLE (PLUGS INTO J1) YELLOW GREEN... -
Page 20: Sounder Outputs
SOUNDER OUTPUTS The Horn Output provides 12VDC to power bells, piezo sirens, self-contained sirens, and siren drivers (do not connect speakers to the Horn Output). Sounders can draw up to 1 amp MAXIMUM, split between the Interior and Exterior Horn Outputs - (See Specifications for UL Ratings). Use a relay connected to an auxiliary power supply if higher current draw is required. -
Page 21: Figure 8 - Sounder Connections
FIGURE 8 - SOUNDER CONNECTIONS Page 15... -
Page 22: Controller Outputs
CONTROLLER OUTPUTS The Omni LTe provides 8 programmable hardwired voltage outputs and two horn voltage outputs. These outputs are programmable for the following output types: General Purpose low voltage switching applications (12VDC) - Units 33 - 40 • Sounder triggering (a trigger for siren and voice drivers for BURG and FIRE) •... -
Page 23: Communicator Outputs
COMMUNICATOR OUTPUTS This output can be used for radio communications or any other type of auxiliary communications to augment the built- in digital and voice dialers. Any communications device can be used with the Omni LTe, provided that it is powered by 12VDC, has 12VDC triggered inputs, and has 2 (or more) channels. -
Page 24: Figure 10 - Remote Keyswitch Connections
1K EOL RESISTOR YELLOW GREEN GREEN BLACK MOMENTARY CONTACT KEYSWITCH FIGURE 10 - REMOTE KEYSWITCH CONNECTIONS Page 18... -
Page 25: Omnistat Thermostats
OMNISTAT THERMOSTATS Omni LTe supports up to 4 Omnistat Communicating Thermostats. The controller can send commands to the thermostat to change mode, cool setting, heat setting, status of fan and hold, and other items. Run a 3 (or 4) conductor wire from Omni LTe to the thermostat location. All thermostats are connected in parallel to Ground, Zone +16, and Output 8. -
Page 26: Programmable Energy Saver Modules
PROGRAMMABLE ENERGY SAVER MODULES NOTE: Programmable Energy Saver Modules must be connected to zones 9-16 on the Omni LTe controller. 1. Omni LTe can support up to 8 Programmable Energy Saver Modules (PESM). Each PESM requires one security zone input and one controller output. The zone input corresponds to the controller output (Zone 9 and Output 1 through Zone 16 and Output 8, respectively). -
Page 27: Temperature, Outdoor Temperature, And Humidity
the heat pump back may be erased by the auxiliary heaters when the heat pump tries to recover from the setback. A PESM will work best with heat pumps that have one or more of the following features: An outdoor temperature switch that prevents the auxiliary heat from coming on unless it is very cold outside. This is sometimes called a "heat balance"... -
Page 28: Figure 13 - Pesm Connections
BLACK YELLOW GREEN EXISTING LOW VOLTAGE THERMOSTAT RED LED ON - ENERGY SAVER IS OVERRIDING THERMOSTAT OFF - THERMOSTAT IS WORKING NORMALLY HEAT / AIR SYSTEM PROGRAMMABLE ENERGY SAVER MODULE FIGURE 13 - PESM CONNECTIONS Page 22... -
Page 29: Built-In Serial Ports
(JP1-JP5) are located below the modular serial port connectors (J1-J5). To connect a serial port to a PC, use the LEVITON Model 21A05-2 Serial Cable Kit. Plug one end of the cable into one of the modular serial port connectors on the controller. Plug the other end into the Model 21A05-1 Communication Cable Adaptor (modular to DB-9 RS-232), which connects the Omni LTe serial port to the computer's DB-9 RS-232 port. -
Page 30: Built-In Ethernet Port
4 POSITION MODULAR PHONE CABLE - TAB UP - - YELLOW WIRE ON TOP - YELLOW GREEN SIDE RS-485 CONNECTIONS FIGURE 15 - RS-485 CONNECTIONS BUILT-IN ETHERNET PORT Omni LTe has an Ethernet port (J6) built onto the controller (labeled ETHERNET). The Ethernet port allows a device to connect to the Omni LTe controller via a network (i.e. -
Page 31: Controller Ip Address
CONTROLLER IP ADDRESS The controller’s local network IP address is used to identify the Omni LTe controller on the network. To view and assign the controller’s local network IP address, from the Set Up menu, press the 6 (MISC) key. Using the down arrow key (↓), scroll to the following menu item: IP ADDRESS 192.168.0.101... - Page 32 Page 26...
-
Page 33: Connecting To Network Via Pc Access
6. Click Connect >> Network >> Connect. PC Access should change from “Off-Line” to “On-Line”. 192.168.0.101 Hub or Router OmniLTe Controller To connect to an Omni LTe controller on a local network using LEVITON PC Access, under Configure >> Network enter the controller’s IP address: 192.168.0.50 (i.e. 192.168.0.101) Computer 192.168.0.51... -
Page 34: Figure 17 - Local / Wide Area Network
If the controller is connected to the Internet via a dynamic IP address, to locate and communicate with the controller from remote locations over the Internet using LEVITON PC Access, you must subscribe to a Dynamic DNS (Domain Name Service). Dynamic DNS is a service that maps your dynamic (changing) IP address to a static (permanent) hostname, allowing you to access your Omni LTe controller over the Internet using your static hostname instead of an IP address. -
Page 35: System Power Up Procedure
SYSTEM POWER UP PROCEDURE 1. Carefully review hookups to the zones, grounds, sounders, and consoles. 2. Disconnect 1 lead of both the interior and exterior sounders. NOTE: Follow this power up procedure to verify proper operation of the power supply, battery charger, and low voltage cut out relay. -
Page 36: Burglar Zone Check Out
4. Pick up an in-house phone, wait about 1 second, and then press the ' # ' key. You should hear the Voice menu on the phone. If not, check to see that the RJ31X jack is properly wired and connected to the controller. There should be no interference from the Telephone Company while the menu is being read over the phone. -
Page 37: In Case Of Trouble
CONSOLE HOOKUPS in this manual. If the console does not run the self-test properly, it should be returned to LEVITON by Leviton for repair. "NO CONTROLLER DATA" or erratic operation of the LCD display could be a result of: A and B terminals connected backwards, poorly, or 2 or more consoles have the same address. - Page 38 9. Wrap the controller board with protective material and pack carefully. LEVITON by Leviton will not be responsible for returned items damaged due to inadequate packaging. 10. Call LEVITON by Leviton with the serial number for a Return Authorization number to help us track your return. Write the R. A. # on the outside of the package.
-
Page 39: Digital Communicator
DIGITAL COMMUNICATOR The Omni LTe digital communicator can use Contact ID, or Standard 4/2 or 3/1, (20 pps, 1800 Hz data, 2300 Hz handshake), or (10 pps, 1900 Hz data, 1400 Hz handshake), dual round compared format. Any central station with modern equipment can receive these formats. -
Page 40: Description Of 4/2 Format
DESCRIPTION OF 4/2 FORMAT The 4/2 format consists of a four-digit account code, from 0000 to FFFF and a two-digit alarm code from 00 to FF. When the digital communicator calls the central station receiver, the latter answers and sends a brief 2300 Hz tone or a 1400 Hz tone called a "Handshake"... -
Page 41: Installer Setup
INSTALLER SETUP This section describes the items that the installer must setup as part of system installation. The Installer Setup mode is used to configure the general operation of the system, the Outputs, the Zone Types, the Digital Communicator, and various other settings. -
Page 42: X-10 3-Phase
The UPB Transmit Count is used to specify the number of UPB transmission attempts when UPB signals are sent from the Omni LTe controller. The controller will also configure LEVITON UPB devices with this same number of attempts; hence, other UPB devices on the network will also transmit using the specified number of transmission attempts. -
Page 43: Output Types
OUTPUT TYPES An output type must be specified for each of the voltage outputs and for the interior and exterior horn outputs. The following output types are available: OUTPUT TYPE NUMBER DESCRIPTION GENERAL PURPOSE General Purpose Output OK TO ARM OK To Arm ARMED Armed... -
Page 44: Z-Wave Node Id
For output types, the current setting is shown on the bottom line. Press the ' # ' key to select a new type from a list of types. The display shows: SELECT TYPE: INT SNDR Use the Up and Down arrow keys to scroll through the list, or select the appropriate output type number, and then press ' # ' to enter the new type. -
Page 45: Zone Response Time
Z 1 TYPE THROUGH Z 32 TYPE This item specifies the zone type for each zone. All choices are listed in this manual. For zone types, the current setting is shown on the bottom line. ZONE 1 TYPE: AUXILIARY #=CHNG THROUGH ZONE 32 TYPE: AUXILIARY... -
Page 46: Latching Zone Types
LATCHING ZONE TYPES When any device (other than FIRE or GAS) is connected to SWITCH 12V or a Switched Power Output, the zone must be configured as one of the LATCHING ZONE TYPES (latching perimeter, latching night interior, latching away interior, and latching tamper). - Page 47 POLICE EMERGENCY This zone type activates the burglar alarm and sounder. An emergency dial out is activated after the DIAL OUT DELAY. DURESS EMERGENCY (SILENT DIAL OUT) If you wish to have a button in your home that activates a SILENT dial out, (no lights flashing and no sounder) it should be connected to a zone that is configured as a DURESS EMERGENCY.
- Page 48 FIRE TAMPER This zone type is used to monitor the wiring to bells and sirens (other than those connected to the Horn Output). The zone will report trouble if an open, short, or other wiring problem is detected in the supervised bell circuit. This zone will make a digital dial out when violated.
-
Page 49: Setup Digital Communicator
SETUP DIGITAL COMMUNICATOR To setup the Digital Communicator, from the Installer Setup menu, select the 3 (DCM) key. FIRST PHONE NUMBER, FIRST ACCOUNT NUMBER The first item in the DIGITAL COMMUNICATOR category is the FIRST PHONE NUMBER. Enter the FIRST PHONE NUMBER on the keypad. -
Page 50: Two-Way Audio
TWO-WAY AUDIO If a Two-Way Audio Module is being used, this item enables hands free audio communication between your customer's premises and the central station. After the transmission of the alarm to the central station, the operator can talk and listen to people and sounds at the premises. -
Page 51: Alarm Codes (4/2 And 3/1 Formats)
To disable the automatic test, press the ' # ' key and then 0 for Never, and ' # '. TEST CODE: 0-FF ALARM CODES (4/2 and 3/1 Formats) Press the down arrow () to advance to the next ZONE ALARM CODE. Press the up arrow () to go to the previous ZONE ALARM CODE. -
Page 52: Z-Wave Thermostat Node Id
To enable or change a thermostat type, press the ' # ' key. Use the arrow keys to scroll through the list of thermostat types, then press ' # ' to select a new type The display shows: SELECT TYPE: AUTO HEAT/COOL ↓... -
Page 53: Pc Access Code
PC ACCESS CODE This code allows dealers to put an access code in the system that is separate from the customer's Master code and the Installer code. Dealers can use the PC Access code to access the system by PC. The PC Access code cannot arm and disarm the system. -
Page 54: Arming Confirmation
ARMING CONFIRMATION The Arming Confirmation is a quick pulse (squawk) given by the outside siren when the alarm system is armed into a security mode and the EXIT DELAY is expired. ARMING CONFIRMATION: 0=NO 1=YES To enable the arming confirmation feature, press the 1 (YES) key, then press the ' # ' key. The default setting is 0 (NO) disabled. -
Page 55: Supervise Ext Sndr
SUPERVISE EXT SNDR This enables or disables supervision of the Exterior Horn Output, which monitors the wiring to the connected sirens. Factory default is disabled. SUPERVISE EXT SNDR: 0=NO 1=YES ENABLE EMERGENCY KEYS This enables or disables the functionality of the emergency keys on the console keypad. Factory default is enabled. Select the 1 (YES) key to enable the emergency keys. -
Page 56: Pickup After Hangup
The default setting is 30. MODEL AND SOFTWARE VERSION Next, the model number and software version for the system is displayed: LEVITON OMNI LTE S/W VERSION 3.11 RESET SYSTEM EEPROM Select the 1 (YES) key to reset the EEPROM. All programs, names, and setup items will be reset. All system RAM will also be initialized and the system will restart. -
Page 57: Setup Expansion
Serial communication using the Z-Wave protocol LEVITON HI-FI Serial communication using the LEVITON Hi-Fi protocol LEVITON HI-FI 2 Serial communication using the LEVITON Hi-Fi 2 protocol ACCESS CONTROL Serial communication the using LEVITON Access Control protocol CLIPSAL C-BUS Serial communication using the Clipsal C-Bus protocol... -
Page 58: Leviton Access Control
Press the ' # ' (#=CFG) key to put the system into configuration mode. The display will show: CONFIGURE READER 1 SWIPE CARD 3 TIMES Go to the Access Control Reader to be enrolled and swipe any LEVITON Access Control Card or Key Tag 3 times in front of the reader: READER 1 ADDRESS: 8.5.0.137... -
Page 59: Unlock Time
Link Assignment A Link Assignment is used when two Access Control Readers are used to control access to the same door (i.e. one reader on the inside and the other on the outside of the restricted door). This is useful when an Access Control Card or Key Tag is required to enter or exit through a restricted door. -
Page 60: Lock Type
Lock Type The Lock Type specifies the type of door lock that is connected to the selected Access Control Reader. The Lock Type can be either be configured for a "Fail Secure" device (door is locked when power fails) or "Fail Safe" mode (door is unlocked when power fails). -
Page 61: Setup Zone Options
SETUP ZONE OPTIONS Zone options are parameters that define the way that a zone functions. There are global zone options that affect all zones and there are individual zone options that affect how each individual zone functions. To configure zone options, from the Installer Setup menu, press the 8 (ZOPT) key. SWINGER SHUTDOWN NUMBER Swinger Shutdown is a false alarm prevention feature that counts the number of alarms caused by a specific zone. -
Page 62: Sia Cp-01 Compliance
SIA CP-01 COMPLIANCE This control complies with the SIA CP-01 Control Panel Standard - Features for False Alarm Reduction. CP-01 is a standard sponsored by the Security Industry Association (SIA) designed with features for security systems and associated arming and disarming devices intended to reduce the incidence of false alarms. PROGRAMMABLE FEATURES SHIPPING DEFAULTS AND RECOMMENDED PROGRAMMING CP-01... -
Page 63: Omni Lte Specifications
Omni LTe SPECIFICATIONS Size: Controller: 13 W x 13 H x 4.5 D Console: 4.6 W x 4.5 H x 1.2 D Weight: Controller: approx. 10 lb. Console: approx. 0.5 lb. Operating 32 - 122 degrees F (0 - 50 degrees C) Ranges: 10 - 95 % relative humidity, non-condensing Power:... -
Page 64: Underwriter's Laboratories (Ul) Installation Requirements
UNDERWRITER'S LABORATORIES (UL) INSTALLATION REQUIREMENTS The Omni LTe control units (20A00-70, -72, and -73) are suitable for household burglar and fire applications. Refer to UL1641 for installation requirements. The line carrier (X-10) operation is considered supplementary. Operation of the line carrier devices was not investigated by UL. For those zones programmed as PANIC, DURESS or POLICE EMERGENCY, the initiating device shall be a UL Listed Hold Up Device switch. -
Page 65: 24-Hour Standby Battery Capacity
24-HOUR STANDBY BATTERY CAPACITY Maximum current ratings for 24-hours: Aux 12VDC, Switch 12VDC, Console, and Outputs 1-8: 250 mA Interior Horn and Exterior Horn: 350 mA 3M, P/N 952 SNAP CONNECTOR OVER WIRE 12" 12" BLACK BLACK WIRE TO - RED WIRE TO + BATTERY BATTERY... -
Page 66: Smoke Detector Installation Guidelines
SMOKE DETECTOR INSTALLATION GUIDELINES 1. Ceiling mounted smoke detectors should be located in the center of the room or hall, or not less than 4 inches from any wall. When the detector is mounted on a wall, the top of the detector should be 4 to 12 inches from the ceiling. -
Page 67: Appendix A - Contact Id Reporting Format
APPENDIX A – CONTACT ID REPORTING FORMAT ZONE TYPE TRIP TROUBLE DESCRIPTION Entry/exit (also Double & Quad) Entry/exit burglary Perimeter (also Latching) Perimeter burglary Night Interior (also Latching) Interior burglary Away Interior (also Latching) Interior burglary Panic Panic alarm Police Emergency Panic alarm Silent Duress Silent panic... -
Page 68: Appendix B - Digital Communicator Code Sheet
Relationship: __________________________________________________ 2. Name: __________________________________________________ Phone #: __________________________________________________ Relationship: __________________________________________________ 3. Name: __________________________________________________ Phone #: __________________________________________________ Relationship: __________________________________________________ Subscriber Equipment: LEVITON by Leviton - Omni LTe Notes: __________________________________________________________________________________ _________________________________________________________________________________________ _________________________________________________________________________________________ _________________________________________________________________________________________ First Phone #: ____________________________________________ First Account #: ____________________________________________ Second (Backup) Phone #: __________________________________... - Page 69 CODE ZONE DESCRIPTION ACTION TO TAKE TEST CODE _______________________ ______________________________ ZONE 1: _______________________ ______________________________ ZONE 2: _______________________ ______________________________ ZONE 3: _______________________ ______________________________ ZONE 4: _______________________ ______________________________ ZONE 5: _______________________ ______________________________ ZONE 6: _______________________ ______________________________ ZONE 7: _______________________ ______________________________ ZONE 8: _______________________ ______________________________ ZONE 9:...
- Page 70 CODE ZONE DESCRIPTION ACTION TO TAKE ZONE 28: _______________________ ______________________________ ZONE 29: _______________________ ______________________________ ZONE 30: _______________________ ______________________________ ZONE 31: _______________________ ______________________________ ZONE 32: _______________________ ______________________________ FREEZE ALARM _______________________ ______________________________ FIRE EMERG _______________________ ______________________________ POLICE EMERG _______________________ ______________________________ AUX EMERG _______________________ ______________________________ DURESS...
- Page 71 CODE ZONE DESCRIPTION ACTION TO TAKE USER 16 OPEN _______________________ ______________________________ OTHER CLOSE _______________________ ______________________________ USER 1 CLOSE _______________________ ______________________________ USER 2 CLOSE _______________________ ______________________________ USER 3 CLOSE _______________________ ______________________________ USER 5 CLOSE _______________________ ______________________________ USER 5 CLOSE _______________________ ______________________________ USER 6 CLOSE _______________________ ______________________________...
- Page 75 LEVITON LIMITED WARRANTY Leviton warrants to the original consumer purchaser and not for the benefit of anyone else that products manufactured by Leviton under the Leviton brand name (“Product”) will be free from defects in material and workmanship for the time periods indicated below, whichever is shorter: • OmniPro II and Lumina Pro: three (3) years from installation or 42 months from manufacture date.
Need help?
Do you have a question about the omnilte and is the answer not in the manual?
Questions and answers