Pioneer DJM-900SRT Operating Instructions Manual
Hide thumbs
Also See for DJM-900SRT:
- Service manual (118 pages) ,
- Operating instructions manual (32 pages) ,
- Firmware update manual (31 pages)
Table of Contents
Advertisement
Available languages
Available languages
Quick Links
DJM-900SRT
DJM-900SRT Serato DJ Edition
http://pioneerdj.com/support/
The Pioneer DJ support site shown above offers FAQs, information on software and various other types of
information and services to allow you to use your product in greater comfort.
Le site de support DJ de Pioneer indiqué ci-dessus propose une FAQ, des informations sur le logiciel et divers
types d'informations et de services qui permettent une utilisation plus confortable de ce produit.
Die oben gezeigte Pioneer DJ-Support-Website enthält häufig gestellte Fragen, Informationen über Software
und andere wichtige Informationen und Dienste, die Ihnen helfen, Ihr Produkt optimal zu verwenden.
Il sito di supporto DJ Pioneer indicato qui sopra offre una sezione FAQ, informazioni sul software ed
informazioni e servizi di vario tipo, per permettere un uso più confortevole dei nostri prodotti.
De bovengenoemde Pioneer DJ ondersteuningswebsite biedt een overzicht van de vaak gestelde vragen,
informatie over software en allerlei andere soorten informatie en diensten die u in staat stellen dit product met
meer gemak te gebruiken.
El sitio de asistencia Pioneer DJ mostrado arriba ofrece las preguntas frecuentes, información del software y
varios otros tipos de información y servicios que le permitirán usar su producto con mayor confort.
На указанном выше сайте поддержки Pioneer DJ содержатся раздел часто задаваемых вопросов,
информация по программному обеспечению, а также различные другие типы информации и услуг,
позволяющие использовать ваше изделие более лучшим образом.
http://rekordbox.com/
For various types of information and services regarding rekordbox™, see the Pioneer website above.
Pour les différents types d'informations et de services concernant rekordbox™, consultez le site Pioneer ci-dessus.
Weitere Informationen und Dienste bezüglich rekordbox™ finden Sie auf der oben angegebenen Pioneer-Website.
Per quanto riguarda vari tipi di informazione e servizi riguardanti rekordbox™, vedere il sito Pioneer menzionato qui sopra.
Zie de hierboven genoemde Pioneer website voor allerlei soorten informatie en diensten met betrekking tot rekordbox™.
Para varios tipos de información y servicios acerca del rekordbox™, visite el sitio web de Pioneer indicado arriba.
Относительно различных типов информации и услуг относительно rekordbox™ смотрите вебсайт Pioneer выше.
http://serato.com/
For the latest version of the Serato DJ software, access Serato.com and download the software from there.
Pour la toute dernière version du logiciel Serato DJ, accédez à Serato.com et téléchargez le logiciel de ce site.
Für die neueste Version der Serato DJ-Software gehen Sie zu Serato.com und laden die Software von dort
herunter.
Per ottenere la più recente versione di Serato DJ, raggiungere Serato.com e scaricare il software di lì.
Ga voor de nieuwste versie van de Serato DJ-software naar Serato.com en download de software van deze site.
Para la versión más reciente del software Serato DJ, acceda a Serato.com y descargue el software desde allí.
Относительно самой последней версии программного обеспечения Serato DJ зайдите на Serato.com и
загрузите оттуда программное обеспечение.
Operating Instructions
Mode d'emploi
Bedienungsanleitung
Istruzioni per l'uso
Handleiding
Manual de instrucciones
Инструкции по эксплуатации
DJ MIXER
TABLE DE MIXAGE
DJ-MISCHPULT
MIXER PER DJ
DJ MENGPANEEL
MESA DE MEZCLAS DJ
DJ микшерный пульт
Advertisement
Chapters
Table of Contents

Related Manuals for Pioneer DJM-900SRT


Summary of Contents for Pioneer DJM-900SRT
- Page 1 TABLE DE MIXAGE DJ-MISCHPULT DJM-900SRT MIXER PER DJ DJ MENGPANEEL DJM-900SRT Serato DJ Edition MESA DE MEZCLAS DJ DJ микшерный пульт http://pioneerdj.com/support/ The Pioneer DJ support site shown above offers FAQs, information on software and various other types of information and services to allow you to use your product in greater comfort.
- Page 2 (2) this device must accept any interference received, including interference that may cause undesired operation. Product Name: DJ MIXER Model Number: DJM-900SRT Responsible Party Name: PIONEER ELECTRONICS (USA) INC. SERVICE SUPPORT DIVISION Address: 1925 E. DOMINGUEZ ST. LONG BEACH, CA 90810-1003, U.S.A.
- Page 3 Information to User Alterations or modifications carried out without appropriate authorization may invalidate the user’s right to operate the equipment. D8-10-2_A1_En CAUTION This product satisfies FCC regulations when shielded cables and connectors are used to connect the unit to other equipment. To prevent electromagnetic interference with electric appliances such as radios and televisions, use shielded cables and connectors for connections.
-
Page 4: Table Of Contents
Contents For those operating Serato DJ for the first time using this unit See the “Quick Start Guide - Serato DJ Edition” for the procedure for making the initial settings required to use the CONTROL CD or CONTROL VINYL in order to operate Serato DJ. -
Page 5: Before Start
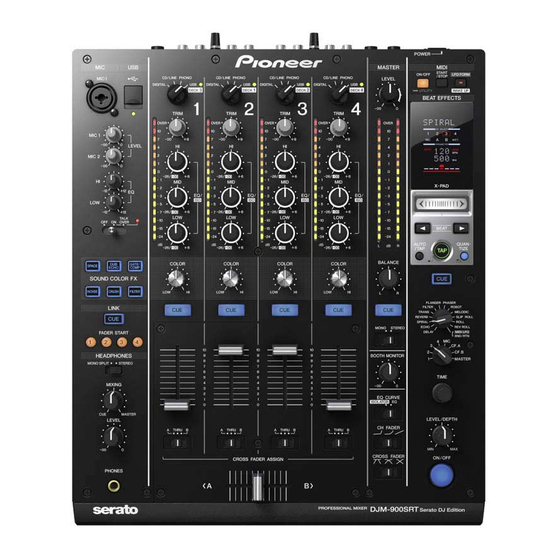
Before start Features This unit is a 4-channel mixer optimally designed for DJ performances using the “Serato DJ” DJ software by Serato. It is equipped with an internal sound card that is compatible with Serato DJ, so performances using Serato DJ can be held immedi- ately after connecting this unit with a computer using a USB cable, with no need to make any troublesome settings. -
Page 6: Installing The Software
Installing the software Installing the driver software 5 U.S. GOVERNMENT RESTRICTED RIGHTS The Program and Documentations are “commercial computer software” and “com- This driver software is a proprietary program for inputting and outputting audio mercial computer software documentation” as those terms are defined in 48 C.F.R. signals from the computer. -
Page 7: Installing The Serato Dj Software
CD-ROM has been loaded. For the latest information on the required operating environment and compatibility as well as to acquire the latest operating system, refer to “Software Info” under “DJM-900SRT” on the 2 Double-click [CD_menu.app]. Pioneer DJ support site below. - Page 8 If any other programs are running on the computer, quit them. The web browser is launched and the Pioneer DJ support site is displayed. 1 Insert the CD-ROM into the computer’s CD drive. 4 Click [Software Info] under [DJM-900SRT] on the Pioneer DJ The CD-ROM menu is displayed. support site.
- Page 9 11 Read the terms of the license agreement carefully, and if you agree, click [Agree]. If you do not agree to the contents of the usage agreement, click [Disagree] to cancel installation. 12 If the following screen appears, drag and drop the [Serato DJ] icon on the [Applications] folder icon.
-
Page 10: Connections
Connections Be sure to turn off the power and unplug the power cord from the power outlet whenever making or changing connections. Connect the power cord after all the connections between devices have been completed. Be sure to use the included power cord. Refer to the operating instructions for the component to be connected. -
Page 11: Connecting Input Terminals
Connecting input terminals When creating a DVS (Digital Vinyl System) combining a computer, audio interface, etc., be careful in connecting the audio interface to this unit’s input terminals and in the settings of the input selector switches. Also refer to the operating instructions of the DJ software and audio interface. Analog player Analog player Analog player... -
Page 12: Connecting To The Control Panel
Connecting to the control panel Connecting this unit and computer For instructions on operating in combination with Serato DJ, see the “Quick Start Be sure to connect using the Computers Guide – Serato DJ Edition”. For details, see Downloading the latest versions of the included USB cable. -
Page 13: Operation
Operation Control Panel POWER MASTER MIDI START ON/ OFF LFO FORM / STOP CD/ LINE PHONO CD/ LINE PHONO CD/ LINE PHONO CD/ LINE PHONO MIC1 LEVEL DIGITAL DIGITAL DIGITAL DIGITAL DECK DECK DECK DECK UTILITY WAKE UP BEAT EFFECTS TRIM TRIM TRIM... -
Page 14: Basic Operation
g COLOR control (page 16) Basic Operation This changes the parameters of the SOUND COLOR FX of the different channels. h Channel Fader (page 14) Adjusts the level of audio signals output in each channel. Outputting sound i CROSS FADER ASSIGN (A, THRU, B) selector switch (page 14) Sets the output destination of each channel to [A] or [B]. -
Page 15: Advanced Operations
Switching the fader curve Audio is output from the [BOOTH] terminal Turn the [BOOTH MONITOR] control. Select the channel fader curve characteristics Adjusts the level of audio signals output from the [BOOTH] terminal. Switch the [CH FADER ( , )] selector switch. Advanced Operations —... - Page 16 Depending on the playing status of Serato DJ or the DJ player (off air, scratch- 1 Connect headphones to the [PHONES] terminal. ing, playing in reverse, etc.), it may not be possible to receive the GRID information. 2 Connect a computer on which rekordbox is installed. For instructions on connections, see Connecting input terminals on page 11.
- Page 17 — [AUTO]: The BPM is measured automatically from the audio signal that is Operating procedure 2 being input. The [AUTO] mode is set when this unit’s power is turned on. — [TAP]: The BPM is input manually by tapping the [TAP] button with a finger. 1 Perform steps 1 to 5 of the Using the BEAT EFFECT function The [AUTO] BPM measurement range is BPM = 70 to 180.
- Page 18 [SND/RTN] [1/7 [2/7 [3/7 [7/7 [6/7 [5/7 [4/7 3 Press the [BEAT , ] button. Set the MIDI signal’s waveform output time. 4 Press the [ON/OFF] button of [BEAT EFFECTS] or touch the [X-PAD]. The MIDI message for turning the effect on is sent. When the [LFO FORM (WAKE UP)] button is pressed and a setting from [1/7 ] –...
-
Page 19: Types Of Effects
Types of effects LEVEL/DEPTH control (param- Use this to set the balance between the original sound and the Types of SOUND COLOR FX effects eter 3) echo sound. X-PAD (parameter 4) Use this to set the delay time. Effect Name Descriptions [COLOR] control Turn counterclockwise: Applies the... - Page 20 [BEAT ] buttons. When the effect time changes, the input sound is recorded again. DJM-900SRT Serato DJ Edition Original buttons (parameter 1) — BEAT TIME control (parameter 2) —...
- Page 21 The MIDI signal waveform pattern switches each time the [LFO FORM (WAKE UP)] button is pressed. Use these to set a waveform output time of 1/4 – 64/1 with buttons (parameter 1) BEAT respect to one beat of the BPM. TIME control (parameter 2) Use this to set the waveform output time.
-
Page 22: Midi Assignment Map
MIDI assignment map MIDI assignment map “CC” is the abbreviation of “control change”. A control change is a type of MIDI signal used to transmit various types of control information, such as timbre, volume, etc. On this unit, values from 0 to 127 are output as CC mainly when controls and faders are operated. CC are also output when certain buttons are operated. “Note”... - Page 23 Button/Control/Switch Category MIDI assignment Trigger/Toggle Transmitted data Name Type Switch CC 034 OFF=0, ON=127 Switch CC 035 OFF=0, ON=127 Switch CC 036 OFF=0, ON=127 Switch CC 037 OFF=0, ON=127 CH SELECT Switch CC 038 OFF=0, ON=127 Switch CC 039 OFF=0, ON=127 CF.A Switch CC 040...
-
Page 24: Changing The Settings
1 Note that the output sound may be distorted even if the master level indicator does not light up to the very top. About the setting utility software For Mac OS X Click [Macintosh HD] icon > [Application] > [Pioneer] > [DJM-900SRT] > [DJM- The setting utility can be used to make the checks and settings described below. 900SRT Settings Utility]. -
Page 25: Checking The Latest Information On The Driver Software
Click the [MIXER INPUT] tab. Adjusting the buffer size (when using Windows ASIO) If an application using this unit as the default audio device (DJ software, etc.) is run- ning, quit that application before adjusting the buffer size. Display the setting utility before starting. Click the [ASIO] tab. -
Page 26: Additional Information
Additional information Troubleshooting Incorrect operation is often mistaken for trouble or malfunction. If you think that there is something wrong with this component, check the points below. Sometimes the trouble may lie in another component. Inspect the other components and electrical appliances being used. If the trouble cannot be rectified after checking the items below, ask your nearest Pioneer authorized service center or your dealer to carry out repair work. -
Page 27: Block Diagram
Block Diagram MIC1 MIC1 LEVEL I/Fμ com ETHER SW IC MIC2 LEVEL Ether MIC2 DIGITAL MASTER CD/LINE TRIM PHONO PHONES Digital MASTER Control Tone DIGITAL MASTER 1 PHONES CD/LINE TRIM CH1_Analog MASTER PHONO MUTE MASTER 2 CH2_Analog Control Tone BOOTH DIGITAL MUTE BOOTH... -
Page 28: Acquiring The Manual
3 “An internet environment is required to access the site. Connected to the internet?” is displayed. Click [Yes]. The web browser is launched and the Pioneer DJ support site is displayed. 4 Click [Software Info] under [DJM-900SRT] on the Pioneer DJ support site. [Serato DJ Support Information] is displayed. -
Page 29: Specifications
— CONTROL CD Specifications See the information on the Pioneer DJ support site (http://pioneerdj.com/support/). © 2013 PIONEER CORPORATION. All rights reserved. General Power requirements ............AC 110 V to 240 V, 50 Hz/60 Hz Power consumption ....................41 W Power consumption (standby) .................0.4 W Main unit weight ...................... - Page 30 Nous vous remercions d’avoir acquis un produit Pioneer. Veuillez lire attentivement ce mode d’emploi afin de connaître la manière d’utiliser l’appareil comme il convient. Cela fait, conservez le mode d’emploi de façon à pouvoir vous y référer en cas de nécessité. Dans certains pays ou certaines régions, la forme de la fiche et de la prise d’alimentation est un peu différente de ce qui est montré...
- Page 31 Informations supplémentaires Sommaire En cas de panne ......................25 Schéma fonctionnel .......................26 Obtention du manuel .....................27 À propos des marques commerciales et des marques déposées ......27 Pour ceux qui utilisent Serato DJ pour la première fois avec cet Spécifications........................28 appareil Reportez-vous au “Guide de démarrage rapide - Édition Serato DJ” pour effectuer les réglages initiaux nécessaires à...
- Page 32 Informations préliminaires Caractéristiques Cet appareil est une table de mixage à 4 canaux conçue pour garantir des presta- tions DJ optimales lorsque le logiciel DJ “Serato DJ” de Serato est utilisé. Il intègre une carte son compatible avec Serato DJ et, dès qu’il est raccordé à un ordinateur avec un câble USB, les prestations avec Serato DJ peuvent commencer sans réglages complexes.
- Page 33 Installation du logiciel Programme, vous déclarez et garantissez que vous ne vous trouvez pas dans de Installation du pilote tels pays et ne figurez pas sur de telles listes. Vous acceptez aussi de ne pas utiliser ce Programme dans un but interdit par la loi des États-Unis, y compris mais sans Ce logiciel pilote est un programme propriétaire permettant de pourvoir en entrée s’y limiter, pour le développement, la conception, la fabrication ou la production et sortie les signaux audio de l’ordinateur.
- Page 34 Intégrale Version à 64 Le navigateur web démarre et le site de support DJ de Pioneer apparaît. bits ® 5 Cliquez sur [Software Download] dans [DJM-900SRT] sur le Windows XP Édition Familiale/Édition Professionnelle (SP3 ou Version à 32 ultérieur) bits site de support DJ de Pioneer.
- Page 35 Pour les toutes dernières informations sur l’environnement opérationnel et la compatibilité ainsi que pour acquérir le tout dernier système d’exploitation, reportez-vous à “Software Info” dans “DJM-900SRT” sur le site de support DJ de Pioneer ci-dessous : http://pioneerdj.com/support/ Le fonctionnement sur tous les ordinateurs n’est pas garanti, même lorsque les conditions de fonctionnement mentionnées ci-dessus sont remplies.
- Page 36 — Suivez les instructions à l’écran, saisissez votre adresse de messagerie et le mot de passe souhaité, puis sélectionnez votre région de résidence. — Si vous cochez [E-mail me Serato newsletters], Serato vous enverra des newsletters avec les toutes dernières informations sur les produits Serato.
- Page 37 Raccordements Veillez à toujours éteindre les appareils et à débrancher le cordon d’alimentation de la prise secteur avant de raccorder un appareil ou de changer les liaisons. Lorsque tous les appareils ont été raccordés, vous pouvez brancher le cordon d’alimentation. Veillez à...
-
Page 38: Raccordement Des Prises De Sortie
Raccordement des prises d’entrée Lorsque vous établissez un DVS (Système Vinyle Numérique) comprenant un ordinateur, une interface audio, etc., faites attention au raccordement de l’interface audio aux prises d’entrée de cet appareil et aux réglages des sélecteurs d’entrée. Reportez-vous aussi au mode d’emploi du logiciel DJ et de l’interface audio. Lecteur analogique Lecteur analogique Lecteur analogique... - Page 39 Raccordement au panneau de commande Raccordement de cet appareil à un ordinateur Veillez à utiliser le câble USB Ordinateurs fourni pour le raccordement. Pour les instructions sur le fonctionnement avec Serato DJ, reportez-vous au “Guide de démarrage rapide – Édition Serato DJ”. Pour plus de détails, reportez- vous à...
-
Page 40: Panneau De Commande
Fonctionnement Panneau de commande POWER MASTER MIDI START ON/ OFF LFO FORM / STOP MIC1 CD/ LINE PHONO CD/ LINE PHONO CD/ LINE PHONO CD/ LINE PHONO LEVEL DIGITAL DIGITAL DIGITAL DIGITAL DECK DECK DECK DECK UTILITY WAKE UP BEAT EFFECTS TRIM TRIM TRIM... - Page 41 f Indicateur de niveau de canal (page 13) F Touche ON/OFF (page 15) Indique le niveau sonore des différents canaux avant de passer par les faders de Met en/hors service la fonction BEAT EFFECT. canaux. N’exercez pas de force excessive lorsque vous tirez les boutons de fader de canal et de crossfader.
- Page 42 5 Tournez la commande [LEVEL] de [HEADPHONES]. 1 Réglez le sélecteur [MONO, STEREO] sur [STEREO]. Le son des canaux pour lesquels la touche [CUE] est pressée provient du casque 2 Tournez la commande [BALANCE]. d’écoute. La balance gauche/droite du son change selon le sens de rotation de la commande Le contrôle s’annule par une nouvelle pression sur la touche [CUE] de casque.
- Page 43 En outre, les fichiers de musique doivent d’abord être analysés avec rekordbox pour 3 Réglez le crossfader. que la fonction QUANTIZE puisse être utilisée. Pour les instructions sur l’analyse Réglez-le sur le côté opposé à celui sur lequel est réglé le canal que vous voulez de fichiers de musique avec rekordbox, reportez-vous aussi au mode d’emploi de utiliser pour le lancement au fader.
- Page 44 [AUTO] s’éclaire lorsque le mode auto est spécifié comme mode 2 Tournez le sélecteur d’effet calé sur le tempo. AUTO (TAP) de mesure BPM. Sélectionnez [SND/RTN (MIDI LFO)]. [TAP] s’éclaire en mode de saisie manuelle. En mode auto, la valeur du BPM détectée automatiquement est 3 Tournez le sélecteur de canal d’effet.
- Page 45 Les séquenceurs MIDI externes ne peuvent pas être synchronisés sur les 1 Appuyez sur la touche [ON/OFF (UTILITY)]. sources dont le BPM ne peut pas être mesuré de manière stable. Mettez la fonction MIDI en service. Les horloges de synchronisation MIDI sont fournies même si les valeurs du BPM 2 Tournez le sélecteur d’effet calé...
-
Page 46: Types De Beat Effect
Types d’effets Sert à régler le retard. Types d’effets SOUND COLOR FX Commande TIME (paramètre 2) 1 à 4000 (ms) Commande LEVEL/DEPTH Sert à régler la balance entre le son original et l’écho. Nom de l’effet Descriptions Commande [COLOR] (paramètre 3) Rotation antihoraire : Applique X-PAD (paramètre 4) Sert à... - Page 47 Le son présent au moment où la touche [ON/OFF] est pressée est enregistré, et le son enregistré est reproduit de manière répétée selon la fraction de temps spécifiée avec les touches [BEAT OVER TALK Générateur d’effets Lorsque la durée de l’effet change, le son entrant est de nouveau enregistré. DJM-900SRT Serato DJ Edition...
- Page 48 Touches BEAT (paramètre — Commande TIME (paramètre 2) — Commande LEVEL/DEPTH Sert à ajuster le niveau sonore à l’entrée de la prise [RETURN]. (paramètre 3) X-PAD (paramètre 4) — MIDI LFO L’onde du signal MIDI (0 – 127) change selon le tempo du morceau. Le motif de la forme d’onde du signal MIDI change à...
- Page 49 Tableau des attributions MIDI Tableau des attributions MIDI “CC” est l’abréviation de “control change”. Un changement de commande est un type de signal MIDI utilisé pour transmettre les différents types d’informations de com- mande, concernant par exemple le timbre, le volume, etc. Sur cet appareil, les valeurs 0 à...
- Page 50 Touche/Commande/Commutateur Catégorie Attribution MIDI Déclenchement/Basculement Données transmises Type Commutateur CC 034 OFF=0, ON=127 Commutateur CC 035 OFF=0, ON=127 Commutateur CC 036 OFF=0, ON=127 Commutateur CC 037 OFF=0, ON=127 CH SELECT Commutateur CC 038 OFF=0, ON=127 Commutateur CC 039 OFF=0, ON=127 CF.A Commutateur CC 040...
-
Page 51: Propos De La Mise En Veille Automatique
— Réglage de la taille de la mémoire (lorsque ASIO de Windows est utilisé) Pour Mac OS X — Vérification de la version du pilote Cliquez sur l’icône [Macintosh HD] > [Application] > [Pioneer] > [DJM-900SRT] > [Utilitaire de réglage du DJM-900SRT]. - Page 52 Le réglage de [USB Output Level] s’applique à tous les sons. Toutefois, lorsque Vérification de l’état des sélecteurs d’entrée de 1 du tableau de l’étape 2 est sélectionné, le son sort au volume auquel il entre cet appareil dans cet appareil. Si le volume n’est pas suffisant avec le réglage de volume du logiciel DJ seu- Affichez l’utilitaire de réglage avant de commencer.
-
Page 53: En Cas De Panne
Informations supplémentaires En cas de panne Une erreur de commande est souvent prise pour une anomalie de fonctionnement ou une panne. Si vous estimez que cet appareil ne fonctionne pas correctement, vérifiez les points ci-dessous. Parfois, le problème peut provenir d’un autre composant. Examinez les autres composants et les appareils électriques utilisés. Si le problème per- siste malgré... - Page 54 Schéma fonctionnel MIC1 MIC1 LEVEL I/Fμ com ETHER SW IC MIC2 LEVEL Ether MIC2 DIGITAL MASTER CD/LINE TRIM PHONO PHONES Digital MASTER Control Tone DIGITAL MASTER 1 PHONES CD/LINE TRIM CH1_Analog MASTER PHONO MUTE MASTER 2 CH2_Analog Control Tone BOOTH DIGITAL MUTE BOOTH...
- Page 55 Connecté à internet ?” apparaît. Cliquez sur [Oui]. Le navigateur web démarre et le site de support DJ de Pioneer apparaît. 4 Cliquez sur [Software Info] dans [DJM-900SRT] sur le site de support DJ de Pioneer. [Serato DJ Support Information] apparaît.
- Page 56 — CONTROL CD Spécifications Reportez-vous aux informations sur le site de support DJ de Pioneer (http://pioneerdj.com/support/). © 2013 PIONEER CORPORATION. Tous droits de reproduction et de traduction Général réservés. Alimentation ..............CA 110 V à 240 V, 50 Hz/60 Hz Consommation ......................41 W Consommation (en veille) ..................0,4 W Poids de l’appareil principal ..................
- Page 58 Vielen Dank, dass Sie sich für dieses Pioneer-Produkt entschieden haben. Bitte lesen Sie diese Bedienungsanleitung gründlich durch, um sich mit der Bedienung des Geräts vertraut zu machen. Nachdem Sie die Bedienungsanleitung gelesen haben, legen Sie sie griffbereit zum Nachschlagen ab. In manchen Ländern oder Regionen können sich die Formen von Netzstecker und Netzsteckdose von denen in den Erklärungszeichnungen unterscheiden.
- Page 59 Zusätzliche Informationen Inhalt Störungssuche ........................25 Blockdiagramm ......................26 Übernehmen der Anleitung ...................27 Über Markenzeichen und eingetragene Markenzeichen ...........27 Für Anwender, die Serato DJ zum ersten Mal mithilfe dieser Einheit Technische Daten ......................28 bedienen Siehe “Kurzanleitung - Serato DJ Edition” für das Verfahren zum Vornehmen der anfänglichen Einstellungen, die zur Verwendung von CONTROL CD oder CONTROL VINYL zur Bedienung von Serato DJ erforderlich sind.
-
Page 60: Vor Der Inbetriebnahme
Vor der Inbetriebnahme Merkmale Lieferumfang Diese Einheit ist ein 4-Kanal-Mixer, der optimal für DJ-Auftritte mit der mit der CD-ROM (Installation Disc) „Serato DJ“ DJ Software von Serato ausgelegt ist. Sie ist mit einer internen USB-Kabel Soundkarte ausgestattet, die mit Serato DJ kompatibel ist, so dass Auftritte mit Netzkabel Serato DJ sofort nach dem Verbinden dieser Einheit mit einem Computer über ein Bedienungsanleitung (dieses Dokument) -
Page 61: Installieren Der Software
Installieren der Software Installieren der Treibersoftware 4 KONTROLLE DES EXPORTS UND EINHALTUNGEN DER EXPORTBESTIMMUNGEN UND VORSCHRIFTEN Diese Treiber-Software ist ein prorietäres Programm für die Eingabe und Ausgabe Sie dürfen das Programm nicht nutzen oder sonst wie exportieren oder re-exportie- von Audiosignalen vom Computer. Um dieses Gerät mit Anschluss an einen ren, außer es ist von den Gesetzen der USA und den Gesetzen des Landes, in dem Computer, auf dem Windows installiert ist, zu verwenden, installieren Sie zuerst die das Programm erworben wurde, erlaubt. -
Page 62: Installieren Der Serato Dj Software
Portugiesisch, Russisch, Chinesisch (Kurzzeichen), Chinesisch (Langzeichen), Koreanisch und Japanisch 5 Klicken Sie auf [Software Download] unter [DJM-900SRT] Bei der Verwendung von Betriebssystemen in anderen Sprachen folgen Sie auf der Pioneer DJ-Support-Website. den Anweisungen auf dem Bildschirm, um die Option [English (Englisch)] zu wählen. - Page 63 Internetverbindung vorhanden?“ wird angezeigt. Klicken Sie auf [Ja]. Der Webbrowser wird gestartet, und die globale Pioneer DJ-Support-Website wird angezeigt. 4 Klicken Sie auf [Software Info] unter [DJM-900SRT] auf der Pioneer DJ-Support-Website. [Serato DJ Support Information] wird angezeigt. Installationsverfahren (Mac OS X) 5 Klicken Sie auf den Link zur Serato DJ-Download-Seite.
- Page 64 Klicken Sie auf [Ja]. Der Webbrowser wird gestartet, und die globale Pioneer DJ-Support-Website wird angezeigt. 5 Klicken Sie auf [Software Info] unter [DJM-900SRT] auf der Pioneer DJ-Support-Website. [Serato DJ Support Information] wird angezeigt. 6 Klicken Sie auf den Link zur Serato DJ-Download-Seite.
-
Page 65: Rückseite
Anschlüsse Schalten Sie die Stromversorgung aus und ziehen Sie das Netzkabel aus der Netzsteckdose, bevor Sie Geräte anschließen oder die Anschlüsse ändern. Schließen Sie das Netzkabel an, nachdem alle Anschlüsse zwischen den Geräten vorgenommen wurden. Verwenden Sie immer das mitgelieferte Netzkabel. Beachten Sie die Bedienungsanleitung der angeschlossenen Komponente. -
Page 66: Anschließen Der Eingangsbuchsen
Anschließen der Eingangsbuchsen Beim Erstellen eines DVS (Digital Vinyl System) durch Kombination mit einem Computer, einer Audioschnittstele usw. seien Sie beim Anschließen der Audioschnittstelle an die Eingänge dieses Geräts und den Einstellungen der Eingangswahlschalter vorsichtig. Beachten Sie auch die Bedienungsanleitungen der DJ-Software und der Audioschnittstelle. Plattenspieler Plattenspieler Plattenspieler... -
Page 67: Anschließen An Das Steuerpult
Anschließen an das Steuerpult Verbinden dieses Geräts mit dem Computer Schließen Sie immer das Computer mitgelieferte USB-Kabel an. Anweisungen zur Bedienung in Kombination mit Serato DJ von siehe „Kurzanleitung – Serato DJ Edition“. Einzelheiten siehe Herunterladen der neues- ten Versionen der Bedienungsanleitungen und der Kurzanleitung - Serato DJ Edition (S. -
Page 68: Bedienung
Bedienung Bedienpult POWER MASTER MIDI START ON/ OFF LFO FORM / STOP MIC1 CD/ LINE PHONO CD/ LINE PHONO CD/ LINE PHONO CD/ LINE PHONO LEVEL DIGITAL DIGITAL DIGITAL DIGITAL DECK DECK DECK DECK UTILITY WAKE UP BEAT EFFECTS TRIM TRIM TRIM TRIM... -
Page 69: Grundlegender Betrieb
g COLOR-Regler (Seite 15) Ziehen Sie nicht gewaltsam an den Kanal-Fader- und Crossfader-Knöpfen. Die Dies ändert die Parameter von SOUND COLOR FX der verschiedenen Kanäle. Knöpfe haben eine Struktur, die verhindert, dass sie leicht herausgezogen wer- den. Durch starkes Ziehen an den Knöpfen kann das Gerät beschädigt werden. h Kanalfader (Seite 13) Stellt den Pegel der Audiosignale ein, die in jedem Kanal ausgegeben werden. -
Page 70: Erweiterte Bedienungen
Zur Einstellung des von den Buchsen [USB] ausgegebenen Sounds wählen Sie 5 Drehen Sie den Regler [LEVEL] für [HEADPHONES]. [MIX (REC OUT)] bei [Mixer Audio Output] im Einstellung-Dienstprogramm. Der Sound der Kanäle, für die die [CUE]-Taste gedrückt ist, wird von den Kopfhörern ausgegeben. - Page 71 Starten Sie die Wiedergabe mit dem Crossfader Verwendung der QUANTIZE-Funktion Effekte können auf den Sound im Tempo mit dem aktuell spielenden Track ange- 1 Stellen Sie den [CROSS FADER ASSIGN (A, THRU, B)]- wendet werden, basierend auf der GRID-Information über Tracks, die mit Serato DJ Wahlschalter auf [A] oder [B].
- Page 72 Der quantitative Parameter des Effekts kann durch Drehen des Reglers [LEVEL/ Verwendung der BEAT EFFECT-Funktion DEPTH] eingestellt werden. Die Taste [ON/OFF] blinkt, wenn der Effekt eingeschaltet ist. Diese Funktion erlaubt es Ihnen, sofort verschiedene Effekte entsprechend dem Wenn die Taste [ON/OFF] erneut gedrückt wird, wird der Effekt ausgeschaltet. Tempo (BPM = Taktschläge pro Minute) des laufenden Tracks einzustellen.
- Page 73 Für die von diesem Gerät ausgegebenen Meldungen siehe MIDI-Zuweisungskarte Wenn die Taste [LFO FORM (WAKE UP)] gedrückt wird und eine Einstellung von auf Seite 21. [1/7 ] – [7/7 ] gewählt ist, kann die MIDI-Meldung für die Tasten und Regler unten gesendet werden, auch wenn der MIDI-Modus ausgeschaltet ist. 1 Verbinden Sie die Buchse [USB] dieses Geräts mit dem —...
-
Page 74: Typen Von Effekten
Typen von Effekten Eingabeton ausgeschaltet Typen von SOUND COLOR FX-Effekten Fade-out Effekt-Name Beschreibungen [COLOR] Regler Gegen den Uhrzeigersinn drehen: Zeit Legt einen Nachhalleffekt auf die 1 Beat Legt einen Nachhalleffekt auf den Mitten- und Tiefenbereiche an. SPACE Verwenden Sie diese, um eine Zeitverzögerung von 1/8 – 16/1 Originalsound an. - Page 75 Dies stellt die Weise ein, in der der aufgezeichnete Sound X-PAD (Parameter 4) abgespielt wird. Frequenz SLIP ROLL Verwenden Sie diese, um den Zyklus zum Verschieben der -Tasten (Parameter 1) Schwellenfrequenz als eine Zeit von 1/4 – 64/1 im Hinblick auf BEAT Der an der Stelle wo [ON/OFF] gedrückt wird eingegeben wird, wird aufgezeichnet, die Zeit eines Beats von BPM einzustellen.
- Page 76 SEND RETURN TALK Effektor OVER DJM-900SRT Serato DJ Edition -Tasten (Parameter 1) — BEAT TIME-Regler (Parameter 2) — LEVEL/DEPTH-Regler Dies stellt die Soundpegeleingabe zur Buchse [RETURN] ein. (Parameter 3) X-PAD (Parameter 4) — MIDI LFO Die MIDI-Signal (0 – 127) Wellenform wird entsprechend dem Tempo des Tracks geändert.
-
Page 77: Midi-Zuweisungskarte
MIDI-Zuweisungskarte MIDI-Zuweisungskarte “CC” ist die Abkürzung von “control change”. Eine Steueränderung ist ein Typ von MIDI-Signal, das zum Übertragen verschiedener Arten von Steuerinformationen, wie Timbre, Lautstärke usw. verwendet wird. Bei diesem Gerät werden Werte von 0 bis 127 hauptsächlich als CC ausgegeben, wenn Regler und Fader bedient werden. CC werden auch ausgegeben, wenn bestimmte Tasten betätigt werden. - Page 78 Taste/Regler/Schalter Kategorie MIDI-Zuweisung Trigger/Toggle Übertragene Daten Name Schalter CC 034 OFF=0, ON=127 Schalter CC 035 OFF=0, ON=127 Schalter CC 036 OFF=0, ON=127 Schalter CC 037 OFF=0, ON=127 CH SELECT Schalter CC 038 OFF=0, ON=127 Schalter CC 039 OFF=0, ON=127 CF.A Schalter CC 040 OFF=0, ON=127...
-
Page 79: Ändern Der Einstellungen
Klicken Sie auf das [Start]-Menü > [Alle Programme] > [Pioneer] > [DJM- — Prüfen des Status der Eingangswahl-Schalter dieses Geräts 900SRT] > [DJM-900SRT Einstellung-Dienstprogramm]. — Einstellung der Audiodaten-Ausgabe von diesem Gerät zum Computer — Einstellen der Puffergröße (bei Verwendung von Windows ASIO) -
Page 80: Prüfen Der Neuesten Informationen Über Die Treibersoftware
Klicken Sie auf das [Macintosh HD]-Icon > [Application] > [Pioneer] > [DJM- Stellen Sie die Lautstärke der Audiodaten-Ausgabe von diesem Gerät ein. 900SRT] > [DJM-900SRT Einstellung-Dienstprogramm]. Die Einstellung [USB Output Level] wird gleich auf alle Audiodaten angelegt. Wenn aber 1 in der Tabelle in Schritt 2 gewählt ist, werden die Audiodaten mit der gleichen Lautstärke ausgegeben, mit der sie an diesem Gerät angelegt... - Page 81 Zusätzliche Informationen Störungssuche Bedienungsfehler werden oft irrtümlich für Störungen oder Ausfälle gehalten. Wenn Sie den Eindruck haben, dass diese Komponente nicht ordnungsgemäß funkti- oniert, überprüfen Sie bitte die folgenden Punkte. Manchmal wird eine Störung auch durch ein externes Gerät verursacht. Überprüfen Sie die anderen verwendeten Komponenten und elektrischen Geräte.
- Page 82 Blockdiagramm MIC1 MIC1 LEVEL I/Fμ com ETHER SW IC MIC2 LEVEL Ether MIC2 DIGITAL MASTER CD/LINE TRIM PHONO PHONES Digital MASTER Control Tone DIGITAL MASTER 1 PHONES CD/LINE TRIM CH1_Analog MASTER PHONO MUTE MASTER 2 CH2_Analog Control Tone BOOTH DIGITAL MUTE BOOTH CH3_Analog...
- Page 83 Klicken Sie auf [Ja]. Der Webbrowser wird gestartet, und die globale Pioneer DJ-Support-Website wird angezeigt. 4 Klicken Sie auf [Software Info] unter [DJM-900SRT] auf der Pioneer DJ-Support-Website. [Serato DJ Support Information] wird angezeigt. 5 Klicken Sie auf den Link zur Serato DJ-Download-Seite.
- Page 84 — CONTROL CD Technische Daten Weitere Informationen finden Sie auf der Pioneer DJ-Support-Website (http://pioneerdj.com/support/). © 2013 PIONEER CORPORATION. Alle Rechte vorbehalten. Allgemeine Stromanforderungen ......110 V bis 240 V Wechselspannung, 50 Hz/60 Hz Leistungsaufnahme ....................41 W Leistungsaufnahme (Standby) .................0,4 W Gewicht des Hauptgeräts ..................
- Page 86 Vi ringraziamo per avere acquistato questo prodotto Pioneer. Vi preghiamo di leggere queste queste istruzioni per l’uso in modo da sapere usare correttamente il proprio modello. Dopo aver letto queste istruzioni, riporle in un luogo sicuro per poterle consultare di nuovo al momento del bisogno. In alcuni paesi o regioni, la forma della spina di alimentazione e della presa di corrente possono non essere quelle delle illustrazioni.
- Page 87 Indice Per chi usa Serato DJ per la prima volta insieme a questa unità Per quanto riguarda le impostazioni iniziali richieste per l’uso di CONTROL CD o CONTROL VINYL per controllare Serato DJ, vedere la “Guida di avvio veloce - Edizione Serato DJ”.
-
Page 88: Prima Di Cominciare
Prima di cominciare Caratteristiche Contenuto della confezione Questa unità è un mixer a 4 canali progettato in maniera ottimale per esibizioni DJ CD-ROM (disco d’installazione) utilizzando il software DJ “Serato DJ” prodotto da Serato. Esso possiede una scheda Cavo USB audio interna compatibile con Serato DJ, di modo che le performance fatte con Cavo di alimentazione Serato DJ sono possibili semplicemente collegando questo unità... -
Page 89: Installazione Del Software
Installazione del software non può essere esportato o riesportato (a) in paesi soggetti a embargo da parte Installazione del driver degli Stati Uniti o (b) inviato ad entità incluse nella Specially Designated Nationals List del Dipartimento del Tesoro degli USA o nelle Denied Persons List e Entity List Questo software del driver è... -
Page 90: Installazione Del Software Serato Dj
Per ottenere informazioni recenti sull’ambiente operativo e sulla compatibilità ed ottenere il Se le cartelle non vengono visualizzate quando un CD-ROM è stato caricato, fare sistema operativo più recente, vedere “Software Info” in “DJM-900SRT” del sito di supporto doppio clic sull’icona del CD sul desktop. - Page 91 Il Web browser si apre ed il sito di supporto DJ Pioneer appare. 1 Inserire il CD-ROM nell’unità CD del computer. 4 Fare clic su [Software Info] in [DJM-900SRT] del sito di Viene visualizzato il menu del CD-ROM. supporto DJ Pioneer.
- Page 92 11 Leggere attentamente i termini dell’accordo di licenza e, se li si accettano, fare clic su [Agree]. Se non si è d’accordo con l’accordo di licenza d’uso, fare clic su [Disagree] e fermare l’installazione. 12 Se apparisse la seguente schermata, trascinare l’icona [Serato DJ] e farla cadere sull’icona della cartella [Applications].
-
Page 93: Pannello Posteriore
Collegamenti Prima di fare o modificare collegamenti, non mancare di spegnere l’apparecchio e di scollegare il cavo di alimentazione. Collegare il cavo di alimentazione dopo che tutti i collegamenti fra dispositivi sono stati fatti. Usare solo il cavo di alimentazione accluso. Consultare le istruzioni per l’uso del componente da collegare. -
Page 94: Collegamento Dei Terminali Di Ingresso
Collegamento dei terminali di ingresso Nel creare un DVS (Digital Vinyl System, sistema vinile digitale) combinando un computer, un interfaccia audio, ecc., fare attenzione nel collegare l’interfaccia audio ai terminali di ingresso di questa unità e fare attenzione alle impostazioni dei selettori di ingresso. Consultare anche le istruzioni per l’uso del software DI e dell’interfaccia audio. -
Page 95: Collegamento Ad Un Pannello Di Controllo
Collegamento ad un pannello di controllo Collegamento di questa unità al computer Per quanto riguarda l’uso insieme a Serato DJ, vedere la “Guida di avvio veloce – Per i collegamenti, usare solo Computer Edizione Serato DJ”. Per dettagli, vedere Download della versione più recente delle il cavo USB accluso. -
Page 96: Pannello Di Controllo
Impiego Pannello di controllo POWER MASTER MIDI START ON/ OFF LFO FORM / STOP MIC1 CD/ LINE PHONO CD/ LINE PHONO CD/ LINE PHONO CD/ LINE PHONO LEVEL DIGITAL DIGITAL DIGITAL DIGITAL DECK DECK DECK DECK UTILITY WAKE UP BEAT EFFECTS TRIM TRIM TRIM... -
Page 97: Uso Di Base
g Controllo COLOR (pagina 15) Non tirare le manopole del fader dei canali e del crossfader con forza eccessiva. Modifica i parametri di SOUND COLOR FX dei vari canali. Le manopole sono costruite in modo da non poter venir tolte facilmente. Tirandole con forza le si possono quindi danneggiare. -
Page 98: Uso Avanzato
Se il pulsante della cuffia [CUE] viene premuto di nuovo, il monitoraggio viene L’audio viene emesso dal terminale [BOOTH] cancellato. Girare il controllo [BOOTH MONITOR]. Commutazione della curva del fader Regola il livello dei segnali audio emessi dal terminale [BOOTH]. Scegliere le caratteristiche della curva del fader Uso avanzato Cambiare di posizione il selettore [CH FADER ( ,... - Page 99 QUANTIZE è utilizzabile. [GRID] lampeggia se le informazioni GRID non sono state Uso della funzione LINK MONITOR ricevute correttamente. A seconda della condizione operativa di Serato DJ o lettore DJ (off air, Controllare anticipatamente [Usare “LINK MONITOR” dei mixer DJ Pioneer] di scratching, reverse playing, ecc.,), potrebbe non essere possibile ricevere le [File] >...
- Page 100 Visualizza i parametri scelti per un particolare effetto. Uso di [X-PAD] Se viene premuto il pulsante [BEAT ], la frazione di battuta Sezione di display corrispondente viene visualizzata per 1 secondo. dei parametri Procedura Stato del pulsante [ON/OFF] di Specificando un valore di parametro fuori gamma con il pulsante Effetto X-PAD [BEAT...
- Page 101 Il messaggio MIDI del pulsante [ON/OFF] di [BEAT EFFECTS] quando [SND/RTN 4 Premere [ON/OFF] della sezione [MIDI]. (MIDI LFO)] è scelto viene mandato solo quando viene fatta la procedura La trasmissione di segnali MIDI inizia. seguente. 4 Premere il pulsante [LFO FORM (WAKE UP)]. Apprendere il messaggio MIDI del pulsante [LFO FORM (WAKE UP)] sul lato di ricezione del segnale MIDI.
-
Page 102: Tipi Di Effetto
Tipi di effetto Pulsanti BEAT (parame- Usare questi controlli per impostare un tempo di ritardo di 1/8 Tipi di effetto SOUND COLOR FX tro 1) – 16/1 rispetto al tempo di una battuta del valore BPM. Usare questo per impostare il tempo di ritardo. Controllo TIME (parametro 2) Nome dell’effetto Descrizioni... - Page 103 Il suono ricevuto nel punto in cui [ON/OFF] viene premuto viene registrato, e tale suono registrato viene emesso varie volte in accordo con la frazione di battuta impo- stata con i pulsanti [BEAT Quando il tempo dell’effetto cambia, il suono in ingresso viene riregistrato. DJM-900SRT Serato DJ Edition...
- Page 104 Pulsanti BEAT (parame- — tro 1) Controllo TIME (parametro 2) — Controllo LEVEL/DEPTH (para- Regola il livello dell’audio che arriva al terminale [RETURN]. metro 3) X-PAD (parametro 4) — MIDI LFO La forma d’onda del segnale MIDI (0 – 127) viene cambiata a seconda del tempo del brano.
-
Page 105: Mappa Di Assegnazione Midi
Mappa di assegnazione MIDI Mappa di assegnazione MIDI “CC” è l’abbreviazione di “control change”. Un cambio comando è un tipo di segnale MIDI usato per trasmettere vari tipi di informazione di comando, ad esempio timbro, volume, ecc. In questa unità, i valori da 0 a 127 vengono emessi come CC principalmente quando comandi e fader sono usati. I CC vengono emessi anche quando certi pulsanti ven- gono usati. - Page 106 Pulsante/controllo/interruttore Categoria Assegnazione MIDI Trigger/Toggle Dati trasmessi Nome Tipo Interruttore CC 034 OFF=0, ON=127 Interruttore CC 035 OFF=0, ON=127 Interruttore CC 036 OFF=0, ON=127 Interruttore CC 037 OFF=0, ON=127 CH SELECT Interruttore CC 038 OFF=0, ON=127 Interruttore CC 039 OFF=0, ON=127 CF.A Interruttore CC 040...
-
Page 107: Modifica Delle Impostazioni
L’utility di impostazione è utilizzabile per fare i controlli e le impostazioni descritti di In Windows seguito. Fare clic sul menu [Start] > [Tutti i programmi] > [Pioneer] > [DJM-900SRT] > — Controllo dello stato dei selettori di ingresso di questa unità [Utility di impostazione del DJM-900SRT]. -
Page 108: Controllo Dell'ultima Versione Del Driver
L’impostazione [USB Output Level] viene applicata in misura uguale a tutti i Controllo dello stato dei selettori di ingresso di dati audio. Tuttavia, quando 1 della tabella 2 viene scelto, i dati audio vengono questa unità emessi col volume che avevano al momento di ingresso in questa unità. Se la regolazione del software DJ da sola non ha volume sufficiente, cambiare Visualizzazione dell’utility di impostazione. -
Page 109: Informazioni Aggiuntive
Informazioni aggiuntive Diagnostica L’uso scorretto dell’apparecchio viene spesso scambiato per un guasto. Se si ritiene che questo componente non funzioni bene, controllare la sezione che segue. A volte il problema risiede in un altro componente. Controllare tutti i componenti ed apparecchi elettronici usati. Se il problema non può venire eliminato neppure dopo aver fatto i controlli suggeriti, chiedere assistenza tecnica al più... -
Page 110: Diagramma A Blocchi
Diagramma a blocchi MIC1 MIC1 LEVEL I/Fμ com ETHER SW IC MIC2 LEVEL Ether MIC2 DIGITAL MASTER CD/LINE TRIM PHONO PHONES Digital MASTER Control Tone DIGITAL MASTER 1 PHONES CD/LINE TRIM CH1_Analog MASTER PHONO MUTE MASTER 2 CH2_Analog Control Tone BOOTH DIGITAL MUTE... -
Page 111: Acquisizione Del Manuale
Internet. Siete collegati a Internet?”. Fare clic su [Si]. Il Web browser si apre ed il sito di supporto DJ Pioneer appare. 4 Fare clic su [Software Info] in [DJM-900SRT] del sito di supporto DJ Pioneer. [Serato DJ Support Information] viene visualizzato. -
Page 112: Dati Tecnici
— CONTROL CD Dati tecnici Vedere le informazioni sul sito di supporto DJ Pioneer (http://pioneerdj.com/support/). © 2013 PIONEER CORPORATION. Tutti i diritti riservati. Generale Requisiti di alimentazione ...........CA da 110 V a 240 V, 50 Hz/60 Hz Consumo di corrente ....................41 W Consumo di corrente (in attesa) ................0,4 W Peso unità... - Page 114 Hartelijk dank voor uw aankoop van dit Pioneer product. Lees deze gebruiksaanwijzing aandachtig door om bekend te raken met de juiste bediening van uw apparaat. Na het doorlezen van de gebruiksaanwijzing dient u deze te bewaren op een veilige plaats, voor latere naslag. In bepaalde landen of gebieden kan de vorm van de netsnoerstekker en het stopcontact verschillen van de afbeeldingen bij de onderstaande uitleg.
- Page 115 Aanvullende informatie Inhoud Verhelpen van storingen ....................26 Blokschema ........................27 Verkrijgen van de handleiding ..................28 Over handelsmerken en gedeponeerde handelsmerken ...........28 Als u Serato DJ voor het eerst met dit toestel gebruikt Specificaties ........................29 Zie de “Snelstartgids - Serato DJ Editie” voor de procedure voor het maken van de vereiste begininstellingen voor CONTROL CD of CONTROL VINYL voor bedie- ning van Serato DJ.
- Page 116 Alvorens te beginnen Kenmerken Inhoud van de doos Dit is een 4-kanaals mengpaneel dat ontworpen en geoptimaliseerd is voor CD-ROM (Installatiedisc) DJ-optredens met de “Serato DJ” DJ-software van Serato. Het toestel is uitgerust USB-kabel met een interne geluidskaart die compatibel is met Serato DJ, dus uitvoeringen met Stroomsnoer Serato DJ kunnen onmiddellijk gehouden worden nadat dit toestel met een USB- Handleiding (dit document)
- Page 117 Installeren van de software Installeren van het stuurprogramma 4 EXPORTBEPERKINGEN EN NALEVING VAN WETTEN EN REGELGEVING Dit stuurprogramma is een exclusief programma voor het insturen en uitsturen van U mag het Programma niet gebruiken of anderszins uitvoeren of opnieuw uitvoeren, geluidssignalen van en naar een computer.
- Page 118 XP Professional x64 Edition wordt niet ondersteund. geopend. De bijgeleverde CD-ROM bevat installatieprogramma’s in de volgende 12 talen. 5 Klik op [Software Download] onder [DJM-900SRT] op de Engels, Frans, Duits, Italiaans, Nederlands, Spaans, Portugees, Russisch, Vereenvoudigd Chinees, Traditioneel Chinees, Koreaans en Japans Pioneer DJ-ondersteuningssite.
- Page 119 Voor de nieuwste informatie over de vereiste gebruiksomgeving en compatibiliteit met de nieuwste besturingssystemen verwijzen we u naar “Software Info” onder “DJM-900SRT” op de Pioneer DJ-ondersteuningssite hieronder. http://pioneerdj.com/support/ De werking kan niet worden gegarandeerd op alle computers, ook niet als aan alle hier aange- geven eisen wat betreft de gebruiksomgeving wordt voldaan.
- Page 120 5 Klik op [Software Info] onder [DJM-900SRT] op de Pioneer DJ-ondersteuningssite. [Serato DJ Support Information] verschijnt. 6 Klik op de koppeling naar de downloadpagina voor Serato De downloadpagina voor [Serato DJ] verschijnt. 7 Meld uzelf aan op uw gebruikersaccount voor “Serato.
- Page 121 Aansluitingen Schakel altijd eerst de stroom uit en trek de stekker uit het stopcontact alvorens u enige aansluiting maakt of verbreekt. Sluit het netnoer pas aan nadat alle aansluitingen tussen de apparatuur volledig zijn gemaakt. Gebruik alleen het bijgeleverde netsnoer. Zie tevens de gebruiksaanwijzingen van de aan te sluiten apparatuur.
- Page 122 Aansluiten van ingangsaansluitingen Wanneer u een DVS (Digital Vinyl System) maakt door een computer, audio-interface enz. met elkaar te combineren, moet u goed opletten bij het verbinden van de audio- interface verbinden met de ingangsaansluitingen van dit toestel en bij het instellen van de ingangskeuzeschakelaars. Zie tevens de handleiding van de DJ-software en de audio-interface in kwestie.
- Page 123 Aansluiten op het bedieningspaneel Verbinding maken tussen dit toestel en een computer U moet de meegeleverde USB-kabel Computers gebruiken voor de aansluiting. Voor instructies over gebruik in combinatie met Serato DJ verwijzen we u naar de “Snelstartgids – Serato DJ Editie”. Zie Downloaden van de nieuwste versies van de handleiding en de Snelstartgids - Serato DJ Editie (blz.28) voor details.
- Page 124 Bediening Regelpaneel POWER MASTER MIDI START ON/ OFF LFO FORM / STOP MIC1 CD/ LINE PHONO CD/ LINE PHONO CD/ LINE PHONO CD/ LINE PHONO LEVEL DIGITAL DIGITAL DIGITAL DIGITAL DECK DECK DECK DECK UTILITY WAKE UP BEAT EFFECTS TRIM TRIM TRIM TRIM...
- Page 125 e EQ/ISO (HI, MID, LOW) instellingen (bladzijde 13) C Effectkanaal-keuzeschakelaar (bladzijde 16) Deze regelen de toonweergave van de diverse kanalen. Schakelt het kanaal om waarop het BEAT EFFECT zal worden toegepast. f Kanaalniveau-aanduiding (bladzijde 13) D TIME instelling (bladzijde 16) Toont het geluidsniveau van de diverse kanalen voor ze door de kanaalfaders Regelt de tijdparameter van het BEAT EFFECT.
- Page 126 Om het via de [USB]-aansluitingen geproduceerde geluidssignaal in te stel- 3 Schakelt de [MONO SPLIT, STEREO] keuzeschakelaar om. len, moet u [MIX (REC OUT)] selecteren bij [Mixer Audio Output] in het — [MONO SPLIT]: Het geluid van de kanalen waarvoor [CUE] wordt ingedrukt, instelhulpprogramma.
- Page 127 LINK MONITOR 5 Beweeg de kanaalfader van u af. Het afspelen van het muziekstuk in Serato DJ of op de DJ-speler begint. Met deze functie kunt u rekordbox-muziekbestanden die zijn opgeslagen op de Wanneer u de kanaal-fader terugzet in de oorspronkelijke stand, keert de speler computer vlot controleren via een hoofdtelefoon.
- Page 128 5 Druk op de [ON/OFF] toets voor [BEAT EFFECTS]. Gebruik van de BEAT EFFECT-functie Het effect wordt toegepast op het geluid. De tijdparameter van het effect is instelbaar door te draaien aan de Met deze functie kunt u onmiddellijk diverse effecten instellen volgens het tempo [TIME]-instelling.
- Page 129 Aanwijzingen voor het instellen van de MIDI-kanalen vindt u op Instellingen 4 Druk op [ON/OFF] of [BEAT EFFECTS], of raak het [X-PAD] aanpassen op bladzijde 23. aan. Zie voor de berichten die dit toestel doorgeeft MIDI-toewijzingstabel op bladzijde De MIDI-melding voor het inschakelen van het effect wordt verstuurd. Wanneer de [LFO FORM (WAKE UP)]-toets wordt ingedrukt en een instelling van [1/7 ] –...
- Page 130 Soorten effecten Inkomend geluid Soorten SOUND COLOR FX effecten weggedraaid Uitfaden Effectnaam Beschrijving [COLOR] instelling Tegen de klok in draaien: Voegt het Tijd nagalmeffect toe aan de midden- 1 beat Voegt een nagalmeffect toe aan en lage tonen. SPACE Gebruik deze om een vertraging in te stellen van 1/8 – 16/1 in het oorspronkelijke geluid.
- Page 131 SLIP ROLL Het geluid dat wordt ingevoerd op het punt waar er op [ON/OFF] wordt gedrukt Frequentie wordt opgenomen en het opgenomen geluid wordt herhaaldelijk gereproduceerd overeenkomstig de beatfractie die is ingesteld met de [BEAT ] toetsen. Gebruik deze om de cyclus in te stellen voor het verplaatsen Wanneer de effecttijd verandert, wordt het inkomend geluid opnieuw opgenomen.
- Page 132 SND/RTN Hierop kunt u een externe effectgenerator, enz. aansluiten. SEND RETURN TALK OVER Effectgenerator DJM-900SRT Serato DJ Edition toetsen (parameter 1) — BEAT TIME instelling (parameter 2) — LEVEL/DEPTH instelling (para- Regelt het niveau van de geluidssignalen die binnenkomen via meter 3) de [RETURN]-aansluiting.
- Page 133 MIDI-toewijzingstabel MIDI-toewijzingstabel “CC” is de afkorting voor “control change”. Een control change is een type MIDI-signaal voor het verzenden van diverse soorten bedieningsinformatie, zoals timbre, volume enz. Op dit toestel worden waarden van 0 t/m 127 voornamelijk geproduceerd als CC wanneer instellingen en faders worden gebruikt. CC-signalen worden ook geproduceerd wanneer bepaalde toetsen worden gebruikt.
- Page 134 Toets/instelling/schakelaar Categorie MIDI-toewijzing Trigger/Alterneren Overgebrachte gegevens Naam Type Schakelaar CC 034 OFF=0, ON=127 Schakelaar CC 035 OFF=0, ON=127 Schakelaar CC 036 OFF=0, ON=127 Schakelaar CC 037 OFF=0, ON=127 CH SELECT Schakelaar CC 038 OFF=0, ON=127 Schakelaar CC 039 OFF=0, ON=127 CF.A Schakelaar CC 040...
- Page 135 Instellingen aanpassen Omtrent de automatische 1 Houd [ON/OFF (UTILITY)] tenminste 1 seconde ingedrukt. Het [USER SETUP]-instelscherm verschijnt. ruststandfunctie Om het [CLUB SETUP]-instelscherm te openen, moet u dit toestel eerst uitscha- kelen, waarna u [POWER] weer indrukt terwijl u [ON/OFF (UTILITY)] ingedrukt Wanneer [Auto Standby] staat ingesteld op [ON], wordt het toestel automatisch uit houdt.
- Page 136 Cross Fader B Cross Fader B Cross Fader B Cross Fader B Voor Windows Klik op het [Starten]-menu > [Alle programma's] > [Pioneer] > [DJM-900SRT] > MIX (REC OUT) MIX (REC OUT) MIX (REC OUT) MIX (REC OUT) [DJM-900SRT Instelfunctie].
- Page 137 Klik op de [About] tab. Controleren van de meest recente informatie over het stuurprogramma Bezoek onze webiste, hieronder vermeld, voor de meest recente informatie over het stuurprogramma voor exclusief gebruik met dit apparaat. http://pioneerdj.com/support/ De werking kan niet worden gegarandeerd wanneer er meerdere van deze meng- panelen zijn aangesloten op een enkele computer.
-
Page 138: Verhelpen Van Storingen
Aanvullende informatie Verhelpen van storingen Verkeerde bediening kan vaak de oorzaak zijn van een schijnbare storing of foutieve werking. Wanneer u denkt dat er iets mis is met dit apparaat, controleert u eerst de onderstaande punten. Soms ligt de oorzaak van het probleem bij een ander apparaat. Controleer daarom ook de andere componenten en elektrische apparatuur die gebruikt wordt. - Page 139 Blokschema MIC1 MIC1 LEVEL I/Fμ com ETHER SW IC MIC2 LEVEL Ether MIC2 DIGITAL MASTER CD/LINE TRIM PHONO PHONES Digital MASTER Control Tone DIGITAL MASTER 1 PHONES CD/LINE TRIM CH1_Analog MASTER PHONO MUTE MASTER 2 CH2_Analog Control Tone BOOTH DIGITAL MUTE BOOTH CH3_Analog...
- Page 140 Klik op [Ja]. De webbrowser wordt opgestart en de Pioneer DJ-ondersteuningssite zal worden geopend. 4 Klik op [Software Info] onder [DJM-900SRT] op de Pioneer DJ-ondersteuningssite. [Serato DJ Support Information] verschijnt. 5 Klik op de koppeling naar de downloadpagina voor Serato De downloadpagina voor [Serato DJ] verschijnt.
- Page 141 — CONTROL CD Specificaties Zie de informatie op de Pioneer DJ-ondersteuningssite (http://pioneerdj.com/support/). © 2013 PIONEER CORPORATION. Alle rechten voorbehouden. Algemene Stroomvereisten ..........110 V tot 240 V wisselstroom, 50 Hz/60 Hz Stroomverbruik ......................41 W Stroomverbruik (in de ruststand) ................0,4 W Gewicht hoofdapparaat ..................
- Page 142 Le damos las gracias por la adquisición de este producto Pioneer. Lea a fondo estas instrucciones de utilización para que aprenda a utilizar correctamente su modelo. Después de haber terminado de leer estas instrucciones, guárdelas en un lugar seguro para, en caso de ser necesario, consultarlas en el futuro. En algunos países o regiones, la forma de la clavija de alimentación y de la toma de corriente pueden ser algunas veces diferentes de la mostrada en las ilustraciones explica- tivas.
- Page 143 Información adicional Contenido Solución de problemas ....................25 Diagrama en bloques .....................26 Adquisición del manual ....................27 Acerca de las marcas de fábrica y marcas registradas ..........27 Para los que utilizan Serato DJ por primera vez mediante esta Especificaciones ......................28 unidad Consulte la “Guía de inicio rápido - Edición Serato DJ” para conocer el proce- dimiento para realizar la configuración inicial necesaria para utilizar CONTROL CD o CONTROL VINYL para utilizar Serato DJ.
-
Page 144: Características
Antes de empezar a usar la unidad Características Contenido de la caja Esta unidad es un mezclador de 4 canales de óptimo diseño para las actuaciones de CD-ROM (Disco de instalación) DJ que usan el software de DJ “Serato DJ” de Serato. Está equipada con una tarjeta Cable USB de sonido interna compatible con Serato DJ, por lo que la actuación usando Serato Cable de alimentación... -
Page 145: Instalación Del Software
Instalación del software obtenido el Programa. En particular, pero sin limitaciones, el Programa no puede Instalación del software controlador ser exportado ni reexportado (a) a ningún país bajo embargo de los EE.UU. o (b) a nadie que se encuentre en la Lista de Ciudadanos Designados Especialmente por Este software controlador es un programa exclusivo que se usa para introducir y el Departamento del Tesoro de los EE.UU., o a ninguna persona o entidad que se para enviar señales de audio desde el ordenador. -
Page 146: Instalación Del Software Serato Dj
Home Basic/Home Premium/Business/Ultimate El navegador Web se inicia y se visualiza el sitio de asistencia Pioneer DJ. versión de 64 bits 5 Haga clic en [Software Download] bajo [DJM-900SRT] en el versión de 32 ® Windows XP Home Edition/Professional Edition (SP3 o posterior) sitio de asistencia Pioneer DJ. - Page 147 El navegador Web se inicia y se visualiza el sitio de asistencia Pioneer DJ. No conecte esta unidad y el ordenador hasta completar la instalación. 4 Haga clic en [Software Info] bajo [DJM-900SRT] en el sitio Si está ejecutándose cualquier otro programa en el ordenador, abandónelo.
- Page 148 Si no ha completado el registro de su cuenta de usuario, hágalo siguiendo el procedimiento de abajo. — Siguiendo las instrucciones de la pantalla, introduzca su dirección de correo electrónico y contraseña que quiera establecer y luego seleccione la región donde vive. —...
-
Page 149: Panel Trasero
Conexiones Asegúrese de desconectar la alimentación y desenchufar el cable de alimentación de la toma de corriente siempre que haga o cambie conexiones. Conecte el cable de alimentación después de terminar las conexiones entre los aparatos. Asegúrese de usar el cable de alimentación incluido. Consulte el manual de instrucciones del componente que va a ser conectado. -
Page 150: Conexión De Terminales De Entrada
Conexión de terminales de entrada Cuando cree un DVS (sistema de vinilo digital) combinando un ordenador, interfaz de audio, etc., tenga cuidado en la conexión de la interfaz de audio a los terminales de entrada de esta unidad y en los ajustes de los conmutadores selectores de entrada. Consulte también el manual de instrucciones del software DJ y de la interfaz de audio. -
Page 151: Conexión Al Panel De Control
Conexión al panel de control Conexión de esta unidad y un ordenador Para instrucciones de la operación en combinación con Serato DJ, vea la “Guía Asegúrese de conectar usando Ordenadores de inicio rápido – Edición Serato DJ”. Para detalles, vea Descarga de las versiones el cable USB incluido. -
Page 152: Panel De Control
Operación Panel de control POWER MASTER MIDI START ON/ OFF LFO FORM / STOP MIC1 CD/ LINE PHONO CD/ LINE PHONO CD/ LINE PHONO CD/ LINE PHONO LEVEL DIGITAL DIGITAL DIGITAL DIGITAL DECK DECK DECK DECK UTILITY WAKE UP BEAT EFFECTS TRIM TRIM TRIM... -
Page 153: Funcionamiento Básico
g Control COLOR (página 15) No tire del fader de canales ni de los controles crossfader con una fuerza excesiva. Éste cambia los parámetros del SOUND COLOR FX de los diferentes canales. Los controles tienen una estructura que no permite extraerlos fácilmente. Tirar con fuerza de los controles podría dañar la unidad. -
Page 154: Operaciones Avanzadas
5 Gire el control [LEVEL] para [HEADPHONES]. 2 Gire el control [BALANCE]. El sonido de los canales para los que se pulsa el botón [CUE] sale por los El balance derecho/izquierdo del sonido cambia según el sentido de giro del control auriculares. - Page 155 del análisis de los archivos de música con el rekordbox, vea también el manual de 3 Ajuste el crossfader. instrucciones del rekordbox. Póngalo en el borde opuesto al lado en el que está establecido el canal que quiera Cuando se use en combinación con el CDJ-2000nexus, actualice primero el usar con la función de inicio de fader.
- Page 156 Uso del efector externo [AUTO] se enciende cuando el modo de medición de BPM se pone AUTO (TAP) en el modo automático. [TAP] se enciende en el modo de entrada manual. 1 Conecte esta unidad y un efector externo. En el modo automático, esto visualiza el valor de BPM detectado Para conocer instrucciones de conexión, vea Conexión de terminales de salida en la automáticamente.
- Page 157 Preparativos para usar la función MIDI LFO Utilización de un secuenciador MIDI externo El software, los aparatos, etc. compatibles con MIDI (“lado de recepción de señales Esta unidad envía la información de operación de los botones y controles en el MIDI”...
-
Page 158: Tipos De Efectos
Tipos de efectos Botones BEAT (paráme- Use éstos para establecer un tiempo de retardo de 1/8 – 16/1 Tipos de los efectos SOUND COLOR FX tro 1) con respecto al tiempo de un tiempo de compás de las BPM. Use esto para establecer el tiempo de retardo. Control TIME (parámetro 2) Nombre de efecto Descripciones... - Page 159 Cuando el tiempo del efecto cambia, el sonido de entrada se vuelve a grabar. Use éstos para establecer el ciclo para mover la frecuencia de Botones BEAT (paráme- corte como un tiempo de 1/4 – 64/1 con respecto al tiempo de tro 1) Original un tiempo de compás de las BPM.
- Page 160 MIDI se pueden controlar usando señales MIDI. SND/RTN Conecte aquí un efector externo, etc. SEND RETURN Efector TALK OVER DJM-900SRT Serato DJ Edition Botones BEAT (paráme- — tro 1) Control TIME (parámetro 2) — Control LEVEL/DEPTH (pará- Ajusta la entrada de nivel de sonido al terminal [RETURN].
-
Page 161: Mapa De Asignación Midi
Mapa de asignación MIDI Mapa de asignación MIDI “CC” es la abreviatura de “control change”. Un cambio de control es un tipo de señal MIDI usada para transmitir varios tipos de información de control, tal como timbre, volumen, etc. En esta unidad, los valores de 0 a 127 salen como CC principalmente cuando se utilizan los controles y los faders. CC también salen cuando se utilizan ciertos botones. “Note”... - Page 162 Botón/Control/Conmutador Categoría Asignación MIDI Disparador/Conmutador Datos transmitidos Nombre Tipo Conmutador CC 034 OFF=0, ON=127 Conmutador CC 035 OFF=0, ON=127 Conmutador CC 036 OFF=0, ON=127 Conmutador CC 037 OFF=0, ON=127 CH SELECT Conmutador CC 038 OFF=0, ON=127 Conmutador CC 039 OFF=0, ON=127 CF.A Conmutador CC 040...
-
Page 163: Cambio De Los Ajustes
Haga clic en el menú [Iniciar] > [Todos los programas] > [Pioneer] > [DJM- — Verificación del estado de los conmutadores selectores de entrada de esta 900SRT] > [Utilidad de configuración del DJM-900SRT]. unidad — Ajuste de la salida de datos de audio de esta unidad al ordenador Para Mac OS X —... -
Page 164: Verificación De La Información Más Reciente En El Software Controlador
El ajuste [USB Output Level] se aplica igualmente a todos los datos de audio. Verificación del estado de los conmutadores Sin embargo, cuando se selecciona 1 en la tabla del paso 2, los datos de audio selectores de entrada de esta unidad salen con el mismo volumen con el que entran en esta unidad. - Page 165 Información adicional Solución de problemas La operación incorrecta se confunde a menudo con un problema o un fallo de funcionamiento. Si piensa que algo funciona mal con este componente, compruebe los puntos de abajo. Algunas veces, el problema puede estar en otro componente. Inspeccione los otros componentes y los aparatos eléctricos que esté utilizando. Si no se puede corregir el problema después de comprobar los elementos de abajo, pida al servicio de Pioneer autorizado más cercano o a su concesionario que realice el trabajo de reparación.
-
Page 166: Diagrama En Bloques
Diagrama en bloques MIC1 MIC1 LEVEL I/Fμ com ETHER SW IC MIC2 LEVEL Ether MIC2 DIGITAL MASTER CD/LINE TRIM PHONO PHONES Digital MASTER Control Tone DIGITAL MASTER 1 PHONES CD/LINE TRIM CH1_Analog MASTER PHONO MUTE MASTER 2 CH2_Analog Control Tone BOOTH DIGITAL MUTE... - Page 167 ¿Conectado a internet?” se visualiza. Haga clic en [Si]. El navegador Web se inicia y se visualiza el sitio de asistencia Pioneer DJ. 4 Haga clic en [Software Info] bajo [DJM-900SRT] en el sitio de asistencia Pioneer DJ. [Serato DJ Support Information] se visualiza.
- Page 168 Si necesita un CONTROL CD nuevo debido al desgaste, rotura, etc., vea más Especificaciones abajo. Note que este artículo es consumible y no está cubierto por la garantía, incluso dentro del periodo de garantía. Generales — CONTROL CD Requisitos de potencia .............CA 110 V a 240 V, 50 Hz/60 Hz Vea la información del sitio de asistencia Pioneer DJ Consumo de energía....................41 W (http://pioneerdj.com/support/).
- Page 170 Если вы желаете утилизировать данное изделие, не выбрасывайте его вместе с обычным бытовым мусором. Существует отдельная система сбора использованных электронных изделий в соответствии с законодательством, которая предполагает соответствующее обращение, возврат и переработку. Чacтные клиенты-в странах-членах ЕС, в Швейцарии и Норвегии могут бесплатно возвращать использованные электронные изделия в...
- Page 171 MASTER ON OFF File...
- Page 174 ® ® CD_menu.app ® ® ® ® English DJM-900SRT_AudioDriver.pkg...
- Page 175 DJM-900SRT — — E-mail me Serato newsletters — ® ™ ® ™ ® ™ ® ™ I agree to the license terms and conditions DJM-900SRT Install Close CD_menu.exe...
- Page 176 Close Agree Disagree Serato DJ Applications CD_menu.app DJM-900SRT — — E-mail me Serato newsletters —...
- Page 177 CH 4 CH 3 CH 2 CH 1 PHONO CD/ LINE PHONO CD/ LINE PHONO CD/ LINE PHONO CD/ LINE RETURN MIC2 MIDI OUT (MONO) POWER SIGNAL GND SIGNAL GND BOOTH MASTER1 MASTER2 REC OUT DIGITAL SEND (MONO) MASTER LINK AC IN 1 GND 2 HOT...
- Page 178 Аналоговый проигрыватель Аналоговый проигрыватель Аналоговый проигрыватель Аналоговый проигрыватель Микрофоны Цифровое аудиовыходное устройство CH 4 CH 3 CH 2 CH 1 PHONO CD/ LINE PHONO CD/ LINE PHONO CD/ LINE PHONO CD/ LINE RETURN MIC2 MIDI OUT (MONO) POWER SIGNAL GND SIGNAL GND BOOTH DIGITAL...
- Page 179 Для подключения используйте Компьютеры поставляемый USB кабель. USB DECK 3 Микрофоны DECK 1 USB DECK 2 USB DECK 4 CD/ LINE PHO MIC1 DIGITAL USB DECK 3 TRIM OVER MIC 1 LEVEL MIC 2 POWER MIXING — MASTER LEVEL THRU —...
- Page 180 POWER MASTER MIDI START ON/ OFF LFO FORM / STOP MIC1 CD/ LINE PHONO CD/ LINE PHONO CD/ LINE PHONO CD/ LINE PHONO LEVEL DIGITAL DIGITAL DIGITAL DIGITAL DECK DECK DECK DECK UTILITY WAKE UP BEAT EFFECTS TRIM TRIM TRIM TRIM OVER OVER...
- Page 181 TIME LEVEL/DEPTH COLOR ON/OFF CROSS FADER ASSIGN A THRU B CROSS FADER MASTER LEVEL MASTER1 MASTER2 POWER MASTER1 MASTER2 BALANCE — DIGITAL MASTER1 DIGITAL — PHONO MONO STEREO PHONO — CD/LINE MASTER1 CD/LINE BOOTH MONITOR — USB BOOTH TRIM EQ CURVE ISOLATOR EQ EQ/ISO HI MID LOW CH FADER CROSS FADER...
- Page 182 MONO SPLIT STEREO — MONO SPLIT MASTER MASTER1 MASTER2 BOOTH REC OUT PHONES DIGITAL — STEREO MASTER OUT MIX (REC OUT) Mixer Audio Output MIXING MONO MASTER STEREO LEVEL HEADPHONES — MONO — STEREO MASTER1 MASTER2 BOOTH REC OUT PHONES DIGITAL MASTER OUT MIX (REC OUT)
- Page 183 ON/OFF BEAT CROSS FADER ASSIGN A THRU B THRU EFFECTS X-PAD FADER START 1 2 3 4 — Fader Start 1 DECK 3 — Fader Start 2 DECK 1 — Fader Start 3 DECK 2 — Fader Start 4 DECK 4 CROSS FADER ASSIGN A THRU B FADER START 1 2 3 4 —...
- Page 184 MIDI LFO COLOR — 1 — MIC — CF.A CF.B — MASTER MASTER SOUND COLOR FX MIDI LFO BEAT ON/OFF BEAT EFFECTS TIME LEVEL DEPTH ON/OFF CH SELECT ON/OFF PARAMETER AUTO GRID TIME AUTO AUTO/TAP TIME AUTO TAP GRID SND/RTN MIDI LFO BEAT BEAT ON/OFF...
- Page 185 X-PAD X-PAD SND/RTN MIDI LFO SND/RTN LFO FORM WAKE UP LFO FORM WAKE UP [SND/RTN] [1/7 [2/7 [3/7 [7/7 [6/7 [5/7 [4/7 BEAT ON/OFF BEAT EFFECTS X-PAD LFO FORM WAKE UP — X-PAD — BEAT EFFECTS — — LEVEL DEPTH ON/OFF UTILITY —...
- Page 186 ECHO COLOR BEAT SPACE Входное звучание отключено Постепенное исчезновение Время 1 удар DUB ECHO BEAT 16/1 TIME 4000 LEVEL/DEPTH X-PAD GATE/COMP SPIRAL Входное звучание отключено Постепенное исчезновение NOISE TRIM Время 1 удар BEAT EQ/ISO HI MID 16/1 TIME 4000 LEVEL/DEPTH CRUSH X-PAD REVERB...
- Page 187 LEVEL/DEPTH BEAT X-PAD TIME LEVEL/DEPTH FILTER X-PAD BEAT SLIP ROLL ON/OFF Частота BEAT BEAT 64/1 Исходное TIME звучание 32000 LEVEL/DEPTH Переключен с Эффект включен 1/2 на 1/1 X-PAD Прокрутка Повтор 1/2 Повтор 1/1 FLANGER BEAT 1/16 16/1 BEAT TIME 4000 Короткая...
- Page 188 SND/RTN MIDI LFO LFO FORM WAKE UP SND/RTN SEND RETURN TALK Эффектор OVER DJM-900SRT Serato DJ Edition BEAT — — TIME LEVEL/DEPTH RETURN — X-PAD MIDI LFO LFO FORM WAKE UP BEAT 64/1 TIME LEVEL/DEPTH — X-PAD MIDI LFO RETURN CF.A...
- Page 189 DIGITAL CD/LINE PHONO USB DECK 3 — TRIM — — — — COLOR — — CROSS FADER ASSIGN DIGITAL CD/LINE PHONO USB DECK 1 — TRIM — — — — COLOR — — CROSS FADER ASSIGN DIGITAL CD/LINE PHONO USB DECK 2 —...
- Page 190 CH SELECT CF.A CF.B MASTER — MIDI LFO — QUANTIZE — — TIME FLANGER PHASER FILTER TIME — BEAT EFFECTS — LEVEL DEPTH — X-PAD X-PAD ON OFF X-PAD SND/RTN MIDI ON OFF X-PAD SND/RTN MIDI LFO — — NOISE SPACE GATE/COMP SOUND COLOR FX...
- Page 191 Mic Output To Booth MIC BTH ON OFF BOOTH Monitor PC UTILITY PC UTLY ON OFF* Peak Limiter PKLIMIT ON OFF Factory Reset INITIAL YES NO* Pioneer DJM-900SRT — DJM-900SRT — — — Macintosh HD Application Pioneer DJM-900SRT DJM-900SRT 23 23...
- Page 192 USB Output Level USB Output Level MIXER INPUT USB Output Level ASIO MIXER OUTPUT About Mixer Audio Output CH1 Control Tone CH2 Control Tone CH3 Control Tone CH4 Control Tone PHONO PHONO PHONO PHONO CH1 Control Tone CH2 Control Tone CH3 Control Tone CH4 Control Tone CD/LINE...
- Page 193 MASTER ATT. –6 dB USER SETUP MASTER ATT. CLUB SETUP Digital Master Out Sampling Rate MASTER LEVEL MASTER 0 dB MASTER ATT. –3 dB –6 dB TRIM 0 dB CROSS FADER ASSIGN A THRU B CROSS FADER ASSIGN A THRU B FADER START USER SETUP FADER START...
- Page 194 MIC1 MIC1 LEVEL I/Fμ com ETHER SW IC MIC2 LEVEL Ether MIC2 DIGITAL MASTER TRIM CD/LINE PHONO PHONES Digital MASTER Control Tone DIGITAL MASTER 1 PHONES TRIM CD/LINE CH1_Analog MASTER PHONO MUTE MASTER 2 CH2_Analog Control Tone BOOTH DIGITAL MUTE BOOTH CH3_Analog D S P...
- Page 195 ® ® CD_menu.exe CD_menu.app DJM-900SRT CD_menu.exe CD_menu.app DJM-900SRT More Downloads Serato DJ x.x User Manual 27 27...
- Page 196 © CD LINE PHONO CD/LINE MIC1 MIC2 CD/LINE MASTER1 PHONO CD LINE MIC1 MIC2 RETURN MASTER1 MASTER2 REC OUT BOOTH SEND PHONES MASTER1 MASTER2 LINE PHONO CD LINE MIC1 Ø MIC2 Ø RETURN Ø DIGITAL IN MASTER BOOTH Ø REC OUT SEND Ø...
- Page 197 29 29...
- Page 198 30 30...
- Page 199 Дату изготовления оборудования можно определить по серийному номеру, который содержит информацию о месяце и годе производства. Серийный номер 12 цифр 2 цифры 10 цифр Дата изготовления оборудования P1 - Год изготовления Год 2001 2002 2003 2004 2005 2006 2007 2008 2009 2010 Символ...
- Page 200 Примечание: В соответствии со статьей 5 Закона Российской Федерации “О защите прав потребителя” и Указанием Правительства Российской Федерации № 720 от 16 июня 1997 года корпорация Pioneer Europe NV устанавливает условие на следующую продолжительность срока службы официально поставляемых на Российский рынок товаров. Аудио...
Need help?
Do you have a question about the DJM-900SRT and is the answer not in the manual?
Questions and answers