Table of Contents
Advertisement
Advertisement
Table of Contents

Related Manuals for Chicago Electric 61687


Summary of Contents for Chicago Electric 61687
-
Page 2: Table Of Contents
2. Do not operate power tools in explosive atmospheres, such as in the presence of flammable liquids, gases or dust. Power tools create sparks which may ignite the dust or fumes. Page 2 For technical questions, please call 1-800-444-3353. Item 61687... -
Page 3: Electrical Safety
Trigger on invites accidents. Unapproved safety equipment may not provide adequate protection. Eye protection must be ANSI-approved and breathing protection must be NIOSH-approved for the specific hazards in the work area. Item 61687 For technical questions, please call 1-800-444-3353. Page 3... -
Page 4: Power Tool Use And Care
5. Remove all foreign objects, such as nails or metal maintain a firm grip on the tool with both fragments, from the workpiece before planing. hands to resist starting torque. Page 4 For technical questions, please call 1-800-444-3353. Item 61687... -
Page 5: Vibration Safety
If any abnormal as tingling, numbness, and white or blue fingers), vibration occurs, stop use immediately. seek medical advice as soon as possible. SAVE THESE INSTRUcTIONS. Item 61687 For technical questions, please call 1-800-444-3353. Page 5... - Page 6 Association, and the National Electrical Code. 2. Double insulated tools may be used in either of the 120 volt outlets shown in the preceding illustration. (See Outlets for 2-prong plug.) Outlets for 2-prong plug Page 6 For technical questions, please call 1-800-444-3353. Item 61687...
-
Page 7: Extension Cords
Volts WARNING marking concerning Risk of Fire. Alternating Current Do not cover ventilation ducts. Keep flammable objects away. WARNING marking concerning Amperes Risk of Electric Shock. Properly connect power cord to appropriate outlet. Item 61687 For technical questions, please call 1-800-444-3353. Page 7... -
Page 8: Specifications
Specifications Electrical Requirements 120VAC / 60Hz / 7.5A Drum Speed 16,500 RPM 33,000 Cuts Per Minute Cutting Speed (2 knife drum) Planing Capacity 0″ – 1/16″ (single pass) Planing Width 3-1/4″ 4008343 Page 8 For technical questions, please call 1-800-444-3353. Item 61687... -
Page 9: Setup
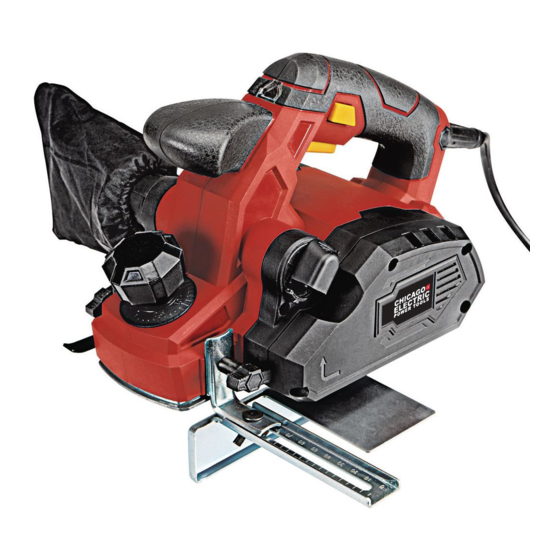
Note: For additional information regarding the parts listed in the following pages, refer to Parts List on page 18. Functions Front Main Handle Handle Dust Safety Button Trigger Depth Adjustment Knob Rabbet Depth Guide Kick Stand (on Rear Base) Depth Gauge Dust chute Latch Fence Item 61687 For technical questions, please call 1-800-444-3353. Page 9... -
Page 10: Operation
Figure A: Knife Drum Assembly are required when handling the Knife. 8. Clean the Knife Holder. Carefully examine the Knife Holder for loose parts or signs of damage. Replace if damaged. Page 10 For technical questions, please call 1-800-444-3353. Item 61687... - Page 11 Base Plate it may create burned spots on the wood. If plate a Knife is adjusted to not cut deeply enough the planer (40) will not be able to travel smoothly across the wood. Adjustable Base plate (58) Figure E Item 61687 For technical questions, please call 1-800-444-3353. Page 11...
-
Page 12: Depth Adjustment
Latch snaps into place. 1. If installed, remove the Dust Bag from the Dust Chute. 4. Slip the open end of the Dust Bag over the open end of the Dust Chute. Page 12 For technical questions, please call 1-800-444-3353. Item 61687... - Page 13 Do not use to plane non-wood materials. extra length to allow free movement while working. Item 61687 For technical questions, please call 1-800-444-3353. Page 13...
-
Page 14: General Operating Instructions
Knives are spinning at full speed. 11. Clean, then store the tool indoors 6. While pressing the Adjustable Base Plate and the out of children’s reach. Fence (if used) against the workpiece, feed the Page 14 For technical questions, please call 1-800-444-3353. Item 61687... - Page 15 Practice on a piece of scrap 2. Follow the General Operating Instructions wood before attempting to chamfer a workpiece. on page 14. Keep the corner securely seated in the groove from the beginning all the way through the cut. Item 61687 For technical questions, please call 1-800-444-3353. Page 15...
-
Page 16: Maintenance
Belt all the way over the Belt slightly to remove it. See Figure K. Small Pulley (26). See Figure M. Small pulley (26) Belt Large pulley (46) Figure M Figure K Page 16 For technical questions, please call 1-800-444-3353. Item 61687... -
Page 17: Troubleshooting
See Extension Cords in Grounding section on page 6. Follow all safety precautions whenever diagnosing or servicing the tool. Disconnect power supply before service. Item 61687 For technical questions, please call 1-800-444-3353. Page 17... -
Page 18: Parts List And Diagram
Note: Some parts are listed and shown for illustration purposes only, and are not available Note: If product has no serial number, record individually as replacement parts. month and year of purchase instead. Page 18 For technical questions, please call 1-800-444-3353. Item 61687... - Page 19 Assembly Diagram Item 61687 For technical questions, please call 1-800-444-3353. Page 19...
-
Page 20: Warranty
Limited 90 Day Warranty Harbor Freight Tools Co. makes every effort to assure that its products meet high quality and durability standards, and warrants to the original purchaser that this product is free from defects in materials and workmanship for the period of 90 days from the date of purchase.
Need help?
Do you have a question about the 61687 and is the answer not in the manual?
Questions and answers