Table of Contents
Advertisement
Available languages
Available languages
Quick Links
2- MANUEL D'UTILISATION
18- USER MANUAL
34- HANDLEIDING
50- BEDIENUNGSANLEITUNG
TB342-47
Lire attentivement la notice avant d'utiliser l'appareil
Before operating this product, please read user manual completely
Lees de handleiding voordat u deze apparaat
Lesen Sie die Bedienungsanleitung bevor Sie das Gerät gebrauchen.
Advertisement
Table of Contents

Related Manuals for Akai TB342-47


Summary of Contents for Akai TB342-47
- Page 1 2- MANUEL D’UTILISATION 18- USER MANUAL 34- HANDLEIDING 50- BEDIENUNGSANLEITUNG TB342-47 Lire attentivement la notice avant d’utiliser l’appareil Before operating this product, please read user manual completely Lees de handleiding voordat u deze apparaat Lesen Sie die Bedienungsanleitung bevor Sie das Gerät gebrauchen.
-
Page 2: Table Of Contents
Contenu Contents Avant de commencer Before we begin Importateur exclusif Exclusive Importer Consignes importantes de sécurité Important Safety Instructions Safety SECURITE Warning PRUDENCE ! Placement and Mounting Mise en place et Instructions de montage 5 Placement Mise en place Wall Mounting Montage mural Description de l’appareil Identifying the Parts... - Page 3 Inhoud Inhalt VOORDAT WE BEGINNEN BEVOR WIR BEGINNEN EXCLUSIEF IMPORTEUR EXKLUSIVER IMPORTEUR Belangrijke veiligheidsinstructies WARNHINWEISE SICHERHEITSHINWEISE SECURITE WARNUNGEN Voorzichtigheid Implementierung und Plaatsing en montage Installationsanleitung Plaatsing Implementierung Wandmontage Wandmontage De onderdelen identificeren AUFBAU DES GERÄTS UND Hoofdeenheid BEDIENELEMENTEN Draadloze subwoofer Afstandsbediening Drahtlose-Subwoofer Afstandsbediening...
-
Page 4: Avant De Commencer
Avant de commencer Merci d'avoir acheté notre AKAI TB342-47 : UNE BARRE DE SON BLUETOOTH AVEC SUBWOOFER SANS FIL. Ce produit a été fabriqué en utilisant des composants de qualité et en respectant des normes de fabrication. Il est une garantie de qualité et de performance. Nos ingénieurs ont inclus dans ce produit de nombreuses fonctionnalités utiles et pratiques. -
Page 5: Consignes Importantes De Sécurité
Consignes importantes de sécurité 7. Ventilation - Les fentes et orifices de ATTENTION ! l’appareil sont prévues pour la ventilation et pour assurer un fonctionnement fiable DANGER D΄ÉLECTROCUTION du produit et pour le protéger contre toute NE PAS OUVRIR surchauffe, ces orifices ne doivent pas être ATTENTION: Risque d΄électrocution, ne pas ouvrir obstrués. -
Page 6: Prudence
Consignes importantes de sécurité 14. Dommages nécessitant une réparation 20 cm d'espace au-dessus et au moins 5 cm – Confiez la réparation à un technicien d’espace de chaque côté de l'appareil. qualifié dans les conditions suivantes: 4. Ne placez pas cet appareil à proximité d’un a) Lorsque le cordon d'alimentation ou la fort champ magnétique. -
Page 7: Mise En Place Et Instructions De Montage
Mise en place et Instructions de montage Mise en place A. Si votre téléviseur est placé sur une table, vous pouvez placer l’appareil sur la table en face du support TV, centrée à l’écran du téléviseur. B. Si votre téléviseur est fixé au mur, vous pouvez monter l’appareil sur le mur juste en dessous de la TV écran. - Page 8 Mise en place et Instructions de montage Fixez les supports muraux à l'unité principale Retirez les vis de l'unité principale. avec les vis retirées de l'unité principale. Wall bracket Percez 2 trous parallèles (Ø 3-8 mm chaque Fixez fermement une cheville dans chaque trou fonction du type de mur) dans le mur.
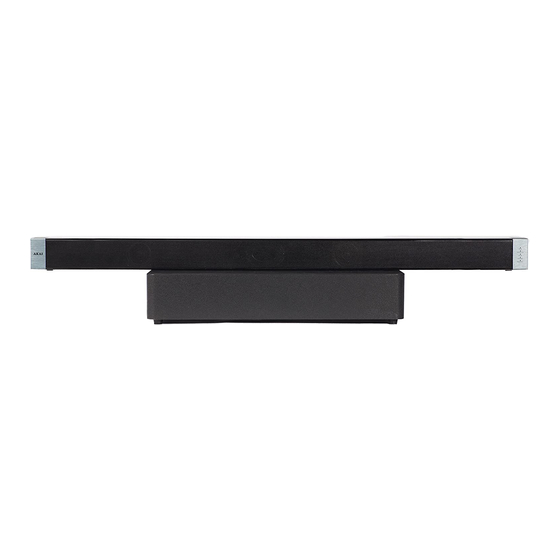
- Page 9 Description de l’appareil POWER AUX/MP3 LINK OPTICAL MOVIE / MUSIC Face avant Haut-parleurs 2 Capteur de la télécommande 3 Indicateurs LED • POWER: En mode veille: le voyant s’allume en rouge. • AUX/MP3 LINK En mode auxiliaire: le voyant s’allume. • OPTIQUE: La sortie audio disponible: le voyant s’allume.
-
Page 10: Description De L'appareil
Description de l’appareil Subwoofer sans fil 1. Le voyant d’appairage L’indicateur d’appairage s'allume lorsque le couplage est réussit. 2. Bouton PAIR Permet de vous appairer à la barre de son. 3. Prise d’alimentation Branchez le cordon d’alimentation.. Description de la télécommande Allumer/Mettre en veille l’appareil. -
Page 11: Préparation De La Télécommande
Préparation de la télécommande La télécommande qui vous est fournie, vous permet d’utiliser l’appareil à distance. • Même si la télécommande est utilisé dans un périmètre de réception bluetooth efficace (6m), s’il y a des obstacles entre l’appareil et la télécommande l’opération peut s’avérer impossible. • Si la télécommande est actionnée à proximité d’autres appareils générant des rayons infrarouges, ou si d’autres dispositifs de commande à distance utilisant des rayons infrarouges sont utilisées près du lecteur, cela peut conduire à... -
Page 12: Connexions & Branchements
Connexions & Branchements ENTREE OPTIQUE Enlevez le capuchon de protection de la prise OPTICAL, puis connectez un câble optique (non fourni) à la sortie optique du téléviseur et la prise OPTICAL de la barre de son Astuce: Si aucun son ne sort de la barre de son et le voyant lumineux clignote rapidement, assurez-vous que le réglage audio de votre source audio (par exemple, un lecteur DVD, console de jeux, TV) est paramétré... -
Page 13: Prise Mp3 Link
Connexions & Branchements PRISE MP3 LINK Utilisez un câble audio 3,5/3,5 mm (fourni) pour relier la prise casque de l’appareil audio externe à la prise MP3 LINK de la barre de son. Connexion à l'alimentation Avant de brancher le cordon d'alimentation, vérifiez que vous avez effectué... -
Page 14: Couplez Le Subwoofer Sans Fil
Couplez le Subwoofer sans fil Couplage automatique Le subwoofer et la barre de son s’appairent automatiquement une fois les appareils branchés et allumés. Aucun câble n’est nécessaire pour connecter les deux appareils. • Lorsque le subwoofer est en mode couplage avec l’appareil principal., l’indicateur de couplage clignote. • Lorsque le subwoofer est couplé avec l’appareil principal, l’indicateur de couplage s’allume. Note: N’appuyez pas sur le bouton PAIR situé à l’arrière du subwoofer, excepté pour un couplage manuel. -
Page 15: Fonctionnement De Base
Fonctionnement de base Mise en marche/ Mise en veille Lorsque vous connectez l'appareil à la prise de courant, l'unité principale est en mode veille. L'indicateur d’alimentation s'allume en rouge. • Appuyez sur la touche /SOURCE sur l'unité principale ou sur la touche de la télécommande pas allumer l'appareil principal. -
Page 16: Fonction Bluetooth
3. Activez votre périphérique Bluetooth et sélectionnez le mode de recherche. "TB342-47" apparaît sur votre liste des périphériques Bluetooth. 4. Sélectionnez "TB342-47" dans la liste d'appairage. L'indicateur BT s'allume en continu lorsque le couplage est réussit. 5. Pour désactiver la fonction Bluetooth, commutez vers une autre source ou désactiver la fonction Bluetooth de votre périphérique. -
Page 17: Bluetooth
Fonction BLUETOOTH 6. Veuillez vérifier la connexion Bluetooth lorsque l'appareil est replacé dans la portée opérationnelle après avoir été mis hors de celle-ci. 7. Si la connexion est perdue, répétez les étapes ci-dessus pour coupler votre appareil à la barre de son. -
Page 18: Spécifications Techniques
Spécifications techniques La barre de son Alimentation .......................... AC220-240V~ 50/60Hz Consommation .................................30 W Puissance de sortie ............................50 W X 2 Distorsion harmonique totale ......................1%(1kHz, 1W) Sensibilité d’entrée audio ..........................700mV Réponse de fréquence........................200 Hz - 20 KHz Total impédance ................................8 Ω Dimensions (L x P x H) ........................ - Page 19 Mise au rebut en fin de vie Attention ! Ce logo apposé sur le produit indique qu’il s’agit d’un appareil dont le traitement en tant que déchet rentre dans le cadre de la directive 2002/96/CE du 27 janvier 2003, relative aux déchets d’équipements électriques et électroniques (DEEE). Ce symbole signifie que les produits électriques et électroniques usagées ne doivent pas être mélangés avec les déchets ménagers généraux.
-
Page 20: Before We Begin
Before we begin Thank you for purchasing the AKAI TB342-47 : a BT Sound Bar with wireless subwoofer. This is your assurance of quality, performance and value. This product was manufactured using the highest quality components and standards of workmanship. Our engineers have included many useful and convenient features in this product. -
Page 21: Important Safety Instructions
Important Safety Instructions 8 Do not install near any heat sources such CAUTION as radiators, heaters, stoves, or other apparatus (including amplifiers) that RISK OF ELECTRIC SHOCK produce heat. DO NOT OPEN 9. Do not defeat the safety purpose of the CAUTION: TO REDUCE THE RISK OF ELECTRIC polarized or grounding plug. -
Page 22: Warning
Important Safety Instructions Caution: 8 Do not attempt to clean the unit with Use of controls or adjustments or chemical solvents as this might damage performance of procedures other than the finish. Use a clean, dry or slightly damp those described herein, may result in cloth. -
Page 23: Placement And Mounting
Placement and Mounting Placement A If your TV is placed on a table, you can place the unit on the table directly in front of the TV stand, centered with the TV screen. B If your TV is attached to a wall, you can mount the unit on the wall directly below the TV screen. Option - A Option - B Wall Mounting (if using option-B) - Page 24 Placement and Mounting Attach the wall brackets to the main unit with Remove the screws from the main unit. the screws removed from the main unit. Wall bracket Drill 2 parallel holes (Ø 3-8 mm each according Firmly fix 1 dowel into each hole in the wall to wall type) in the wall.
-
Page 25: Identifying The Parts
Identifying the Parts Main Unit POWER AUX/MP3 LINK OPTICAL MOVIE / MUSIC Front View 1 Speakers 2 Remote Control Sensor 3 LED Indicatoren • POWER: In STANDBY mode: Light up red. • AUX/MP3 LINK In AUX mode: Light turn on. In MP3 LINK mode: Light flash. • OPTICAL: Sound output available: Light turn on. -
Page 26: Wireless Subwoofer
Identifying the Parts Wireless Subwoofer 1 PAIR Indicator Light Pair indicator lights up when the pairing succeeds. 2 PAIR button Connect to the main unit. 3 AC~ Socket Connect to power. Remote Control Switch the unit between ON and STANDBY mode. -
Page 27: Prepare The Remote Control
Prepare the Remote Control The provided Remote Control allows the unit to be operated from a distance. Even if the Remote Control is operated within the effective range (6m), remote control • operation may be impossible if there are any obstacles between the unit and the remote control. -
Page 28: Connections
Connections Use the OPTICAL Socket Remove the protective cap of the OPTICAL socket, then connect an OPTICAL cable (not supplied) to the TV’s OPTICAL OUT socket and the OPTICAL socket on the unit. Tip: If there is no sound come out of the soundbar and the indicator light flash fast. Make sure the audio setting of your source player (e.g. -
Page 29: Use The Mp3 Link Socket
Connections Use the MP3 Link Socket Use a 3.5mm to 3.5mm audio cable (supplied) to connect the external audio device headphone socket to the MP3 LINK socket on the unit. Connect Power Before connecting the AC power cord, ensure you have completed all other connections. -
Page 30: Pairing The Wireless Subwoofer With The Main Unit
Pairing the Wireless Subwoofer with the Main Unit Automatic pairing The subwoofer and soundbar will automatically pair when both units are plugged into the mains sockets and turned on. No cable is needed for connecting the two units. • When the subwoofer is pairing with the main unit, the Pair Indicator will flash. •... -
Page 31: Basic Operation
Basic Operation Standby/ON When you first connect the main unit to the mains socket, the main unit will be in Standby mode. The POWER Indicator will light up red. • Press the /SOURCE button on the main unit or the button on the remote control to switch the main unit on. -
Page 32: Aux/Mp3 Link/Optical Operation
3 Activate your Bluetooth device and select the search mode. “TB342-47” will appear on your Bluetooth device list. 4 Select “TB342-47” in the pairing list. The BT indicator will light up solidly while the pairing succeeds. 5 To disconnect the Bluetooth function, switch to another function on the unit or disable the function from your Bluetooth device. -
Page 33: Listen To Music From Bluetooth Device
Play with Bluetooth Device 7 If the connection is lost, follow the instructions above to pair your device to the player again. Listen to Music from Bluetooth Device If the connected Bluetooth device supports Advanced Audio Distribution Profile (A2DP), you can listen to the music stored on the device through the player. -
Page 34: Specifications
Specifications Soundbar Power requirements ......................AC220-240V ~ 50/60Hz Power consumption ..............................30 W Output power ..............................50 W X 2 Total harmonic distortion ........................1%(1kHz, 1W) Audio input sensitivity ............................700mV Frequency Response ..........................200 Hz - 20 KHz Impedance ..................................8 Ω Dimension (W x H x D) ........................ 1065 x 62 x 60 mm Subwoofer Power requirements ...................... -
Page 35: End Of Life Disposal
End of Life Disposal Warning! This logo set on the product means that the recycling of this apparatus comes within the framework of the Directive 2002/96/CE of January 27, 2003 concerning the Waste of Electrical and Electronic Equipment (WEEE). This symbol means that used electrical and electronic products should not be mixed with general household wste. -
Page 36: Voordat We Beginnen
VOORDAT WE BEGINNEN Dank U voor het kopen van de AKAI TB342-47 : een BT Sound Bar met draadloze subwoofer. Dit is uw garantie voor kwaliteit, prestatie en waarde. Onze ontwerpers hebben vele nuttige en makkelijke functies ingevoegd in dit product. Leest u alstublieft deze gebruiksaanwijzing compleet door om er zeker van te zijn dat u het grootste voordeel van elke functie behaald. -
Page 37: Belangrijke Veiligheidsinstructies
Belangrijke veiligheidsinstructies u het schoon gaat maken. Gebruik geen VOORZICHTIG vloeibare schoonmaakmiddelen of sprays. Gebruik een vochtige doek om het toestel RISICO VAN ELEKTRISCHE schoon te maken. SCHOKKEN NIET OPENEN 7. VENTILATIE — De sleuven en openingen WAARSCHUWING: OM HET RISICO VAN EEN in de behuizing zorgen ervoor dat het ELEKTRISCHE SCHOK TE VERKLEINEN, VERWIJDER product niet oververhit raakt en naar... -
Page 38: Voorzichtigheid
Belangrijke veiligheidsinstructies 14. SCHADE DIE REPARATIE VEREIST ventilatieopeningen met voorwerpen zoals — Trek de stekker van dit product uit kranten, tafelkleden, gordijnen etc. Zorg het stopcontact en laat het onder de ervoor dat er minstens 20 cm ruimte boven volgende omstandigheden door bevoegd en tenminste 5 cm ruimte aan elke kant van onderhoudspersoneel repareren. -
Page 39: Plaatsing En Montage
Plaatsing en montage Plaatsing A. Als de tv op een tafel is geplaatst, kunt u de eenheid direct voor de voet van de tv op tafel zetten, in het midden voor het tv-scherm. B. Als de tv aan een muur is bevestigd, kunt u de eenheid direct onder het tv-scherm tegen de muur bevestigen. - Page 40 Plaatsing en montage Bevestig de muurbeugels aan de hoofdeen- Verwijder de schroeven uit de hoofdeenheid. heid waarbij de schroeven uit de hoofdeen- heid zijn verwijderd. Muurbeugel Boor 2 parallelle gaten (Ø 3-8 mm elk, Steek zonodig 1 plug stevig in elk gat in de afhankelijk van het type muur) in de muur.
-
Page 41: De Onderdelen Identificeren
De onderdelen identificeren Hoofdeenheid POWER AUX/MP3 LINK OPTICAL MOVIE / MUSIC Vooraanzicht 1 Luidsprekers 2 Afstandsbedieningssensor 3 LED Indicatoren • AAN/UI: In stand-by-stand: licht rood op. • AUX/MP3-KOPPELING In AUX stand: licht gaat branden. In MP3 KOPPELING stand: licht knippert. • OPTISCH: Geluidsuitvoer beschikbaar: licht gaat branden. -
Page 42: Draadloze Subwoofer
De onderdelen identificeren Draadloze subwoofer 1 Indicatorlampje KOPPELEN De indicator koppelen licht op wanneer het koppelen is gelukt. 2 Knop PAIR (KOPPELEN) Verbinding maken met de hoofdeenheid. 3 AC~-aansluiting Aansluiten op netstroom. Afstandsbediening Schakel de eenheid tussen de standen AAN en STAND-BY. 2. -
Page 43: De Afstandsbediening Voorbereiden
De afstandsbediening voorbereiden Met de meegeleverde afstandsbediening kunt u de eenheid op afstand bedienen. • Zelfs als de afstandsbediening binnen het effectieve bereik (6 m) wordt bediend, kan het gebruik onmogelijk zijn als zich obstakels tussen de eenheid en de afstandsbediening bevinden. • De afstandsbediening zal mogelijk niet goed werken als u deze gebruikt in de buurt van andere producten die infraroodstralen genereren of als andere afstandsbedieningen die infraroodstralen gebruiken in de buurt van de eenheid worden gebruikt. -
Page 44: Aansluitingen
Aansluitingen De OPTISCH-aansluiting gebruiken Verwijder de beschermkap van de OPTISCH-aansluiting en sluit een optische kabel aan (niet meegeleverd) op de OPTISCH UIT-aansluiting van de tv en de OPTISCH-aansluiting van de eenheid. Tip: als er geen geluid uit de geluidsbalk komt en het indicatorlampje snel knippert. Controleer of de audio-instelling van de bronspeler (zoals een dvd-speler, gameconsole, tv) is ingesteld op PCM met optische uitgang. -
Page 45: De Mp3 Link-Aansluiting Gebruiken
Aansluitingen De MP3 Link-aansluiting gebruiken Gebruik een 3,5 mm naar 3,5 mm audiokabel (meegeleverd) om de hoofdtelefoonaansluiting van het externe audio-apparaat aan te sluiten op de MP3 KOPPELING-aansluiting op de eenheid. De voeding aansluiten Voordat u het netsnoer aansluit, moet u ervoor zorgen dat alle andere aansluitingen zijn voltooid. -
Page 46: Handmatig Koppelen
De draadloze subwoofer koppelen met de hoofdeenheid OPMERKING: Druk niet op de knop Pair (Koppelen) op de achterkant van de subwoofer, behalve voor handmatig koppelen. Als het automatisch koppelen mislukt, moet u de subwoofer handmatig koppelen met de hoofdeenheid. Handmatig koppelen 1. -
Page 47: Standen Selecteren
Basisbediening Standen selecteren //BRON op de hoofdeenheid of op de knop BRON op de Druk meerdere malen op de knop afstandsbediening om te schakelen tussen de standen AUX, MP3 KOPPELING, OPTISCH en BLUETOOTH. • Als de stand AUX is geselecteerd, licht de indicator AUX/MP3-KOPPELING continu op. • Als de stand MP3 KOPPELING is geselecteerd, knippert de indicator AUX/MP3-KOPPELING . -
Page 48: Afspelen Met Bluetooth-Apparaat
Of druk op de knop KOPPELEN op de afstandsbediening om detecteerbaar te zijn. De BT-indicator knippert snel. 3. Schakel het Bluetooth-apparaat in en kies de zoekstand. “TB342-47” verschijnt in de lijst met Bluetooth-apparaten. 4. Selecteer "TB342-47” in de koppellijst. De BT-indicator licht continu op als het koppelen is gelukt. -
Page 49: Muziek Van Het Bluetooth-Apparaat Beluisteren
Afspelen met Bluetooth-apparaat Muziek van het Bluetooth-apparaat beluisteren Als het verbonden Bluetooth-apparaat het A2DP-profiel (Advanced Audio Distribution Profile) ondersteunt, kunt u via de speler luisteren naar de muziek die op het apparaat is opgeslagen. Als het apparaat ook het AVRCP-profiel (Audio Video Remote Control Profile) ondersteunt, kunt u de afstandsbediening van de speler gebruiken om muziek die op het apparaat is opgeslagen, af te spelen. -
Page 50: Specifications
Specifications Geluidsbalk Stroomvereisten ........................ AC 220-240 V~ 50/60 Hz Stroomverbruik .................................30 W Uitgangsvermogen ............................50 W X 2 Totale harmonische vervorming .....................1%(1 kHz, 1 W) Audio-ingangsgevoeligheid ...........................700 mV Frequentierespons ..........................200 Hz - 20 KHz Impedantie ..................................8 Ω Afmetingen (B x H x D) ....................... 1065 x 62 x 60 mm Subwoofer Stroomvereisten ........................ -
Page 51: Afvoer Einde Levensduur
Afvoer einde levensduur Waarschuwing! Het waarmerk op dit product betekent dat het recyclen van dit apparaat gebeurt binnen de regels van de Directive 2002/96/CE van januari 27, 2003 betreffende de afvoer van elektrische en elektronische apparaten (WEEE). Dit symbool betekent dat gebruikte elektrische en elektronische producten niet moeten worden vermengd met het algemene huishoudelijk afval. -
Page 52: Bevor Wir Beginnen
BEVOR WIR BEGINNEN Vielen Dank für Kaufen von TB342-47 : ein BT-Soundleiste mit drahtlose-subwoofer. Das ist Ihre Versicherung von Qualität, Leistung und Wert. Unsere Ingenieure haben viele brauchbare und praktische Eigenschaften in dieses Produkt eingeschlossen. Stellen Sie bitte sicher, diese Anleitung vollständig zu lesen, um sicherzustellen, dass Sie maximalen Nutzen von jeder Eigenschaft bekommen. -
Page 53: Warnhinweise
WARNHINWEISE in einen Einbauschrank, Bücherschrank ACHTUNG oder Rack-Regal gestellt werden, wenn GEFAHR EINES ELEKTRISCHEN ausreichend für Belüftung gesorgt ist, Die SCHLAGS NICHT öFFNEN Öffnungen dürfen nie durch Stellen vom Produkt an einem Bett, Sofa, Teppich oder ACHTUNG: ZUR MINDERUNG DES anderen ähnlichen Oberflächen blockiert RISIKOS EINES ELEKTRISCHEN SCHLAGS werden. -
Page 54: Warnungen
WARNHINWEISE 14. BESCHÄDIGUNG BENÖTIGE WARTUNG die Spannung des Systems zu sehen, ob es - Servicefall: Ziehen Sie bitte auf jeden identisch mit dem lokalen Spannung ist. Fall den Netzstecker und wenden sich 3. Die Belüftungsöffnungen im Gehäuse des bitte in folgenden Fällen an qualifiziertes Geräts sollten nicht durch Gegenstände, wie Servicepersonal: z.B. -
Page 55: Implementierung Und Installationsanleitung
Implementierung und Installationsanleitung Implementierung A. Wenn das Fernsehgerät auf einem Tisch platziert, können Sie das Gerät auf dem Tisch vor dem TV-Ständer zu platzieren, auf den Bildschirm zentriert. B. Falls Ihr Fernseher Wand montiert, können Sie das Gerät an der Wand direkt unter dem TV-Bildschirm montieren. - Page 56 Implementierung und Installationsanleitung Befestigen Sie die Wandhalterung an der Entfernen Sie die Schrauben von der Haupteinheit mit den Schrauben vom Haupteinheit. Hauptgerät entfernt. Wall bracket Bohren Sie zwei parallele Löcher (Ø 3-8 jeweils Stecken sie einen Stift in jedes Loch in der in Abhängigkeit von der Art der Wand mm) in Wand, wenn nötig.
-
Page 57: Aufbau Des Geräts Und Bedienelementen
AUFBAU DES GERÄTS UND BEDIENELEMENTEN POWER AUX/MP3 LINK OPTICAL MOVIE / MUSIC Vorderansicht 1. LAUTSPRECHER 2. Fernfühler 3. LED-Anzeigen • POWER: Im Standby-Modus: Die LED leuchtet rot. • AUX/MP3 LINK AUX-Modus: Die LED leuchtet. • OPTICAL: Die verfügbaren Ausgabe Audio: die LED-Leuchten. -
Page 58: Drahtlose-Subwoofer
AUFBAU DES GERÄTS UND BEDIENELEMENTEN Drahtlose-Subwoofer 1 PAIR (Paarung) Licht Anzeige Paar-Anzeige leuchtet auf, wenn die Paarung erfolgreich ist. 2 PAIR (Paarung) Knopf Verbindung mit der Haupteinheit. 3 AC~Buchse Anschluss an den Strom. Afstandsbediening Schalten / Standby-Gerät. 2. SOURCE Kann zwischen verschiedenen Modi abwechselnd zu wechseln. -
Page 59: Vorbereiten Der Fernbedienung
Vorbereiten der Fernbedienung Die mitgelieferte Fernbedienung können Sie das Gerät per Fernzugriff nutzen. • Auch wenn die Fernbedienung in einem Umkreis effizienten Empfang (6m) verwendet wird, kann, wenn sich Hindernisse zwischen dem Gerät und der Fernbedienung unmöglich sein. • Wenn die Fernbedienung ist in der Nähe von anderen Geräten, die Infrarotstrahlen erzeugen betrieben wird, oder wenn andere Fernbedienungen mit Infrarot-Strahlen werden in der Nähe der Spieler verwendet, kann dies zu Fehlfunktionen führen und umgekehrt, andere Produkte können Fehlfunktionen auftreten. -
Page 60: Verbindungen Und Anschlüsse
Verbindungen und Anschlüsse OPTICAL EINGANG Entfernen Sie die Schutzkappe von der OPTICAL-Buchse, dann schließen Sie ein optisches Kabel (nicht mitgeliefert) an den optischen Ausgang der TV-und der optischen Buchse der Soundleiste. Tipp: Wenn es kommt kein Ton aus der Soundleiste und die Statusanzeige blinkt schnell. Stellen Sie sicher, dass die Audio-Einstellung auf Ihre Audioquelle (zu DVD-Player, Spielkonsole, TV) zu PCM mit optischem Ausgang gesetzt ist. -
Page 61: Mp3 / Link-Buchse
Verbindungen und Anschlüsse MP3 / LINK-Buchse Verwenden Sie ein Audio 3,5 / 3,5 mm-Kabel (mitgeliefert) an die Kopfhörerbuchse externes Audiogerät mit dem MP3 LINK-Buchse an der Soundbar verbinden. Anschließen der Stromversorgung Bevor Sie das Netzkabel, stellen Sie sicher, dass Sie alle anderen Verbindungen haben. - Beschädigung des Produkts möglich! Stellen Sie sicher, dass die Versorgungsspannung den Wert auf der... -
Page 62: Paarung Der Drahtlose-Subwoofer Mit Der Haupteinheit
Paarung der Drahtlose-Subwoofer mit der Haupteinheit automatische Kopplung Der Subwoofer und Soundbar wurden automatisch paaren, wenn beide Geräte in die Netzsteckdosen eingesteckt und eingeschaltet. Kein Kabel zur Verbindung der beiden Einheiten benötigt ist. • Wenn der Subwoofer mit der Haupteinheit koppeln, wird das Paarung Licht Anzeige blinken. • Wenn der Subwoofer ist mit der Haupteinheit verbinden, wird das Paarung Anzeige leuchten. HINWEIS: Drücken Sie nicht das Paarung Knopf auf der Rückseite des Subwoofers, ausgenommen für die manuelle Paarung. -
Page 63: Grundsätzliche Bedienung
Grundsätzliche Bedienung Einschalten / Standby Wenn Sie das Gerät an die Steckdose anschließen, wird das Hauptgerät im Standby-Modus. Die Netzanzeige leuchtet rot. • Drücken Sie die /SOURCE-Taste auf dem Gerät oder der Fernbedienung Taste nicht auf dem Hauptgerät einzuschalten. Der Indikator für die neuesten Mode-Status-LEDs verwendet. • Drücken und halten Sie die Taste /SOURCE am Hauptgerät oder drücken Sie die Taste auf der Fernbedienung nicht das Hauptgerät Standby-Modus. -
Page 64: Betrieb Aux/Mp3 Link / Optical
Oder drücken Sie die BT PAIR-Taste auf der Fernbedienung nachweisbar zu sein. Die BT-Anzeige blinkt schnell. 3. Aktivieren Sie Ihr Bluetooth-Gerät, und wählen Sie den Suchmodus. "TB342-47" erscheint auf der Liste der Bluetooth-Geräte. 4. Wählen Sie "TB342-47" in der Paarungsliste. Die BT-Anzeige leuchtet kontinuierlich, wenn die Kupplung ist erfolgreich. -
Page 65: Hören Sie Musik Von Bluetooth-Gerät
Bluetooth Betrieb 5. Wenn Sie Ihr Gerät mit dem Soundbar verbinden möchten, legen Sie sie innerhalb des Betriebsbereichs. 6. Bitte überprüfen Sie die Bluetooth-Verbindung, wenn die Soundbar in der Bluetooth- Reichweite, nachdem er aus der Reichweite platziert. 7. Wenn die Verbindung unterbrochen wird, wiederholen Sie die obigen Schritte, um das Gerät mit dem Soundbar koppeln. -
Page 66: Technische Spezifikationen
Technische Spezifikationen Soundbar (haupteinheit) Stromversorgung ......................AC 220-240 V~ 50/60 Hz Leistungsaufnahme ..............................30 W Ausgangsleistung............................. 50 W X 2 Gesamte harmonische Verzerrung ....................1%(1 kHz, 1 W) Audio-Eingangsempfindlichkeit ........................700 mV Frequenz Ansprechen ........................200 Hz - 20 KHz Impedanz ..................................8 Ω Abmessungen des Gerätes (B x H x D) ................. 1065 x 62 x 60 mm Subwoofer Stromversorgung ...................... -
Page 67: Entsorgung
Entsorgung Warnung ! Dieses Logo am Produkt bedeutet, dass das Recycling dieses Geräts im Rahmen von Richtlinien 2002/96/CE vom 27. Januar 2003 in Bezug auf Abfall von elektrischen und elektronischen Anlagen (WEEE) kommt. Dieses Symbol bedeutet, dass gebrauchte elektrische und elektronische Produkte nicht mit allgemeinem Hausabfall gemischt werden dürfen. - Page 68 TB342-47...
Need help?
Do you have a question about the TB342-47 and is the answer not in the manual?
Questions and answers