Table of Contents
Advertisement
Advertisement
Table of Contents

Related Manuals for DigiTech RP55


Summary of Contents for DigiTech RP55
- Page 1 MODELING GUITAR PROCESSOR Owner's Manual...
- Page 2 Sandy, Utah 84070, USA undesired operation. Date: April 28, 2011 Operation of this unit within significant European Contact: Your local DigiTech Sales and Service Office or electromagnetic fields should be avoided. Harman Music Group 8760 South Sandy Parkway Sandy, Utah • use only shielded interconnecting cables.
-
Page 3: Safety Instructions
SAFETY INSTRUCTIONS WARNING FOR YOUR PROTECTION NOTICE FOR CUSTOMERS IF YOUR UNIT IS EqUIPPED WITH READ THE FOLLOWING: A POWER CORD. KEEP THESE INSTRUCTIONS WARNING: THIS APPLIANCE SHALL BE CONNECTED TO A MAINS SOCKET OUTLET WITH A PROTECTIVE EARTHING HEED ALL WARNINGS CONNECTION. -
Page 4: Warranty
7. The foregoing is in lieu of all other warranties, expressed or implied, and DigiTech neither assumes nor authorizes any person to assume any obligation or liability in connection with the sale of this product. In no event shall DigiTech or its dealers be liable for special or consequential damages or from any delay in the performance of this warranty due to causes beyond their control. - Page 5 We recommend that you become better acquainted with us, and what we have to offer by going through this Owner’s manual with your RP55 in front of you. It is your key to unlocking the potential within the RP55.
-
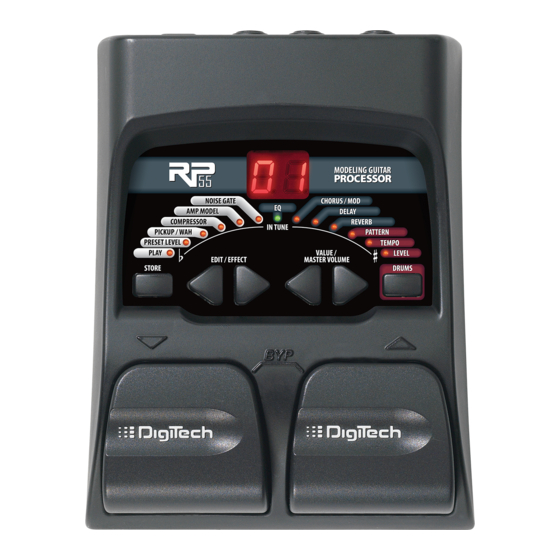
Page 6: The Front Panel
The Front Panel 1. Footswitches - These 2 Footswitches are used to select presets, access the Tuner, or bypass the RP55. The Up Footswitch increments, and the Down Footswitch decrements through the presets. Pressing both Footswitches simultaneously bypasses the selected preset. Pressing and holding both... - Page 7 Each effect LED will light to indicate which effect you are editing 4. Drums - The Drums button is used to turn on and off the RP55’s drum machine. When the Drums feature is active, the Drums LED lights and the selected drum pattern plays continuously.
-
Page 8: Rear Panel
TRS stereo “Y” cord to connect to the inputs of 2 amplifiers for stereo applications. This jack also can be used as a headphone jack. Note: When using the RP55 direct into a mixer or recording device, or when using it with headphones, you can enable the Global Cabinet Modeling feature to emulate speaker simulation on each of the RP55’s presets. -
Page 9: Making Connections
Before connecting the RP55, make sure that the power to your amplifier is turned off, and the power to the RP55 is disconnected. There is not a power switch on the RP55. To turn the RP55 off, disconnect your instrument from the Input Jack (for battery power) or disconnect the optional power supply from the Power Jack or from the AC outlet. -
Page 10: Stereo Operation
For stereo operation connect the guitar to the Input of the RP55. Connect a TRS stereo “Y” cord or a pair of stereo headphones to the RP55’s Output. When using a “Y” cord, connect one end of the “Y” cord to the input of one amplifier or channel of a mixer. -
Page 11: Applying Power
Applying Power There are two options for powering the RP55: battery power, and the optional DC power supply. Before applying power to anything, set your amp(s) to a clean tone and set the tone controls to a flat EQ response (on most amps, this would be 0 or 5 on the tone controls). -
Page 12: Play Mode
Factory Presets. Play Mode When you first apply power to the RP55, it powers up in Play mode. The far left LED lights, indicating you’re in Play mode. In Play mode, use the Up and Down Footswitches to access... - Page 13 Tuner The Tuner in the RP55 lets you quickly tune or check the tuning of your guitar. Enter the Tuner by pressing and holding both Footswitches simultaneously. The tu briefly displays indicating that you are in Tuner mode. To begin tuning, play a note on your guitar (the neck pickup usually works best).
-
Page 14: Editing/Creating Presets
Press either footswitch to exit Bypass and return the last selected preset. Editing/Creating Presets Creating your own signature sound with the RP55 is easy and intuitive. The RP55 lets you create your own presets, or fine tune existing Presets to suit your needs. When creating or editing a sound, you must start with a User or Factory Preset. - Page 15 The Effect LEDs When editing a preset, the Effect LEDs are used to indicate which effect is selected for editing. The Edit buttons move you through the Effect modules. The LEDs light indicating which effect group is selected. Each effect has multiple settings to select from. The Value buttons are used to change the value for the selected effect.
-
Page 16: Storing/Copying Preset
Storing/Copying a Preset Once the preset has been modified, you may store your settings to one of the 40 User Preset locations (Presets 1-40). The following steps outline how to store changes to a preset or copy a preset to a different location: 1. -
Page 17: Effect Definitions
Effect Definitions The RP55 can be thought of as several different “virtual” amplifiers, and individual hi-tech effects. Each effect within the RP55 can be programmed to suit your personal application. Understanding how these effects alter the sound helps you achieve the sound you are looking for. The following overview of the RP55’s effects outlines what each effect does. -
Page 18: Amp/Cabinet Modeling
- Based on a Classic Tweed F1-f9 - A vintage fuzz distortion C1-C9 - Based on a British Combo AC - A flat top acoustic guitar Any trademarks are the property of their respective companies and are in no way associated with DigiTech. -
Page 19: Chorus/Mod
Equalization is used to shape the tonal response of your guitar signal. The EQ in the RP55 is similar to the tone knobs on an amplifier. Values 1-4 cut the level of each band, 5 is flat (no cut or boost), and values 6-9 boost the level of each band. - Page 20 Chorus ( C1-C9 A Chorus adds a short delay to your signal. The delayed signal is modulated in and out of tune and then mixed back with the original signal to create a thicker sound, and stereo image. Use the Value buttons to select one of the nine Chorus settings. Flange ( F1-f9 A Flanger uses the same principle as a Chorus but uses a shorter delay time and adds...
- Page 21 Vibrato ( b1-b9 A Vibrato effect modulates the pitch of the incoming signal at an even rate. Use the Value buttons to select one of the nine Vibrato settings. Rotary Speaker ( r1-r9 Rotary Speaker is an emulation of a device that included a spinning horn and woofer. The rotation of these two speakers produces an interesting combination of sound panning from side to side with a slight pitch change produced from the speed of the sound coming towards, and then going away from the listener.
- Page 22 of effect as if two guitars were playing the same part together. Use the Value buttons to select one of the nine Detuner settings. Pitch Shift ( H1-H9 The Pitch Shifting copies the incoming signal, and shifts the pitch of the copy to a different note.
- Page 23 Delay The RP55 has 3 different delay types, Digital (D), Analog (A), and Ping Pong (P), each with up to 2 seconds of delay time available. There are two different parameters used to program the delay, Delay Variation and Time. The first parameter of the delay effect is Delay Type/ Variation, which selects the delay type to be used and varies the amount of feedback (number of repeats) and level.
-
Page 24: Global Cabinet Modeling
RP55 in this manner. To enable Cabinet Modeling: 1. Press and hold the drums button when applying power to the RP55. Wait until the display reads Cabinet On. Release the Drums button. -
Page 25: Factory Reset
All such data will be lost forever! The procedure for performing a Factory Reset is as follows: 1. Disconnect the power supply from the RP55 (AC Power) or unplug the guitar from the input jack (battery power). 2. Press and hold the left EDIT button while re-connecting the power or plugging your guitar into the RP55’s input. -
Page 26: Specifications
Appendix Specifications: Input: 1/4” input Output: 1/4” Stereo TRS (can be used as a headphone output) Control In: 1/4” input – Use a passive mono TS (tip/sleeve) expression or volume pedal as an expression controller Power Consumption: 5 Watts Maximum (w/ optional power supply) Battery Life: ~10 hours with continuous usage Power Supply: 6 AA Batteries or optional 9 VDC power supply. - Page 27 Preset List (user/Factory) Stacked Bad Dog Recto Delay Steely Phase Clean Chorus Rhythm Crunch Octave Drive Metal Scoop Slap Rhythm Classic Blackface Crunchy Phase 20 Fathoms Fuzz Church Electro-Sitar Grindy Detune Smooth Drive Big Boutique Fuzzboy Acoustic Chorus Surfin' Sustainium Clean Flange Rotary Blues Thickerer...
- Page 28 Sandy, utah 84070 Ph (801) 566-8800 FAX (801) 566-7005 DigiTech is a registered trademark ® of harman Copyright - harman Printed in China RP55 Modeling Guitar Processor Owner’s Guide 18-0838V-A Please visit DigiTech on the World Wide Web at: www.digitech.com...
Need help?
Do you have a question about the RP55 and is the answer not in the manual?
Questions and answers